Table of Contents
Advertisement
Quick Links
Advertisement
Table of Contents

Subscribe to Our Youtube Channel
Related Manuals for Feelworld F970


Summary of Contents for Feelworld F970
- Page 1 5.5″ High Bright Monitor F970 Install and Power Kit User Manual...
- Page 2 Foreword Thank you for purchasing our 5.5-inch high bright touch screen monitor. Please read this manual carefully before using the unit. Have a great experience! Caution ● Please avoid the heavy impact and drop onto the ground when move the product.
- Page 3 Supports 3D LUT Log to REC.709 and user 3D LUT upload (up to 32). Sony F970 external install and power kit design can be used to install and supply power to external equipment, easy to install and disassemble, simplify your photography equipment.
-
Page 4: Table Of Contents
1.4 Bottom Port Instruction -------------------------------------- 6 1.5 Left Port Instruction ------------------------------------------ 6 1.6 Power Supply Way ------------------------------------------- 7 1.7 Sony F970 Install and Power Kit ------------------------- 10 1.8 Mount Points -------------------------------------------------- 10 1. 9 Sunshade ----------------------------------------------------- 12 2. Menu Operation Instruction ------------------------------ 13 3. -
Page 5: Product Description
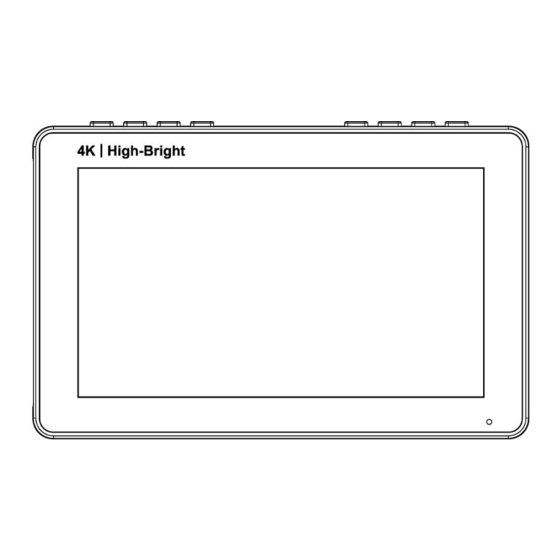
1. Product Description 1.1 Front Panel Instruction Indicator: After connecting the power, the indicator light is on (red). Long Press button to turn on the monitor, it turns yellow. After the signal is connected, it turns green. Panel Instruction 1.2 Rear... -
Page 6: Top Button Instruction
PUSH firstly before remove the battery. NP-F Battery Slot: It is applicable to install NP-F series of batteries. F970 Install and Power Kit: Installing the external equipment, like wireless transmitter, LED light, video converter and others which can 1.7 Sony F970 be powered by Sony F970 battery. -
Page 7: Bottom Port Instruction
backlight Increase or adjust value of selected parameter Power On/Off button; Return/Exit Menu 1.4 Bottom Port Instruction DC OUT 8.4V: DC power output interface, polarity as the output power Barrel output for powering your camera with a separately available DC coupler via adaptor (NP-FW50 Sony & LP-E6 Canon&DMW-BLF19 Panasonic). -
Page 8: Power Supply Way
DC IN 12V: DC power input, polarity as the input power 1.6 Power Supply Way (1) The rear cover of the monitor is equipped with a F970 battery plate, which is applicable to F970 series of batteries. ● Sony F970 battery plate for battery of Sony DV: Sony F970 F960 F950 F930 F770 F750 F730 F570 F550 F530 series. - Page 9 1.7 Sony F970 Install and Power Kit A Sony F970 external install and power kit design is added to the back of the monitor. The external kit can be used to install and install the external equipment, like wireless transmitter, LED light, video converter and others which can be powered by Sony F970 battery.
- Page 10 (3) Steps to remove the kit: ①. Loosen the 2 screws. ②. Use both hands to move the kit up. ③. Move the round holes to the corresponding 2 screws. (You can also install the kit upside down.)
-
Page 11: Sony F970 Install And Power Kit
④. Then gently lift the kit upwards and carefully disassemble the 2P power cord. ⑤. Then remove the 2 screws. (4) Install back to the kit: first screw the 2 screws back to the screw hole used to install the kit on the back of the monitor, install the 2P power cable to the cutout, then align the round hole of the kit with the screw, and then push the kit to the screw at the center of the kit cross, then tighten the screws. - Page 12 (2) Tilt Arm Mounting The monitor secures to your camera using the included Tilt Arm via shoe mount or 1/4"-20 thread. • Allows the monitor to rotate 360 degrees for viewing convenience • Secure and lightweight mounting via shoe mount or 1/4"-20 thread •...
-
Page 13: Sunshade
1.9 Sunshade ① Sunshade ② Sunshade Frame ③ Fixed Frame ④ Sunshade Application First lock the Sunshade Frame ②with the monitor tight ③. Open the sunshade ①, and match the sticker on the sunshade... -
Page 14: Menu Operation Instruction
inside to the marked part of the sunshade frame ②, smooth and press 3 sides on the sunshade, and then complete the sunshade installation ④. 2. Menu Operation Instruction After the monitor is correctly connected to the power supply, the indicator light is on (red), long press , turn on the monitor, the indicator light turns yellow, and after the HDMI signal is input,... -
Page 15: Menu Ui Interface Instruction
(2) Button Menu Operation ①.When the menu is not displayed, directly press the "∨" or "∧"button to adjust the volume or backlight. You can set the left and right buttons in the in the Left Right Key Set of menu User Option ②.Press “MENU”... -
Page 16: Menu Function Instruction
4. Menu Function Instruction Assist On, Off After turning on, waveform, vector, histogram and embedded All Waves audio will be shown. On, Off Mode:RGB、YUV、Y This essential feature assists with the calibration of professional video cameras. It shows the overall brightness of the image assisting the video professional in correcting exposure. - Page 17 shows how saturated the image is and where the pixels in the Vector image land on the color spectrum. On, Off Mode:RGB1、RGB2、Y Histogram RGB Histogram:It can display the graphic of color tone distribution, can intuitively display the exposure status of the image, and display overlapping histograms in red, green, and blue channels Y Histogram:...
- Page 18 On, Off Mode: Normal, ARRI False Colors An image that depicts an object in colors that differ from those a photograph (a true color image) would show. Marker On, Off 2x2,3x3,4x4,5x5,6x6,7x7,8x8,9x9 Mode: Grid Color: Red, Green, Blue, Black, White, Gray The area of the picture can be divided into 4, 9, 16, 25, 36, 49, 64, 81 equal grids.
- Page 19 Scan Mode Auto, 16:9, 16:10, 4:3, 5:4, 1.85:1, 2.35:1, Full Screen Provides a wide variety of aspect ratio to match different camera Aspect Ratio anamorphic lenses. On, Off Mode:1.33X, 1.6X, 2.0X, 2.0X MAG, User Anamorphic Under the User, can be customized(1.20X~2.00X) Allows you to use anamorphic lenses or adapters and see the image unsqueezed, even if your camera does not de-squeeze in camera.
- Page 20 After the LUT Switch is turned on, you can use the Lut (SLOG2, SLOG3, LOGC, VLOG). The Lut item is displayed after the Lut Switch is turned on. LUT is a table for quickly looking up and output specific color data.
- Page 21 small, it can cause the image to lose its colorful appearance. Saturation:0~100 Adjustment of color concentration Tint:0~100 Color Temp.:5600K, 6500K, 9300K, User Under the User, the red, green and blue of the image can be Color Adjustment adjusted (0~255), made the colors of the image achieve your favorite.
-
Page 22: How To Load Lut
OSD Time:Off, 15Sec, 30Sec, 45Sec Select the display time of the menu on the screen OSD Option OSD Trans: Off, 25%, 50%, 75% Adjust the transparency of the menu picture background on the screen No Signal: Red, Green, Blue, Black, White, Gray Can be change the background color of screen when no signal On, Off 0~100... -
Page 23: Technical Parameters
5.4.1 Make sure USB flash driver insert to Type-C to USB adapter and connect with the TYPE-C interface of monitor 5.4.2 Enter main menu --LUT--Lut Import -- click Confirm to load the monitor will auto detect the USB flash driver If there is valid lut file in USB flash driver, the monitor will load lut files and show “[n] name. -
Page 24: Trouble Shooting
3840×2160p (30/29.97/25/24/23.98) 4096×2160p (24Hz) 7~24V Power Input Voltage Power Consumption ≦9W 148Lx93Hx21.75D (mm) Unit Size (mm) 245g (with F970 external install and power kit) Unit Weight ¼-20 thread points Mount Points Working Temperature -20℃~50℃ -30℃~60℃ Storage Temperature 7. Trouble Shooting Only black and white or monochrome picture ①... - Page 25 No sound 7.3 Earphone Check if Volume control do not open, press the volume button, and try to increase the volume. ■ If there are still other problems, please contact with our related technologists. ★ As we are improving product features and product performance, so if there is any change on the specification without prior notice.
Need help?
Do you have a question about the F970 and is the answer not in the manual?
Questions and answers