Advertisement
Advertisement
Table of Contents

Subscribe to Our Youtube Channel
Related Manuals for Feelworld FW1018SPV1


Summary of Contents for Feelworld FW1018SPV1
- Page 1 10.1" Full HD Field Monitor Support 4K HDMI Input/ Output User Manual...
-
Page 2: Table Of Contents
CONTENTS 1. Product Overview ------------------------------------ 2 2. Cautions ------------------------------------------------- 3 3. Product Features ------------------------------------- 4 4. Product Description --------------------------------- 6 5. Power Supply ----------------------------------------- 10 6. TALLY Indicator Connection --------------------- 12 7. Menu Operation Instruction ---------------------- 13 8. Menu Function Instruction ------------------------ 14 9. -
Page 3: Product Overview
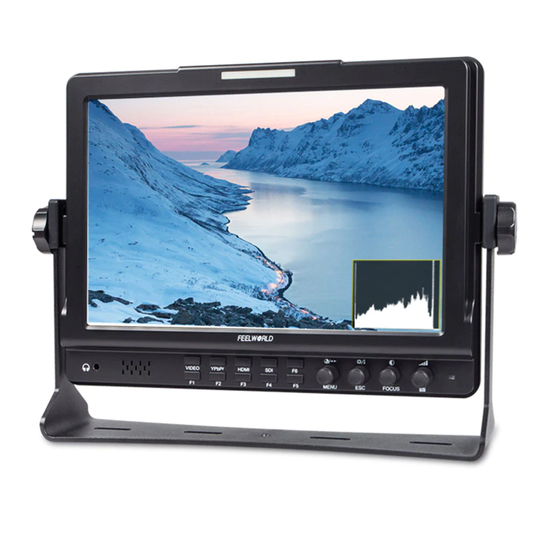
Product Overview Thank you for using our professional broadcasting kits color LCD monitor. This monitor adopts advanced integrated circuits, high-quality new HD IPS LCD panel, which makes it low power consumption, stable performance etc. Advanced features include Focus Assist, Center Marker, Safe Frames, Color Temp. adjust, ideal portable lightweight as viewfinder and video monitor equipment. -
Page 4: Cautions
2. Cautions ● Please avoid the heavy impact and drop onto the ground when move the product. ● Please do not cover the vents and holes on the enclosure and do not place the machine on a bed, sofa, and rug to ensure good ventilation. -
Page 5: Product Features
6. Please do not stick on the screen. 7. Please simply wipe with a clean soft cloth and make sure no water on the screen. ● To better protect the plastic cover, please follow these ways as below to avoid the damage: 1. - Page 6 ● Image Flip (H, V, H/V) ● Image Freeze ● Image Nine Grid, zoom one of the images to realize the full screen ● Pixel to Pixel ● Marker Types, Safe Frames and Center Marker ● Display and adjust the image Color Temp ●...
-
Page 7: Product Description
4. Product Description Front Panel Features : Earphone jack 2. Speaker 3. VIDEO: Video signal input selected 4. YPbPr: Ypbpr signal input selected 5. HDMI: HDMI signal input selected 6. SDI: SDI signal input selected (Without SDI model, this button has no effect) 7. - Page 8 Press this button to pop up OSD menu, rotate it to select the secondary menu bar or function menu set and analogue value adjustment. /ESC : Without enter into the menu, directly rotate this button, it is for image Brightness adjustment. Under menu operation, left rotate this button to enter into function menu and select, press it to exit menu.
- Page 9 Rear Panel Features 1. Signal interfaces (See below “Signal Interfaces Instruction”) 2. Power switch: ▬: Power on (ON), O: Power off (OFF) 3. TALLY (indicator) signal input 4. 4-PIN(XLR)DC 12V Power input 5. DC power input port 6. USB upgrades port Remark: There is a hidden upgrade interface behind the battery plate, please remove the battery plate if you need to upgrade it.
- Page 10 Signal Interfaces Instruction 1. HDMI IN & OUT 2. Y IN & OUT 3. Pb IN & OUT 4. Pr IN & OUT 5. VIDEO IN & OUT 6. AUDIO L/ R IN 7. 3G-SDI IN & OUT (Optional)
-
Page 11: Power Supply
5. Power Supply This monitor can be powered with these three ways: ★ DC Power Supply: The power supplied by the adapter. 12V is optional DC voltage charger, insert DC power input interface directly. You can choose qualified adapter with output voltage DC 6 ~ 36V, output capacity >12W by customers. - Page 12 There are five different types of batteries; customers can choose the corresponding battery according to the battery plates. (Standard accessory is F970 if no request). ★ Battery Plate: F970 LP-E6 D28S Anton Plate V-Mount Plate We assemble the suitable battery plate for the customers according to the different requirements of the batteries.
-
Page 13: Tally Indicator Connection
QM51D QM51 FM71 FM70 series ●LP-E6 battery plate for battery of Canon DV: Canon LP-E6 ●D28S battery plate for battery of Panasonic DV: Panasonic D55 554S D54SE D40 D35 D33 D32 D28 D25 D22 series ●U60 battery plate for battery of Sony DV: SONY BP-U30/U60/U90, domestic U62/U65/U66/U95/U98 series. -
Page 14: Menu Operation Instruction
7. Menu Operation Instruction Follow the instructions mentioned above then plugged into a power supply and signal, turn on the power, and then follow below instructions for menu operation: Menu operation and F1~F6 shortcuts button set 7.1 Press “MENU” to enter “main menu” interface. 7.2 Left/ right rotate /MENU button to select, then left rotate... -
Page 15: Menu Function Instruction
8. Menu Function Instruction P2P, Zoom ALL, L/R Zoom, U/D Zoom, Aspect Ratio, Anamorphic Mode, Nine Grid all functions that associated with the image magnification function are non-supported in 4K Mode. Image Pic. Mode Dynamic, Standard, Mild, User Select ‘user’ to adjust Brightness, Contrast, Saturation, Sharpness. - Page 16 Setting Language English,中文, Español, Português, Français, Nederlands, Deutsch,日本語 Aspect Ratio Just Scan, Panorama, Auto., 4:3, 16:9, Zoom 1, Zoom 2 No Signal White Screen, Blue Screen, Red Screen, Green Screen, Black Screen OSD Trans. Off, Low, Middle, High OSD H 0~100 OSD V 0~100...
- Page 17 Function (Histogram P Model) Center Marker Off, On Safe Frames Off, 80%, 85%, 90%, 93%, 96%, 2.35:1 Image Freeze Off, On Image Flip Off, H_V Flip, H Flip, V Flip Check Field Off, Mono, Red, Green, Blue Off, On Histogram Off, On False Colors...
- Page 18 Function (Without Histogram Model) Center Marker Off, On Safe Frames Off, 80%, 85%, 90%, 93%, 96%, 2.35:1 Image Freeze Off, On Image Flip Off, H_V Flip, H Flip, V Flip Check Field Off, Mono, Red, Green, Blue Off, On Zoom Off, 4X, 9X, 16X Anamorphic...
-
Page 19: Parameters
Custom Button Setting F1~F6 F1~F6 shortcut buttons set: 1. Press “ /MENU” knob to enter into menu, rotate “ /MENU” knob to select F menu, and then left rotate “ /ESC” button to enter F1. 2. Rotate “ /MENU” knob to pop up custom function menu bar. - Page 20 Input 3G-SDI (Optional), HDMI, YPbPr, VIDEO, AUDIO (L/R) Output 3G-SDI (Optional), HDMI, YPbPr, VIDEO Audio Stereo Headphone; Speaker (built-in) TALLY RS232 D-sub 9pin 480i/ 576i 720p (60/59.94/50/30/29/25/24/23.98) SDI Format 1080i (60/59.94/50) 1080p (60/59.94/50/30/29.97/25/24/24sF/23.98/23.98sF) 480i/576i/480p/576p 720p(60/59.94/50/30/29/25/24/23.98) 1080i(60/59.94/50) HDMI Format 1080p(60/59.94/50/30/29.97/25/24/24sF/23.98/23.98sF) 4K UHD 3840×2160p (30/29.97/25/24/23.98Hz) 4096×2160p (24Hz) 4K UHD 3840×2160p (30/29.97/25/24/23.98Hz) YPbPr Format...
-
Page 21: Trouble Shooting
10. Trouble Shooting If there is any problem when using the unit, please try following ways to inspect and solve. Please contact us if you still could not solve it or have other problems. ● Without image display Fault cause and solve ◆Video cable off or connect Check the quality of the cable, make incorrectly... - Page 22 ● Speaker without sound Fault cause and solve ◆Volume adjustment was closed Reset the volume control and adjust to a proper position ◆HDMI cable poor connected Check the quality of cable, or change cable have a try ◆Video without sound output A normal phenomenon.
Need help?
Do you have a question about the FW1018SPV1 and is the answer not in the manual?
Questions and answers