
Related Manuals for Marshall Amplification CV370


Summary of Contents for Marshall Amplification CV370
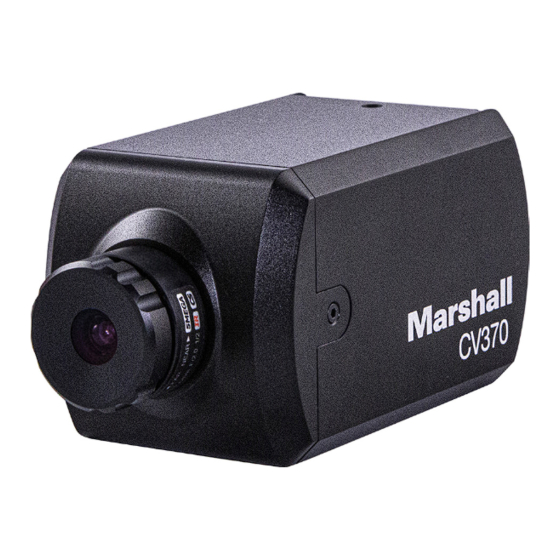
- Page 1 B r o a d c a s t A/V D i v i s i o n •CV370 •CV374 •CV570 •CV574 Compact & Miniature NDI HX3 POV Cameras Lenses not included. User Manual...
-
Page 2: Table Of Contents
Table of Contents Copyright Information ................................. Chapter 1: Safety Instruction ............................Chapter 2: Package Contents ............................Chapter 3: On Screen Display Menu ...........................4 Chapter 4: Connecting Camera to Network ......................5 Chapter 5: Web Interface Settings ..........................6 Chapter 6: Upgrade ................................Warranty .................................... -
Page 3: Chapter 1: Safety Instruction
CV370, CV374, CV570, CV574 User Manual Chapter 1: Safety Instructions Always follow these safety instructions when setting up and using this product: 1. Operation Please use the product in the recommended operating environment where temperatures are between -10˚C ~ 50˚C, and humidity level is 70% or below. -
Page 4: Chapter 2: Package Contents
Chapter 2: Package Contents Camera I/O Breakout Cable 12VDC Power Audio Input Power Adapter www.marshall-usa.com... -
Page 5: Chapter 3: On Screen Display Menu
CV370, CV374, CV570, CV574 User Manual Chapter 3: On Screen Display Menu Power the camera with DC12V plug or PoE+(IEEE 802.3at). Use Up, Down, Right, Left, and Enter joystick from the I/O breakout cable: Press Enter to access the menu and exit the menu from the main OSD. -
Page 6: Chapter 4: Connecting Camera To Network
Resolu�on for CV370 & CV570 SIZE 720p, 1080i, 1080p, 2160p CV370/CV374/CV570/CV574 camera comes with DHCP enabled by default. Resolu�on for CV374 & CV574 Available frame rates: If the camera is connected to a router or DHCP enabled network device, it will be assigned 720p: 25/29.97/30/50/59.94/60... -
Page 7: Chapter 5: Web Interface Settings
CV370, CV374, CV570, CV574 User Manual Chapter 5: Web Interface Settings Default login user name is admin Password is 9999 Live View www.marshall-usa.com... - Page 8 Main stream and sub stream buttons for live view image (within the web browser) stream quality set from Stream Encoding menu 5.1.1 Exposure Exposure Mode: Select exposure mode (Auto, Manual) Gain: Select gain level when Manual mode is selected (0 – 30dB) Shutter: Select shutter speed value when Manual mode is selected (1/30 –...
- Page 9 CV370, CV374, CV570, CV574 User Manual 5.1.3 Image Mirror: Enable or disable image mirror Flip: Enable or disable image flip BLC: Enable or disable backlight compensation. D-WDR: Enable or disable Digital Wide Dynamic Range Day&Night: Insert or remove IR Cut filter.
- Page 10 5.1.5 Noise Reduction 2D Noise Reduction: Enable or disable 2D noise reduction. 3D Noise Reduction: Select 3D noise reduction level (Auto, 1 – 4, Off) 5.1.6 Video VI Framerate: Select VI framerate to adjust the HDMI Output: Select HDMI output format. sensor level frame capture.
- Page 11 CV370, CV374, CV570, CV574 User Manual Stream Encoding setting of the camera and video over IP protocols can be configured from this menu. 5.3.1 Encoding Stream has Main and Sub Stream settings. Encode Mode: Select encoding compression (H.264, H.265) Profile: Select encoding profile (MP, HP) RTSP Address: Displays the RTSP address of the camera.
- Page 12 5.3.2 RTMP RTMP Address: Copy and paste the RTMP destination address in the box. Stream Key: Copy and paste the stream key provided by the RTMP host. Enable and Confirm: Click on Enable button and press confirm to enable RTMP stream. When RTMP stream is properly setup, check mark indicator will appear as shown Note: When RTMP stream is used on YouTube, audio (from section 5.2) needs to be enabled.
- Page 13 CV370, CV374, CV570, CV574 User Manual 5.3.4 Mode: Select SRT mode (Listener, Caller, Rendezvous) Port: Type the port number used in SRT. Default is 1600 Latency(ms): Set SRT latency in milli seconds Encryption: Enable or disable stream encryption Key Length: Select key length (16, 24, 32)
- Page 14 System System menu includes network configuration of the camera, account setting, and NTP 5.4.1 Network By default, DHCP is enabled. If the network does not support DHCP, 192.168.100.150 will be assigned to the camera 30 seconds after the initial boot up. DHCP: Select DHCP or Static IP address IP: Type desired IP address if static IP is used Netmask: Type subnet mask address if static...
- Page 15 CV370, CV374, CV570, CV574 User Manual 5.4.3 Time Time Zone: Select the time zone of the location NTP Enable: Enable or disable the NTP NTP Update Interval: Select the interval of NTP update (30m – 24h) NTP Server Address: Modify the NTP server.
-
Page 16: Chapter 6: Upgrade
Chapter 6: Upgrade CV370/CV374/CV570/CV574 has two types of upgrades required. When ISP update is needed, an upgrade can be performed from the Maintenance menu under the web interface. When major update is required, camera ARM process needs to be updated via USB connection.
Need help?
Do you have a question about the CV370 and is the answer not in the manual?
Questions and answers