
Related Manuals for Marshall Amplification CV380-CS


Summary of Contents for Marshall Amplification CV380-CS
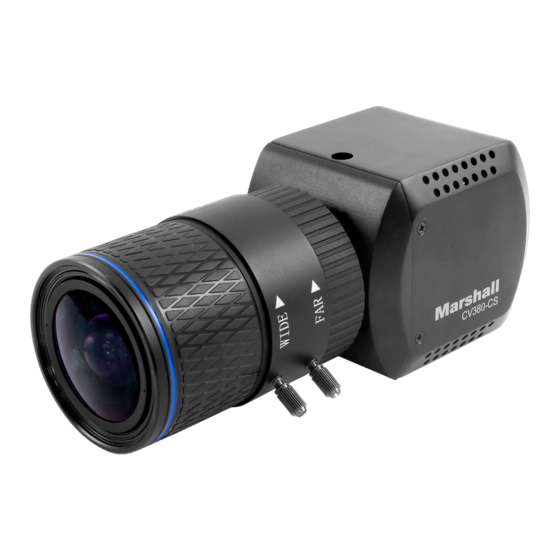
- Page 1 B r o a d c a s t A / V D i v i s i o n CV380-CS True 4k30 Compact Camera User Manual...
-
Page 2: Table Of Contents
Table of Contents Table of Contents 1. Menu Structure 2. OSD Joystick and Button 3. WB Control 4. AE Control 5. Day / Night 6. Audio 7. Image Control 8. Special 9. Setup 10. Reset 11. Exit 12. Troubleshooting Warranty... -
Page 3: Menu Structure
CV380-CS Manual 1. Menu Structure SETUP SUB MENU SUB MENU ONE PUSH INDOOR CONTROL OUTDOOR BLUE MANUAL AGC MAX SENS UP AUTO AE BRIGHT FLK CONTROL SHUTTER AGC MAX SHUT FIX SENS UP AE BRIGHT FLK CONTROL IRIS AGC MAX... - Page 4 SETUP SUB MENU SUB MENU AE CONTROL MANUAL FLK CONTROL DAY/NIGHT NIGHT COLOR NIGHT COLOR BURST MIC/LINE AUDIO LEVEL AUDIO MIC ATTENUATOR SAMPLE BITS LENS SHADING CONTRAST BRIGHTNESS SATURATION IMAGE EDGE ENHANCE CONTROL AUTO SATURATE AUTO EDGE BLACK LEVEL GAMMA CORRECT DNR MODE DNR LEVEL DZOOM...
-
Page 5: Osd Joystick And Button
OUTPUT FORMAT RESET USER/FACTORY EXIT 2. OSD Joystick and Button LINE IN MIC IN I/O Cable for CV380-CS CV380-CS Used to access the menu and confirm selection. Used to move the cursor up. DOWN Used to move the cursor down LEFT Used to move the cursor to left and change the value. -
Page 6: Wb Control
3. WB CONTROL Select WB CONTROL using the UP or DOWN button. You can change between AUTO, ATW, PUSH, and MANUAL using the LEFT or RIGHT buttons. • AUTO: Controls the automatic adjustment of the light source’s color temperature from 3,000°K ~ 8,000°K. -
Page 7: Ae Control
CV380-CS Manual 4. AE CONTROL Select AE CONTROL using the UP or DOWN button. You can select one sub-mode using the UP or DOWN buttons. MENU AE CONTROL WB CONTROL MANUAL MODE AUTO AE CONTROL > SHUT FIX DAY/NIGHT AUTO... -
Page 8: Day / Night
5. DAY / NIGHT Select DAY / NIGHT using the UP or DOWN button. You can select one sub-mode from AUTO, COLOR, and NIGHT using the UP or DOWN buttons. MODE: Set camera to either color mode or B&W mode. (Day, Night) DAY: When set to DAY mode, camera stays in color and IR cut filter is engaged. -
Page 9: Audio
CV380-CS Manual 6. AUDIO Select AUDIO using the UP or DOWN button and enter ON using SEL button. You can select one sub-mode using the UP or DOWN buttons. • MIC / LINE: When using audio microphone use MIC mode, when using other audio sources use LINE setting •... -
Page 10: Image Control
7. IMAGE CONTROL Select IMAGE CONTROL using the UP or DOWN button. You can select LENS SHADING, CONTRAST, HUE, And EDGE ENHANCE using the UP or DOWN buttons. MENU IMAGE CONTROL WB CONTROL MANUAL LENS SHADING AE CONTROL > CONTRAST DAY/NIGHT AUTO BRIGHTNESS... -
Page 11: Special
CV380-CS Manual 8. SPECIAL Select SPECIAL using the UP or DOWN button. You can select DEFOG, MOTION DETECT, BACKLIGHT, DEFECT PIXEL, and FLICKER DETECT using the UP or DOWN buttons. MENU SPECIAL WB CONTROL MANUAL DZOOM AE CONTROL > DEFOG... -
Page 12: Setup
9. SETUP CAMERA setup can be adjusted from this menu. You can select CAMERA ID, Communication, System Info, and Output Format using the UP or DOWN buttons. MENU SETUP WB CONTROL MANUAL CAM TITLE AE CONTROL > COMMUNICATION > DAY/NIGHT AUTO SYSTEM INFO >... -
Page 13: Reset
CV380-CS Manual 10. RESET Select RESET using the UP or DOWN buttons. • RESET: Reset the camera settings the factory defaults or user setting value. MENU RESET WB CONTROL MANUAL RESET MODE FACTORY AE CONTROL > RESET DAY/NIGHT AUTO> SAVE AS USER AUDIO >... -
Page 14: Exit
11. EXIT Select EXIT using the UP or DOWN button. MENU WB CONTROL MANUAL AE CONTROL > DAY/NIGHT AUTO > AUDIO IMAGE CONTROL > SPECIAL SETUP > RESET ON> EXIT • SAVE: Exit the setup after saving the value changes. -
Page 15: Troubleshooting
CV380-CS Manual 12. TROUBLESHOOTING Before sending the camera for repair, please check below to make sure that the camera is installed correctly. If it still does not perform adequately, please consult with your supplier. Problem Solutions a. Check that all connected devices are powered on. - Page 16 Warranty For Warranty information please refer to Marshall website page: https://marshall-usa.com/company/warranty.php 20608 Madrona Avenue, Torrance, CA 90503 Tel: (800) 800-6608 / (310) 333-0606 • Fax: 310-333-0688 www.marshall-usa.com support@marshall-usa.com...