Sign In
Upload
Download
Table of Contents
Contents
Add to my manuals
Delete from my manuals
Share
URL of this page:
HTML Link:
Bookmark this page
Add
Manual will be automatically added to "My Manuals"
Print this page
×
Bookmark added
×
Added to my manuals
Manuals
Brands
Hytera Manuals
Portable Radio
HP56 Series
User manual
Hytera HP56 Series User Manual
Hide thumbs
Also See for HP56 Series
:
Quick reference manual
(3 pages)
1
2
3
Table Of Contents
4
5
6
7
8
9
10
11
12
13
14
15
16
17
18
19
20
21
22
23
24
25
26
27
28
29
30
31
32
33
34
35
36
37
38
39
40
41
42
43
44
45
46
page
of
46
Go
/
46
Contents
Table of Contents
Troubleshooting
Bookmarks
Table of Contents
Table of Contents
Documentation Information
Packing List
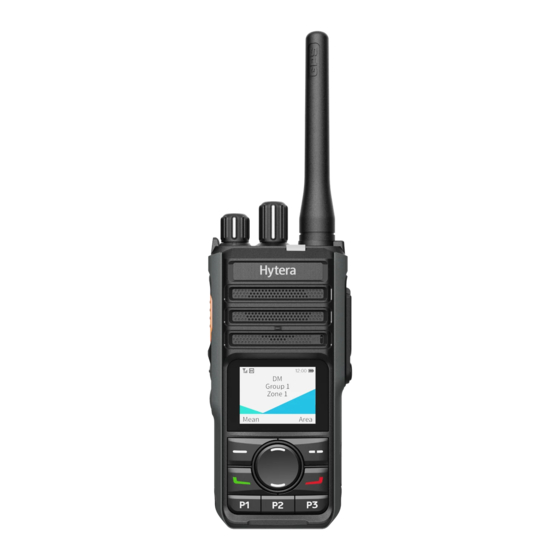
Product Overview
Before Use
Charge the Battery
Install the Antenna
Attach the Belt Clip
Attach the Battery
Attach the Audio Accessory
Basic Operations
Turn on or off the Radio
Adjust the Volume
Select a Zone
Select a Channel
Check the Radio Information
Status Indications
LCD Icons
LED Indicator
Call Services
Group Call
Initiate a Group Call
Answer a Group Call
End a Group Call
Private Call
Initiate a Private Call
Receive a Private Call
End a Private Call
All Call
Initiate an All Call
Receive an All Call
End an All Call
Call on Analog Channel
Message Services
View a Message
Delete a Message
Contacts
Settings
Basic Settings
Set the Display
Set the Keypad Lock
Set the Date and Time
Set MIC & SPK
Set the USB Path
Set Language
Call Settings
Set Power Level
Set Squelch Level
Enable Compandor
Security Settings
Encryption
Lone Worker
Scrambler
Profiles
Switch Profiles
Customize each Profile
Set MIC AGC
Set AI-Based Noise Cancellation
Set Audio Mode
Set Alert Tone
Set the LED Indicator
Reset the Radio Profile
Radio Features
Scan
Enable Scan
Set Scan List
Positioning
Enable Positioning
View Position
Enable GPS Report
Connect to a BT Device
Switch BT Audio
Set BT
One Touch Call/Menu
Roam
Priority Interrupt
Xpt
Emergency Services
Initiate an Emergency Call
Receive an Emergency Call
End an Emergency Call
Radio Disable and Radio Enable
Troubleshooting
Care and Cleaning
Radio
Battery
Cleaning
Sterilizing
Storing
Optional Accessories
Abbreviations
Advertisement
Quick Links
1
Product Overview
2
Basic Operations
Download this manual
HP56X Digital Portable Radio
User Manual
Hytera Communications Corporation Limited
Table of
Contents
Previous
Page
Next
Page
1
2
3
4
5
Advertisement
Table of Contents
Need help?
Do you have a question about the HP56 Series and is the answer not in the manual?
Ask a question
Questions and answers
Related Manuals for Hytera HP56 Series
Radio Hytera HP56 Series Quick Reference Manual
(3 pages)
Radio Hytera HP50X User Manual
Digital portable radio (34 pages)
Portable Radio Hytera HP50X User Manual
Intrinsically safe digital portable radio (43 pages)
Portable Radio Hytera HP566 User Manual
(46 pages)
Portable Radio Hytera HP568 User Manual
(46 pages)
Portable Radio Hytera HP565BT User Manual
(46 pages)
Portable Radio Hytera HP565G User Manual
(46 pages)
Portable Radio Hytera HP56X User Manual
Intrinsically safe digital portable radio (55 pages)
Portable Radio Hytera HP78X Quick Reference Manual
(13 pages)
Portable Radio Hytera HP78X Quick Reference Manual
(7 pages)
Portable Radio Hytera HP78X User Manual
(64 pages)
Portable Radio Hytera HP70X Quick Reference Manual
(19 pages)
Portable Radio Hytera HP70X User Manual
(42 pages)
Portable Radio Hytera HP68X User Manual
(48 pages)
Portable Radio Hytera HP60X Quick Reference Manual
(19 pages)
Portable Radio Hytera HP79XEx Quick Reference Manual
Intrinsically safe digital portable radio (8 pages)
This manual is also suitable for:
Hp562
Hp565
Hp566
Hp568
Hp569
Hp565bt
...
Show all
Hp565g
Table of Contents
Print
Rename the bookmark
Delete bookmark?
Delete from my manuals?
Login
Sign In
OR
Sign in with Facebook
Sign in with Google
Upload manual
Upload from disk
Upload from URL


Need help?
Do you have a question about the HP56 Series and is the answer not in the manual?
Questions and answers