Table of Contents
Advertisement
Quick Links
Advertisement
Table of Contents

Summary of Contents for BRIO Moderna CLCTPOU820UVF2
- Page 1 Moderna Countertop Water Dispenser Setup Manual Model No.: CLCTPOU820UVF2...
-
Page 2: Table Of Contents
Table of Contents Safety Information . . . . . . . . . . . . . . . . . . . . . . . . . . . . . . . . . . . . . . . . . . . . . . . . . . . . . . . . . . . . . . . . . . 3 Intended Use . -
Page 3: Safety Information
Safety Information WARNING: To reduce risk of injury and property damage, you must read this entire guide before assembling, installing, and operating the dispenser. WARNING: This product dispense water at very high temperatures. Failure to use properly can cause personal injury. When operating this dispenser, always exercise basic safety precautions, including the following: •... -
Page 4: Intended Use
Intended Use This dispenser is intended to be used in household and similar applications such as: • Staff kitchen areas, offices, and other working environments • Farm houses Hotels, motels, and bed-and-breakfast-type environments • • Catering and other similar non-retail applications The dispenser is not intended for use by persons (including children) with reduced physical, sensory, or mental capabilities, or lack of experience and knowledge, unless they have been given supervision or instruction concerning use of the appliance by a person responsible for their safety. -
Page 5: Product Features
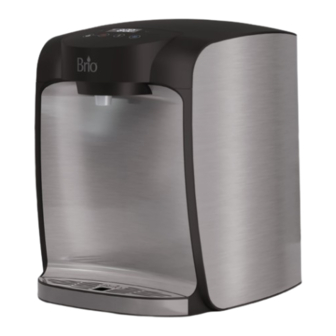
Product Features Part Description Part Description Touch panel Cold water switch (green) Side filter panel Hot water switch (red) Drip tray Water drain with cover Water tap Water inlet with blue silicone plug Overflow outlet Night light switch (blue) Power cord Specifications CLCTPOU820UVF2 Model... -
Page 6: How To Use Quick-Connect Tubing
How to Use Quick-Connect Tubing For ease of installation, the dispenser includes quick-connect tubing. Review the following instructions before installing dispenser. 1 . Cutting Tubing Use the included Tube Cutter (G) or a sharp knife to cut the end of the tubing. After cutting, ensure ends are straight and able to sit flush against the back of the fitting. -
Page 7: Connect To The Cold Water Supply
Position the back and sides of the dispenser at least 4 inches (10 cm) from a walls to permit free air circulation between the walls and the water dispenser. 4 in. (10 cm) 4 in. (10 cm) 2 . Connect to the Cold Water Supply CAUTION: DO NOT CONNECT THIS WATER LINE TO A HOT WATER SUPPLY LINE. -
Page 8: Flush Filters
Connect the filter to the Filter Housing (D) by inserting the filter and rotating clockwise until the BRIO logos on the filter and the Filter Housing (D) are aligned. Ensure both the cold water supply and the shutoff valve on the Shutoff Valve Tube (A) are in the OFF position. -
Page 9: Complete Installation
Flush the filter for a minimum of 5 minutes. The recommended rate is 1.5-3 gallons of water (about 10 minutes) or until the water is clear in appearance. Turn off the cold water supply, then turn off the shutoff valve on the Shutoff Valve Tube (A). -
Page 10: Using The Dispenser
Press either the Hot, Ambient, or Cold button on the Touch Panel until water is flowing steadily, and any air is removed from the tanks. Turn on the green Cold Water Switch (7) and red Hot-Water Switch (8) on back of the dispenser. NOTE: It takes approximately 15 minutes for the cold water to reach its optimal temperature and approximately 90 minutes for the hot water to reach its optimal temperature. -
Page 11: Dispensing Water
3 . Adjusting Hot Water Temperature Simultaneously press the Unlock and Hot Water buttons for 3 seconds. The digital screen will flash, displaying the current hot water temperature. Using the Up or Down Arrows, adjust to the desired temperature. Temperature adjusts by 2-degree increments. -
Page 12: Cleaning And Maintenance
Cleaning and Maintenance Keep dispenser in a cool, dry place and out of direct sunlight. • • Ensure all sides of dispenser are at least 4 in. (10 cm) from walls. • Wipe the surfaces clean with a clean, moist cloth. NEVER immerse the dispenser in water or clean with a solvent. -
Page 13: Troubleshooting
Remove the silicone plug and re-attach it to the filter door. The dispenser is now ready to use. NOTE: If the digital screen displays “loop” for more than 15 seconds without any operation, the dispenser will return to the normal state. If you wish to exit the sanitation process before it has ended, press the Cold button for 3 seconds to return to a standby state. -
Page 14: Warranty
Warranty Brio (“Vendor”) warrants to the original purchaser of the Brio Water Coolers (the “Product”), and to no other person, that if the Product is assembled and operated in accordance with the printed instructions accompanying it, then for a period of one (1) year from the date of purchase, all parts in the Product shall be free from defects in material and workmanship. - Page 16 Contact Us Call: +1 844-257-4103 ©2022 Brio Water Technology, Inc.


Need help?
Do you have a question about the Moderna CLCTPOU820UVF2 and is the answer not in the manual?
Questions and answers