Table of Contents
Advertisement
Quick Links
Advertisement
Table of Contents

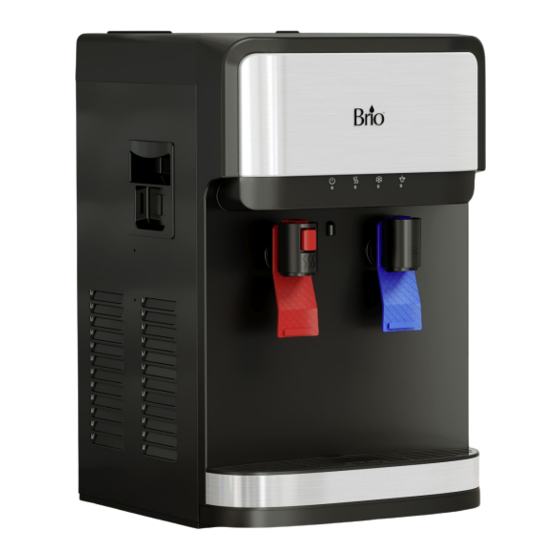
Summary of Contents for BRIO CLCTPOU320UVF3
- Page 1 Water Dispenser Setup Manual Model No.: CLCTPOU320UVF3...
-
Page 2: Table Of Contents
Table of Contents Safety Information � � � � � � � � � � � � � � � � � � � � � � � � � � � � � � � � � � � � � � � � � � � � � � � � � � � � � � � � � � � � � � � � � � � 3 Intended Use �... -
Page 3: Safety Information
Safety Information WARNING: To reduce risk of injury and property damage, you must read this entire guide before assembling, installing and operating the dispenser. WARNING: This product dispenses water at very high temperatures. Failure to use properly can cause personal injury. When operating this dispenser, always exercise basic safety precautions, including the following: •... -
Page 4: Intended Use
Intended Use This dispenser is intended to be used in household and similar applications such as: • Staff kitchen areas, offices and other working environments • Farm houses • Clients in hotels, motels and other residential type environments • Bed and breakfast type environments •... -
Page 5: Indicator Panel Description
Indicator Panel Description 1� Power indicator light – When illuminated, indicates that the dispenser is on. 2� Hot water indicator light – When illuminated, indicates that the dispenser is heating water. 3� Cold water indicator light – When illuminated, indicates that the dispenser is cooling water. -
Page 6: Materials Needed
Materials Needed Screwdriver Wrench Installation 1� Determine Installation Location A� Place the dispenser upright. B� Locate the dispenser on a hard and level surface in a cool shaded location near a grounded wall outlet. NOTICE: Do NOT plug in the power cord until the entire installation section is completed. -
Page 7: Install The Filters And Tubing
C� Make a hole on the surface where the water dispenser will be installed. D� Attach the grounding bracket (J) on the surface by screwing tightly. 3� Install the Filters and Tubing A� Click the three black mounting brackets (H) onto the top of the condenser. - Page 8 D� Slide the next filter housing (F) onto the middle mounting bracket (H) and connect the other end of the filter connecting tube (A). E� Repeat for the third filter housing. F� Connect the shut off valve with tube (B) to the left filter housing (F).
-
Page 9: Connect To The Cold Water Supply
4� Connect to the Cold Water Supply CAUTION: DO NOT CONNECT THIS WATER LINE TO A HOT WATER SUPPLY LINE. The water supply to the unit MUST be from the COLD WATER LINE. Using HOT WATER will severely damage your filters. A�... -
Page 10: Flush The Filters And Complete The Installation
5� Flush the Filters and Complete the Installation IMPORTANT: Follow this procedure every time you replace your filters. IMPORTANT: Ensure the water supply is off before you begin. A� Connect the red filter flushing tube (D) to the right filter housing (F). B�... -
Page 11: Operation
Operation IMPORTANT: This unit has been tested and sanitized prior to packing and shipping. During transit, dust and odors can accumulate in the tank and lines. Dispense and dispose at least one quart of water prior to drinking any water. Turn the Dispenser On/Off IMPORTANT: Before you activate the hot and cold switches, ensure water has filled the tanks inside the... -
Page 12: Troubleshooting
Troubleshooting Problem Solution • It takes up to one hour after setup to dispense cold water. • Make sure the power cord is properly connected to a working outlet. • Make sure the back of the dispenser is at least 20 cm from a wall and The cold water is not cold. -
Page 13: Clean The Dispenser
Clean the Dispenser CAUTION: Before cleaning, make sure the power switch is in the O (off) position and unplug the water dispenser. IMPORTANT: This dispenser contains UV technology that will help keep your dispenser clean. However, if you do need to clean your dispenser for any reason, follow these steps: 1�... -
Page 14: Filter Replacement Schedule
Filter Replacement Schedule Filter Type Replacement Schedule Function Pre-carbon 6 months or 950 gallons Reduces chlorine, taste and odor, lead and cysts. Performs a coarse filtration of original water. Removes mud, sand, Sediment 6 months or 950 gallons iron, rust, suspensions and impurities. Post carbon 6 months or 950 gallons Taste and impurity removal. -
Page 15: Care And Maintenance
Care and Maintenance • Keep this dispenser in a dry and cool place and avoid direct sunshine. • Ensure the back of the dispenser is at least 20 cm (8 in.) away from the wall. • Never put the dispenser on paper or foam, which may store water and then cause creepage. Never put anything flammable beside this machine. -
Page 16: Warranty
Warranty Brio (“Vendor”) warrants to the original purchaser of the Brio Water Coolers (the “Product”), and to no other person, that if the Product is assembled and operated in accordance with the printed instructions accompanying it, then for a period of one (1) year from the date of purchase, all parts in the Product shall be free from defects in material and workmanship. - Page 18 Contact Us Call: +1 844-257-4103 ©2020 DTWUSA...


Need help?
Do you have a question about the CLCTPOU320UVF3 and is the answer not in the manual?
Questions and answers