Advertisement
Quick Links
Technical Support and E-Warranty Certificate www.vevor.com/support
HANGING POT RACK
USER MANUAL
BB-BGGJ02
We continue to be committed to provide you tools with competitive price.
"Save Half", "Half Price" or any other similar expressions used by us only represents an
estimate of savings you might benefit from buying certain tools with us compared to the major
top brands and doses not necessarily mean to cover all categories of tools offered by us. You
are kindly reminded to verify carefully when you are placing an order with us if you are
actually saving half in comparison with the top major brands.
Advertisement

Related Manuals for VEVOR BB-BGGJ02


Summary of Contents for VEVOR BB-BGGJ02
- Page 1 Technical Support and E-Warranty Certificate www.vevor.com/support HANGING POT RACK USER MANUAL BB-BGGJ02 We continue to be committed to provide you tools with competitive price. "Save Half", "Half Price" or any other similar expressions used by us only represents an estimate of savings you might benefit from buying certain tools with us compared to the major top brands and doses not necessarily mean to cover all categories of tools offered by us.
- Page 2 CustomerService@vevor.com This is the original instruction, please read all manual instructions carefully before operating. VEVOR reserves a clear interpretation of our user manual. The appearance of the product shall be subject to the product you received. Please forgive us that we won't inform you again if...
-
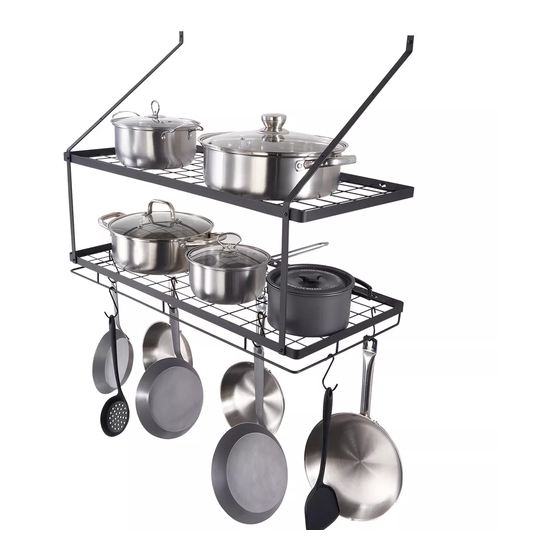
Page 3: Product Parameters
PRODUCT PARAMETERS Loading Model Product Size(W*D*H) Capacity 30"x14"x23" BB-BGGJ02 (762x356x584mm) 55 lb (Max) ASSEMBLY PRECAUTIONS 1. Assembly needs to follow these instructions. Incorrect assembly can be a hazard. 2. Wear safety goggles and heavy-duty work gloves during assembly. 3. Do not assemble when tired or under the influence of alcohol, drugs or medication. -
Page 4: Use Precautions
USE PRECAUTIONS WARNING: TO PREVENT SERIOUS INJURY AND DEATH FROM TIPPING: 1. This product is not a toy. Do not allow children to play with or approach this item. 2. Use as intended only. Do not sit or stand on the product. 3. - Page 5 PARTS LIST Base Frame Iron bar M4*8 ST4*16 Name For wooden Parts Quantiy 2 PCS 2 PCS 2PCS 8 PCS 8 PCS Name M4*30 Plastic plug positioning Hook card (For wall) (For wall) Parts Quantiy 8 PCS 8 PCS 1 PCS 12PCS...
-
Page 6: Assembly Steps
ASSEMBLY STEPS Installation Mode 1 STEP1 1.Put the positioning card (H) on the wall and punch holes then put the plastic plugs(G) into the holes. (If install on wooden material,mark the punch position with pencil.)... - Page 7 STEP2 2.Assemble the frames(B) and ironbars (C) with M4*8 screws (D) onto the base (A). STEP3 3.Punch the M4*30 screws(F) half into the wall.
- Page 8 STEP4 4.Hanging the producton the wall and stuck with screws at the right side. 5.Fix the product on COMPLETION the wall with M4*30 screws(F) and finish the installation. Tips:If install on wooden wall ,you just need to use M4*16 screws to install at step 3,4,5 and without plastic plug.
- Page 9 Installation Mode 2 STEP1 1.Put the positioning card (H) on the wall and punch holes then put the plastic plugs(G) into the holes. (If install on wooden material,mark the punch position with pencil.)...
- Page 10 STEP2 2.Assemble the frames(B) with M4*8 screws (D) onto the base (A). STEP3 3.Punch the M4*16 screws(E) half into the wall. 4.Hanging the product on the wall and stuck with screws at the right side.
- Page 11 STEP4 5.Fix the product on the wall with M4*16 screws(E) and STEP5 finish the installation.
- Page 12 Cleaning -For cleaning, wipe the surface with a damp (not wet) cloth or wipe dry with a clean lint free cotton cloth. -Window cleaning liquid or a similar cleaning liquid can be used to clean the surface.
- Page 13 Support and E-Warranty Certificate www.vevor.com/support...
Need help?
Do you have a question about the BB-BGGJ02 and is the answer not in the manual?
Questions and answers