ABB ACS480 Hardware Manual
Hide thumbs
Also See for ACS480:
- Hardware manual (180 pages) ,
- Troubleshooting manual (24 pages) ,
- Quick installation and start-up manual (2 pages)

Subscribe to Our Youtube Channel
Related Manuals for ABB ACS480


Summary of Contents for ABB ACS480
- Page 1 ABB machinery drives ABB general purpose drives Hardware manual Hardware manual ACS380 drives ACS480 drives...
- Page 2 List of related manuals Drive manuals and guides Code (English) ACS480 drives hardware manual 3AXD50000047392 ACS480 quick installation and start-up guide 3AXD50000047400 ACS480 standard control program firmware manual 3AXD50000047399 Option manuals and guides ACS-AP-x assistant control panel user’s manual 3AUA0000085685 ACS-BP-S basic control panel user’s manual...
- Page 3 Hardware manual ACS480 drives Table of contents 1. Safety instructions 4. Mechanical installation 6. Electrical installation 3AXD50000047392 Rev B 2018 ABB Oy. All Rights Reserved. Translated from original manual 3AXD50000047392 EFFECTIVE: 2018-04-12...
-
Page 5: Table Of Contents
Table of contents 5 Table of contents List of related manuals ............2 1. - Page 6 6 Table of contents 4. Mechanical installation Contents of this chapter ........... . . 35 Examining the installation site .
- Page 7 Connecting the control cables ..........62 Default I/O connection diagram (ABB standard macro) ......63 Connecting EIA-485 Modbus RTU terminal to the drive .
- Page 8 8 Table of contents Switching frequency derating ..........87 Altitude derating .
- Page 9 Table of contents 9 Frame R1 (400 V) (front & side) ..........120 Frame R1 (400 V) (bottom &...
- Page 10 Providing feedback on ABB Drives manuals ........
-
Page 11: Safety Instructions
Safety instructions 11 Safety instructions Contents of this chapter This chapter contains the safety instructions which you must obey when you install and operate the drive and do maintenance on the drive. Obey the safety instructions to prevent injury, death or damage to the equipment. Use of warnings and notes in this manual Warnings tell you about conditions which can cause injury or death, or damage to the equipment. -
Page 12: General Safety In Installation, Start-Up And Maintenance
12 Safety instructions General safety in installation, start-up and maintenance These instructions are for all personnel that install the drive and do maintenance work on it. WARNING! Obey these instructions. If you ignore them, injury or death, or damage to the equipment can occur. •... -
Page 13: Electrical Safety In Installation, Start-Up And Maintenance
Safety instructions 13 Electrical safety in installation, start-up and maintenance Precautions before electrical work These warnings are for all personnel who do work on the drive, motor cable or motor. WARNING! Obey these instructions. If you ignore them, injury or death, or damage to the equipment can occur. - Page 14 14 Safety instructions Additional instructions and notes WARNING! Obey these instructions. If you ignore them, injury or death, or damage to the equipment can occur. • If you install the drive on an IT system (an ungrounded power system or a high- resistance-grounded [over 30 ohms] power system), disconnect the internal EMC filter;...
-
Page 15: Precautions Before Electrical Work
Safety instructions 15 Grounding These instructions are for all personnel who are responsible for the electrical installation, including the grounding of the drive. WARNING! Obey these instructions. If you ignore them, injury or death, or equipment malfunction can occur, and electromagnetic interference can increase. -
Page 16: Additional Instructions And Notes
16 Safety instructions Additional instructions for permanent magnet motor drives Safety in installation, start-up and maintenance These are additional warnings concerning permanent magnet motor drives. The other safety instructions in this chapter are also valid. WARNING! Obey these instructions. If you ignore them, injury or death and damage to the equipment can occur. -
Page 17: General Safety In Operation
Safety instructions 17 General safety in operation These instructions are for all personnel that operate the drive. WARNING! Obey these instructions. If you ignore them, injury or death, or damage to the equipment can occur. • Do not control the motor with the disconnector at the drive power supply. Use the control panel start and stop keys or the start/stop commands from an external control device connected through the I/O or fieldbus interface. - Page 18 18 Safety instructions...
-
Page 19: Introduction To The Manual
The chapter also has a flowchart for the delivery, installation and commissioning of the drive. Applicability The manual applies to ACS480 drives. 3-phase and 1-phase 230V device will be released later. Please contact local ABB to check the availability Target audience The reader must know the fundamentals of electricity, wiring, electrical components and electrical schematic symbols. -
Page 20: Contents Of This Manual
20 Introduction to the manual Contents of this manual • Safety instructions (on page 11) gives the safety instructions that you must obey when you install, commission, operate and service the drive. • Introduction to the manual (on page 19) describes the applicability, target audience, purpose and contents of this manual. -
Page 21: Quick Installation And Commissioning Flowchart
Connect the control cables. Connecting the control cables on page 62. Examine the installation. Installation checklist on page 73. Commission the drive. Refer to the ACS480 Quick installation and start-up guide (3AXD50000047400 [English]) and the ACS480 Firmware manual (3AXD50000047399 [English]). -
Page 22: Categorization By Frame (Size)
22 Introduction to the manual Terms and abbreviations Term/abbreviation Explanation ACS-AP-X Assistant control panel. An advanced operator keypad for communication with the drive. Brake chopper Conducts the surplus energy from the intermediate circuit of the drive to the brake resistor when necessary. The chopper operates when the DC link voltage exceeds a certain maximum limit. - Page 23 Introduction to the manual 23 Term/abbreviation Explanation Macro Pre-defined default set of parameters in a drive control program. Each macro is intended for a specific application. NETA-21 Optional remote monitoring tool Network control With fieldbus protocols based on the Common Industrial Protocol (CIP ), such as DeviceNet and Ethernet/IP, denotes the control of the drive using the Net Ctrl and Net Ref objects of the ODVA AC/DC Drive...
- Page 24 24 Introduction to the manual...
-
Page 25: Hardware Description
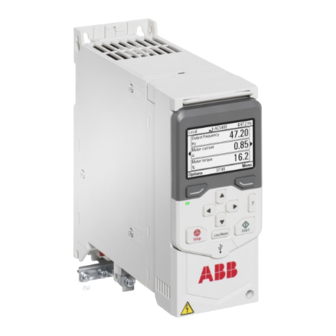
It shows a general diagram of the power connections and control interfaces. General description The ACS480 is a drive for controlling asynchronous AC induction motors, permanent magnet synchronous motors and ABB synchronous reluctance motors (SynRM motors). It is optimized for cabinet mounting. -
Page 26: Hardware Overview
26 Hardware description Hardware overview No. Description No. Description Type designation label Motor and braking resistor terminals Model information label Cooling fan (not on R0) Software information label Front cover Control panel connection Fixed control terminals Control panel Cold configuration connection (CCA-01) EMC filter grounding screw Option slot for communication modules Varistor grounding screw... - Page 27 Hardware description 27 No. Description No. Description Input power terminal...
-
Page 28: Control Connections
28 Hardware description Control connections There are fixed control connections on the base unit and optional control connections based on the installed option module. Standard unit Connections of the base unit: 1. Auxiliary voltage outputs 2. Digital inputs 3. Safe torque-off connections 4. -
Page 29: Base Unit
Hardware description 29 Base unit Connections of the base unit: 1. Auxiliary voltage outputs 2. Digital inputs 3. Safe torque-off connections 4. Relay output connection 5. Cold configuration connection for CCA-01 6. Option module slot 1 +24V DGND RO C DCOM RO1A SGND... -
Page 30: Mounted Options
(3AUA0000085685 [EN]). For information on how to start up the drive, and modify the settings and parameters, refer to the ACS480 Firmware manual (3AXD50000047399 [EN]). PC connection To connect a PC to the drive, there are two alternatives: 1. -
Page 31: Drive Labels
• Software information label under the front cover • Type designation label on the left side of the drive For label positions, refer to Hardware overview on page 26. Model information label ACS480-04-04A1-4 S/N: 1170301940 No. Description Drive type Bar code Serial number ... - Page 32 32 Hardware description Type designation label This is a sample type designation label. IND.CONT.EQ. 1PDS ABB Oy 50/60 Hz FRAME IP20 No. Description Type designation, refer to Type designation key on page 33. Frame (size) Degree of protection Nominal ratings, refer to Ratings on page 84.
-
Page 33: Type Designation Label
The type designation tells you the specifications and configuration of the drive. For more information on the ratings, refer to Technical data on page 83. Sample type code: ACS480-04-12A7-4+XXXX Segment ACS480 - 04 - 02A7 - 4 + Option codes... - Page 34 34 Hardware description Code Description K475 FENA-21 2-port Ethernet (Ethernet/IP, Modbus/TCP, PROFINET) +K490 FEIP-21 Ethernet/IP +K491 FMBT-21 Modbus/TCP +K492 FPNO-21 PROFINET Documentation +R700 English +R707 French Full set of printed manuals in the selected language. An +R701 German +R708 Spanish English manual is included, if a +R702 Italian +R709 Portuguese...
-
Page 35: Operation Principle
Hardware description 35 Operation principle The figure shows the simplified main circuit diagram of the drive. T1/U T2/V T3/W Description Rectifier. Converts alternating current and voltage to direct current and voltage. DC link. DC circuit between rectifier and inverter. Inverter. Converts direct current and voltage to alternating current and voltage. Brake chopper. - Page 36 36 Hardware description...
-
Page 37: Mechanical Installation
Mechanical installation 35 Mechanical installation Contents of this chapter The chapter tells you how to examine the installation site, unpack, check the delivery and install the drive mechanically. Installation alternatives You can install the drive: • With screws on to a wall •... -
Page 38: Examining The Installation Site
36 Mechanical installation • Make sure that the hot exhaust air from a drive does not flow into the cooling inlet of other drives or equipment. • The drive has an IP20 ingress protection classification for cabinet installation. Examining the installation site Make sure that: •... -
Page 39: Unpacking The Delivery
Mechanical installation 37 Unpacking the delivery Make sure that all of the items are present and that there are no signs of damage. Standard drive package contents: • Drive • Assistant control panel (not installed) • I/O & Modbus module (not installed) •... -
Page 40: Installing The Drive
38 Mechanical installation Installing the drive You can install the drive: • With screws to a suitable surface • To a DIN installation rail with the integrated lock To install the drive with screws 1. Mark the surface for the mounting holes. Refer to Dimensions and weights page 96. -
Page 41: To Install The Drive To A Din Installation Rail
Mechanical installation 39 To install the drive to a DIN installation rail 1. Move the locking part to the left. 2. Push and hold the locking button down. 3. Put the top tabs of the drive onto the top edge of the DIN installation rail. - Page 42 40 Mechanical installation...
-
Page 43: Planning The Electrical Installation
Make sure that the installation is designed and done according to the applicable local laws and regulations. ABB does not assume any liability whatsoever for any installation which breaches the local laws and/or other regulations. If the recommendations given by ABB are not followed, the drive may experience problems that the warranty does not cover. -
Page 44: Other Regions
42 Planning the electrical installation Other regions The disconnecting device must conform to the applicable local safety regulations. Checking the compatibility of the motor and drive Use an asynchronous AC induction motor, permanent magnet motor or synchronous reluctance motor (SynRM) with the drive. Several induction motors can be connected to the drive at a time. -
Page 45: Typical Power Cable Sizes
These are the typical cross-sectional area of the power cables at the nominal drive current. Drive type Frame (Cu) 1-phase U = 200...240 V ACS480-04-02A4-1 3×1.5 + 1.5 ACS480-04-03A7-1 3×1.5 + 1.5 ACS480-04-04A8-1 3×1.5 + 1.5 ACS480-04-06A9-1 3×1.5 + 1.5 ACS480-04-07A8-1 3×1.5 + 1.5... - Page 46 44 Planning the electrical installation Drive type Frame (Cu) ACS480-04-05A7-4 3×1.5 + 1.5 ACS480-04-07A3-4 3×1.5 + 1.5 ACS480-04-09A5-4 3×2.5 + 2.5 ACS480-04-12A7-4 3×2.5 + 2.5 ACS480-04-018A-4 3×6 + 6 ACS480-04-026A-4 3×6 + 6 ACS480-04-033A-4 3×10 + 10 ACS480-04-039A-4 3×16 + 16 ACS480-04-046A-4 3×25 + 16...
-
Page 47: Recommended Power Cable Types
Planning the electrical installation 45 Recommended power cable types Symmetrical shielded cable with three phase conductors and a concentric PE conductor as the shield. The shield must meet the requirements of IEC 61800-5-1 (refer to page 42). Make sure that local/state/country electrical codes permit this cable type. -
Page 48: Motor Cable Shield
46 Planning the electrical installation Motor cable shield If the motor cable shield is the only protective earth conductor of the motor, make sure that the conductivity of the shield is sufficient. Refer to Selecting the power cables on page or to IEC 61800-5-1. - Page 49 Planning the electrical installation 47 Armored cable or shielded power cable Six-conductor (three phase and three ground conductors) type MC continuous corrugated aluminum armor cable with symmetrical grounds is available from the following suppliers (trade names in parentheses): • Anixter Wire & Cable (VFD) •...
-
Page 50: Selecting The Control Cables
Relay cable The cable type with braided metallic screen (for example ÖLFLEX by LAPPKABEL, Germany) has been tested and approved by ABB. Drive composer PC tool cable Use a USB type A (PC) – type B (control panel) cable. The maximum permitted... -
Page 51: Routing The Cables
Planning the electrical installation 49 Routing the cables Select the cable routes as follows: • Put the input power cable (I), motor cable (M) and control cables (C) into separate trays. • Put the motor cable (M) away from the other cables. •... -
Page 52: Separate Control Cable Ducts
83. The fuses protect the input cable, restrict drive damage and prevent damage to adjoining equipment if there is a short-circuit. For information on circuit breakers, contact ABB for more information. Protecting the motor and motor cable in short-circuits If the motor cable has the correct size for the nominal current, the drive protects the motor cable and motor if there is a short-circuit. -
Page 53: Implementing Thermal Overload Protection
Planning the electrical installation 51 Implementing thermal overload protection Protecting the drive, and the input power and motor cables against thermal overload If the cables have the correct size for the nominal current, the drive protects itself and the input and motor cables against thermal overload. WARNING! If the drive is connected to several motors, use a separate circuit breaker or fuses to protect each motor cable and motor against overload. -
Page 54: Implementing The Safe Torque Off Function
52 Planning the electrical installation Note: The stop key on the control panel of the drive does not generate an emergency stop or separate the drive from dangerous potential. Implementing the Safe torque off function Refer to Safe torque off function on page 137. -
Page 55: Protecting The Contacts Of Relay Outputs
Planning the electrical installation 53 Protecting the contacts of relay outputs Inductive loads (relays, contactors and motors) cause voltage transients when switched off. The voltage transients can connect capacitively or inductively to other conductors and cause a malfunction in the system. Use a noise attenuating circuit (varistors, RC filters [AC] or diodes [DC]) to minimize the EMC emission of inductive loads at switch-off. - Page 56 54 Planning the electrical installation...
-
Page 57: Electrical Installation
Electrical installation 55 Electrical installation Contents of this chapter The chapter describes how to check the insulation of the installation and the compatibility with IT (ungrounded) and corner-grounded TN systems. It shows how to connect the power and control cables, install optional modules and connect a PC. Warnings WARNING! Obey the instructions in Safety instructions... -
Page 58: Measuring Insulation
Use a measuring voltage of 1,000 V DC. The insulation resistance of an ABB motor must be more than 100 Mohm (reference value at 25 °C or 77 °F). For the insulation resistance of other motors, refer to the manufacturer’s instructions. -
Page 59: Compatibility With It (Ungrounded) And Corner-Grounded Tn Systems
Electrical installation 57 Compatibility with IT (ungrounded) and corner-grounded TN systems EMC filter WARNING! Do not use the internal EMC filter of the drive in an IT system (an ungrounded power system or a high-resistance-grounded [over 30 ohms] power system). If you use the internal EMC filter, the system is connected to the ground potential through the EMC filter capacitors. -
Page 60: Ground-To-Phase Varistor
58 Electrical installation The EMC grounding screw is located on the bottom of the frame in R3 and R4 frames. Ground-to-phase varistor The metallic varistor screw (VAR) connects the varistor protection circuit to electrical ground. To disconnect the varistor protection circuit from ground, remove the varistor screw. -
Page 61: Connecting The Power Cables
Electrical installation 59 Connecting the power cables Connection diagram a. Two grounding conductors. Use two conductors, if the cross-section of grounding conductor is less than 10 mm Cu or 16 mm Al (IEC/EN 61800-5-1). For example, use the cable shield in addition to the fourth conductor. b. -
Page 62: Connection Procedure
60 Electrical installation Connection procedure WARNING! Obey the Safety instructions on page 11. If you ignore them, injury or death, or damage to the equipment can occur. WARNING! If the drive is connected to an IT (non-grounded) system or to a corner-grounded TN system, disconnect the EMC filter grounding screw. - Page 63 Electrical installation 61 7. Strip the input power cable. 8. If the input power cable has a shield, twist it into a bundle, mark it with yellow-green insulation tape, fit a cable lug, and connect it to the grounding terminal. 9.
-
Page 64: Connecting The Control Cables
Default I/O connection diagram (ABB standard macro) on page for the default I/O connections of the ABB standard macro. For other macros and information, refer to ACS480 Firmware manual (3AXD50000047399 [English]). Connect the cables as shown in Control cable connection procedure on page 67. -
Page 65: Default I/O Connection Diagram (Abb Standard Macro)
Electrical installation 63 Default I/O connection diagram (ABB standard macro) This connection diagram is valid for drives with the I/O & Modbus extension module. Refer to Type designation key on page 33. Terminal Description Terminals in base unit Reference voltage and analog I/O Signal cable shield (screen) Output frequency/speed reference: 0...10 V... - Page 66 64 Electrical installation Fieldbus connection diagram This connection diagram is valid for drives with a fieldbus extension module. Refer to Type designation key on page 33. Terminal Description Aux. voltage output and digital connections +24 V Aux. voltage output +24 V DC, max. 200 mA DGND Aux.
-
Page 67: Connecting Eia-485 Modbus Rtu Terminal To The Drive
Electrical installation 65 Connecting EIA-485 Modbus RTU terminal to the drive Connect the fieldbus to the EIA-485 Modbus RTU terminal on the RIIO-01 module. The connection diagram is shown below. Fieldbus controller Termination ON Data flow Fieldbus Control Word (CW) References Process I/O (cyclic) Status Word (SW) - Page 68 66 Electrical installation Connection examples of two-wire and three-wire sensors The figures give examples of connections for a two-wire or three-wire sensor/transmitter that is supplied by the auxiliary voltage output of the drive. Note: Do not exceed the maximum capability of the auxiliary 24 V (200 mA) output. Two-wire sensor/transmitter 4…20 mA Process actual value measurement or reference,...
-
Page 69: Control Cable Connection Procedure
Control cable connection procedure Do the connections according to the macro in use. The default macro connections are valid with the I/O module (refer to page 63), except for the ABB 2-wire limited macro. Keep the signal wire pairs twisted as near to the terminals as possible to prevent inductive coupling. -
Page 70: Auxiliary Voltage Connection
There is a DC to DC flyback converter power supply inside BAPO-01 module. This power supply takes 24 V DC as input and outputs 5 V DC to control board to keep the processor and communication links alive at all times. ACS480 External supply BAPO-01... -
Page 71: Option Modules
Electrical installation 69 Option modules WARNING! Obey the Safety instructions on page 11. If you ignore them, injury or death, or damage to the equipment can occur. The drive has two option module slots: • Front option: Communication module slot under the front cover. •... - Page 72 70 Electrical installation If you have the BIO-01 option module, you can add a fieldbus option module on top of it. 2. Pull the plastic locking tab of the option module up. 3. Carefully align the option module with the option module slot in the front of the drive.
-
Page 73: To Remove A Front Option
Electrical installation 71 To remove a front option 1. Disconnect the control cables from the option module. 2. Loosen the locking screw. 3. Pull the locking tab out to unlock the option module. 4. Carefully pull the option module to disconnect and remove it. Note that the option module can be tightly in position. - Page 74 72 Electrical installation...
-
Page 75: Installation Checklist
Installation checklist 73 Installation checklist Contents of this chapter This chapter contains an installation checklist which you must complete before you start up the drive. Warnings WARNING! Obey the instructions in Safety instructions on page 11. If you ignore them, injury or death, or damage to the equipment can occur. Checklist Refer to Precautions before electrical work... - Page 76 74 Installation checklist Make sure that … There is an adequately sized protective earth (ground) conductor between the drive and the switchboard. There is an adequately sized protective earth (ground) conductor between the motor and the drive. All protective earth (ground) conductors are connected to the correct terminals and the terminals are tightened (pull the conductors to check).
-
Page 77: Maintenance
Maintenance 75 Maintenance Contents of this chapter The chapter contains the preventive maintenance instructions. -
Page 78: Maintenance Intervals
Long term operation near the specified maximum ratings or ambient conditions may require shorter maintenance intervals for certain components. ABB recommends annual drive inspections to ensure the highest reliability and optimum performance. -
Page 79: Cleaning The Heat Sink
Maintenance 77 Cleaning the heat sink The fins of the drive heat sink become dusty from the cooling air. If the heat sink is not clean, this can cause the drive to give overtemperature warnings and faults. WARNING! Obey the instructions in Safety instructions on page 11. -
Page 80: Replacing The Cooling Fans
After you replace the fan, reset the fan counter. Refer to the ACS480 Firmware manual (3AXD50000047399 [English]). You can get replacement fans from ABB. Use only ABB specified spare parts. To replace the cooling fan for frame sizes R1, R2 and R3... - Page 81 Maintenance 79 7. Free the fan clips and remove the fan from the fan cover. 8. Install the new fan into the fan cover. Make sure that the air flow is in the correct direction. The air flows in from the bottom of the drive and out from the top of the drive.
-
Page 82: To Replace The Cooling Fan For Frame R4
80 Maintenance To replace the cooling fan for frame R4 WARNING! Obey the instructions in Safety instructions on page 13. Ignoring the instructions can cause physical injury or death, or damage to the equipment. - Page 83 Maintenance 81 1. Wait for 5 minutes and measure to make sure that there is no voltage. Refer to Precautions before electrical work page 15. 2. Stop the drive and disconnect it from the power line. 3. Use a suitable flat screwdriver to open the fan cover.
-
Page 84: Servicing The Capacitors
Capacitor failure can cause damage to the drive and an input cable fuse failure, or a fault in the drive. Contact ABB if you think that a capacitor failed. Capacitor reforming You must reform the capacitors if the drive is stored for a year or more. -
Page 85: Technical Data
Technical data 83 Technical data Contents of this chapter The chapter contains the technical specifications of the drive, such as ratings, sizes and technical requirements as well as provisions for fulfilling the requirements for CE, UL and other approval marks. -
Page 86: Ratings
84 Technical data Ratings IEC ratings Type Input Input Output ratings Frame ACS480- rating with size Max. Nominal use Light-duty use Heavy-duty use choke current 1-phase U = 200…240 V 02A4-1 0.37 0.37 0.25 03A7-1 0.55 0.55 0.37 04A8-1 10.1... -
Page 87: Nema Ratings
Technical data 85 NEMA ratings Type Input Input with Output ratings Frame ACS480-04- rating choke size Light-duty use Heavy-duty use 3-phase U = 460 V (440…480 V) 02A7-4 0.75 03A4-4 04A1-4 05A7-4 07A3-4 09A5-4 12.2 12A7-4 17.6 11.0 11.0 018A-4 22.4... -
Page 88: Derating
The derating factor for 1500 m is 1 - 1/10 000 m · (1500 - 1000) m = 0.95. The minimum size required becomes then I = 9.4 A / 0.95 = 9.9 A. Referring to I in the ratings tables (starting from page 84), drive type ACS480-04-12A7-4 exceeds the I requirement of 9.9 A. ... -
Page 89: Switching Frequency Derating
Technical data 87 Switching frequency derating Type Current with different switching frequencies (I at 50 °C) ACS480-04- 2 kHz 4 kHz 8 kHz 12 kHz 1-phase U = 200…240 V 02A4-1 03A7-1 04A8-1 06A9-1 07A8-1 09A8-1 12A2-1 12.2 12.2 10.0... -
Page 90: Altitude Derating
88 Technical data Altitude derating 230 V units: 1000...2000 m above sea level, the derating is 1% for every 100 m (330 ft). 400 V units: 1000...4000 m above sea level, the derating is 1% for every 100 m (330 ft) Up to 4000 m altitude is possible for 400 V units when following boundary conditions are taken into account: •... -
Page 91: Fuses (Iec)
gG fuses Make sure that the operating time of the fuse is less than 0.5 seconds. Obey the local regulations. Type Input Min. short- Nominal Voltage ABB type IEC 60269 current circuit current rating size ACS480-04- current 1-phase U = 200…240 V... -
Page 92: Gr Fuses
90 Technical data Type Input Min. short- Nominal Voltage ABB type IEC 60269 current circuit current rating size ACS480-04- current 3-phase U = 380…480 V 02A7-4 OFAF000H6 03A4-4 OFAF000H6 04A1-4 OFAF000H10 05A7-4 OFAF000H10 07A3-4 11.5 OFAF000H16 09A5-4 15.0 OFAF000H16 12A7-4 20.2... - Page 93 Technical data 91 Type Input Min. short- Nominal Voltage Bussmann IEC 60269 current circuit current rating type size ACS480-04- current 3-phase U = 380…480 V 02A7-4 170M2694 03A4-4 170M2694 04A1-4 170M2695 05A7-4 170M2695 07A3-4 11.5 170M2696 09A5-4 15.0 170M2696 12A7-4 20.2...
-
Page 94: Ul Fuses
UL fuses Type Input Min. short- Nominal Voltage Bussmann/ Type current circuit current rating Edison type ACS480-04- current 1-phase U = 200…240 V 02A4-1 JJN/TJN10 UL class T 03A7-1 JJN/TJN10 UL class T 04A8-1 10.1 JJN/TJN20 UL class T 06A9-1 14.5... -
Page 95: Alternate Short-Circuit Protection
The protective characteristics of the circuit breakers depend on the type, construction and settings of the breakers. There are also limitations pertaining to the short-circuit capacity of the supply network. Your local ABB representative can help you in selecting the breaker type when the supply network characteristics are known. -
Page 96: Self-Protected Combination Manual Controller - Type Eusa (Ul) Environment
2CDC131085M0201 – Manual Motor Starters – North American Applications for complete technical data on the ABB Type E manual motor protectors. In order for these manual motor protectors to be used for branch circuit protection, they must be UL listed Type E manual motor protectors, otherwise they can be used only as an At Motor Disconnect. - Page 97 97. For UL only: The minimum enclosure volume is specified in the UL listing when applied with the ABB Type E MMP shown in the table. The drives are intended to be mounted in an enclosure, unless a NEMA-1 kit is added.
-
Page 98: Dimensions And Weights
96 Technical data Dimensions and weights Frame Dimensions and weights (IP20 / UL type open)) size Weight 8.07 8.78 6.93 2.87 8.15 1.97 7.52 1.70 3.74 8.07 8.78 6.93 2.87 8.15 1.97 7.52 1.77 3.90 8.07 8.78 6.93 3.80 8.15 2.95 7.52 2.35... -
Page 99: Free Space Requirements
(all digital inputs in the on state and the panel, fieldbus and fan in use). The total heat dissipation is the sum of the heat dissipation in the main and control circuits. Type Heat dissipation Air flow Noise Frame ACS480-04- Main Control Control Main and size circuit at... - Page 100 98 Technical data Type Heat dissipation Air flow Noise Frame ACS480-04- Main Control Control Main and size circuit at circuit circuit control rated I minimum maximum boards and I maximum dB(A) 04A1-4 63 dB 05A7-4 63 dB 07A3-4 63 dB...
-
Page 101: Terminal Data For The Power Cables
Technical data 99 Terminal data for the power cables Type U1, V1, W1 / U2, V2, W2 / BRK+, BRK- / DC+, DC- terminals PE terminal ACS480-04- Torque Min (solid/stranded) Max (solid/stranded) Torque N·m lbf·in N·m lbf·in 1-phase U = 200…240 V 02A4-1 0.2/0.2... -
Page 102: Terminal Data For The Control Cables
100 Technical data Terminal data for the control cables Type All control cables ACS480-04- Wire size Torque N·m lbf·in 1-phase U = 200…240 V 02A4-1 0.14...1.5 26...16 0.5...0.6 4.4...5.3 03A7-1 0.14...1.5 26...16 0.5...0.6 4.4...5.3 04A8-1 0.14...1.5 26...16 0.5...0.6 4.4...5.3 06A9-1 0.14...1.5... -
Page 103: External Emc Filters
EMC category that is met with the external EMC filter. For information on the maximum permitted motor cable length, refer to Motor cable length on page 103. Type EMC filter type Category ACS480-04- ABB order code Schaffner order code 1-phase U = 200…240 V 02A4-1 RFI-11 FN 21754-6.1-07 03A7-1 RFI-12 FN 21754-16.1-07... -
Page 104: Electric Power Network Specification
102 Technical data Electric power network specification Voltage (U 200/208/220/230/240 V AC 1-phase for 200 V AC drives 200/208/220/230/240 V AC 3-phase for 200 V AC drives 380/400/415/440/460/480 V AC 3-phase for 400 V AC drives +10%/-15% variation from converter nominal voltage is allowed as default. -
Page 105: Motor Cable Length
Technical data 103 Motor connection data Motor type Asynchronous induction motor or permanent magnet synchronous motor Voltage (U 0 to U , 3-phase symmetrical, U at the field weakening point Short-circuit protection The motor output is short-circuit proof by IEC 61800-5-1 and (IEC 61800-5-1, UL 61800-5-1. - Page 106 104 Technical data EMC compatibility and motor cable length To comply with the EMC limits in the European EMC Directive (standard IEC/EN 61800-3), use these maximum motor cable lengths for the 4 kHz switching frequency. Frame Maximum motor cable length, 4 kHz size With internal EMC filter 1-phase 208...240 V...
-
Page 107: Control Connection Data
Technical data 105 Control connection data Analog inputs Voltage signal, 0…10 V DC (10% overrange, 11 V DC max.) (AI1, AI2) single-ended = 221.6 kohm Current signal, 0…20 mA (10% overrange, 22 mA max.) single-ended = 137 ohm Inaccuracy ≤ 1.0%, of full scale Overvoltage up to 30 V DC protection... -
Page 108: Brake Resistor Connection
The brake resistor output is conditionally short-circuit proof by (IEC 61800-5-1, IEC/EN 61800-5-1 and UL 61800-5-1. For correct fuse selection, IEC 60439-1, contact your local ABB representative. Rated conditional short-circuit UL 61800-5-1) current as defined in IEC 60439-1. Efficiency Approximately 98% at nominal power level. -
Page 109: Ambient Conditions
Technical data 107 Ambient conditions Environmental limits for the drive are given below. The drive is to be used in a heated indoor controlled environment. Operation Storage Transportation installed for in the protective in the protective stationary use package package Installation site altitude 230 V units: 0 to 2000 m above sea level (with derating... -
Page 110: Materials
IEC 62635 guidelines. To aid recycling, plastic parts are marked with an appropriate identification code. Please contact your local ABB distributor for further information on environmental aspects and recycling instructions for professional recyclers. End of life treatment must follow international and local... -
Page 111: Applicable Standards
Technical data 109 Applicable standards The drive complies with the following standards: EN ISO 13849-1:2015 Safety of machinery – Safety related parts of the control systems – Part 1: general principles for design EN ISO 13849-2:2012 Safety of machinery – Safety-related parts of the control systems – Part 2: Validation EN 60204-1:2006 + Safety of machinery. -
Page 112: Ce Marking
110 Technical data CE marking A CE mark is attached to the drive to verify that the drive follows the provisions of the European Low Voltage, EMC, RoHS and WEEE Directives.The CE marking also verifies that the drive, in regard to its safety functions (such as Safe torque off), conforms with the Machinery Directive as a safety component. -
Page 113: Compliance With The European Machinery Directive
Technical data 111 Compliance with the European Machinery Directive The drive includes the Safe torque off function and can be equipped with other safety functions for machinery which, as safety components, are in the scope of the Machinery Directive. These functions of the drive comply with European harmonized standards such as EN 61800-5-2. -
Page 114: Compliance With En 61800-3:2004 + A1:2012
Category C1 The conducted emission limits are complied with the following provisions: 1. The optional EMC filter is selected according to the ABB documentation and installed as specified in the EMC filter manual. 2. The motor and control cables are selected as specified in this manual. - Page 115 Technical data 113 If it is used in a residential or domestic environment, the drive can cause radio- frequency interference. If it is necessary, take measures to prevent interference, in addition to the requirements for the CE compliance. WARNING! Do not install a drive with the internal EMC filter connected on IT (ungrounded).
-
Page 116: Category C4
Equipment 2. An EMC plan for preventing disturbances is drawn up for the installation. A template is available from the local ABB representative. 3. The motor and control cables are selected as specified in this manual. 4. The drive is installed according to the instructions given in this manual. -
Page 117: Ul Marking
Technical data 115 UL marking If the drive type label has the UL marking, the drive has UL certification. UL checklist • Make sure that the drive type designation label includes the cULus Listed marking. • CAUTION - Risk of electric shock. After disconnecting the input power, always wait for 5 minutes to let the intermediate circuit capacitors discharge before you start working on the drive, motor or motor cable. -
Page 118: Eac Marking
ABB and its affiliates are not liable for damages and/or losses related to such security breaches, any unauthorized access,... -
Page 119: Dimension Drawings
Dimension drawings 117 Dimension drawings The dimension drawings of the ACS480 drive in frame sizes R0, R1, R2, R3 and R4. The dimensions are in millimeters and inches. -
Page 120: Frame R0 (230 V) (Front & Side)
118 Dimension drawings Frame R0 (230 V) (front & side) -
Page 121: Frame R0 (230 V) (Bottom & Rear)
Dimension drawings 119 Frame R0 (230 V) (bottom & rear) -
Page 122: Frame R1 (400 V) (Front & Side)
120 Dimension drawings Frame R1 (400 V) (front & side) -
Page 123: Frame R1 (400 V) (Bottom & Rear)
Dimension drawings 121 Frame R1 (400 V) (bottom & rear) -
Page 124: Frame R2 (400 V) (Front & Side)
122 Dimension drawings Frame R2 (400 V) (front & side) -
Page 125: Frame R2 (400 V) (Bottom & Rear)
Dimension drawings 123 Frame R2 (400 V) (bottom & rear) -
Page 126: Frame R3 (Front & Side)
124 Dimension drawings Frame R3 (front & side) -
Page 127: Frame R3 (Bottom & Rear)
Dimension drawings 125 Frame R3 (bottom & rear) -
Page 128: Frame R4 (Front & Side)
126 Dimension drawings Frame R4 (front & side) -
Page 129: Frame R4 ()
Dimension drawings 127 Frame R4 () - Page 130 128 Dimension drawings...
-
Page 131: Resistor Braking
Resistor braking 129 Resistor braking Contents of this chapter The chapter describes how to select the brake resistor and cables, protect the system, connect the brake resistor and enable resistor braking. Operation principle and hardware description The brake chopper handles the energy generated by a decelerating motor. The chopper connects the brake resistor to the intermediate DC circuit whenever the voltage in the circuit exceeds the limit defined by the control program. - Page 132 130 Resistor braking Equations for selecting the resistor: 150000 Eq. 1. U = 200…240 V: Rmax Rmax 450000 Rave = 380…415 V: Rmax 615000 = 415…480 V: R = Rmax Eq. 2. · Rpulse Rmax Eq. 3. · For conversion, use 1 hp = 746 W. Rave Rmax where...
-
Page 133: Reference Brake Resistors
Resistor braking 131 Reference brake resistors Example resistor types Braking time Type BRcont BRmax ACS480- ohm ohm Danotherm 1-phase U = 200…240 V 02A4-1 32.5 0.25 0.33 0.38 0.50 CBH 360 C T 406 210R Refer to braking resistor 03A7-1 32.5... -
Page 134: Selecting And Routing The Brake Resistor Cables
The maximum length of the resistor cable(s) is 10 m (33 ft). EMC compliance of the complete installation ABB has not verified that the EMC requirements are fulfilled with external user- defined brake resistors and cabling. The EMC compliance of the complete installation must be considered by the customer. -
Page 135: Protecting The System In Brake Circuit Fault Situations
Resistor braking 133 Protecting the system in brake circuit fault situations Protecting the system in cable and brake resistor short-circuit situations The input fuses will also protect the resistor cable when it is identical with the input cable. Protecting the system against thermal overload Equipping the drive with a main contactor is highly recommended for safety reasons. -
Page 136: Electrical Installation
134 Resistor braking Electrical installation Checking the insulation of the assembly Follow the instructions given in section Brake resistor assembly on page Brake resistor assembly. Connection diagram See section Connecting the power cables on page 59. Connection procedure See section Connecting the power cables on page 59. -
Page 137: Start-Up
Resistor braking 135 Start-up Set the following parameters: 1. Disable the overvoltage control of the drive with parameter 30.30 Overvoltage control. 2. Set the source of parameter 31.01 External event 1 source to point to the digital input where the thermal switch of the brake resistor is wired. 3. - Page 138 136 Resistor braking...
-
Page 139: Safe Torque Off Function
Safe torque off function 137 Safe torque off function Contents of this chapter This chapter describes the Safe torque off (STO) function of the drive and gives instructions for its use. Description The Safe torque off function can be used, for example, as the final actuator device of safety circuits that stop the inverter in case of danger (such as an emergency stop circuit). -
Page 140: Compliance With The European Machinery Directive
138 Safe torque off function The Safe torque off function of the drive complies with these standards: Standard Name IEC 60204-1:2016 Safety of machinery – Electrical equipment of machines – Part 1: General requirements EN 60204-1:2006 + A1:2009 + AC:2010 IEC 61000-6-7:2014 Electromagnetic compatibility (EMC) –... -
Page 141: Connection Principle
Safe torque off function 139 Connection principle Connection with internal +24 V DC power supply Drive Control board + 24 V DC OUT1 SGND UDC+ T1/U, Control logic T2/V, T3/W UDC- Connection with external +24 V DC power supply 24 V DC Drive Control board... -
Page 142: Wiring Examples
140 Safe torque off function Wiring examples An example of a Safe torque off wiring with internal +24 V DC power supply is shown below. Safety PLC Drive OUT1 SGND Safety relay An example of a Safe torque off wiring with external +24 V DC power supply is shown below. -
Page 143: Cable Types And Lengths
Safe torque off function 141 Cable types and lengths • Double-shielded twisted-pair cable is recommended. • Maximum cable length 100 m (328 ft) between activation switch (K) and drive control unit. Note: A short-circuit in the wiring between the switch and an STO terminal causes a dangerous fault and therefore it is recommended to use a safety relay (including wiring diagnostics), or a wiring method (shield grounding, channel separation) which reduces or eliminates the risk caused by the short-circuit. -
Page 144: Start-Up Including Acceptance Test
142 Safe torque off function Start-up including acceptance test To ensure the safe operation of a safety function, validation is required. The final assembler of the machine must validate the function by performing an acceptance test. The acceptance test must be performed •... -
Page 145: Acceptance Test Procedure
Safe torque off function 143 Acceptance test procedure After wiring the Safe torque off function, validate its operation as follows. Action WARNING! Follow the Safety instructions (page 11). If you ignore them, injury or death, or damage to the equipment can occur. Ensure that the drive can be run and stopped freely during start-up. -
Page 146: Use
144 Safe torque off function Action Test the operation of the failure detection of the drive. The motor can be stopped or running. • Open the 1st channel of the STO circuit (wire coming to IN1). If the motor was running, it should coast to a stop. - Page 147 Safe torque off function 145 WARNING! (With permanent magnet motors or synchronous reluctance motors [SynRM] only) In case of a multiple IGBT power semiconductor failure, the drive system can produce an alignment torque which maximally rotates the motor shaft by 180/p degrees regardless of the activation of the Safe torque off function.
-
Page 148: Maintenance
If any wiring or component change is needed after start up, or the parameters are restored, follow the test given in section Acceptance test procedure (page 143). Use only ABB approved spare parts. Record all maintenance and proof test activities in the machine logbook. Competence... - Page 149 See the drive firmware manual for the indications generated by the drive, and for details on directing fault and warning indications to an output on the control unit for external diagnostics. Any failures of the Safe torque off function must be reported to ABB.
-
Page 150: Safety Data
148 Safe torque off function Safety data The safety data for the Safe torque off function is given below. Note: The safety data is calculated for redundant use, and does not apply if both STO channels are not used. Frame MTTF Cat. - Page 151 Safe torque off function 149 A fault exclusion on the failure mode “short circuit on printed circuit board” has been made (EN ISO 13849-2, table D.5). The analysis is based on an assumption that one failure occurs at one time. No accumulated failures have been analyzed. •...
-
Page 152: Abbreviations
150 Safe torque off function Abbreviations Abbr. Reference Description Cat. EN ISO 13849-1 Classification of the safety-related parts of a control system in respect of their resistance to faults and their subsequent behavior in the fault condition, and which is achieved by the structural arrangement of the parts, fault detection and/or by their reliability. -
Page 153: Bapo-01 Power Extension Module
BAPO-01 power extension module 151 BAPO-01 power extension module Contents of this chapter This chapter contains a description and technical data of the optional BAPO-01 auxiliary power extension module. The chapter also contains references to the relevant other content elsewhere in the manual. Safety instructions WARNING! Obey the instructions in Safety instructions... -
Page 154: Hardware Description
152 BAPO-01 power extension module Hardware description Product overview The BAPO-01 auxiliary power extension module (option +L534) enables the use of an external auxiliary power supply with the drive. You need an external auxiliary power supply to keep the drive on during a power outage. Connect the auxiliary voltage supply to the +24V and DGND terminals on the drive. -
Page 155: Mechanical Installation
BAPO-01 power extension module 153 Mechanical installation Refer to Option modules on page 69. Electrical installation Connect the auxiliary voltage supply to the +24V and DGND terminals on the drive. Refer to Option modules on page 69. The BAPO module has internal connections to provide back-up power to the control board (I/O, fieldbus). -
Page 156: Technical Data
154 BAPO-01 power extension module Technical data Voltage and current rating for the auxiliary power supply Refer to Option modules on page 69. Power loss Power losses with maximum load 4 W. Dimensions 3AXD50000031166 rev. A... -
Page 157: Bio-01 I/O Extension Module
BIO-01 I/O extension module 155 BIO-01 I/O extension module Contents of this chapter This chapter contains a description and technical data of the optional BIO-01 I/O extension module. The chapter also contains references to the relevant other content elsewhere in the manual. Safety instructions WARNING! Obey the instructions in Safety instructions... -
Page 158: Hardware Description
156 BIO-01 I/O extension module Hardware description Product overview The BIO-01 front option module (Option +L515) is an I/O extension module to be used with fieldbus. The BIO-01 option module is installed between the drive and the fieldbus module. The BIO-01 has three additional digital inputs (DI3, DI4 and DI5), one analog input (AI1) and one digital input (DO1) that is referred as DIO1 in the firmware (but works only in output mode). -
Page 159: Electrical Installation
SGND Safe torque off. Factory connection. Both circuits must be closed for the drive to start. OUT1 Start-up The BIO-01 module is automatically identified by the drive firmware. To configure the inputs refer to the ACS480 firmware manual (3AXD50000047399 [English]) -
Page 160: Technical Data
158 BIO-01 I/O extension module Technical data Control connection data For BIO-01 electrical data, refer to Technical data on page 83. Dimensions Note! BIO-01 is supplied with a high cover part (part no 3AXD50000190188) that increases the drive depth by 15 mm (0.6 in). -
Page 161: Further Information
Product and service inquiries Address any inquiries about the product to your local ABB representative, quoting the type designation and serial number of the unit in question. A listing of ABB sales, support and service contacts can be found by navigating to www.abb.com/searchchannels. - Page 162 Contact us www.abb.com/drives www.abb.com/drivespartners 3AXD50000047392 Rev B (EN) 2018-04-12...
Need help?
Do you have a question about the ACS480 and is the answer not in the manual?
Questions and answers