Table of Contents
Advertisement
Advertisement
Table of Contents

Subscribe to Our Youtube Channel
Related Manuals for scil Element HT5+


Summary of Contents for scil Element HT5+
- Page 1 Element HT5+ User Manual Vers.: 20230710ENG Page 1...
-
Page 2: Table Of Contents
Table of content Safety information ....................... 6 Labels and symbols on the system ................6 General safety messages ..................10 Understanding the analyzer ...................12 Intended use ......................12 Blood sample parameters, histograms and scattergrams ........12 2.2.1 Parameters ......................12 2.2.2 Histograms ......................13 2.2.3 Scattergrams ....................13 Product description....................13 Overview of the software interface .................17... - Page 3 4.3.1 Connection of the reagents .................26 4.3.2 Connection of the peripherals ................28 Operating the analyzer ....................29 Introduction ......................29 Initial checks......................30 Startup and login ....................30 Enter/exit from standby ..................31 Sample collection and handling ................31 5.5.1 Sample preparation ..................32 5.5.2 Sample analysis ....................33 5.5.3 Processing analysis results ................34 Shutdown .......................35...
- Page 4 How to calibrate .....................45 8.3.1 Preparing the analyzer ..................45 8.3.2 Calibration with calibrator ................45 8.3.3 Verifying calibration factors ................45 8.3.4 Calibration history (for administrator only) ............45 Customizing the analyzer software ................46 9.1 Introduction ........................46 9.2 Setting up the analyzer ....................46 9.2.1 System setup ....................46 9.2.2...
- Page 5 C. Performance specifications ..................64 C.1 Display range ......................64 C.2 Background/blank count .....................64 C.3 Linearity Range ......................64 C.4 Reproducibility ......................65 C.5 Carryover ........................66 D. Keyboard (optional) ......................66 E. External Barcode Scanner (optional) ................66 F. Printer (optional) ......................66 G. Interfaces ........................66 H. Power Supply .......................66 I.
-
Page 6: Safety Information
1 Safety information 1.1 Labels and symbols on the system The following symbols are used to indicate danger and alert information. Symbols Description Biological hazard General warning/caution sign The statement is alerting you to an operating hazard that can cause personnel injury (warning) or to a possibility of analyzer damage or unreliable analysis results (caution). - Page 7 Symbols Description Fragile, handle with care This way up Keep dry Do not roll Stacking limit by number The use of this symbol indicates that waste electrical and electronic equipment must not be disposed of as unsorted municipal waste and must be collected separately. CE mark Vers.: 20230710ENG Page 7...
- Page 8 Description Biological risk The sample prob is sharp and potentially biohazardous. Exercise caution when working around it. Description Warning Connect only to a properly earth grounded outlet. To avoid electrical shock, disconnect power prior to maintenance. Biological risk Vers.: 20230710ENG Page 8...
- Page 9 Description Warning To avoid personal injury do not put your hand under the syringe or inside the slot. Warning To avoid personal injury do not put your hand under the pipette or inside the slot. Vers.: 20230710ENG Page 9...
-
Page 10: General Safety Messages
Description Class 3b laser radiation when open and internal locks defeated. Avoid exposure to the beam. Laser radiation Avoid exposure to the beam. Class 3B laser product Peak power: 10mW Wavelength: 635 nm 1.2 General safety messages BIOHAZARD • All the samples, controls, calibrators, reagents, waste and areas contacted by them are potentially biohazardous. - Page 11 Please take action to address any alarm and problem indication immediately. • Do not touch the moving parts. • Contact scil animal care company or scil-authorized distributors if any damaged part is found. • Be careful when opening/closing and removing/installing the doors, covers and boards of the analyzer.
-
Page 12: Understanding The Analyzer
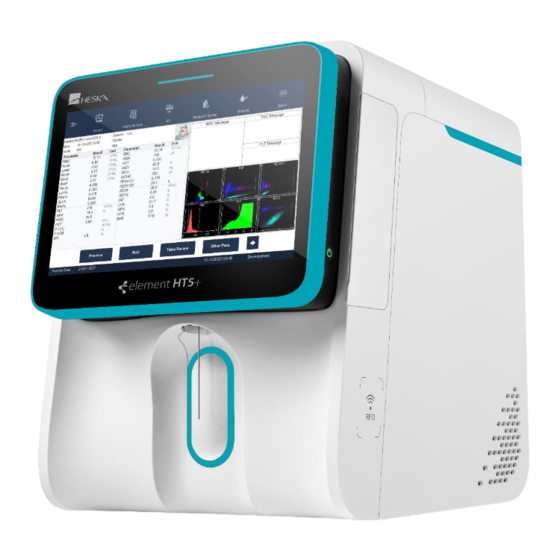
2 Understanding the analyzer 2.1 Intended use This analyser provides complete blood count, leukocytes differential, hemoglobin concentration measurement and reticulocytes measurement for animal blood samples. 2.2 Blood sample parameters, histograms and scattergrams The analyzer provides 33 parameters measurement, 3 histograms and 4 scattergrams. 2.2.1 Parameters Parameter group Name... -
Page 13: Histograms
2.2.2 Histograms Name Abbreviation White Blood Cells Histogram WBC Histogram Red Blood Cells Histogram RBC Histogram Platelets Histogram PLT Histogram 2.2.3 Scattergrams Name Abbreviation Differential Scattergram DIFF Scattergram Reticulocytes Scattergram RET Scattergram Optical Platelet Scattergram PLT-O Scattergram Reticulocytes – Extension Scattergram RET-EXT Scattergram 2.3 Product description Element HT5+ Hematology Analyzer includes the Sample Processing Unit (SPU), Data... - Page 14 Name Description Status indicator Ready: the indicator stays in green. Running: the indicator flickers in green. Sample probe piercing: the indicator flickers fast. Error: the indicator stays in red. Standby: the indicator stays in orange Shutdown: the indicator is off. Touchscreen Sample probe Aspirate key...
- Page 15 Name USB port (protocol 3.0) USB prot (protocol 2.0) Network interface V-6 DR DILUENT inlet V-6 LD LYSE inlet V-6 LH LYSE inlet V-6 Solution Reagent inlet V-6 DS DILUENT inlet Waste outlet Waste sensor Power inlet Power switch Vers.: 20230710ENG Page 15...
- Page 16 The USB port and network port are on the back of the analyzer. They can be used to connect a printer, etc. and to transmit data. Contact scil animal care company or scil-authorized distributors for a list of supported printer models.
-
Page 17: Overview Of The Software Interface
2.4 Overview of the software interface 1. Menu Tap the “Menu” button at the top left of the software screen to display the system menu. 2. Utility button area Name Icon Count Table Review Vers.: 20230710ENG Page 17... -
Page 18: Reagents, Controls And Calibrators
As the analyzer, reagents, controls and calibrators are components of a system, performance of the system depends on the combined integrity of all components. You must only use the scil animal care company-specified reagents, controls, and calibrators which are formulated specifically for the fluidic system of your analyzer in order to provide optimal system performance. -
Page 19: Reagents
When you need to buy reagents and consumables, please contact the commercial service department. 2.5.1 Reagents All reagents used with the analyzer are special supporting reagents for scil animal care company equipment. Please refer to Appendice A2: Reagents to obtain more details on reagents. -
Page 20: Understanding The System Principles
Understanding the system principles 3.1 Introduction The measurement methods used in this analyzer are: sheath flow impedance method for determining the RBC and PLT data; colorimetric method for determining HGB concentration and SF Cube Cell Analysis technology (laser flow cytometry and fluorescent staining) for determining the WBC differential data and the RET data. -
Page 21: Hgb Measurement
First, the RBC are lysed and the WBC subpopulations are made different in size and complexity by the lyse. The nucleic acid substances in WBC are marked by the new asymmetric cyanine fluorescent substance. Due to the different content of nucleic acid in different WBC subpopulations, maturity stages or abnormal development status, the volume of fluorescent dye staining the nucleic acid substances is different. -
Page 22: Plt And Ret: Sf Cube Cell Analysis Technology
Each pulse is amplified and compared to the internal reference voltage channel, which only accepts the pulses of certain amplitude. If the pulse generated is above the RBC/PLT lower threshold, it is counted as a RBC/PLT. Compared with the common impedance method, the sheath flow impedance method is featured by higher efficiency, better signal quality, more accurate analysis results and lower consumption of reagents. -
Page 23: Derivation Of Plt - Related Parameters
������ �������� = × 100 ������ Where the RBC is expressed in 10 /L, MCV in fL and HGB in g/L. RDW-CV: Based on the RBC histogram, the analyzer calculates the CV (Coefficient of Variation) of the erythrocyte distribution width, expressed in %. RDW-SV: Based on the RBC histogram, the analyzer calculates the SV (Standard Deviation) of the erythrocyte distribution width, expressed in fL. -
Page 24: Derivation Of Ret - Related Parameters
WARNING The installation, authorization, upgrade and modification of the analyzer software must be performed by scil authorized personnel. Your analyzer is tested before it is shipped from the factory. International symbols and special handling instructions tell the carrier how to treat this electronic instrument. When you receive your analyzer, carefully inspect the carton. -
Page 25: Power Requirements
• The countertop where the analyzer is placed shall be able to withstand at least 40 kg of weight. 4.2.2 Power requirements WARNING • Make sure the analyzer is properly grounded. • Before turning on the analyzer, make sure the input voltage meets the requirements. CAUTION •... -
Page 26: Moving And Installing The Analyzer
4.2.4 Moving and installing the analyzer NOTE: Before the analyzer is shipped, some components are fixed by a red tie to avoid any damage during the transportation. Remove the red tie before using the analyzer by opening the front cover from bottom to top and identify the four red ties that need to be removed. 4.3 Connecting the analyzer system 4.3.1 Connection of the reagents Connect the reagents as shown in the following figures. - Page 27 *Connection of the waste container (1: floater sensor and 2: tube), the DS Diluent (3), the Solution Reagent (4), the LH Lyse (5), the LD Lyse (6) and the DR Diluent (7) CAUTION • Make sure the diluent pipe and waste pipe are no longer than 1500 mm. •...
-
Page 28: Connection Of The Peripherals
4.3.2 Connection of the peripherals If peripherals have to be connected, connect them as shown in the following figures. Make sure the connections are correct and firm. *Connection of a USB stick 3.0 (1), a USB stick 2.0 (2) or a network cable (3) CAUTION Be sure to use the specified external devices only and keep them away from water. -
Page 29: Operating The Analyzer
Operating the analyzer 5.1 Introduction This chapter provides step-by-step procedures for operating your analyzer on a daily basis. A flow chart presenting the common daily operating process is shown below. CAUTION • Do not contact the patients’ sample blood directly. •... -
Page 30: Initial Checks
5.2 Initial checks Perform the following checks before turning on the analyzer. 1. Check the waste container. • Check and make sure the waste container is not full. 2. Check reagents. • Check to see if the reagents are expired, empty or frozen. Reagents must be equilibrated for 24 hours before use. -
Page 31: Enter/Exit From Standby
NOTE: The default username is “user” and the password is “User”. • • If the software cannot be started successfully after being launched for several times, contact the technical support department or the authorized distributor. 5. Tap to enter the system. NOTE: •... -
Page 32: Sample Preparation
5.5.1 Sample preparation The analyzer can run 3 types of samples: whole blood samples, pre-diluted samples and body fluid samples. CAUTION • Prepare samples following the recommended procedure of the manufacturer. • All samples shall be mixed as shown in the following figure. Whole blood samples: 1. -
Page 33: Sample Analysis
CAUTION • Be sure to run the pre-diluted samples within 30 minutes after the dilution. Otherwise the results may be unreliable. • If there is much pre-diluted sample adhering to the tube cap or to the tube wall, the analyzer may not be able to aspirate sufficient volume of the sample. When preparing pre-diluted samples, slightly tap the bottom of the test tubes with a finger. -
Page 34: Processing Analysis Results
3. Remove the sample: The sample probe will automatically aspirate the sample. When you hear the beep sound, you may remove the sample. 4. Auto analysis and result reporting: The analyzer will automatically run the sample. When the analysis is finished, the results, scattergrams and histograms will be displayed on the screen. -
Page 35: Shutdown
2. Printing and transmission to LIS If “Auto print after sample analysis” function is enabled, the analyzer will print reports automatically; and if “Auto comm." function is enabled, the analysis results, sample and patient information will be auto transmitted to LIS. 5.6 Shutdown CAUTION Do not start up the analyzer immediately after it is shut down. -
Page 36: Reviewing Sample Results
Reviewing sample results 6.1 Introduction The analyzer automatically saves analysis results. The Element HT5+ Hematology Analyzer can store up to 40,000 analysis results. 6.2 Browsing in the table review mode Operators can review, validate, search and export saved results from the “Table Review” screen. -
Page 37: Graph Review
6.2.2 Graph review Select a record and touch GRAPH from the “Table Review” screen to view the analysis results details and graphs of the selected sample. Tap PREVIOUS or NEXT to browse the previous or next sample. 6.2.3 Deleting a result 1. -
Page 38: Searching A Result
3. Enter necessary information as needed and/or use the drop-down lists to select information. 4. Tap OK to save the information. 6.2.5 Searching a result From the “Table Review” screen, tap SEARCH to search records that match defined conditions. The following dialog box will be displayed. 1. -
Page 39: Calculating Cv Values
6.2.6 Calculating CV values 1. Select multiple samples (at least 3) for which you want to calculate the CV values from the “Table Review” screen. 2. Tap CV to display the “CV” dialog box. 3. The screen displays the mean value, the SD value and the CV value for each parameter. -
Page 40: Flags Of Analysis Results
6.2.10 Flags of analysis results The analyzer provides two types of flags for analysis results: parameter flags (1) and flags for abnormal blood cell differential or morphology (2). 1. The analyzer provides the following parameter flags: a. If the parameter is followed by an H or L, it means the analysis result has exceeded the upper or lower limit of the reference range. -
Page 41: Using The Qc Program
Low MCHC Alert MCHC low MCHC > 10% below lower normal range limit. High MCHC Alert MCHC high MCHC > 10% above upper normal range limit. PLT Flag Thrombocytopenia PLT low PLT# > 25% below lower normal range limit. Thrombocytosis PLT high PLT# >... -
Page 42: Qc Program
QC involves measuring materials with known, stable characteristics at frequent intervals. Analysis of the results with statistical methods allows the inference that sample results are reliable. CAUTION • Running QC sample with error present will lead to unreliable results. If errors are reported during QC analysis, resolve the errors first and then continue with the analysis. -
Page 43: Reviewing The Results
3. Select the file No of the desired QC file. 4. Place the tube of the control under the probe and press the aspirate key to start the QC measurement. 5. The measurement will automatically starts. NOTE: Up to 100 QC results can be saved in each QC file. 7.2.3 Reviewing the results After QC analysis, you can review the QC results in the following ways: “QC Graph“... -
Page 44: Calibrating The Analyzer
Calibrating the analyzer 8.1 Introduction Calibration is a procedure to standardize the analyzer by determining its deviation under certain specified conditions. In order to get accurate sample analysis results, you should calibrate the analyzer per the procedure below when necessary. All the parameters or part of the parameters of WBC, RBC, HGB, MCV and PLT can be calibrated by the calibration programs. -
Page 45: How To Calibrate
8.3 How to calibrate 8.3.1 Preparing the analyzer Do the following pre-calibration procedures before calibration. Check and make sure enough reagents have been prepared for the calibration. You need to re-start the calibration if the reagents run out during the process. Check the background (for calibration right after startup) or blank count results. -
Page 46: Customizing The Analyzer Software
Customizing the analyzer software 9.1 Introduction The Element HT5+ Hematology Analyzer is a flexible laboratory instrument that can be customized to your working environment. You can use the SETUP menu to customize the software options as introduced in this section and confirm your modifications with YES. For the security of the settings and data, two access levels are provided to the operator of the analyzer. -
Page 47: User Management
9.2.2 User management Select MENU > SETUP > USER MANAGEMENT to set up the following content: • Add user • Delete user • Modify password NOTE: • For the password and user ID, 12 characters can be entered at most. •... -
Page 48: Maintenance Setup (For Administrators Only)
9.2.6 Maintenance setup (for administrators only) Tap MENU > SETUP > MAINTENANCE to set up the following content: • Standby: set up the wait time (between 30 and 60 min) before the analyzer enters the standby status. • Probe cleanser maintenance: set up the start time (between 00:00 and 23:59) and the reminding interval (between 5 and 60 min) for the daily probe cleanser maintenance. - Page 49 3. Define the auto startup time in the corresponding field. For example, if you set the “Complete Time” for auto startup to 8:00 on Monday, the analyzer automatically starts the startup procedure at 7:40, and completes the procedure at 8:00. 4.
-
Page 50: Servicing The Analyzer
Servicing the analyzer 10.1 Introduction Preventive and corrective maintenance procedures are required to keep the analyzer in a good operating condition. This analyzer provides multiple maintenance functions for this purpose. This chapter introduces how to use the provided functions to maintain and troubleshoot your analyzer. - Page 51 BIOHAZARD After replacing the reagent container/bag, check the tubing connected to the cap assembly and make sure it is not bent over. CAUTION While installing or replacing the fluorescent dye bag, hold the upper corners of the bag or the part under the bag mouth (where the interior tube is located), in order not to extrude the reagent out.
- Page 52 Read reagent information by swiping RFID card to the swiping card area on the right of the analyzer. A beep sound occurs if the reagent information is successfully identified. Three beep sounds occur if there is a mismatch between the RFID card and the reagent. NOTE: •...
- Page 53 Replacing dye: 1. Open the dye compartment door. 2. Get a new dye bag, open the cap and the aluminium film sealing the bag. 3. Take out the bag to be replaced along the direction of the supporting rack. 4. Turn the cap of the old reagent container and then take out the cap assembly with caution.
-
Page 54: Maintaining The Analyzer
10.3 Maintaining the analyzer Maintenance options of the analyzer include different options. Tap MENU > SERVICE > MAINTENANCE to access to these options. Probe cleanser maintenance: You should perform the Probe Cleanser maintenance procedure when: • Background results are out of range, QC results abnormal or scattergram abnormal due to long term idleness of the analyzer;... - Page 55 Reagents: See 10.2 Reagent management to have information on how to replace the reagents. To prime the reagents, follow these steps: 1. Tap REAGENT from the “Maintenance” screen. 2. Select the reagent that requires a priming. The analyzer will start the priming automatically.
-
Page 56: Touchscreen Calibration
10.4 Touchscreen calibration If the touchscreen does not correctly respond to the positions you touched, perform the procedure to calibrate the touchscreen. 1. Tap MENU > SERVICE > SCREEN CAL. 2. Tap SCREEN CAL. in the middle of the screen. 3. -
Page 57: Troubleshooting The Analyzer
Troubleshooting the analyzer 11.1 Introduction This chapter contains information that is helpful in locating and correcting problems that may occur during operation of your analyzer. NOTE: This chapter is not a complete service manual and is limited to problems that are readily diagnosed and/or corrected by the user of the analyzer. - Page 58 The name and troubleshooting method of the errors are displayed. Names of the errors are displayed in the order of their occurrence. You may touch to select the error and view its troubleshooting information in the troubleshooting box. The troubleshooting information of the first error is displayed by default. Please follow the troubleshooting to resolve the error in sequence.
- Page 59 Error Name Actions LH Lyse expires. 1. Tap REMOVE ERROR and register new reagent information into the Replace the reagent. dialog box displayed. 2. Tap REPLACE to prime reagent after replacing the reagent container. DR Diluent expires. 1. Tap REMOVE ERROR and register new reagent information into the Replace the reagent.
- Page 60 Error Name Actions SP syringe action Tap REMOVE ERROR. abnormal Auto pressure Tap REMOVE ERROR. building out of time Startup initiation Tap REMOVE ERROR. not performed Drive board Tap REMOVE ERROR. communication out of time SCI priming out of Tap REMOVE ERROR. time Background Tap REMOVE ERROR.
- Page 61 Error Name Actions Preheating bath Tap REMOVE ERROR. temperature control abnormal Ambient 1. Make sure the ambient temperature is within acceptable range. temperature is high 2. Tap REMOVE ERROR to re-test the temperature. Ambient 1. Make sure the ambient temperature is within acceptable range. temperature low 2.
- Page 62 NOTE: In any case if the error persists, contact the technical support service. Vers.: 20230710ENG Page 62...
-
Page 63: Appendices
Appendices A. Specifications A.1 Classification According to the CE classification, the Element HT5+ Hematology Analyzer belongs to in vitro diagnostic medical devices other than those covered by Annex II and devices for performance evaluation. A.2 Reagents Reagents : Applicable channel Model Name Diluent... -
Page 64: Performance Specifications
C. Performance specifications C.1 Display range Parameter Display range 0.00 × 10 /L ~ 999.99 × 10 0.00 × 10 /L ~ 99.99 × 10 0 g/L ~ 350 g/L 0 × 10 /L ~ 9999 × 10 0 fL ~ 450 fL C.2 Background/blank count Parameter Background/blank count requirements... -
Page 65: Reproducibility
C.4 Repeatability requirements for QC Whole blood Parameter Range reproducibility ≤ 3.0% 3.50 x 10 /L ~ 4.50 x 10 ≥ 4.50 x 10 ≤ 2.5% ≥ 3.50 x 10 ≤ 1.5% ≤ 1.0% 110 g/L ~ 180 g/L ≤ 1.0% 60 fL ~ 95 fL ≤... -
Page 66: Carryover
Whole blood Parameter Range reproducibility MFR ≥ 20% RBC ≥ 3.00 × 10 ≤ 100% or ± 2.0% /L RET%: 1.00% ~ 4.00% RBC ≥ 3.00 × 10 ≤ 30% /L RET%: 1.00% ~ 4.00% IRF ≥ 20% PLT ≥ 50×10 ≤... -
Page 67: Emc Description
J. EMC description WARNING Do not use this device in close proximity to sources of strong electromagnetic radiation (e.g., unshielded intentional RF sources), as these may interfere with the proper operation. This equipment complies with the emission and immunity requirements of the EN61326– 1:2012 and EN61326–1:2013. -
Page 68: Dimensions And Weight
O. Dimensions and weight Element HT5+ Value Width (W) ≤ 12.8 in (325 mm) Dimensions Height with feet (H) ≤ 17.7 in (450 mm) Depth (D) ≤ 19.7 in (500 mm) ≤ 77.2 lbs (35 Kg) Weight P. Contra-indications None Q. -
Page 69: Intellectual Property Statement
Intellectual Property Statement © 2023 Shenzhen Mindray Animal Medical Technology Co., Ltd. All rights reserved. For this Operator’s Manual, the issued date is 2023-07. Intellectual Property Statement SHENZHEN MINDRAY BIO-MEDICAL ELECTRONICS CO., LTD. (hereinafter called Mindray) owns the intellectual property rights to this Mindray product and this manual. This manual may refer to information protected by copyright or patents and does not convey any license under the patent rights or copyright of Mindray, or of others. - Page 70 Responsibility on the manufacturer party Contents of this manual are subject to changes without prior notice. All information contained in this manual is believed to be correct. Mindray Animal Medical shall not be liable for errors contained herein nor for incidental or consequential damages in connection with the furnishing, performance, or use of this manual.
Need help?
Do you have a question about the Element HT5+ and is the answer not in the manual?
Questions and answers