
Subscribe to Our Youtube Channel
Related Manuals for scil element RC


Summary of Contents for scil element RC
- Page 1 Product Manual Veterinary Chemistry Analyzer element RC __________________________________________________________________________ Vers. 20210510ENG Page 1...
- Page 2 Thank you for choosing the element RC fully automated dry biochemistry analyzer. This manual is configured to provide you with the following instructions: Features, dimensions, principles of measurement, instructions for use, maintenance, packaging, storage, and shipping. Please review this instruction manual carefully before use.
-
Page 3: Table Of Contents
TABLE OF CONTENTS SECTION 1: USING THIS MANUAL ..................5 Scope of Application ....................5 Warning and Safety Symbols .................. 5 element RC Analyzer Use ..................6 Compliance with Safety Measures ................7 SECTION 2: INTRODUCTION ....................8 Analyzer Appearance ....................8 Basic Introduction .................... - Page 4 5.1.1 Sample handing ....................20 Test Rotor Preparation ...................20 5.2.1 Reagent rotor storage and disposal ..............21 5.2.2 Pipette patient sample ..................22 Sample Test ......................23 Test Procedure Precautions ...................25 Print Results ......................26 5.5.1 Built-in printer print reports ................26 SECTION 6: SERVICE AND MAINTENANCE ..............27 Analyzer Cleaning ....................27 Software Upgrade ....................27 6.2.1...
-
Page 5: Section 1: Using This Manual
Users who received operation training from qualified scil personnel. Users who received the operation training from authorized distributors of scil. scil reserves the right to revise the instructions and issue software updates. No individual or organization may reproduce, modify or translate the contents of this manual without the written consent of scil. -
Page 6: Element Rc Analyzer Use
RC Analyzer Use Follow the instructions below before operation: ❖ Please check the analyzer contents and packing list. ❖ Please read documents included with the analyzer. WARNING The analyzer should be protected from working in humid and corrosive environments. Do not use flammable or explosive gas around the equipment. -
Page 7: Compliance With Safety Measures
Preventing electric shock Do not open the shell of the analyzer without the authorization of scil and prevent the introduction of liquids into the analyzer. Please contact scil Technical Support Services with any questions. Ensure that the power cord is in good condition before use. Do not use a damaged electric cord to prevent electric shock. -
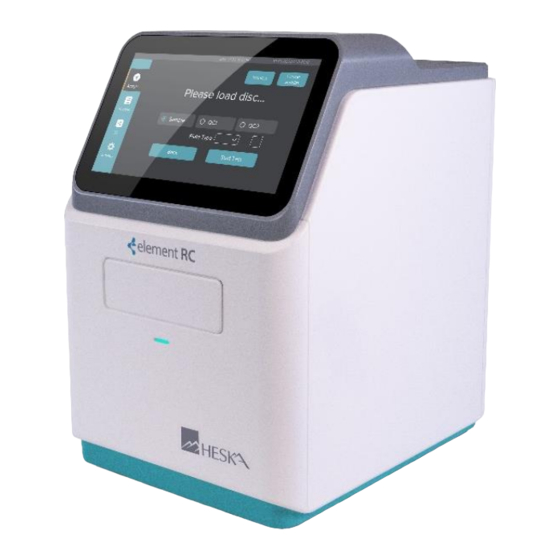
Page 8: Section 2: Introduction
The element RC Analyzer will report results after 12 minutes of analysis. The analysis results are automatically displayed and printed after the analysis is completed. Furthermore, the results are transmitted to the practice management software if the instrument is connected. -
Page 9: Detection Principle
Detection Principle element RC Analyzer is a bio-based analyzer with microcomputer. It is used in conjunction with the available test rotors to detect the concentration of biochemical substances in the patient sample, and utilizes the corresponding methods of end- point, rate, two-point method, and the eight-segment wavelength synchronous detection. -
Page 10: Analyzer Function
❖ Built-in thermal printer. Scope of Application The element RC is suitable for biochemical analysis of Li-Hep whole blood, Li-Hep plasma and serum when used in conjunction with the available test rotors. It is for veterinary medicine use only. Executive Standard ❖... -
Page 11: Electromagnetic Compatibility Statement
Electromagnetic Compatibility Statement ❖ This equipment complies with GB/T18268.1–2010 (IEC61326–1:2005, IDT ) "Electromagnetic compatibility requirements for electrical equipment for measurement, control and laboratory – Part 1: General requirements" and GB/T18268.26–2010 (IEC61326–2–6:2005, IDT ) Electromagnetic compatibility requirements for electrical equipment for measurement, control and laboratory use Part 26: Particular requirements for in vitro diagnostic (IVD) medical equipment. -
Page 12: Technical Parameters
Technical Parameters Sample type Lithium heparin whole blood, Lithium heparin plasma and serum Sample volume 100μl Bar code Two-dimensional bar code Testing time 12 minutes/sample Testing principle Absorption spectroscopy, Transmission turbidimetry Testing method End point, Rate, Fixed time Absorbance 0.001 Abs Cross infection QC &... -
Page 13: Section 3: Instrument Installation
SECTION 3: INSTRUMENT INSTALLATION Operating Environment To ensure optimal performance, the instrument should be installed in accordance with the following environmental conditions: ❖ Elevation not to exceed 6500 feet (2000 m) ❖ Temperature: 50ºF–86ºF (10ºC–30ºC) ❖ Relative humidity: 30%–70% ❖ Barometric pressure: 860 hPa ~1060 hPa. -
Page 14: Installation
Installation 3.2.1 Installing the instrument Remove the instrument from shipping carton and place it on a stable, level surface. Inspect for any damage. Connect the power cord to the analyzer. Press the power switch at the back of the instrument, the indicator light will illuminate below the screen. -
Page 15: Section 4: Common Operations
SECTION 4: COMMON OPERATIONS Startup Startup screen: Initialization screen: Commonly Used Buttons The system will automatically enter the interface as shown below in figure 4-1 after analyzer starts up. Confirm the date and time on the top border is correct. There are 4 main buttons on the touch screen interface. -
Page 16: Main Screen Buttons
4.2.1 Main Screen Buttons Test Run patient sample from this screen. NOTE: Section 5.3 for further information. Reports Review prior test results. Select a report and select to view results. From the Reports screen, select “ ” for additional options to the right. Select Back to exit to Reports screen. - Page 17 Quality control sample lot information and target ranges can be added in the menu. Settings Configure the element RC Analyzer: A. Information settings B. Parameter settings C. Print settings D. Connection settings E. Log export F. Others A. Information settings Set analyzer date/time and enter clinic or hospital name.
- Page 18 Change individual assays, such as units, reference ranges, etc. NOTE: Do not make changes to parameters unless advised to do so by a scil representative. C. Printing settings Select the internal printer and turn on automatic results printing. D. Connection settings Select data transmission settings.
-
Page 19: Soft Keyboard
5. Other settings Do not make changes to parameters unless advised to do so by a scil representative. 4.2.2 Soft keyboard The soft keyboard is a built-in keyboard. Users can select the field where information is entered and typed in the window, once the cursor starts blinking and the soft keyboard is activated. -
Page 20: Section 5: Testing And Results
SECTION 5: TESTING AND RESULTS Sample Requirements WARNING Always follow biohazard procedures in accordance with the sample handling rules of your facility when handling samples (blood). 5.1.1 Sample handing Collect whole blood sample using 22 g (or larger) needle. Gently invert tube several times to ensure proper mixing of sample with lithium heparin. CAUTION ❖... -
Page 21: Reagent Rotor Storage And Disposal
5.2.1 Reagent rotor storage and disposal ❖ Store test rotors in the refrigerator between 2–8°C. ❖ Remove test rotor from refrigerator and allow to warm up to room temperature for 20 minutes in sealed pouch prior to sample analysis. ❖ Test rotors in sealed pouches can be stored at room temperature for a maximum of 48 hours. -
Page 22: Pipette Patient Sample
5.2.2 Pipette patient sample Use the supplied 100μl pipette and disposable tip to pipette patient sample into the sample port. Fill the sample well to the fill line. Pipette tips are single use, do not re- Fill port use to avoid sample contamination. Fill line Hold the test rotor horizontally by the edges when insert into the analyzer... -
Page 23: Sample Test
Sample Test Turn on the analyzer, if it is not already powered on. The element RC Analyzer will begin a self-check diagnostic. The analyzer will warm the incubator to proper testing temperature, ~5 minutes. From the Welcome screen, tap on TEST. - Page 24 The analyzer scans the QR code on the test rotor and begins countdown. Patient information can be added by touching SAMPLE INFO. Touch STOP to terminate current patient sample analysis. Touch OK when the test is terminated. CAUTION Test rotor and patient sample will no longer be valid after terminating testing.
-
Page 25: Test Procedure Precautions
Test Procedure Precautions Analyzer ❖ Use grounded power supply and supplied power cord. ❖ Confirm the ambient temperature of the analyzer is 10ºC–30ºC. ❖ Do not disconnect power during operation. ❖ Close the drawer when the analyzer is not in use. ❖... -
Page 26: Print Results
Print Results 5.5.1 Built-in printer print reports Sample report The results of the analysis are automatically stored, and the user can choose to print using the built-in printer. The header information of the printed report includes: hospital name, patient name, medical record number, sample number, age range, gender, blood sample, test rotor ID, instrument ID, software version and test time. -
Page 27: Section 6: Service And Maintenance
SECTION 6: SERVICE AND MAINTENANCE The element RC Analyzer requires minimal maintenance to ensure optimal performance. Analyzer Cleaning Air filter Inspect air filter weekly. Clean as needed by removing and rinsing with water. Blot dry and replace. Casing Clean the outside of the machine as needed with a mild detergent and a soft wet cloth. Do not spray or pour any detergent or liquid directly onto the instrument. -
Page 28: Usb Flash Drive Upgrade
► right click ► format ► select "FAT32" file system ► start ► confirm ► format completion prompt ► confirm. Obtain the software compression package from scil’s Technical Support Services. Unzip the upgrade package to get the "upgradepackage" directory, which should be placed in the root directory of the USB drive. -
Page 29: Troubleshooting
Internal printer error M5002 check printer for proper loading of paper external printer error M5021, M5022 check printer connection check printer for proper loading of paper NOTE: Contact scil Technical Support Services for additional troubleshooting. __________________________________________________________________________ Vers. 20210510ENG Page 29... -
Page 30: Section 7: Packing, Storage And Transportation
SECTION 7: PACKING, STORAGE AND TRANSPORTATION Packing, Storage and Transportation This instrument is packaged in a cardboard box outer shell and high-quality foam for shock protection. Do not stack the analyzer. Transportation temperature: -20ºC–55ºC Storage temperature: 0ºC–40ºC ≤ 85%. Relative humidity: Carton case symbols: This Fragile... -
Page 31: Section 8: Explanation And Risk Warning On Emc
If the equipment cable connection is faulty, please contact our company for repair or replacement, otherwise it may cause excessive electromagnetic interference. If the equipment is faulty, please contact scil’s Technical Support Services. Do not repair or replace the components yourself, otherwise it may cause excessive electromagnetic interference. -
Page 32: Operating Mode
This product belongs to professional IVD equipment and needs to pay attention to the following preventive warnings: ❖ The emission and immunity requirements specified in Tables 1 to 4 shall be met. ❖ It is recommended to evaluate the electromagnetic environment prior to use. ❖... - Page 33 Table 1 – Guide and manufacturer's statement—electromagnetic emissions. The product is intended to be used in the electromagnetic environment specified. Emission Test Compliance Environmental Guidance Radio frequency emission Group 1 The product uses RF energy only for its internal functions. Therefore, its RF emissions are low GB 4824 and there is little possibility of interference with electronic equipment.
- Page 34 environments. Voltage dip, short 0%Ut, Continue 1 0%Ut, Continue 1 Network power supply interruption and voltage cycle cycle should have the quality change on the power of use in typical (On Ut, 100% sag) (On Ut, 100% sag) input line commercial or hospital environment.
- Page 35 Table 3 – Guide and manufacturer's statement—electromagnetic immunity. The product is intended to be used in the electromagnetic environment specified. Immunity test IEC 61326 Test Coincidence Environmental Guidance level Level Guide Test Level Guide Radio frequency 3V (Effective 3 V (Effective Portable and mobile radio frequency communication equipment should not be conduction GB/T...
- Page 36 transmitters, such as wireless (cellular/cordless) telephones and ground mobile radio base stations, amateur radios, AM/FM radio broadcasting and television broadcasting, cannot accurately predict their electric field in theory. In order to evaluate the electromagnetic environment of fixed radio frequency transmitter, the survey of electromagnetic field should be considered.
- Page 37 Table 4 – Recommended isolation distance between portable and mobile radio frequency communication equipment and products. Maximum rated Isolation distance corresponding to different frequencies of transmitter/m output power of transmitter W 150 KHz~80 MHz 80 MHz~800 MHz 800 MHz~2.0 GHz d=1.2√P d=1.2√P d=2.3√P...
- Page 38 Service-Contact: scil animal care company GmbH Dina-Weissmann-Allee 6 68519 Viernheim Germany Telefone: +49 6204 7890 – 0 Fax: +49 6204 7890 – 200 E-Mail: info-de(at)scilvet.com __________________________________________________________________________ Vers. 20210510ENG Page 38...
Need help?
Do you have a question about the element RC and is the answer not in the manual?
Questions and answers