Table of Contents
Advertisement
Quick Links
Advertisement
Table of Contents

Related Manuals for D-Link DPH-120SE


Summary of Contents for D-Link DPH-120SE
- Page 2 Safety Notices Please read the following safety notices before installing or using this phone. They are crucial for the safe and reliable operation of the device. Please use the external power supply that is included in the package. Other powers supplies may cause damage to the phone, affect the behavior or induce noise.
-
Page 3: Table Of Contents
Table of Content INTRODUCING DPH-120S/DPH-120SE VOIP PHONE ..............6 DPH-120S/DPH-120SE ............6 HANK YOU FOR YOUR PURCHASING ........................6 ELIVERY ONTENT ................... E EYPAD RROR OOKMARK NOT DEFINED ........................7 ORT FOR CONNECTING ........................8 CON INTRODUCTION ........................9 INTRODUCTION INITIAL CONNECTING AND SETTINGS ..................10... - Page 4 OTHER FUNCTIONS ........................19 ........................19 ANDDOWN ........................19 NONYMOUS .............................19 .............................19 ..........................19 EDIAL ........................20 ALL COMPLETION .............. E EADSET RROR OOKMARK NOT DEFINED ..........................20 OWER IGHT DTMF ..........................20 5.10 ..........................20 ASSWORD 5.11 URL & A URI ......................20 CTION CTIVE 5.12 XML ............................21 BASIC SETTINGS ..........................22 ............................22 EYBOARD...
- Page 5 8.3.2.4 SERVICE PORT ..........................35 8.3.2.5 DHCP SERVICE ..........................37 8.3.2.6 TIME&DATE ..........................38 8.3.3 VOIP ............................40 8.3.3.1 SIP ..............................40 8.3.3.2 STUN.............................. 48 8.3.3.3 DIAL PEER ............................ 49 8.3.4 PHONE .............................52 8.3.4.1 AUDIO ............................52 8.3.4.2 FEATURE ............................54 8.3.4.3 DIAL PLAN ...........................
-
Page 6: Introducing Dph-120S/Dph-120Se Voip Phone
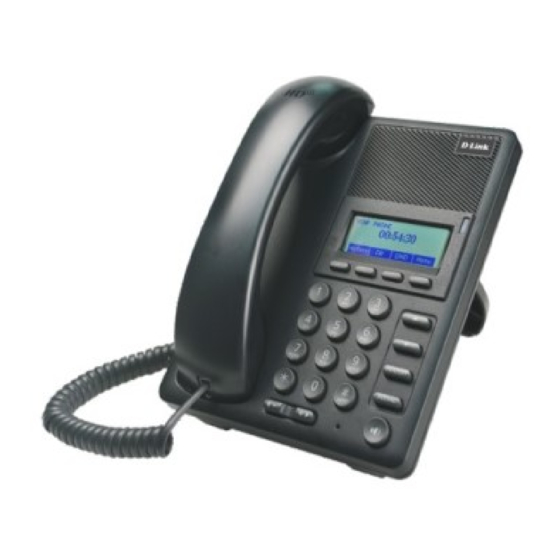
DPH-120S/DPH-120SE Thank you for your purchasing DPH-120S/DPH-120SE. DPH-120S/DPH-120SE is a full-feature telephone that provides voice communication over the same data network that your computer uses. This phone’s functions not only much like a traditional phone, allowing to place and receive calls, and enjoy other features that traditional phone has, but it also own many data services features which you could not expect from a traditional telephone. -
Page 7: Keypad
Keypad Key name Function Description These keys are used in many areas of phone operation. Navigation Depending on the application they will have different functions. The key use to link the headphone. Headset Volume -/+ Adjust the volume by pressing these two keys. Redial When off hook, this will dial the last called number. -
Page 8: Port For Connecting
Various functions depending on the phone mode. Softkey Description will be shown in LCD. 1/2/3/4 Keyboard Dial phone numbers 1.4 Port for connecting Port Port name Description Power switch Input: 5V AC, 1A 10/100M Connect it to Network 10/100M Connect it to PC Handset Port type: RJ-9 connector 1.5 Icon introduction... -
Page 9: Led Introduction
In hand-free mode In handset mode In headset mode Missed call Call forward 1.6 LED introduction Power Indication LED (Power Light Enabled) LED Status Description Steady red Power on. Blinking red There is an incoming call. Power off. Power Indication LED (Power Light Disabled) LED Status Description Blinking red... -
Page 10: Initial Connecting And Settings
2 Initial Connecting and Settings 2.1 Connect the phone Connect to network Step 1: Connect the IP Phone to the corporate IP telephony network. Before you connect the phone to the network, please check if your network can work normally. You can do this in one of two ways, depending on how your workspace is set up. -
Page 11: Power Adaptor Connection
Make sure that the power you use is comply with the parameters of power adaptor. 1. Plug power adaptor to power socket. 2. Plug power adaptor’s DC output to the DC5V port of DPH-120S/DPH-120SE to start up. 3. There will be displayed black line and “INITIALIZING” on the screen. After finishing startup, phone will show greeting, current date and time and so forth. - Page 12 3. Press Back, then choose PPPoE Set, press Enter. 4. The screen will show the current information.Press Del to delete it, then input your PPPoE user and password and press Save. 5. Press Back six times to return to the idle screen. 6.
-
Page 13: Basic Function
3 Basic Function 3.1 Making a call Call Device You can make a phone call via the following devices: 1. Pick up the handset, icon will be showed in the idle screen. 2. Press the Speaker button, icon will be showed in the idle screen. 3. -
Page 14: Dnd
3.3 DND Press DND softkey to active DND Mode. Further incoming calls will be rejected and the display shows: icon. Press DND softkey twice to deactivate DND mode. You can find the incoming call record in the Call History. 3.4 Call Forward This feature allows you to forward an incoming call to another phone number. -
Page 15: Call Transfer
3.8 Call transfer 1. Blind Transfer During talk, press the key Transf, and then dial the number that you want to transfer to, and finished by"#". Phone will transfer the current call to the third party. After finishing transfer, the call you talk to will be hanged up. User cannot select SIP line when phone transfers call. -
Page 16: Advancedfunction
4 AdvancedFunction 4.1 Call pickup Call pickup is implemented by simulating pickup function of PBX. it’s that, when A calls B, B rings but no answer, at this moment, C can hook off and input an appointed prefix plus B’s number, pick up A’s call and talk with A. The following chart shows how to configure an appointed prefix in dial peer to have call pick up function. -
Page 17: Click To Dial
*3* is appointed prefix code. After making the above configuration, A can dial *3* plus B’s phone number to make the redial function. *4* is appointed prefix code. After configuration, A can dial *4* to cancel redial function. User can set prefix in random,in the case of no affecting current dialing rules. 4.4 Click to dial When user A browsesin an appointed Web page, user Acan click to call user B via a link(this link to user B), then user A’s phone will ring, after A hooks off, the... -
Page 18: Memo
4) If you want to write a message, you can press New and enter message. Use the 2aB softkey to change the Input Method. When you input the message you want to send, press OK, then use the navigation keys to select the line from which you want to send, then Send. -
Page 19: Other Functions
Other Functions 4.9 Auto Handdown Press Menu ->Features-> Enter->Auto Handdown-> Enter. 2. Set the Mode Enable through the navigation key, then set Time, unit is minute, then press Save. 3. When the call ends, after the time that you have set, the phone will back to the idle interface. -
Page 20: Call Completion
chooseEnable, you also need to set Interval and Times, and then press Save. 3. After enable auto redial, calling out someone, if he is in busy, it will pop up a prompt box whether to auto redial, press OK, the phone will call out him according the Interval and Times that you set. -
Page 21: Push Xml
URL to the phone, the phone will produce one action for example open dnd, so PC can control the phone. 4.19 Push XML Enter the web page of the phone->PHONE->FEATURE, input Push XML Server(e.g. PC’IP), then PC can push text, SMS, phonebook, advertisement,, execute etc. -
Page 22: Basic Settings
5 Basic Settings 5.1 Keyboard 1. Press Menu ->Settings-> Enter->Basic Settings-> Enter->Keyboard->Enter. 2. There are four items: DSS Key settings, Programmable Keys, Desktop Long Pressed, SoftKey, You can set up respectively on them. Press the key Enter to the interface, then use the navigation keys to choose the function for the key according to you want. -
Page 23: Greeting Words
2. You can enter the message and press Save, it will display in the phone screen when the phone start up. 5.7 Language 1. Press Menu ->Settings-> Enter->Basic Settings-> Enter->Language ->Enter. 2. DPH-120S/DPH-120SE support only one languages, you cann’t use the navigation keys to choose. The default one languages is English... -
Page 24: Advanced Settings
6 Advanced Settings 6.1 Accounts Press Menu->Enter->Advanced settings, and then input the password to enter the interface, the default password is 123. You can set it through the web page. Then choose Account then press Enter, you can do some sip settings. 6.2 Network Press Menu->Enter->Advanced settings, and then input the password to enter the interface. -
Page 25: Web Configuration
7 Web configuration 7.1 Introduction of configuration Ways to configure DPH-120S/DPH-120SE has three different ways to different users. Use phone keypad. Use web browser (recommendatory way). Use telnet with CLI command. Password Configuration There are two levels to access to phone: root level and general level. User with... -
Page 26: Configuration Via Web
After you configure the IP phone, you need click save button in config under Maintenance in the left catalog to save your configuration. Otherwise the phone will lose your modification after power off and on. 7.3 Configuration via WEB BASIC STATUS 7.3.1.1 Status... -
Page 27: Wizard
Wizard Please select the proper network mode according to the network condition. DPH-120S/DPH-120SE provide three different network settings: Static: If your ISP server provides you the static IP address, please select this mode, and then finish Static Mode setting. If you don’t know about parameters of Static Mode setting, please ask your ISP for them. - Page 28 this domain to the end of the domain which you input before and parse it again. Primary DNS Input your primary DNS server address. Secondary DNS Input your standby DNS server address. Display Name Set the display name. Server Address Input your SIP server address.
-
Page 29: Call Log
Service Name It will be provided by ISP. User Input your ADSL account. Password Input your ADSL password. Notice: Click【Finish】button after finished your setting, IP Phone will save the setting automatically and reboot,After reboot,you can dial by the SIP account. CALL LOG 7.3.1.3 You can query all the outgoing through this page. -
Page 30: Network
LANGUAGE Field name explanation Language Set the language of phone,English is default. The greeting words will display on LCD when phone Greeting Words isidle.It can support 12 chars.the default chars are VOIPPHONE. Notice: the maximal length of the greeting message is sixteen English characters and five Chinese characters. - Page 31 The current Gateway IP address. Please select the proper network mode according to the network condition. DPH-120S/DPH-120SE provide three different network settings: Static: If your ISP server provides you the static IP address, please select this mode, and then finish Static Mode setting. If you don’t know about parameters of Static Mode setting, please ask your ISP for them.
-
Page 32: Lan
1) Click “Apply” button after finished your setting, IP Phone will save the setting automatically and new setting will take effect. 2) If you modify the IP address, the web wills not response by the old IP address. Your need input new IP address in the address column to logon in the phone. -
Page 33: Qos&Vlan
Enable Bridge the phone will no longer set IP address for LAN Mode physical port,LAN and WAN will join in the same network. Click “Apply”, the phone will reboot. Notice:WhenLAN IP or bridge mode status is changed, the system will reboot! If you choose the bridge mode, the LAN configuration will be disabled. - Page 34 broadcast information is sent out from port 1 then transmitted to port 2,3and 4. In chart 2, red and blue indicate two different VLANs in the switch, and port 1 and port 2 belong to red VLAN, port 3 and port 4 belong to blue VLAN. If a broadcast frame is sent out from port 1, switch will transmit it to port 2, the other port in the red VLAN and not transmit it to port3 and port 4 in blue VLAN.
-
Page 35: Service Port
SIP DSCP Specify the value of the SIP DSCP. Audio RTP DSCP Specify the value of the Audio RTP DSCP. WAN Port VLAN Settings Enable WAN Port Enable WAN Port VLAN by selecting it. VLAN WAN Port VLAN Specify the value of the WAN Port VLAN ID, the range of the value is 0-4095. - Page 36 into non-80 standard port; Example: The IP address is 192.168.1.70. and the port value is 8090, the accessing address is http://192.168.1.70:8090. HTTPS Port Before using the https, you must download https authentication certification into the phone, then setweb browser port, the default is 443 port, if you want to enhance system safety, you'd better change it into non-443 standard port.
-
Page 37: Dhcp Service
DHCP SERVICE 7.3.1.9 DHCP SERVICE Field name explanation DHCP LeaseTable IP-MAC mapping table. If the LAN port of the phone connects to a device, this table will show the IP and MAC address of this device. Shows the DHCP Lease Table, the unit of Lease time is Minute. Lease Table Name Specify the name of the lease table. -
Page 38: Time&Date
Select name of lease table, click the Delete button will delete the selected lease table from DHCP lease table. Enable Select DNS Relay, the default is enabled. Click the DNS Relay Apply button to become effective. Notice: 1) The size of lease table cannot be larger than the quantity of C network IP address. - Page 39 TIME&DATE Field name explanation Simple Network Time Protocol (SNTP) Settings Enable SNTP Enable SNTP by selecting it. Enable DHCP Time Enable DHCP Time by selecting it, then the phone will automatically synchronize the standard time. Primary Server Set SNTP Primary Server IP address. Secondary Server Set SNTP Secondary Server IP address.
-
Page 40: Voip
Time Settings Enable Enable daylight saving time. Offset(minutes) Setup the variety length. Month Setup start and end month. Week Setup start and end week. Setup start and end day. Hour Setup start and end hours. Minute Setup start and end minutes. Manual Time Settings Notice: You need specify the above all items. - Page 42 SIP Config Field name explanation SIP Line Choose line to set info about SIP,there are 4 lines to choose. You can switch by【Load】button. Basic Settings Status Shows if the phone has been registered the SIP server or not; or so, show Unapplied. Server Address Input your SIP server address.
- Page 43 Domain Realm phone will use the Register server address as sip domain automatically. (Usually it is same with registered server and proxy server IP address). Backup Server Input the Backup Server Address, if the primary Address server is unavailable, then the phone will enable the Backup Server Address.
- Page 44 Timeout the incoming call after Auto Answer Time. Enable Session Timer Set Enable/Disable Session Timer, whether support RFC4028.It will refresh the SIP sessions. Session Timeout Set the session timeout. Subscribe for MWI Enable the Subscribe for MWI by selecting it, the phone will send subscribe message for MWI to the SIP Server.
- Page 45 Always CFwd Off Set the Always CFwd Off Code, when you choose to Code disable the always forward function on your phone, it will send message to the server, and the server will turn off the function immediately. Busy CFwd On Code Set the Busy CFwd On Code, when you choose to enable the busy forward function v on your phone, it will send message to the server, and the server will...
- Page 46 Keep Alive Interval Set examining interval of the server, default is 60 seconds. User Agent Set the user agent if have, the default is VoIP Phone 1.0. Select DTMF sending mode, there are three modes: DTMF_RELAY DTMF Type DTMF_RFC2833 ...
- Page 47 the packets sent from server,phone will use the source IP address, not the address in via field. Enable GRUU Set to support GRUU Enable Display name Set to make quotation mark to display name as the Quote phone sends out signal, in order to be compatible with server.
-
Page 48: Stun
STUN 7.3.1.12 In this web page, you can config SIP STUN. STUN: By STUN server, the phone in private network could know the type of NAT and the NAT mapping IP and port of SIP. The phone might register itself to SIP server with global IP and port to realize the device both calling and being called in private network. -
Page 49: Dial Peer
that a NAT mapping is idle after time out, it will release the mapping and the system need send a STUN packet to keep the mapping effective and alive. SIP Waiting Time Specify the sip wait stun time; you can input the time depended on your network condition. - Page 50 1.* Match any single digit that is dialed. If user makes the above configuration, after user dials 11 digit numbers started with 13, the phone will send out 0 plus the dialed numbers automatically. 2. [] Specifies a range that will match digit. It may be a range, a list of ranges separated by commas, or a list of digits.
- Page 51 If you want to set peer to peer call, please input destination IP address or domain name. If you want to use this dial rule on SIP2 line, you need input 255.255.255.255 or 0.0.0.2 in it.SIP3 into 0.0.0.3 Port Set the Signal port, the default is 5060 for SIP. Alias Set alias.
-
Page 52: Phone
This setting will realize When you dial speed dial function, after “2”, the SIP1 you dialing the numeric server will key “2”, the number after receive all will be sent out. 33334444. The phone will When you dial automatically send out “8309“, the SIP1 alias number adding your server will... - Page 53 AUDIO Configuration Field name explanation First Codec The firstpreferential DSP codec: G.711A/u, G.722, G.723, G.729. Second Codec The second preferential DSP codec: G.711A/u, G.722, G.723, G.729. Third Codec The third preferential DSP codec: G.711A/u, G.722, G.723, G.729. Fourth Codec The forth preferential DSP codec: G.711A/u, G.722, G.723, G.729.
-
Page 54: Feature
Tone Standard Select Tone Standard. Enable VAD Select it or not to enable or disable VAD. If enable VAD, G729 Payload length could not be set over 20ms. DTMF Payload Set DTMF Payload Type. Type FEATURE 7.3.1.15 In this web page, you can configure Hotline, Call Transfer, Call Waiting, 3 Ways Call, Black List, white list Limit List and so on. - Page 55 FEATURE Field name explanation Do Not Select DND, the phone will reject any incoming call, the callers Disturb will be reminded by busy, but any outgoing call from the phone will work well. If you select Ban Outgoing to enable it, and you cannot dial out Outgoing any number.
- Page 56 Enable Call Enable Call Transfer by selecting it. Transfer Semi-Attend Enable Semi-Attended Transfer by selecting it. ed Transfer Enable Auto Enable Auto Redial by selecting it, then the phone reminds Redial whether redial, when the caller is busy or rejects. Auto Redial Specify the Auto Redial interval.
- Page 57 Call locked, you can dial the emergency call number. Number Enable Enable Password Dial by selecting it, When number entered is Password beginning with the password prefix, the following N numbers Dial After the password prefix will be hidden as *, N stand for the value which you enter in the Password Length field.
-
Page 58: Dial Plan
Block out then you cannot dial out any phone number whose prefix is 001. X and are wildcardx means matching any single digit. For example, 4xxx expresses any number with prefix 4 which length is 4 will be forbidden to dialed out means matching any arbitrary number digit. - Page 59 DIAL PLAN Configuration Field name explanation Basic Setting Press "#" to Send Set Enable/Disable the phone ended with “#” dial. Dial Fixed Length Specify the Fixed Length of phone ending with. Set the timeout of the last dial digit. The call will be Send after (3-30)...
-
Page 60: Contact
Cause any number started with 9911 to be dialed 4 seconds after dialing ceases. Notice: End with “#”, Fixed Length, Time out and Digital Map Table can be used simultaneously, System will stop dialing and send number according to your set rules. CONTACT 7.3.1.17 You can input the name, phone number and select ring type for each name here. - Page 61 Phonebook Table Name Shows the name corresponding to the phone number. Shows the detail of current phonebook. Notice: the maximum capability of the phonebook is 500 items, you can select many or a contact to add to group and add to blacklist, and delete many or a contact, and delete all contacts.
-
Page 62: Remote Contact
Expresses any number with prefix 6 will be forbidden to be responded. If user wants to allow a number or a series of number incoming, he may add the number(s) to the list as the white list rule. The configuration rule is -number, for example, -123456, or -1234xx. -
Page 63: Web Dial
WEB DIAL 7.3.1.19 You can make a call through the WEB DIAL, enter the Dial Number then press Dial, if you want to finish the talk, press Hang-up. FUNCTION KEY FUNCTION KEY 7.3.1.20... -
Page 64: Softkey
SOFTKEY 7.3.1.21 SOFTKEY You can configure different functions in different screens for every softkey. -
Page 65: Maintenance
Maintenance Auto Provision 7.3.1.22 VoIP endpoint supports PnP and DHCP and Phone Flash to obtain the parameters. The PnP and DHCP and Phone Flash are all deployed, endpoint will go by the following process to try to obtain the server address and other parameters, when it boots up: DHCP optin... - Page 66 Auto Provision Field name explanation Auto Update Setting Current Config Show the current config file’s version. If the version Version of the configuration downloaded is higher than the version of the running configurations, the auto provision would upgrade, or stop here. If the endpoints confirm the configuration by Digest method, the endpoints wouldn’t upgrade configuration unless the configuration in the server is different with the...
-
Page 67: Syslog
when it boots up. Any SIP server understanding that message will reply with a SIP NOTIFY message containing the AutoProvisioning Server URL where the phones can request their configuration. PnP Server Specify the PnP Server. PnP Port Specify the PnP Server. PnP Transport Specify the PnP Transfer protocol. - Page 68 Level 4---warning: There are some potential dangers. But your system can work. Level 5---notice: Your system works well in special condition, but you need to check its working environment and parameter. Level 6---info: the daily debugging info. Level 7---debug: the lowest debug infoProfessional debugging info from R&D person.
-
Page 69: Config
CONFIG 7.3.1.24 Config Setting Field name Explanation Save Configuration You can save all changes of configurations. Click the Save button, all changes of configuration will be saved, and be effective immediately. Backup Right clicks on “Right click here…” and select “Save Configuration Target As config File(.txt)”... - Page 70 Update Field name Explanation Web Update Click the browse button, find out the config file saved Web Update before or provided by manufacturer, download it to the phone directly, press “Update” to save. You can also update downloaded update file, logo picture, ring, mmiset file by web.
-
Page 71: Access
phone from FTP/TFTP server. The configuration will be effective after the phone is reset. 4. Phone book export (.vcf): Upload the phonebook file to FTP/TFTP server, name and save it. 5. PhoneBook import (.vcf): Download the phonebook file to phone from FTP/TFTP server. Protocol Select FTP/TFTP server. -
Page 72: Reboot
digit. This table shows the current user existed. User Set account user name. User Level Set user level, Root user has the right to modify configuration, General can only read. Password Set the password. Confirm Confirm the password. Select the account and click the Modify to modify the selected account, and click the Delete to delete the selected account. -
Page 73: Firewall
WEB Filter User could make some deviceown IP, which is pre-specified, access to the MMI of the phone to config and manage the phone. Field name explanation Web Filter Table Settings: Add or delete the IP address segments that access to the phone. Set initial IP address in the Start IP column, Set end IP address in the End IP column, and click Add to add this IP segment. -
Page 74: Nat
networks set in rules for security. Firewall, is also called access list, is a simple implementation of a Cisco-like access list (firewall). It supports two access lists: one for filtering input packets, and the other for filtering output packets. Each kind of list could be added 10 items. We will give you an instance for your reference. - Page 75 DMZ config: In order to make some intranet equipment support better service for extranet, and make internal network security more effectively, these equipment open to extranet need be separated from the other equipment not open to extranet by the corresponding isolation method according to different demands. We can provide the different security level protection in terms of the different resources by building a DMZ region which can provide the network level protection for the equipment environment, reduce the risk which is caused by providing service to...
-
Page 76: Vpn
NAT Configuration Field name explanation IPSec ALG It is an encryption technology. Select it to enable IPSec ALG, the default is enabled. FTP is a service of connection layer which can FTP ALG transform intranet IP into extranet IP when intranet IP is sending out packet. - Page 77 access to enterprise inner network from public network. That is to say, you can set it to connect public networks in different areas into inner network via a special tunnel. VPN Configuration Field name explanation VPN IP Shows the current VPN IP address. Select L2TP.
-
Page 78: Security
SECURITY 7.3.1.32 Security Field name explanation Update Security File Select Security File Select the security file you want to update, then click Update button to update. Delete Security File Select Security File Select the security file you want to delete, then click Delete button to update. -
Page 79: Appendix
8 Appendix 8.1 Specification Hardware Item DPH-120S/DPH-120SE Adapter Input: 100-240V (Input /Output) Output: 5V 600mA port 10/100Base- T RJ-45 1 PORT 10/100Base- T RJ-45 1 PORT headset RJ-9 PORT Power Idle: 2.5W/Active: 2.8W Consumption LCD Size 128x48 pixels Operation 0~40... - Page 80 G.722 G.726 Codec Setting per SIP line Echo cancellation: G.168 Compliance in LEC, additional acoustic echo cancellation(AEC) can reach 96ms max filter length in hands-free mode Supports Voice Gain Setting, VAD, CNG Full duplex hands-free ...
- Page 81 DTMFIn-Band RFC2833 AUTO SIP applications Call Forward Call Transfer(Blind/Attended) Hold Call Waiting 3 Way Conference SMS Remote Pickup Join Call Redial Unredial Multi-line Intercom ...
- Page 82 Anonymous Call Reject Black List (Reject Authenticated Call) Limit Call Do Not Disturb Caller ID CLIR(reject anonymous call) CLIP(make anonymous call) Dial without Registration Phonebook 500 records Support call logs ...
-
Page 83: Network Features
Customized LCD logo as screensaver Ring Tone via Speaker Customized Signal Tone Parameters TimeDisplay 12/24 Hour Support Daylight Saving Time SupportsPath, Group Supports SIP Privacy Supports MWI SupportsSpeedDial Supports XML Network Features ... -
Page 84: Maintenance And Management
Supports DMZ Supports VPN L2TP OpenVPN Wan Port Supports Main DNS and Secondary DNS Supports DNS via DHCP or Static DNS Supports DHCP client on WAN Supports DHCP server on LAN QoS with DiffServ ... -
Page 85: Digit Character Map Table
Telnet Phone Keypad Two Account Levels Multi-Language Support English Chinese Supports Syslog Supports Auto Provisioning Firmware Upgrade Auto-Provisioning 8.2 Digit-character map table Keypad Character Keypad Character 7 P Q R S p q r s 2 A B C a b c 8 T U V t u v 3 D E F d e f...
Need help?
Do you have a question about the DPH-120SE and is the answer not in the manual?
Questions and answers