
Related Manuals for Amila WATER ROWER ET7460R


Summary of Contents for Amila WATER ROWER ET7460R
- Page 1 ET7460R ATER OWER (code: 92355) Assembly instructions & χρήσης IN ORDER FOR THE WARRANTY TO BE VALID, PLEASE, BEFORE YOU BEGIN ASSEMBLING AND USING THE BIKE, READ THIS INSTRUCTIONS.
-
Page 2: Parts List
PRECAUTIONS • Consult your physician before starting an exercise program. • If you feel dizzy or weak, immediately stop exercising. • Use this exercise equipment only on a horizontal flat surface. PARTS LIST 76 1 Water pump 100 1 Water purification tablets 77 1 Funnel 46 1... -
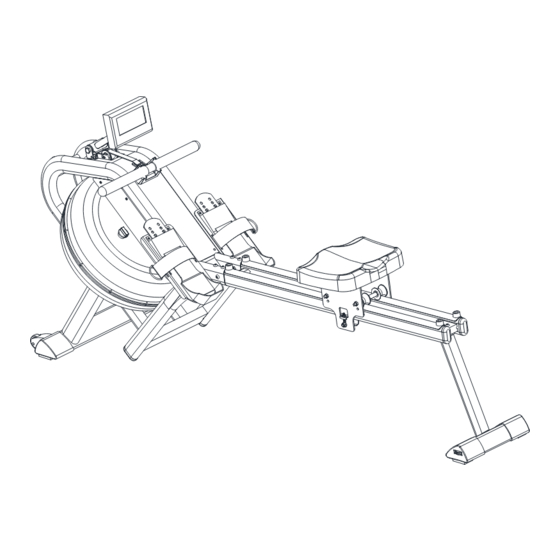
Page 3: Exploded Drawing
# PCS DRAWING DESCRIPTION # PCS DRAWING DESCRIPTION Bolt Μ8x60 71 12 Washer 16x8,5x1,5 Safety nut Μ8 Bolt M8x15 Washer 16x8,5x1,5 O-rings Spanner 13-15 & screw- Bolt M5x16 driver Allen wrench #5 Bolt M8x42 Bolt M8x75 Bolt M8x35 EXPLODED DRAWING —... - Page 4 Assembly Before you begin, spread all parts on the floor, somewhere with ample space. Get acquainted with the parts and assembly steps by reading these instructions. Step 1 • Slide the seat (36) on the sliding rail (3). The aluminium plate should be on top. •...
- Page 5 Step 4 • Connect the sensor wires (47) coming out of the console (46) with the one on the top of the main frame (1). • Attach the console (46) on its base using 1 bolt (63), 2 washers (71) and 1 nut (56). Tighten well using the allen wrench (75) and spanner (74).
- Page 6 Water level and resistance (Fig. 1): • Consult the water level label on the side of the tank. The maximum allowed quantity corresponds to level No. 6. Placing more water in the tank voids the warranty. • The resistance depends on the amount of water, where at level 6 is the highest and level 1 is the lowest.
- Page 7 Pedal adjustment • The pedal straps are adjustable and can be per- sonalised to fit any user’s foot. • The pedal length (23) is also adjustable. USING THE ROWER Buttons UP / DOWN : Change values or scroll through selections. ENTER: Confirms your selection or, during while working out, change the values diplayed on the screen.
- Page 8 TEMPERATURE: The room temperature is displayed on the centre part of the console when the rower has entered sleep mode. CLOCK: This is displayed on the top-left part of the console when the rower has entered sleep mode. Usage • Insert 2xΑΑ...
- Page 9 • When the target value you have set is reached, that specific counter will be replaced with the mean of its value. • You can stop your workout at any time by pressing the Stop button. RACE: • The value of L9 will be flash on the console.. •...
-
Page 10: Warm Up Exercises
WARM-UP EXERCISES A proper workout consists of warm-up, aerobic exercise and relaxation. Repeat the program 2 or, preferably, 3 times a week, relaxing one day in between. After a few months you will be able to in- crease the frequency of your workouts to 4 or 5 times per week. Warming up should be a key part of your exercise, something not to be missed.
Need help?
Do you have a question about the WATER ROWER ET7460R and is the answer not in the manual?
Questions and answers