Table of Contents
Advertisement
Quick Links
Advertisement
Table of Contents

Related Manuals for St. Jude Medical Confirm Rx DM3500


Summary of Contents for St. Jude Medical Confirm Rx DM3500
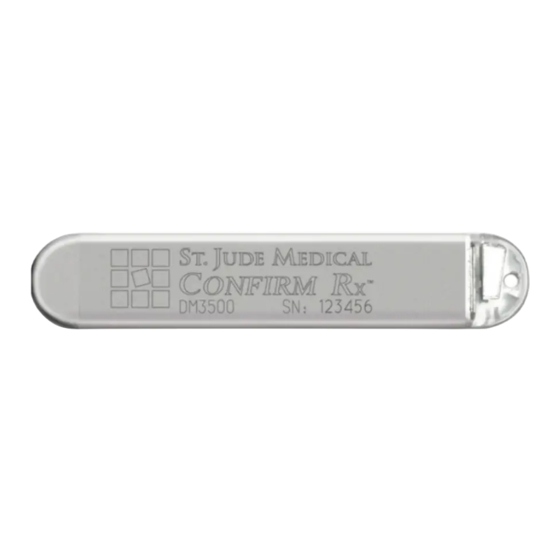
- Page 1 Confirm Rx™ Model DM3500 Insertable Cardiac Monitor User's Manual...
- Page 2 Unless otherwise noted, ™ indicates that the name is a trademark of, or licensed to, St. Jude Medical or one of its subsidiaries. ST. JUDE MEDICAL and the nine-squares symbol are trademarks and service marks of St. Jude Medical, LLC and its related companies.
-
Page 3: Intended Purpose
MR Conditional monitor The St. Jude Medical™ Confirm Rx™ insertable cardiac monitor (ICM) is designed to monitor and store electrogram (EGM) data and to communicate with the programmer and patient application. The ICM constitutes the inserted portion of the system. The Merlin™ Patient Care System (PCS) with software version 23.0 (or greater), myMerlin™... -
Page 4: Intended Use
Indications The Confirm Rx™ ICM is indicated for the monitoring and diagnostic evaluation of patients who experience unexplained symptoms that may be associated with cardiac arrhythmias, such as: dizziness, palpitations, chest pain, syncope, and shortness of breath, as well as patients who are at risk for abnormal cardiac rhythms such as bradycardia, tachycardia, and sinus pauses. -
Page 5: Intended Patient Population
Table 2. Accessories and their intended uses Accessory Model Number Intended use Confirm Rx ICM through the skin incision into the subcutaneous pocket. Accessory kit DM3500A The Confirm Rx ICM Accessory Kit, which includes the incision and insertion tool, is intended to implant the Confirm Rx ICM device. -
Page 6: Mri Safety Information
Intended Clinical Benefits The intended clinical benefit of Confirm Rx™ ICM is to help physicians and clinicians monitor, diagnose and document the heart rhythm in patients who are at risk for cardiac arrhythmias by detecting arrhythmias and unexplained symptoms and transmitting data for review. The expected clinical performance of the Confirm Rx ICM is an R-wave amplitude of comparable to or higher than 0.2 mV, an AF detection sensitivity that is comparable to or greater than 78 percent and an AF detection positive predictive value that is comparable to or greater than 64 percent. -
Page 7: Data Security
Data Security St. Jude Medical takes a broad and deep approach to ensuring the safety, security and privacy of the patient information and data on our devices and systems connecting patients to healthcare providers and clinics. Patients, clinical staff, and hospital IT staff do not need to configure the device or take any special action, for example firewall use, to safeguard patient information and device data. -
Page 8: Device Replacement
Summary of Safety and Clinical Performance A summary of the safety and clinical performance for this device is available at https://ec.europa.eu/tools/ eudamed. Search for the device using the UDI-DI provided on the outer packaging of the device. This is the SSCP location after the launch of the European Database on Medical Devices/Eudamed. -
Page 9: Storage And Handling
▪ ▪ Do not use the device or accessories if the packaging is wet, punctured, opened or damaged because the integrity of the sterile packaging may be compromised. Return the device to St. Jude Medical. ▪ ▪ Do not implant the device when the sterility indicator within the inner package is purple, because it might not have been sterilized, or when the storage package has been pierced or altered, because this could have rendered it non-sterile. - Page 10 24 inches (61 cm) while within its intact shelf package. Sterility, integrity, or function cannot be guaranteed under these conditions, and the device should be returned to St. Jude Medical for inspection. Temperature Equilibrium ▪...
-
Page 11: Environmental And Medical Therapy Hazards
Environmental and Medical Therapy Hazards ▪ ▪ Advise patients to avoid devices that generate a strong electric or magnetic interference (EMI). EMI could cause malfunction of or damage to the device, resulting in inappropriate episode storage or inhibition of episode storage. Moving away from the source or turning it off will usually allow the device to return to its normal mode of operation. -
Page 12: Ultrasound Therapy
High Radiation Sources ▪ ▪ Do not direct high radiation sources such as cobalt 60 or gamma radiation at the device. If a patient requires radiation therapy in the vicinity of the device, place lead shielding over the device to prevent radiation damage, and confirm the device is functioning after treatment. - Page 13 Radiofrequency Ablation Radiofrequency ablation in a patient with a device may cause malfunction or damage. Minimize RF ablation risks by: ▪ ▪ Disabling monitoring ▪ ▪ Avoiding direct contact between the ablation catheter and the inserted device ▪ ▪ Positioning the groundplate so that the current pathway does not pass near the inserted device. For example, place the groundplate under the patient's buttocks or legs.
- Page 14 Electronic Article Surveillance (EAS) ▪ ▪ Advise patients that the Electronic Article Surveillance/Anti-theft (EAS) systems such as those at the point of sale and entrances/exits of stores, libraries, banks, or tag readers that include radio frequency identification (RFID) equipment emit signals that may interact with the device. To minimize the possibility of interaction, advise patients to simply walk through these areas at a normal pace and avoid lingering near or leaning on these systems.
-
Page 15: Explant And Disposal
ICM wide enough to accommodate the ICM. Ensure that the device is freed from suture before removing the device. ▪ ▪ Return all explanted devices to St. Jude Medical. ▪ ▪ Never incinerate the device because of the potential for explosion. Explant the device before cremation. -
Page 16: Clinician Use Information
▪ ▪ Extrusion ▪ ▪ Formation of hematomas or cysts ▪ ▪ Infection ▪ ▪ Keloid formation ▪ ▪ Migration Clinician Use Information Physician Training Physicians should be familiar with sterile device insertion procedures and with follow-up evaluation and management of patients with an insertable cardiac monitor (or should refer the patient to such a physician). See the Monitoring Devices Help manual for instructions on programming the insertable cardiac monitor. -
Page 17: Package Contents
▪ ▪ Review of the FastPath™ Summary screen ▪ ▪ Review of stored episodes and real-time EGMs ▪ ▪ Confirmation that the final parameter settings are correct. See also: ▪ ▪ Battery Status (page 30) Package Contents The device is supplied in a sterile tray for introduction into the operating field. The tray contains: ▪... - Page 18 interface will provide a prompt to insert the device once the required information is entered. See the Monitoring Devices Help manual for instructions on programming the insertable cardiac monitor. Opening the Sterile Package To open the package: 1. Peel back the outer tray cover, starting with the corner labeled with an arrow. 2.
- Page 19 Table 3. Insertion locations 4th intercostal space, parallel to the sternum Anterolateral, inframammary between the 5th and 6th ribs NOTE: ▪ An implant site parallel to the midline, closer to the sternum and away from the lower half of the pectoral ▪...
-
Page 20: Inserting The Device
Inserting the Device To insert the device: 1. Prepare the insertion site using conventional antiseptic and local anesthetic procedures. 2. Pull back the skin and make an angled cut with the incision tool. NOTE: Create the incision above the final insertable cardiac monitor position to reduce the force of gravity acting on the incision site during healing. - Page 21 3. Hold the insertion tool as shown in the figure below, at approximately a 45 degree angle to the incision. Insert the blunt dissection tip of the insertion tool just past the skin, then adjust the angle to guide the insertion tool almost parallel with the patient's chest.
- Page 22 NOTE: The insertion tool is designed to form an ideally sized pocket with some distance between the device and the incision. Avoid forming a pocket larger than the introducer. 4. Hold the insertion tool firmly at the incision site by gripping the ribbed finger recesses as shown in the following figure.
- Page 23 5. Continue to hold the insertion tool firmly at the incision site. Advance the plunger to insert the device. The plunger has a feature to stop the introducer when the device is at the proper depth. Do not force the plunger past the stop feature. Figure 4.
- Page 24 Figure 5. Remove the insertion tool 1. Measure R-wave amplitude and observe the signal quality on the Merlin™ PCS. Consider body position and arm movement as part of this assessment. If signals are small or unstable, remove the device, reload the device in the insertion tool, and reposition the device. See the Monitoring Devices Help manual for information about adjusting sensitivity parameters to match implant conditions.
- Page 25 NOTE: The device can be repositioned through the same incision, if desired. When repositioning the device, significantly change the insertion angle to ensure that the new device pocket does not merge with the previous pocket. 2. If deemed necessary, use the suture hole on the device header to secure the device to the underlying tissue.
-
Page 26: Explanting The Device
Reloading the Device To reload the device: Place the device into the insertion tool so that the lasermark (2) on the device reads toward the top of the insertion tool (1). Angle the device and position it under the first tab (3). Then press the device under the second tab (4) until it snaps into place. -
Page 27: Patient Education
Figure 7. Explant technique Patient Education St. Jude Medical provides a booklet for patients to explain the device and its operation, in addition to a patient manual to explain the myMerlin mobile application. You can use this to supplement your discussions with the patient, and caregiver or other interested persons. -
Page 28: Patient Identification Card
Patient Identification Card A patient identification (ID) card should be provided to all patients with a Confirm Rx™ ICM. The ID card indicates that the patient has an inserted cardiac monitor. Radiopaque Identification Each device has an x-ray absorptive marker for non-invasive identification. The two-letter model code is visible on a radiograph. - Page 29 Physical Specifications Device Specifications Table 5. Device specifications Specification Data Dimensions (h x l x t) (mm) 49 x 9.4 x 3.1 Weight (g) Displacement volume (cm Surface area of can electrode 105.9 Surface area of header 10.8 electrode (mm The dimensions, weight, and displacement volume are nominal values based on engineering model measurements.
-
Page 30: Battery Specifications
Table 5. Device specifications Specification Data Shortest distance between 39.85 electrodes (mm) Can and electrode material Titanium Header material Polyurethane and epoxy Coating Parylene The Confirm Rx™ device complies to EU MDR regulations for hazardous and toxic substances. Battery Specifications Table 6. - Page 31 Table 6. Battery specifications Parameter Data Number of cells One cell Battery voltage (beginning of 3.40 V service) Elective replacement voltage 2.81 V (ERI) End-of-service voltage (EOS) 2.67 V Longevity 2 years, under the following usage scenarios: ▪ Average of 1 auto-detected episode per day ▪...
-
Page 32: Battery Status
Battery Status The battery status is based on battery capacity, not battery voltage. It is determined primarily by device usage and is shown on the FastPath™ Summary window and on the Wrap-up™ Overview window. See the Monitoring Devices Help manual for more information. See also Battery Specifications above. -
Page 33: Anatel (Brazil)
Operation is subject to the following two conditions: ▪ ▪ This device may not cause harmful interference. ▪ ▪ This device must accept any interference received, including interference that may cause undesired operation. Modifications not expressly approved by the manufacturer could void the user’s authority to operate the equipment under FCC rules. -
Page 34: Wireless Technology Information
Identification Information for Product Registration This device has a label that contains, among other information, a product identifier in the following format: Table 7. Registration identification information Identifier Type Registration Identifier FCC registration number RIASJMRFICMDM3500 Industry Canada (IC) registration 8745A-DM3500123 number Wireless Technology Information The following table summarizes the technical details of the Bluetooth®... - Page 35 Table 8. Bluetooth low energy wireless technology information Parameter Data Range 2 m typical Center frequency 2.44 GHz Channel 40 channels Bandwidth 2 MHz per channel Data flow Bi-directional Protocol Bluetooth LE Radio Transmitter, Cables, Transducers The device contains a radio transmitter/receiver with the following parameters. Radio transmitter parameters: ▪...
-
Page 36: Quality Of Service For Wireless Technology
▪ ▪ Duty cycle: Variable, but low (<5%) ▪ ▪ Semi-duplex capability The radio receiver in the device is using the same frequency and bandwidth as the transmitter. Cables and transducers: Cables and transducers are not used during normal use of the device nor while programming the device. Quality of Service for Wireless Technology Bluetooth®... -
Page 37: Wireless Security Measures
The monitor creates a unique key for the paired unit and verifies it at the onset of every communication. If the unique key is not verified, the monitor denies access. Technical Support St. Jude Medical maintains 24-hour phone lines for technical questions and support: ▪ ▪... - Page 38 ▪ manuals.sjm.com For additional assistance, call your local St. Jude Medical representative. If, in the course of use of this device, you have reason to believe that a serious incident occurred, please report it to the manufacturer. For customers in the European Union, report the serious incident to your national authority as well as to the manufacturer.
- Page 39 Symbol Description Manufacturing facility Product literature Accessories Storage temperature. Temperature value is indicated adjacent to the symbol. Incision tool Insertion tool...
- Page 40 Sorting such waste and removing it from other forms of waste lessens the contribution of potentially toxic substances into municipal disposal systems and into the larger ecosystem. Return the device to St. Jude Medical at the end of its operating life.
- Page 41 Made in USA European conformity, affixed according to the relevant provisions of European Council Regulation 2017/745 (NB 2797 and RE directive 2014/53/EU Annex III. Hereby, St. Jude Medical declares that this device complies with the relevant provisions of this regulation and directive.
- Page 42 Symbol Description The full text of the European Union RE directive 2014/53/EU declaration of conformity is available at the following internet address: www.sjmglobal.com/euconformity. Importer Unique Device Identifier Medical Device Made in Malaysia Double sterile barrier FCC ID: XX00000 Federal Communication Commission Number (FCC ID: #) IC: 0000X-000 Industry Canada Radio Communications License (IC: #)
- Page 46 sjm.com 2022-01 ARTEN600140236 B *600140236*...
Need help?
Do you have a question about the Confirm Rx DM3500 and is the answer not in the manual?
Questions and answers