Advertisement
Quick Links
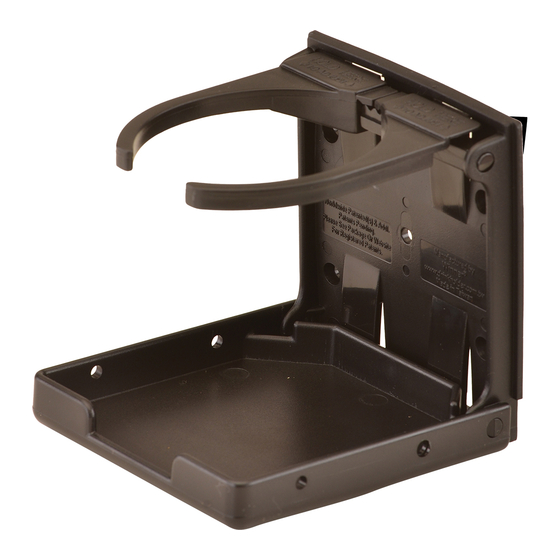
HOW TO ASSEMBLE YOUR
FOLDING CUP HOLDER
Item # CH-1000
1
Determine on which side, left
or right, the cup holder will be
installed. Align the rubber mat
inside of the mounting bracket
(Figure 1).
Note: The rubber mat is only
for a 7/8" tubing diameter. A 1"
tubing diameter does not need it.
2
Add the other mounting bracket to the opposite
side
. Ensure that the inner plastic gear faces the side
the cup holder will be attached to (Figure 2).
the two larger screws and washers through the
sides of the mounting bracket without the gear
and tighten with a phillips screw driver.
NO POWER TOOLS.
a.
Figure 1
Insert
Inner
Plastic
Gear
Figure 2
WHAT'S INCLUDED
a. (1) Cup Holder
c. (1) Anti-Slip Rubber Insert
b. (1) Hardware Set
d. (1) Rubber Mat
e. (2) Mounting Brackets
b.
d.
c.
3
Attach folding cup holder
on the inner plastic gear
and ensure the base of the
cup holder is parallel to the
ground (rotate cup holder to
adjust along gear if needed).
Secure with washer and small
screw (Figure 3).
5
Peel off the paper cover
from the anti-slip rubber
insert. Attach to the bottom
of the cup holder (Figure 5).
*Revised May 16, 2022
e.
4
Folding cup holder can be
adjusted by sliding the two
clamps to the appropriate size
(Figure 4). To fold up the cup
holder adjust the clamps to
the narrowest setting before
flipping the base up.
CLAMP ADJUSTMENT
Figure 4
Figure 3
Quick & Easy
Requires Phililps
Assembly
Screwdriver
Follow these
SIMPLE STEPS
Figure 5
Advertisement

Related Manuals for Nova CH-1000


Summary of Contents for Nova CH-1000
- Page 1 Requires Phililps Assembly Screwdriver Follow these FOLDING CUP HOLDER SIMPLE STEPS Item # CH-1000 Determine on which side, left Attach folding cup holder Folding cup holder can be or right, the cup holder will be on the inner plastic gear adjusted by sliding the two installed.
- Page 2 The warranty is void upon any sale or transfer of ownership or use by other person. NOVA warrants its products are free from defects in material and workmanship under NORMAL use for the period commencing upon the date of purchase and continuing...
Need help?
Do you have a question about the CH-1000 and is the answer not in the manual?
Questions and answers