
Related Manuals for Ei Electronics Ei3024


Summary of Contents for Ei Electronics Ei3024
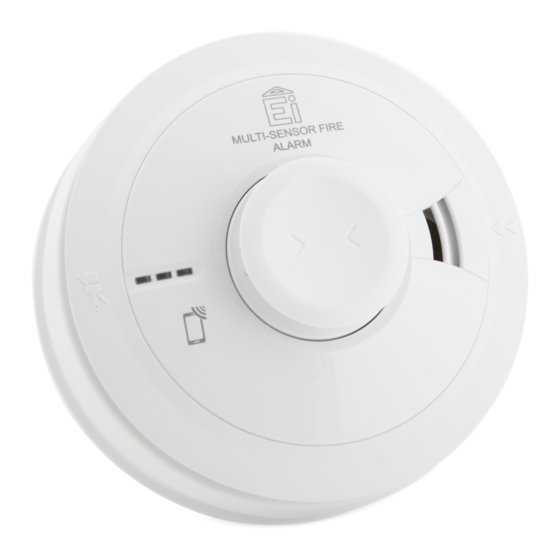
- Page 1 230V~ MULTI-SENSOR FIRE ALARM with Rechargeable Lithium Cell Back-up Ei2110e Series Instruction Manual INSTALLER Section...
-
Page 2: Table Of Contents
CONTENTS 1. QUICK GUIDE 1.1 INSTALLATION GUIDE 1.2 ALARM REMOVAL 2. HOW MANY ALARMS TO INSTALL 2.1 LD SYSTEMS 2.2 SELECTING ALARM TYPE 2.3 GRADE D SYSTEM 3. POSITIONING ALARMS 3.1 LOCATIONS TO AVOID 4. INSTALLATION 4.1 MOUNTING & WIRING ALARMS 4.2 INTERCONNECTING ALARMS... - Page 3 INSTALL IN THE CENTRE OF CEILING AT LEAST 300mm FROM LIGHT FITTINGS & WALLS INTERCONNECT ALL ALARMS ENSURE MAINS POWER IS CORRECTLY CONNECTED TO L & N TERMINALS ON ALL INTERCONNECTED ALARMS - OTHERWISE UNITS WILL BE DAMAGED DO NOT FIT ACTUAL ALARMS UNTIL ALL BUILDING WORK IS COMPLETED TO AVOID CONTAMINATION.
-
Page 6: How Many Alarms To Install
Optical Smoke Alarm or an Ionisation Smoke Alarm. (The Ei2110e Multi-Sensor Fire Alarm can also be used and interconnected with any Ei Electronics mains powered compatible Alarm if necessary). The advice here follows the guidance in British Standard BS 5839-Part 6:2013 in general (for further information see the BS standard itself). -
Page 7: Ld Systems
2.1 LD Systems LD (Life protection in Dwellings) systems define the level of fire protection required for households, depending on the fire risk and regulations. Ei Electronics recommends that an LD1 system be installed for optimum protection. Please see following pages for detailed information. - Page 8 Optimum Protection LD1: As LD2, but in addition Smoke or Heat Alarms should be located in all rooms and other areas of the dwelling. (apart from toilets or bathroom) BASIC PROTECTION Basic Protection LD2: Smoke or Heat Alarms in all rooms or areas that present a high fire risk to occupants.
-
Page 9: Selecting Alarm Type
2.2 Selecting Alarm Type Multi-Sensor Fire Alarm & Heat Alarm Selection Locations & Performance Alarm Type Heat Multi-Sensor Alarm Fire Alarm Locations Hall, Corridors, Escape Routes Kitchens Living Rooms Bedrooms Shower / Bathroom Fire Response Slow Smouldering Fires (polyurethane foam, ignited bedding etc.) Fast Flaming Fires (flaming wood/plastic, oil, solvents, chip pans etc.) Temperature >58... -
Page 10: Grade D System
1 Some Fire authorities (concerned with the slow response of Heat Alarms) advise that Smoke Alarms (or Multi-Sensor Alarms) should be fitted. This is acceptable according to BS 5839-6 provided there are clearly not going to be problems with nuisance alarms. Fit Heat Alarms only if nuisance alarms are very likely and it is acceptable that a warning will only be given by the Heat Alarm when there is a very significant flaming fire in the room. -
Page 11: Positioning Alarms
3. Positioning Alarms The locations must comply with applicable building regulations. Hot smoke rises and spreads out, so a central ceiling position is the preferred location. The air is “dead” and does not move in corners, therefore alarms must be mounted away from corners. -
Page 12: Locations To Avoid
3.1 Locations To Avoid DON’T place Multi-Sensor Fire Alarms in any of the following areas: • Bathrooms, kitchens, shower rooms, garages or other rooms where the Alarm may be triggered by steam, condensation, normal smoke or fumes. Keep at least 6 metres away from sources of normal smoke/fumes. -
Page 13: Installation
• Do not locate in insect infested areas. Small insects getting into the optical sensor chamber can cause intermittent alarms. Insects and contamination on the heat sensor can increase its response time. 4. Installation The Alarm is designed to be permanently mounted, using it’s own built-in terminal block to connect it to the mains. - Page 14 installed, first cover it completely, particularly around the edges, with a dust cover (eg. with the elasticated cover supplied or a plastic bag), until all cleaning is finished. The Alarm must not be connected when the house wiring insulation is being checked with high voltages.
-
Page 15: Mounting & Wiring Alarms
4.1 Mounting & Wiring Alarms 1. Select a location complying with the FOAM CEILING GASKET advice in previous sections (see pages 8-18). 2. Disconnect the AC mains supply from the circuit that is going to be used. 3. Lift off the wiring cover as shown in Figure 3. - Page 16 • check for Live using a neon tester. • check that the Interconnect wire is NOT connected to Live, Neutral or Earth. Do not use an Earth wire for the Interconnect line. N.B. The Alarm does not need to be earthed. However the terminal marked is provided for the convenience of the installer so that any copper Earth wire or cable coloured green &...
- Page 17 If the mains wires are being brought along the surface: (a) position the mounting plate so the cable trunking is as shown in Figure 4. (b) the mounting plate has a removable section, take it out to interface directly with 25mm trunking as shown in Figure 5.
-
Page 18: Interconnecting Alarms
4.2 Interconnecting Alarms Note: A maximum of twelve Ei2110e Multi-Sensor Fire Alarms can be interconnected in an Ei Electronics Alarm system. (Note the Multi-Sensor Fire Alarm Ei2110e can also be interconnected to Ei140RC / Ei160RC / Ei140e / Ei160e Series Smoke/Heat Alarms if required). - Page 19 • All Alarms must be cleaned and maintained regularly. • A qualified person must be on call to quickly remove any nuisance Alarms (i.e. Alarm with red light flashing rapidly) which are causing all the other Alarms to sound. WARNING: Do not connect these Alarms to any other type of Ei Alarm (apart from those listed above) or to any other model produced by another manufacturer.
- Page 20 Ensure the Alarms operate correctly - see “TESTING & MAINTAINING YOUR ALARM” section. Aico Ltd. Mile End Business Park, Maesbury Rd, Oswestry, Shropshire SY10 8NN, U.K. Tel: 01691 664100 www.aico.co.uk Ei Electronics. Shannon, Co Clare, Ireland. Tel:+353 (0)61 471277 www.eielectronics.com © Ei Electronics 2015...
- Page 21 230V~ MULTI-SENSOR FIRE ALARM with Rechargeable Lithium Cell Back-up Ei2110e Series Contains vital information on unit operation and installation. Read and retain carefully. If you are just installing this unit this leaflet MUST be given to the householder. Instruction Manual USER Section...
- Page 22 CONTENTS 1. REGULAR CHECKS 2. IMPORTANT INFORMATION 3. INDICATOR SUMMARY 4. MULTI-SENSOR FIRE ALARM FEATURES 5. TESTING & MAINTAINING YOUR ALARM 6. CLEANING YOUR ALARM 7. ALARM MEMORY 8. IMPORTANT SAFEGUARDS 9. PLANNING YOUR ESCAPE ROUTE 10. GETTING YOUR ALARM SERVICED 11.
-
Page 23: Regular Checks
1. REGULAR CHECKS Look for: Constant green light Red light flash every 40 sec. Press test button for 10 sec. Alarm will sound loudly. Vacuum around side vents to clean. -
Page 24: Important Information
2. IMPORTANT INFORMATION Do not paint your Alarm. Do not allow paint, water or dust to contaminate your Alarm. Your Alarm is a mains 230V AC electrical appliance. Do not open or insert anything into the Alarm. N.B. If the cause of an alarm is uncertain then it should be deemed to be an actual fire and the dwelling should be evacuated immediately. - Page 25 If the Alarm beeps and the yellow light flashes at the same time the battery is depleted – ensure green mains power light is on. If a nuisance alarm occurs, press the Test/Hush button to silence the Alarm for 10 minutes. Clean your Alarm regularly.
-
Page 26: Indicator Summary
3. Ei2110e INDICATOR SUMMARY Normal Operation Action Red LED Yellow LED Sounder Power up Slide on Base 1 Flash 1 Flash Standby 1 Flash every 48 Sec Sensing Fire Rapid flashing (0.5 sec) Full Sound Full Sound Sensing Fire Interconnect Fault Mode Action Red LED... -
Page 27: Multi-Sensor Fire Alarm Features
4. MULTI-SENSOR FIRE ALARM FEATURES The state of the art Ei2110e Multi-Sensor Fire Alarm, with its Heat enhanced Optical Smoke Sensor, has a significantly improved performance as described below. 1. Faster Response to a wider range of fires -The combination of the ultra fast temperature sensing thermistor and the high performance optical sensor within the Alarm, enhances the fire sensing performance such that the Alarm detects all the 7 different Test Fires (TF) specified in the standard BS ISO 7240-15: 2014. -
Page 28: Testing & Maintaining Your Alarm
5. RadioLINK + Upgradeable - The Ei2110e has modular RF capability when used in conjunction with the Ei100MRF RadioLINK + Module. This feature allows the Ei2110e to communicate with other RF devices as an alternative to a hard-wired interconnection. The Ei2110e can function in RF, hard-wired or hybrid systems. For more information on the added RadioLINK + features please visit www.eielectronics.com. - Page 29 WARNING: DO NOT TEST WITH FLAME This can set fire to the Alarm and damage the house We do not recommend testing with smoke or heat as the results can be misleading unless special apparatus is used. (iii) Check for any sign of contamination such as cobwebs or dust and clean the Alarm as described in the “CLEANING YOUR ALARM”...
-
Page 30: Cleaning Your Alarm
(i) Check that the green mains power light is on. If it is off the Alarm is not receiving mains power and is being powered from its internal back-up cells. The beeps indicate that these cells are depleted. The cells are not replaceable. Check fuses, circuit breakers and wiring to determine the cause of the interruption to the mains power supply. - Page 31 Automatic Dust Compensation. The Alarm monitors the contamination build-up in the chamber and then slowly compensates for it over an extended period - this is to ensure that a slow burning smouldering fire over a long period is not confused with dust build-up. If the contamination has occurred quickly (e.g.
-
Page 32: Alarm Memory
Hush Feature The Alarm has a combined Test/Hush Button to help you control nuisance false alarms. To silence a false alarm, press the Test/Hush Button located on the cover. This condition allows unwanted alarms to be silenced for a period of approximately 10 minutes. When in ‘Hush’... -
Page 33: Important Safeguards
8. IMPORTANT SAFEGUARDS When a fire Alarm system is installed, basic safety precautions should always be followed, including those listed below: • Please read all instructions. • Rehearse emergency escape plans so everyone at home knows what to do in case the Alarm sounds. - Page 34 1. Check room doors for heat or smoke. Do not open a hot door. Use an alternate escape route. Close doors behind you as you leave. 2. If smoke is heavy, crawl out, staying close to floor. Take short breaths, if possible, through a wet cloth or hold your breath. More people die from smoke inhalation than from flames.
- Page 35 Limitations of Fire Alarms Fire Alarms have significantly helped to reduce the number of fire fatalities in countries where they are widely installed. However independent authorities have stated that they may be ineffective in some circumstances. There are a number of reasons for this: •...
-
Page 36: Getting Your Alarm Serviced
11. FIVE YEAR GUARANTEE Ei Electronics guarantees this Alarm for five years from date of purchase against any defects that are due to faulty materials or workmanship. This guarantee only applies to normal conditions of use and service, and does not include damage resulting from accident, neglect, misuse, unauthorised dismantling, or contamination howsoever caused. -
Page 37: Troubleshooting
LED will flash twice (1 second apart) every 48 seconds for 24 hours (or until the test button is pressed, which ever is the shorter). If an optional Ei Electronics Control Switch is installed, press Locate when the system is sounding to identify the source of the alarm. - Page 38 3. REGULAR OR IRREGULAR SINGLE BEEPS: Check the green mains power light is on. If not, check the fuse, circuit breakers and wiring connections. If the green light is off, the internal back-up cells will deplete after some months and will need to be recharged. Reinstate the mains supply to the Alarm and the back-up cells will automatically recharge.
- Page 39 Block E1 The crossed out wheelie bin symbol that is on your product indicates that this product should not be disposed of via the normal household waste stream. Proper disposal will prevent possible harm to the environment or to human health. When disposing of this product please separate it from other waste streams to ensure that it can be recycled in an environmentally sound manner.
- Page 40 0086 Ei Electronics, Shannon, Co. Clare, Ireland DoP No.15-0005 EN14604:2005 + AC:2008 Smoke Alarm Devices: Ei2110e Fire Safety Nominal activation conditions/ sensitivity, Pass Vibration resistance Pass response delay (response time) and performance under fire condition Pass Pass Operational reliability Humidity resistance...
Need help?
Do you have a question about the Ei3024 and is the answer not in the manual?
Questions and answers