Garmin TREAD Owner's Manual
Hide thumbs
Also See for TREAD:
- Owner's manual (176 pages) ,
- Installation instructions manual (14 pages) ,
- Owner's manual (38 pages)
Table of Contents
Advertisement
Quick Links
Advertisement
Table of Contents
Troubleshooting

Related Manuals for Garmin TREAD


Summary of Contents for Garmin TREAD
- Page 1 TREAD ® Owner’s Manual...
- Page 2 © 2023 Garmin Ltd. or its subsidiaries All rights reserved. Under the copyright laws, this manual may not be copied, in whole or in part, without the written consent of Garmin. Garmin reserves the right to change or improve its products and to make changes in the content of this manual without obligation to notify any person or organization of such changes or improvements. Go to www.garmin.com...
-
Page 3: Table Of Contents
Table of Contents Turning the Radio Off......9 Enabling Push-to-Talk with a Headset..........9 Getting Started......... 1 Transmitting Your Voice..... 9 Acquiring GPS Signals......1 Adjusting the Radio Volume....9 Status Bar Icons........1 Radio Settings........9 Using the Touchscreen......1 inReach®... - Page 4 Adding a Location to Your Route..33 Editing a Routine......23 Shaping Your Route......33 Deleting a Routine......23 Avoiding Delays, Tolls, and Areas..33 Tread Audio App........24 Avoiding Road Features....33 LED Controls........24 Custom Avoidances......33 Enabling LED Groups..... 25 Avoiding a Road......
- Page 5 Arriving at Your Destination....34 Location..........41 Changing the Route Calculation Adding a Shortcut......... 41 Mode............34 Removing a Shortcut......41 Taking a Route Using Garmin Adventurous Routing™......34 Saving Locations........41 Taking a Detour........35 Saving a Location......41 Going Home........... 35 Saving a Waypoint on the Map..
- Page 6 Tools and Materials Needed.... 54 Computer........... 68 Tread Audio Box Mounting Transferring Data From Your Considerations........54 Computer........... 69 Mounting the Tread Audio Box Black Disconnecting the USB Cable... 69 Box Device........54 Adding BaseCamp™ Data to Connections........54 Garmin Explore........69 Port Identification......
-
Page 7: Getting Started
® signal strength. Active vehicle profile. Current time. Battery charge level. Tread app connection status (Pairing with Your Smartphone, page 26). Using the Touchscreen • Tap the screen to select an item. • Drag or swipe your finger across the screen to pan or scroll. -
Page 8: Steering Wheel Controls
Steering Wheel Controls In some vehicles, you can control menus on your navigation system using the steering wheel controls. See your vehicle owner's manual for more information about vehicle controls. Using the On-Screen Buttons On-screen buttons allow you to navigate the pages, menus, and menu options on your device. •... -
Page 9: Off-Road Navigation Features
Off-Road Navigation Features Routes A route is a path from your current location to one or more destinations. • For off-road use, you can set the device to calculate point-to-point routes in a straight line (Straight Line Routes, page 4). • The device calculates a recommended route to your destination based on the preferences you set, including the route calculation mode (Changing the Route Calculation Mode, page 34) and avoidances... -
Page 10: Straight Line Routes
Straight Line Routes For areas without defined roads or trails, the device guides you to your destination using a straight line route. You can set multiple waypoints to navigate a route through areas without roads. Distance to the destination. Route highlighted on the map. Vehicle speed. -
Page 11: Recording Tracks
3 Select Go!. Viewing Your Collections on the Map Before you can view the Collections map layer, you must pair your device with the Tread app and sync your device with your Garmin Explore account. You can view your Garmin Explore collections directly on the map. You must enable the collections map layer to use this feature. -
Page 12: Adjusting Warning Angles
• To start a group ride with riders that have a Group Ride mount, select Create a Radio Group Ride. • To start a group ride with riders using the Tread app, select Create a Mobile Group Ride. 5 If necessary, select the radio channel, and select Next. -
Page 13: Rejoining A Recent Group Ride
Rejoining a Recent Group Ride You can rejoin any of your ten most-recent group rides. 1 From the main menu, select Group Ride > Recent Group Rides. 2 Select a recent group ride, and select Join. Adding Riders to a Group Ride You can add riders to a group ride that is already in progress. -
Page 14: Exiting A Group Ride
You can use the Radio app to create radio presets, select a radio channel, and select squelch codes. To use this feature, you must connect the device and the antenna to the Group Ride mount. The Tread device configures radio settings automatically when you join or create a group ride. -
Page 15: Selecting A Roger Tone
3 Select Push to Talk with Headset. 4 Select Transmitting Your Voice Before you can transmit your voice, you must pair your Tread device with a compatible Bluetooth headset. You can transmit your voice over the radio using a compatible Bluetooth headset. Select an option: •... -
Page 16: Connecting An Inreach Device
You should only use the SOS function in a real emergency situation. Initiating an SOS Rescue WARNING Before you can initiate an SOS rescue using your Tread navigator, you must pair it with a compatible inReach satellite communicator (Connecting an inReach Device, page 10). -
Page 17: Canceling An Sos Rescue
Canceling an SOS Rescue If you no longer need assistance, you can cancel an SOS rescue after it is sent to the emergency response service. Select Cancel SOS. Your device transmits the cancellation request. When you receive a confirmation message from the emergency response service, the device returns to normal operation. -
Page 18: Viewing A Map Tool
Viewing a Map Tool 1 From the map, select 2 Select a map tool. The map tool appears in a panel at the edge of the map. 3 When you are done using the map tool, select Up Ahead The Up Ahead tool provides information about upcoming locations along your route or the road on which you are traveling. -
Page 19: Trip Information
Trip Information Viewing Trip Data from the Map From the map, select > Trip Data. Customizing the Trip Data Fields 1 From the map, select > Trip Data. 2 Select a trip data field. 3 Select an option. The new trip data field appears in the trip data map tool. Resetting Trip Information 1 From the map, select Speed. -
Page 20: Changing The Map Buttons
The dog tracking features allow you to see information transmitted from your compatible Garmin ® handheld dog device on your Tread device. You can navigate to your dogs, view their current status and location, and observe the distance they have traveled. Receiving Data From Your Handheld Device Before you can receive data, you must enable broadcasting on your handheld dog device. -
Page 21: Dog Status Icons
Dog Status Icons Icons indicate the status and location of your dogs. Sitting Running On point Treed Unknown* Collar battery low Collar connection lost Collar GPS reception lost *The unknown status icon indicates the collar has not acquired a satellite signal and the handheld device cannot determine the location of the dog. -
Page 22: Changing The Vehicle Information Data Fields
Changing the Vehicle Information Data Fields You can change the direction, elevation, sunrise and sunset, location, and time of day data fields on the odometer and trip vehicle information page. 1 Select 2 If necessary, select , and select a data field. 3 Select a type of data to display. -
Page 23: Birdseye Imagery
BirdsEye Imagery BirdsEye imagery provides downloadable, high-resolution map imagery, including detailed satellite imagery and raster-based topographical maps. You can download BirdsEye Satellite Imagery directly to your device when it is connected to a Wi‑Fi network. Downloading BirdsEye Imagery Before you can download BirdsEye imagery directly to your device, you must connect to a wireless network (Connecting to a Wireless Network, page 44). -
Page 24: Editing And Reordering Locations In A Route
Editing and Reordering Locations in a Route 1 Select Apps > Navigation > Route Planner. 2 Select a saved route. 3 Select List. 4 Select a location. 5 Select an option: • To change the location, select , and enter a new location. •... -
Page 25: Saving Your Recent Track As A Route
Saving Your Recent Track as a Route You can save your recent track as a route, which you can navigate later using the route planner (Navigating to a Saved Route, page 18). 1 Select Apps > Adventure > TracBack. Your recent track appears on the map. 2 Select >... -
Page 26: Garmin Powerswitch™ App
Displays Garmin PowerSwitch device tabs and custom layout tabs Activating a Power Switch Before you can use the Garmin PowerSwitch app to activate a switch, you must install your Garmin PowerSwitch device in your vehicle and pair it with the Garmin PowerSwitch app. -
Page 27: Customizing A Button
Before you can use control input functions, you must connect a control input to your Garmin PowerSwitch device (Connecting a Control Input, page 51). You can assign one or more switches to turn on when the Garmin PowerSwitch device receives a signal from a control input. 1 Select 2 Select your Garmin PowerSwitch device. -
Page 28: Adding A Button To A Custom Layout
Routines Routines automate your Garmin PowerSwitch device. When you define a routine on your compatible Garmin navigation device, it turns switches on or off automatically when the conditions of the routine are met. For example, you can set a routine to turn on a switch at specific time each day or when your vehicle reaches a specific speed. -
Page 29: Adding A Routine
Adding a Routine 1 From the Garmin PowerSwitch app, select > Routines. 2 If necessary, select Add Routine. 3 Select When. 4 Select a trigger: • To set a switch to trigger when your vehicle reaches a specific speed, select Speed > Next, and follow the on-screen instructions to enter speed thresholds. -
Page 30: Tread Audio App
Tread Audio App Before you can use the controls in the Tread Audio app, you must install your Tread Audio Box and Tread 6.5" XS-LED Tower Speakers in your vehicle and pair the Tread Audio Box with the Tread Audio app. -
Page 31: Enabling Led Groups
By default, the controls for LED groups RGB 1 and RGB 2 are enabled. Enabling an LED group allows you to use the LED lighting controls for that group. You can enable the LED group for the Tread 6.5" XS-LED Tower Speakers or any additional speakers or addressable LEDs after you set up and pair them with your Tread Audio Box. -
Page 32: Live Services, Traffic, And Smartphone Features
1 From the app store on your smartphone, install the Tread app. 2 Turn on your Tread device, and place the device and your smartphone within 3 m (10 ft.) of each other. 3 On your phone, open the Tread app. -
Page 33: Pairing Additional Bluetooth Devices
Do not read or interact with notifications while driving, because doing so can cause distraction that could lead to an accident resulting in serious personal injury or death. Before you can use this feature, your device must be connected to a supported phone running the Tread app (Pairing with Your Smartphone, page 26). -
Page 34: Viewing The List Of Notifications
All features may not be available for your phone. Using Bluetooth wireless technology, your device can connect to your compatible mobile phone and wireless headset or helmet to become a hands-free device. To check compatibility, go to www.garmin.com/bluetooth. Placing a Call 1 Select Apps >... -
Page 35: Enabling Or Disabling Bluetooth Features
Showing or Hiding Notification Categories for Your Apple Device ® If you are connected to an Apple device, you can filter the notifications shown on your Tread device by showing or hiding categories. 1 Select Apps > Tools > Smart Notifications >... -
Page 36: Street Navigation
Street Navigation Starting a Route 1 Select Where To, and search for a location. 2 Select a location. 3 Select an option: • To start navigating using the recommended route, select Go!. • To choose an alternate route, select , and select a route. Alternate routes appear to the right of the map. -
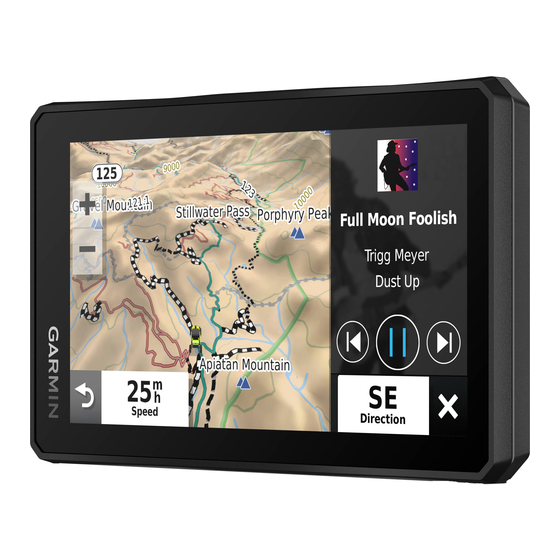
Page 37: Your Route On The Map
Your Route on the Map As you travel, the device guides you to your destination using voice prompts and information on the map. Instructions for your next turn or exit, or other actions appear across the top of the map. Next action in the route. -
Page 38: Active Lane Guidance
Active Lane Guidance As you approach some turns, exits, or interchanges in your route, a detailed simulation of the road appears beside the map, if available. A colored line indicates the proper lane for the turn. Viewing Turns and Directions While navigating a route, you can view upcoming turns, lane changes, or other directions for your route. -
Page 39: Changing Your Active Route
Changing Your Active Route Adding a Location to Your Route Before you can add a location to your route, you must be navigating a route (Starting a Route, page 30). You can add locations to the middle or end of your route. For example, you can add a fuel station as the next destination in your route. -
Page 40: Avoiding An Area
• Select Turn-by-Turn to calculate routes on streets and trails. • Select Straight Line to calculate point-to-point routes (without roads). Taking a Route Using Garmin Adventurous Routing ™ Your device can calculate adventurous routes that prefer curvy roads, hills, and fewer highways. This feature can provide a more enjoyable ride, but it may increase the time or distance to your destination. -
Page 41: Taking A Detour
Taking a Detour You can take a detour for a specified distance along your route or detour around specific roads. This is useful if you encounter construction zones, closed roads, or poor road conditions. 1 From the map, select > Edit Route. 2 Select an option: •... -
Page 42: Finding A Location Using The Search Bar
Select a location to view the option menu. Select to view detailed information about the location. Select to view alternate routes to the location. Select to start navigating using Garmin Adventurous Routing. Select to start navigating to the location using the recommended route. Finding and Saving Locations... -
Page 43: Changing The Search Area
Synchronizing Garmin Explore Account Data Before you can synchronize account data, you must connect to the Tread app and enable Garmin Explore. You can synchronize data, such as tracks, with your Garmin Explore account. This can be helpful to keep your data available on each of your compatible devices. -
Page 44: Finding National Parks
Finding National Parks Device models that include maps for North America or the United States also include detailed information for national parks in the United States. You can navigate to a national park or to a location within a national park. NOTICE You are responsible for understanding and complying with any applicable rules, laws, or regulations associated with national parks. -
Page 45: Finding Adventure Points
3 Select a location. Tripadvisor NOTICE Garmin is not responsible for the accuracy or timeliness of the Tripadvisor information. You are responsible for understanding and complying with any applicable rules, laws, or regulations associated with points of interest. Your device includes Tripadvisor traveler ratings. Tripadvisor ratings appear automatically in the search results list for restaurants, hotels, and attractions. -
Page 46: Finding An Address
• To save the coordinates as a location, select Save. • To start a route to the coordinates, select Go!. Finding Fuel Stations and Prices Before you can use this feature, your device must be connected to a supported phone running the Tread app (Pairing with Your Smartphone, page 26). -
Page 47: Getting Directions To Your Current Location
Getting Directions to Your Current Location If you need to tell another person how to get to your current location, your device can give you a list of directions. 1 From the map, select the vehicle. 2 Select > Directions to Me. 3 Select a starting location. -
Page 48: Editing A Saved Location
Editing a Saved Location 1 Select Where To > Waypoints. 2 If necessary, select a category. 3 Select a location. 4 Select 5 Select > Edit. 6 Select an option: • Select Name. • Select Phone Number. • Select Categories to assign categories to the saved location. •... -
Page 49: Driver Awareness Features And Alerts
The driver alerts and speed limit features are for information only and do not replace your responsibility to abide by all posted speed limit signs and to use safe driving judgment at all times. Garmin is not responsible for any traffic fines or citations you receive for failing to follow all applicable traffic laws and signs. -
Page 50: Map Display Settings
Units: Sets the units of measure. myMaps: Sets which installed maps the device uses. Enabling Maps You can enable map products installed on your device. TIP: To purchase additional map products, go to garmin.com/maps. 1 Select > Map Display > myMaps. 2 Select a map. -
Page 51: Display Settings
Legal Information: Allows you to view the end-user license agreement (EULA) and software license information. Regulatory Information: Displays e-label regulatory and compliance information. Garmin Device Information: Displays hardware and software version information. Enabling or Disabling Location Services The location services feature must be enabled for your device to find your location, calculate routes, and provide navigational assistance. -
Page 52: Tread Specifications
• You can connect the device to a Wi‑Fi network to update directly on the device (recommended). This option allows you to update your device conveniently without connecting it to a computer. • You can connect the device to a computer and update it using the Garmin Express application (garmin.com... -
Page 53: Updating Maps And Software Using A Wi-Fi Network
This allows you to keep your device up to date without connecting it to a computer. 1 Using the included USB cable, connect the device to external power. NOTE: A USB power adapter is not included. Go to the product page on garmin.com to purchase a power adapter accessory. -
Page 54: Troubleshooting
Incorrectly wiring the power cable can result in damage to the vehicle or the battery and can cause bodily injury. You can use a connected Garmin PowerSwitch device to control lights, fans, and more from your Tread device. Mounting Considerations •... -
Page 55: Mounting The Device
Avoid wires, gauges, air bags, air bag covers, HVAC, and other items when drilling pilot holes and attaching the mount to the vehicle. Garmin is not responsible for any damages or consequences arising from the installation. 1 Place the mount on the selected location. -
Page 56: Opening The Front Cover
Opening the Front Cover You must open the front cover to make electrical connections. 1 Lift the front cover latch and rotate it counter-clockwise. 2 Pull the front cover off of the device. Appendix... -
Page 57: Connecting Accessories
Accessory requirements: • Verify the amperage rating of each accessory before wiring it to the Garmin PowerSwitch device. The device supports accessories up to 30 A for each channel and a maximum of 100 A for the entire system. -
Page 58: Connecting The Device To Vehicle Power
Pairing with a Garmin Navigation Device You can pair your Garmin PowerSwitch device with a compatible Garmin navigation device. 1 Turn on power to your Garmin PowerSwitch device, and place your compatible Garmin navigation device within 1 m (3.3 ft.) of it. -
Page 59: Garmin Powerswitch Specifications
You can use a connected Tread Audio system to control audio and LED lights from your Tread device. The device withstands incidental exposure to water of up to 1 m for up to 30 min. For more information, go to www.garmin.com/waterrating. Appendix... -
Page 60: Tools And Materials Needed
• To avoid interference with a magnetic compass, you should install the device at least 203 mm (8 in.) away from a compass. Mounting the Tread Audio Box Black Box Device Before you mount the device, you must select a mounting location, and determine what screws and other mounting hardware are needed for the surface. -
Page 61: Port Identification
Port Identification Item Description FUSE Contains the 15 A fuse for the LED outputs. Not used. Connects the device to the auxiliary in and line/subwoofer out wiring harness. Connects the device to the ground terminal wire (GND). Connects the device to the +12V terminal wire. Connects the device to the AM/FM antenna. -
Page 62: Speaker And Led Wiring Harness Wire And Connector Identification
Speaker and LED Wiring Harness Wire and Connector Identification Wire Group Wire Color and Description Red: Connects to the vehicle accessory line. If the ignition wire is unused, ground the Ignition ignition wire or leave it disconnected. Blue: Connects to an optional external amplifier to turn it on when the stereo turns on. Amplifier on White: Left (+), Connects to the included speaker. -
Page 63: Rca Wiring Harness Wire And Connector Identification
Addressable LED Wiring Considerations You can wire addressable LED lights to your Tread Audio Box. For more information, see the manual for your addressable LED lights. Compatible addressable LED types: • WS2812B • WS2813 Addressable LED LED Wire Color and Function... -
Page 64: Connecting The Device To Vehicle Power
Connecting the Device to Vehicle Power You should always confirm all electrical connections are secure and will not come loose while operating the device. NOTICE If the ignition wire is not used, do not tie the ignition to the positive terminal on the vehicle battery. Ground the ignition wire or leave it disconnected. -
Page 65: Using The Heat-Shrink Crimp Connectors
Using the Heat-Shrink Crimp Connectors You should use the included heat-shrink crimp connectors to make a water-tight connection between the bare wires. WARNING Only use the heat gun to apply heat to the heat-shrink crimp connectors in a well-ventilated area. Do not use the heat gun near clothing or bare skin. -
Page 66: Speaker Zones
Item Description Zone 2 speakers Water-tight connection Zone 1 speakers Amplifier-on signal wire Powered amplifier Line out and subwoofer out Subwoofer Speaker Zones You can group speakers in one area into speaker zones. This enables you to control the audio level of the each zone individually. -
Page 67: Wireless Remote Mounting Considerations
Wireless Remote Mounting Considerations NOTICE Selecting the correct mounting location is critical to optimize the performance of the wireless remote. • You must mount the wireless remote in a location that is within 10 m (33 ft.) of the stereo. • You must mount the wireless remote in a location where it is not submerged. •... -
Page 68: Mounting The Speakers And Brackets
Mounting the Speakers and Brackets You can mount the Tread 6.5" XS-LED Tower Speakers to a roll bar using the included brackets. When installing the speaker and bracket, you can route the speaker and LED cable along the roll bar. -
Page 69: Wiring
) for speaker wires. • Use 20 AWG (0.52 mm ) for LED wires. Additional Speakers You can wire additional Tread 6.5" XS-LED Tower Speakers together. Refer to the owner's manual for your stereo system at garmin.com/express for more information. Appendix... -
Page 70: Wireless Remote Overview
Radio and AUX sources: Press to mute or un-mute. Other sources: Press to pause or resume. Connecting the Wireless Remote to your Tread Audio Box 1 Bring the Tread Audio System remote within 10 m (33 ft.) of the compatible stereo. NOTE: Stay 10 m (33 ft.) away from other ANT ®... -
Page 71: Pairing With A Garmin Navigation Device
Your navigation device may not support the Tread Audio device without the latest software. For more information about updating the device software, see the owner's manual for your navigation device. 2 Turn on power to your Tread Audio device, and place your compatible Garmin navigation device within 1 m (3.3 ft.) of it. -
Page 72: Tread 6.5" Xs-Led Tower Speakers Specifications
Tread 6.5" XS-LED Tower Speakers Specifications Max. power 200 W RMS power 50 W Sensitivity (1 W/1 m) 91 dB Frequency response From 80 Hz to 18 kHz Recommended amplifier power (RMS, playing music) From 20 to 150 W Nominal voice coil diameter 30 mm Impedance 4 ohms Operating temperature range From 0 to 50°C (from 32 to 122°F) -
Page 73: Bracket Specifications
Bracket Specifications Material Aluminum alloy with silicone pads Supported roll bar sizes From 33.4 mm (1.31 in.) to 50.8 mm (2.00 in.) outer diameter Bracket Side Dimensions 85 mm (3 in.) From 74 mm (2 in.) to 94 mm (3 in.) Bracket Top Dimensions 37 mm (1 in.) 48 mm (2 in.) Data Management The device has a memory card slot for additional data storage. -
Page 74: About Memory Cards
About Memory Cards You can purchase memory cards from an electronics supplier, or purchase pre-loaded Garmin mapping software (www.garmin.com). Memory cards can be used to store files such as maps and custom POIs. Installing a Memory Card for Maps and Data You can install a memory card to increase the storage space for maps and other data on your device. -
Page 75: Transferring Data From Your Computer
Adding BaseCamp Data to Garmin Explore ™ You can export your BaseCamp data files and import them to Garmin Explore for use with your Tread device. 1 Export your data from BaseCamp: • If you are using an Apple computer, see Exporting Data from BaseCamp with an Apple Computer, page 69. -
Page 76: Importing Data To Garmin Explore
2 Select the Map tab. 3 Select 4 Follow the on-screen instructions. The data syncs to the Tread app and your Tread device automatically. Purchasing Additional Maps 1 Go to your device product page at garmin.com. 2 Click the Maps tab. - Page 78 January 2024 GUID-700B8BF2-F8BB-42A2-A617-3CC00CB4CCA0 v2...
Need help?
Do you have a question about the TREAD and is the answer not in the manual?
Questions and answers