Subscribe to Our Youtube Channel
Summary of Contents for SPORTNOW A61-046V00
- Page 1 IN230800234V01_DE A61-046V00 60MIN WICHTIG - BITTE HEBEN SIE DIESE ANLEITUNG FÜR EINE SPÄTERE BEZUGNAHME AUF: SORGFÄLTIG DURCHLESEN MONTAGEANLEITUNG...
- Page 4 Höheneinstellung Verwenden Sie die Schrauben 'F1', 'F2' und 'A3' wie in der Abbildung gezeigt, um die Höhe des Produkts einzustellen.
- Page 5 Rohrabdeckung oben Wasserdeckel unten M8x35mm M8x110mm M8x16mm M8x20mm M8x90mm M10x85mm...
- Page 6 Wie in der Abbildung rechts gezeigt, kann Stück Pappe oder ein Holzbrett verwendet werden, wenn Grate oder Verformungen an der Rohrverbindung vorhan- den sind. Einfach unter das untere Rohr legen und gegen den verengten Teil des Rohrs klopfen. Wie in der linken Abbildung gezeigt, wird der obere, verengte Teil des Rohres (Y) in den unteren Teil des Mittelrohrs (X) eingeführt.
- Page 7 Verwenden Sie die Schraubenkombinationen (B1 und B4), um die Körbe (J und M) und die klauenförmige Halterung (K) wie in der Abbildung gezeigt zu verbinden. Hin- weis: Die beiden federbelasteten Schraubenkombinationen (B4, B5, B6 und B7) müssen mit den beiden Löchern am Korb verbunden werden. Wie in der Abbildung gezeigt, die Schrauben (C1 und C2) verwenden, um das obere Ende der klauenförmigen Halterung (K) an der Rückseite der Rückwand (M) zu befes- tigen, und dann die Schrauben anziehen.
- Page 8 Das obere Ende des Rohrs oben(W) mit den Schrauben (F1, F2 und A3) in der Mitte der klauenförmigen Halterung (K) befestigen (siehe Abbildung). installierte Rohr oben(W) in das Mittelrohr (X) einführen und das Mittelrohr und das Rohr oben mit zwei Schrauben (F) befestigen.
- Page 9 Das Netz (L) wie abgebildet an der Rand (J) befestigen. Sand Wasserkappe Wasser Wenn das Produkt nicht viel bewegt wird, Sand statt Wasser in den Sockel füllen, um Gefrieren und Beschädigungen zu vermeiden. Hinweis: Ist der Sand einmal in den Sockel gefüllt, kann er nicht mehr entfernt werden.
-
Page 10: Assembly Instruction
IN230800234V01_EN A61-046V00 60MIN IMPORTANT, RETAIN FOR FUTURE REFERENCE: READ CAREFULLY ASSEMBLY INSTRUCTION -10-... - Page 11 -11-...
- Page 12 -12-...
-
Page 13: Height Adjustment
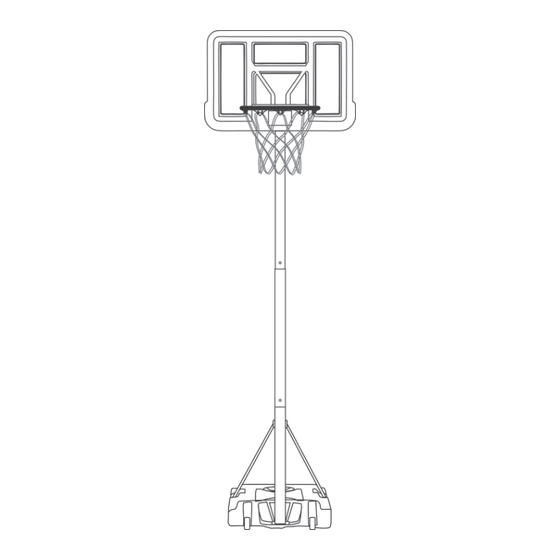
Height adjustment As shown in the figure, use the screws ‘F1’, ‘F2’ and ‘F3’ to adjust the product’s height. -13-... - Page 14 Upper pipe cover Base water cover M8x35mm M8x110mm M8x16mm M8x20mm M8x90mm M10x85mm -14-...
- Page 15 As shown in the right figure, if there are any burrs or defor- mations at the pipe connec- tion, you can use a piece of cardboard wooden board. Simply place beneath the lower pipe and tap it against the narrowed section of the pipe.
- Page 16 As shown in the figure, use the screw combinations (B1 and B4) to connect the bas- kets (J and M) and the claw-shaped bracket (K). Note: The two spring-loaded screw combinations (B4, B5, B6 and B7) must be connected to the two holes on the basket. As shown in the figure, use the screw combinations (C1 and C2) to fix the upper end of the claw-shaped bracket (K) to the rear of the backboard (M), then tighten the screws.
- Page 17 As shown in the figure, use screw combinations (F1, F2 and F3) to fix the upper end of the upper tube (W) in the middle of the claw-shaped bracket (K). Insert the installed upper pipe (W) into the middle pipe (X), then use two screws (F) to secure the middle pipe and upper pipe.
- Page 18 Install Net (L) on Rim (J) as shown. Sand Water Cap Water If you are not moving the product a lot, use sand, not water, in the base to avoid freez- ing and damage. Note: You cannot empty the sand once it is in the base. -18-...
- Page 19 -19-...


Need help?
Do you have a question about the A61-046V00 and is the answer not in the manual?
Questions and answers