Table of Contents
Advertisement
Quick Links
Advertisement
Table of Contents

Related Manuals for Roland BRIDGE CAST X


Summary of Contents for Roland BRIDGE CAST X
- Page 1 BRIDGE CAST X Owner’s Manual...
-
Page 2: Table Of Contents
Table of contents Table of contents BRIDGE CAST X Owner’s Manual ................................. 4 Panel descriptions (on BRIDGE CAST X) ..............................6 Top panel ........................................6 Rear panel ........................................11 Installing the dedicated app and driver ..............................15 About the BRIDGE CAST app ..................................15 Installing the BRIDGE CAST app and driver .............................. - Page 3 Backing up/restoring the settings on this unit ............................78 Restoring the factory settings (Factory Reset) ............................82 Other Settings ......................................83 Using background music and sound effects from Roland Cloud (BGM CAST) ................. 85 Signing in to Roland Cloud ..................................85 Using background music ..................................... 86 Using sound effects ......................................
-
Page 4: Bridge Cast X Owner's Manual
BRIDGE CAST X Owner’s Manual BRIDGE CAST X Owner’s Manual Supplying power to this unit You can power this unit via USB bus power if the computer to which it is connected can supply 5 V/3 A of power. Connect your computer to the USB II port. For details, see “USB II... - Page 5 BRIDGE CAST X Owner’s Manual About the “BRIDGE CAST” dedicated app The BRIDGE CAST app is a dedicated app used for configuring the settings of this unit and helps you to use this unit’s features (for computers running Windows/macOS). You can use this app for a variety of operations, such as adjusting the mic sound quality, adjusting the game sound or voice chat audio, backing up/restoring the settings on this unit and more.
-
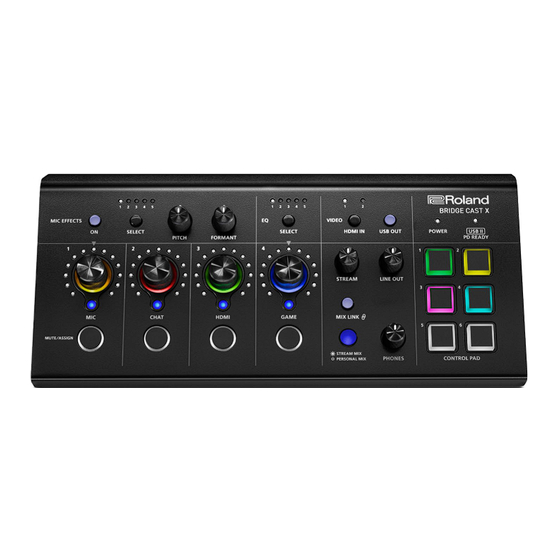
Page 6: Panel Descriptions (On Bridge Cast X)
Panel descriptions (on BRIDGE CAST X) Panel descriptions (on BRIDGE CAST X) This section explains the names of the components of the BRIDGE CAST and how each one works. â panel(P.6) â Rear panel(P.11) Top panel You can use the “BRIDGE CAST” dedicated app to access more detailed settings. For details, refer to “About the BRIDGE CAST... - Page 7 Panel descriptions (on BRIDGE CAST X) Adjusting the input gain (sensitivity) Hold down the MIC EFFECTS [ON] button and turn the CH [1] knob. â BRIDGE CAST app: Adjusting the input gain (sensitivity)(P.35) MIC EFFECTS [SELECT] button This recalls a mic effect preset. Each press of the button cycles between settings 1 through 5 in order.
- Page 8 Panel descriptions (on BRIDGE CAST X) VIDEO [USB OUT] button state Video output VIDEO [USB OUT] button operation Unlit Computer does not recognize Video is not output. When the button is dark, it lights up when the BRIDGE CAST X as a pressed.
- Page 9 Panel descriptions (on BRIDGE CAST X) STREAM MIX bus Unlit PERSONAL MIX bus When the input source is “MIC” (mic audio) The buses are switched as followed. STREAM MIX bus – Unlit PERSONAL MIX bus Set which source to operate from using the MIC/PERSONAL selector switch(P.29) in...
- Page 10 This area indicates the power status of the BRIDGE CAST X. POWER indicator This lights up when the necessary power is supplied to operate the BRIDGE CAST X from the POWER IN port or the USB II port. USB II PD READY indicator...
-
Page 11: Rear Panel
Panel descriptions (on BRIDGE CAST X) Rear panel About the included USB cable This unit includes two USB cables. The USB cable with the “POWER” tag supports USB 2.0, and the other USB cable supports USB 3.2. * Do not use the included USB cables with any other equipment besides this unit. - Page 12 MIDI messages can be transmitted and received. (STREAM MIX https://roland.cm/bridgecast_om bus audio) ● “BRIDGE CAST X-I CTRL” and “BRIDGE CAST X-I APP” are PERSONAL recognized as MIDI devices when accessing from a MIDI- (PERSONAL MIX compatible app on your computer.
- Page 13 Panel descriptions (on BRIDGE CAST X) The dedicated driver must be installed when you use the “PC” setting. âInstalling the BRIDGE CAST app and driver(P.16) CONSOLE/MOBILE: when connecting to a video game console, iPad or iPhone This lets you transmit and receive the following audio signals.
- Page 14 Panel descriptions (on BRIDGE CAST X) PHONES/HEADSET jack (four-conductor stereo mini phone type) Connect your headphones or headset here. The audio from the bus being used is output from this jack. When using a headset, the audio from the headset mic is input.
-
Page 15: Installing The Dedicated App And Driver
Installing the dedicated app and driver Installing the dedicated app and driver This section explains about the “BRIDGE CAST” dedicated app used for operating and configuring the settings on this unit, as well as how to install the dedicated driver. â... -
Page 16: Installing The Bridge Cast App And Driver
Launch your browser and access the following website. https://roland.cm/bridgecastx From the downloads page, search for “BRIDGE CAST X USB Driver Ver.xxx for Windows 10/11” and click on the link. Right-click on the compressed file that was downloaded, and select “Extract All”. - Page 17 Launch your browser and access the following Web page. https://roland.cm/bridgecastx From the downloads page, search for “BRIDGE CAST X Driver Ver.xxx for macOS” and click on the link. “xxx” indicates the version number. Follow the onscreen instructions to download the dedicated driver.
-
Page 18: Connecting To Your Computer Or External Equipment And Configuring The Settings
Connect your computer to the USB I or USB II port. To import the video output signal from the BRIDGE CAST X into your computer, connect to the USB II port. Set the USB I or USB II connection settings switch to “PC”, according to the USB port you’re using. - Page 19 Connecting to your computer or external equipment and configuring the settings Mic audio input You must set the type of mic to be used and the input gain (sensitivity) in order to input audio from the mic. â Selecting the type of mic to use(P.34) â...
-
Page 20: Configuring The Device Settings On Your Computer
PERSONAL MIX bus audio STREAM (BRIDGE CAST X STREAM MIX bus audio *1: “BRIDGE CAST X-I” is shown when you connect to the USB I port, and “BRIDGE CAST X-II” is shown when you connect to the USB II port. Examples of settings Here are some setting examples. - Page 21 (P.30)”, in the home screen of the BRIDGE CAST app. ● Set the MIDI input device on your MIDI-compatible app to “BRIDGE CAST X CTRL”. Receiving (from a MIDI-compatible app to this unit) ● Set the MIDI output device on your MIDI-compatible app to “BRIDGE CAST X CTRL”.
-
Page 22: Connecting To An Ipad/Iphone
® When connecting to an iPad/iPhone that has a Lightning connector, use a Lightning to USB 3 Camera Adapter, available separately. When connecting the Lightning to USB 3 Camera Adapter to the BRIDGE CAST X, use a USB Type-C ®... - Page 23 Connecting to an iPad/iPhone Mic audio input You must set the type of mic to be used and the input gain (sensitivity) in order to input audio from the mic. â Selecting the type of mic to use(P.34) â Adjusting the input gain (sensitivity) for the mic(P.35) Adjusting the volume Operate the CH [1]–[4] knobs to adjust the volume.
-
Page 24: Connecting To A Video Game Console
Connecting to a video game console Connecting to a video game console This is an example of how to connect the devices when you want to use your tablet or smartphone to have a voice chat while listening to the sound of the game. * To prevent malfunction and equipment failure, always turn down the volume, and turn off all the units before making any connections. - Page 25 Connecting to a video game console Adjusting the volume Operate the CH [1]–[4] knobs to adjust the volume. Bus selection CH [1] knob CH [2] knob CH [3] knob CH [4] knob buttons STREAM MIX Volume for monitoring your own Volume of the Volume for Volume of the other...
-
Page 26: Connecting Hdmi Devices And Outputting Video Via Usb
Connecting HDMI devices and outputting video via USB Connecting HDMI devices and outputting video via USB Here’s an example of how to output the game or other video signal that’s input from the HDMI IN (1, 2) connectors via USB to your computer. -
Page 27: App
Exporting a profile(P.75) System settings Backing up/restoring the settings on this unit(P.78) Restoring the factory settings (Factory Reset)(P.82) Other Settings(P.83) Background music and sound effects Registering a sound effect(P.31) Using background music and sound effects from Roland Cloud (BGM CAST)(P.85) -
Page 28: Adjusting The Volume (Home Screen)
Exporting a profile(P.75) SYSTEM Backing up/restoring the settings on this unit(P.78) Restoring the factory settings (Factory Reset)(P.82) Other Settings(P.83) BGM CAST Signing in to Roland Cloud(P.85) Using background music(P.86) Using sound effects(P.88) Making the settings for Roland Cloud and background music(P.90) -
Page 29: Input Section
Indicates the volume levels. MIC/PERSONAL When you’ve selected “PERSONAL MIX” using the bus selection button on the BRIDGE CAST X, this selector switch selects whether to control either the mic audio (not routed through a bus) or the PERSONAL MIX bus. - Page 30 Links/unlinks the two buses (STREAM MIX, PERSONAL MIX). This works the same as the [MIX LINK] button on the BRIDGE CAST X. When the link is on, you can adjust the input level while retaining the volume balance for each bus.
-
Page 31: Registering A Sound Effect
● Sound effects are saved in the memory (SFX A, SFX B) of this unit. The method of playing back these sound effects is different from Roland Cloud. ● The memories in this unit contain preset sounds when the unit is shipped from the factory. - Page 32 Adjusting the volume (home screen) In the LOAD SFX FILE dialog box, select the WAV file you wish to register, and then click the [Open] button. The WAV file path is shown. Click the [PREVIEW] button to playback a preview of the WAV file you set. You can adjust the preview volume in “SYSTEM ”...
-
Page 33: Output Section
Adjusting the volume (home screen) OUTPUT section This adjusts the output volume. You can’t adjust the volume for STREAM, LINE OUT and PHONES by using the BRIDGE CAST app. Adjust the volume with the knobs on this unit instead. Click the icon to mute/unmute the audio. Name Icon Explanation... -
Page 34: Adjusting The Mic Audio
Adjusting the Mic Audio Adjusting the Mic Audio This section explains how to adjust the mic audio. â Getting ready to use a mic(P.34) â Calibrating the mic sound quality (Cleanup)(P.36) â Processing the Mic Audio (Mic Effects)(P.38) â Saving the Mic Effect Settings as a Preset(P.40) â... - Page 35 Adjusting the Mic Audio Adjusting the input gain (sensitivity) Here’s how to adjust the mic’s input gain so that the input audio is at the appropriate level. On the menu screen, click the “MIC SETUP” tab and speak into the mic while adjusting the “GAIN”. Raise the input gain as high as possible, while making sure that the waveform in the graph stays within the blue area.
-
Page 36: Calibrating The Mic Sound Quality (Cleanup)
Adjusting the Mic Audio Calibrating the mic sound quality (Cleanup) Here’s how to adjust the sound quality of the mic audio to make your voice sound listenable and clear. This feature helps you to suppress ambient noise or to normalize the differences in volume between mics, for instance. On the menu screen, click the “MIC CLEANUP”... - Page 37 Adjusting the Mic Audio Menu Value Explanation LOW CUT: This cuts out unneeded low-band audio. LOW CUT Off, On Turns the low cut on/off. Flat–500 Hz Sets the frequency point from which the output is cut. The frequencies below the frequency point you set are cut. NOISE SUPPRESSOR: This suppresses noises picked up from the surrounding environment by the mic.
-
Page 38: Processing The Mic Audio (Mic Effects)
Adjusting the Mic Audio Processing the Mic Audio (Mic Effects) You can apply effects to the mic audio (voice changer and reverb) to process the voice. â Changing the audio (Voice Changer) â Adding reverb to audio (Reverb) Changing the audio (Voice Changer) This effect alters the pitch and tonal quality of your voice. - Page 39 Adjusting the Mic Audio Adding reverb to audio (Reverb) You can add reverb to a voice to give the impression of spatial depth. This is also effective for giving emphasis when announcing the title of a production or program. On the menu screen, click the “MIC EFFECTS” tab and set the parameters in the respective menus . Menu Value Explanation...
-
Page 40: Saving The Mic Effect Settings As A Preset
Adjusting the Mic Audio Saving the Mic Effect Settings as a Preset You can save the current mic effect settings as presets and recall them as needed. You can save up to five presets. * Editable presets are preregistered by factory default. â... - Page 41 Adjusting the Mic Audio Recalling a preset On the menu screen, click the “MIC EFFECTS” tab and then click the preset you want to recall. This recalls the effect settings. When you edit the settings of a preset you recalled, the preset name changes from white to yellow.
- Page 42 Adjusting the Mic Audio Initializing a preset Here’s how to initialize a preset and restore the settings of presets 1–5 to their default state. On the menu screen, click the “MIC EFFECTS” tab and then click the [RESET] button. A confirmation message appears. Click the [OK] button.
-
Page 43: Exporting A Mic Effect Preset File
Adjusting the Mic Audio Exporting a mic effect preset file You can save the effect presets (1–5) as a single file (.brdgcEfx) to your computer. Use the BRIDGE CAST app when you want to reload the saved file into this unit. â... - Page 44 Adjusting the Mic Audio Loading a preset file Here’s how to apply the settings you saved for the effect presets (1–5) back to this unit. On the menu screen, click the “MIC EFFECTS” tab and then click the [LOAD FILE] button. In the LOAD FILE dialog box, select the file you wish to load (.brdgcEfx), and then click the [Open] button.
- Page 45 Adjusting the Mic Audio Click the [OK] button. A message appears after the effect preset settings have been applied. Click the [OK] button to close the message. Related information: Saving the Mic Effect Settings as a Preset(P.40)
-
Page 46: Adjusting The Game Sound
Listening to game audio in virtual surround Roland’s unique three-dimensional acoustic technology lets you listen in virtual surround sound to the 5.1/7.1 audio input from the HDMI IN 1 or 2 connectors when using headphones. This lets you experience a spacious stereo image that goes beyond the base-level stereo image, even with headphones. - Page 47 Adjusting the game sound Menu Value Explanation VIRTUAL SURROUND This selects the input source for virtual surround. Not used HDMI Audio input from HDMI IN 1 or 2 connector GAME (USB) Game audio (input source: GAME) FRONT ANGLE 1–89 Adjusts the angle of the front speakers. “1”...
-
Page 48: Outputting 5.1/7.1 Audio From The Hdmi Connector Of A Windows Pc
Adjusting the game sound Outputting 5.1/7.1 audio from the HDMI connector of a Windows PC To listen to the audio from your Windows computer on the BRIDGE CAST X in virtual surround sound, the computer must be outputting 5.1/7.1 audio. -
Page 49: Using The Equalizer To Adjust The Game Sound
Adjusting the game sound Using the Equalizer to Adjust the Game Sound You can use the equalizer to adjust the tonal character of the game sound (input source: GAME ). This lets you emphasize important frequency ranges in the game or de-emphasize unnecessary frequency ranges. You can also apply an equalizer to the input audio from HDMI IN (1, 2). - Page 50 Adjusting the game sound You can save up to five game settings (equalizer, virtual surround) as presets, and recall them whenever you like. â Saving the game settings as a preset(P.51) You can also save the game presets as a single file. â...
-
Page 51: Saving The Game Settings As A Preset
Adjusting the game sound Saving the game settings as a preset You can save the current game settings (equalizer, virtual surround) as presets, and recall them whenever you like. You can save up to five presets. * Editable presets are preregistered by factory default. â... - Page 52 Adjusting the game sound You can edit the preset names later. To do this, click next to the preset name, input the name in the rename window and click the [OK] button. Recalling a preset On the menu screen, click the “GAME” tab and then click the preset you want to recall. This recalls the effect settings.
- Page 53 Adjusting the game sound Initializing a preset Here’s how to initialize a preset and restore the settings of presets 1–5 to their default state. On the menu screen, click the “GAME” tab and then click the [RESET] button. A confirmation message appears. Click the [OK] button.
-
Page 54: Exporting A Game Preset File
Adjusting the game sound Exporting a game preset file You can save the game presets (1–5) as a single file (.brdgcEQ) to your computer. Use the BRIDGE CAST app when you want to reload the saved file into this unit. â... - Page 55 Adjusting the game sound Loading a preset file Here’s how to apply the settings you saved for the game presets (1–5) back to this unit. On the menu screen, click the “GAME” tab and then click the [LOAD FILE] button. In the LOAD FILE dialog box, select the file you wish to load (.brdgcEQ), and then click the [Open] button.
- Page 56 Adjusting the game sound Click the [OK] button. A confirmation message appears after the game preset settings have been applied. Click the [OK] button to close the message. Related links: Saving the game settings as a preset(P.51)
-
Page 57: Adjusting The Voice Chat Audio
Adjusting the voice chat audio Adjusting the voice chat audio This section shows you how to adjust the voice chat sound (input source: CHAT) that’s input from the USB port. â Making the voice chat audio easier to hear(P.57) Making the voice chat audio easier to hear Here’s how to adjust the sound of the other party’s voice in a voice chat (input source: CHAT). -
Page 58: Control Pad Settings
CONTROL PAD settings CONTROL PAD settings This section explains the settings for using the control pads. â Assigning functions to the control pads(P.58) â Saving the control pad settings as a preset(P.64) â Exporting a control pad preset file(P.67) Assigning functions to the control pads Here’s how to assign functions to the control pads [1]–[6]. -
Page 59: Assigning Hot Keys
CONTROL PAD settings Assigning hot keys By setting the function of a pad to “HOTKEY”, you can press the pad just once to execute an action easily, instead of using keyboard shortcuts (a combination of key presses). Set COMMAND to “HOTKEY”. “Click to Assign”... -
Page 60: List Of Commands
CONTROL PAD settings List of commands COMMAND OPTION 1 OPTION 2 BUTTON Function Pad illumination (*1) TYPE When pad When pad is not is pressed pressed TOGGLE TOGGLE MUTE ALL, TOGGLE Mutes/unmutes the audio for the Brightness Goes dark STREAM, specified channel. - Page 61 CONTROL PAD settings 1[ON/OFF]– TOGGLE Switches the specified mic effect Brightness Brightness 5[ON/OFF] preset number on/off. EFFECTS * The preset is turned ON right after it switches. +, - ONESHOT Switches to the next mic effect preset number (+1) or to the previous preset number (-1).
-
Page 62: Registering Sound Effects To Play Using The Control Pads
● Sound effects are saved in the memory (SFX A, SFX B) of this unit. The method of playing back these sound effects is different from Roland Cloud. ● The memories in this unit contain preset sounds when the unit is shipped from the factory. - Page 63 CONTROL PAD settings The WAV file path is shown. Click the [PREVIEW] button to playback a preview of the WAV file you set. You can adjust the preview volume in “SYSTEM ” of the input source. *1: When the connection setting for the USB I port is “MOBILE/CONSOLE” and the connection setting for the USB II port is “MOBILE”, the input source is “USB”.
-
Page 64: Saving The Control Pad Settings As A Preset
CONTROL PAD settings Saving the CONTROL PAD settings as a preset You can save the current CONTROL PAD settings as presets and recall them as needed. You can save up to five presets. * Editable presets are preregistered by factory default. â... - Page 65 CONTROL PAD settings Recalling a preset On the menu screen, click the “CONTROL PAD” tab and then click the preset you want to recall. This recalls the CONTROL PAD settings. When you edit the settings of a preset you recalled, the preset name changes from white to yellow.
- Page 66 CONTROL PAD settings Initializing a preset Here’s how to initialize a preset and restore the settings of presets 1–5 to their default state. On the menu screen, click the “CONTROL PAD” tab and then click the [WRITE] button. A confirmation message appears. Click the [OK] button.
-
Page 67: Exporting A Control Pad Preset File
CONTROL PAD settings Exporting a CONTROL PAD preset file You can save the CONTROL PAD presets (1–5) as a single file (.brdgcPad) to your computer. Use the BRIDGE CAST app when you want to reload the saved file into this unit. â... - Page 68 CONTROL PAD settings Loading a preset file Here’s how to apply the settings you saved for the CONTROL PAD presets (1–5) back to this unit. On the menu screen, click the “CONTROL PAD” tab and then click the [LOAD FILE] button. In the LOAD FILE dialog box, select the file you wish to load (.brdgcPad), and then click the [Open] button.
- Page 69 CONTROL PAD settings Click the [OK] button. A message appears after the CONTROL PAD preset settings have been applied. Click the [OK] button to close the message. Related information: Saving the CONTROL PAD settings as a preset(P.64)
-
Page 70: Output Settings
(the audio signal that’s input from the BRIDGE CAST X to your computer). By applying delay to the audio output, you can make the timing of the video and audio match. -
Page 71: Configuring A Profile
Configuring a profile Configuring a profile This section explains how to create and use profiles. â Creating a profile(P.71) â Exporting a profile(P.75) Creating a profile The profile function lets you save your own custom settings. By creating profiles for different uses, you can recall your custom settings for each, simply by switching between profiles. - Page 72 Configuring a profile Creating a profile * Editable profiles are preregistered by factory default. Customize the settings on this unit. On the menu screen, click the “PROFILE” tab and then click the [WRITE] button. Input the profile name and click the save destination memory number in “WRITE TO”. Profile names can contain up to 18 single-byte alphanumeric characters or symbols.
- Page 73 Configuring a profile Switching between profiles On the menu screen, click the “PROFILE” tab and then click the profile you want to switch to. This switches between settings on this unit. When you edit the settings of a profile you recalled, the profile name changes from white to yellow.
- Page 74 Configuring a profile Initializing a profile Here’s how to initialize a profile and restore the settings of profiles 1–5 to their default state. On the menu screen, click the “PROFILE” tab and then click the [RESET] button. A confirmation message appears. Click the [OK] button.
-
Page 75: Exporting A Profile
Configuring a profile Exporting a profile You can save the profiles (1–5) as a single file (.brdgcProfile) to your computer. Use the BRIDGE CAST app when you want to reload the saved file into this unit. â Exporting a profile â... - Page 76 Configuring a profile Loading a profile Here’s how to apply the settings you saved for the profile (1–5) back to this unit. On the menu screen, click the “PROFILE” tab and then click the [LOAD FILE] button. In the LOAD FILE dialog box, select the file you wish to load (.brdgcProfile), and then click the [Open] button.
- Page 77 Configuring a profile Click the [OK] button. A confirmation message appears after the profile settings have been applied. Click the [OK] button to close the message. Related information: Creating a profile(P.71)
-
Page 78: System Settings
System settings System settings This section explains about the system-related operations and settings on the BRIDGE CAST X. â Backing up/restoring the settings on this unit(P.78) â Restoring the factory settings (Factory Reset)(P.82) â Other Settings(P.83) Backing up/restoring the settings on this unit You can back up the settings on this unit as a single file (.brdgcBackup). - Page 79 System settings Backing up On the menu screen, click the “SYSTEM” tab and then click the [BACKUP] button. In the Save dialog box, name the file and specify the save destination, and click the [Save] button. This backs up the file (.brdgcBackup).
- Page 80 System settings Restoring Here’s how to restore the settings for this unit that you backed up. Restoring the settings overwrites the current settings. On the menu screen, click the “SYSTEM” tab and then click the [RESTORE] button. In the LOAD FILE dialog box, select the file you wish to load (.brdgcBackup), and then click the [Open] button.
- Page 81 System settings Click the [OK] button. A confirmation message appears after the data has been restored. Click the [OK] button to close the message.
-
Page 82: Restoring The Factory Settings (Factory Reset)
System settings Restoring the factory settings (Factory Reset) This shows you how to restore this unit to its factory settings. * When you execute a factory reset, all of the settings except for the sound effects (SFX A, SFX B) are restored to their factory settings. -
Page 83: Other Settings
Other Settings These are the settings for the brightness of the indicators on the BRIDGE CAST X as well as for what the level meters display. On the menu screen, click the “SYSTEM” tab and set the parameters in the respective menus. - Page 84 System settings HDMI IN Selects the HDMI formats (resolution and frame rate) that can be inputted to the BRIDGE CAST X. The selected formats (EDID) are transmitted to the device that’s connected to the HDMI IN connector. CAPABILITY MODE (EDID) * To output a video signal with a frame rate of 60 Hz or greater to HDMI THRU, select either “DISPLAY THRU”...
-
Page 85: Using Background Music And Sound Effects From Roland Cloud (Bgm Cast)
Using background music and sound effects from Roland Cloud (BGM CAST) Using background music and sound effects from Roland Cloud (BGM CAST) You can use the background music and sound effects on the BRIDGE CAST X that are available via Roland Cloud. â Signing in to Roland Cloud(P.85) -
Page 86: Using Background Music
The background music from Roland Cloud is streamed during playback via the app. ● The Roland Cloud background music is input to the “MUSIC” input source. By assigning “MUSIC” to the CH [1]–[4] knobs, you can adjust the volume of the background music on this unit. - Page 87 Using background music and sound effects from Roland Cloud (BGM CAST) Name Display Explanation Background music Shows the name (song title) of the background music. Example: name MOOD/GENRE Shows the mood and genre of the selected background Example: music. Add song to Adds the current background music to the playlist.
-
Page 88: Using Sound Effects
Using background music and sound effects from Roland Cloud (BGM CAST) Using sound effects You can download the sound effects that are available via Roland Cloud into the app, to be used on the BRIDGE CAST X. ● By assigning the sound effects you downloaded into the app to the MUTE/ASSIGN [1]–[4] buttons on the BRIDGE CAST X, you can play them back at the timing you like. - Page 89 Using background music and sound effects from Roland Cloud (BGM CAST) Assign the sound effects to the MUTE/ASSIGN [1]–[4] buttons. Select one of the sound effects (“SOUND EFFECTS A (BGM CAST)”–“SOUND EFFECTS D (BGM CAST)”) from “MUTE/ASSIGN(P.30)”. For instance, if you select “SOUND EFFECTS A (BGM CAST)”, the sound effect you registered to “A” in step 2 is assigned to the MUTE/ASSIGN button.
-
Page 90: Making The Settings For Roland Cloud And Background Music
Using background music and sound effects from Roland Cloud (BGM CAST) Making the settings for Roland Cloud and background music Here’s how to check the data in Roland Cloud and configure the playback settings for background music. Click the icon at the top right-hand part of the screen. -
Page 91: Appendix
■■■ Appendix ■■■ ■■■ Appendix ■■■ Main specifications(P.92) Mixer block diagram(P.95) -
Page 92: Main Specifications
Main specifications Main specifications à Video HDMI IN/THRU Formats 1280 x 720/50p, 59.94p, 60p, 100p, 119.88p, 120p (CTA-861-F) 1920 x 1080/23.98p, 24p, 25p, 29.97p, 30p, 50p, 59.94p, 60p, 100p, 119.88p, 120p (CTA-861- 2560 x 1080/23.98p, 24p, 25p, 29.97p, 30p, 50p, 59.94p, 60p, 100p, 119.88p, 120p (CTA-861- 3840 x 2160/23.98p, 24p, 25p, 29.97p, 30p, 50p, 59.94p, 60p (CTA-861-F) 1280 x 720/60 Hz (VESA DMT) 1920 x 1080/60 Hz (VESA DMT) - Page 93 BRIDGE CAST X, Roland cannot guarantee that a given computer can be used satisfactorily with the BRIDGE CAST X based solely on the fact that it meets the above requirements. This is because there are too many other variables that may influence the processing environment, including differences in motherboard design and the particular combination of other devices involved.
- Page 94 Type-C Cable ® ® USB 2.0 Type-C to Type-C Cable (POWER) ® ® * This document explains the specifications of the product at the time that the document was issued. For the latest information, refer to the Roland website.
-
Page 95: Mixer Block Diagram
Mixer block diagram Mixer block diagram... - Page 96 BRIDGE CAST X Owner’s Manual ©2024 Roland Corporation...
Need help?
Do you have a question about the BRIDGE CAST X and is the answer not in the manual?
Questions and answers