Subscribe to Our Youtube Channel
Summary of Contents for Sangamo CHPWIFI
- Page 1 C H P W I F I F o r t P r o g r a m m a b l e T h e r m o s t a t w i t h R F a n d W i F i U S E R M A N U A L...
-
Page 2: Table Of Contents
Pairing the Thermostat and Receiver Product Description, Preparation for use & Installation Instructions Page 10 How to intergrate the CHPWIFI into Alexa Page 11 Page 12 How to intergrate the CHPWIFI into Google Home Page 13 Voice Commands Page 14 Notes... -
Page 3: Features
Features • Large LED display • Touch button • Permanent user settings, and program settings during power loss • One button “Holiday” mode • Programming Periods; • 7 Day individual, 5/2 split (Monday - Friday, Saturday & Sunday) • 6 Separate time/temperature periods per day •... -
Page 4: Product Overview
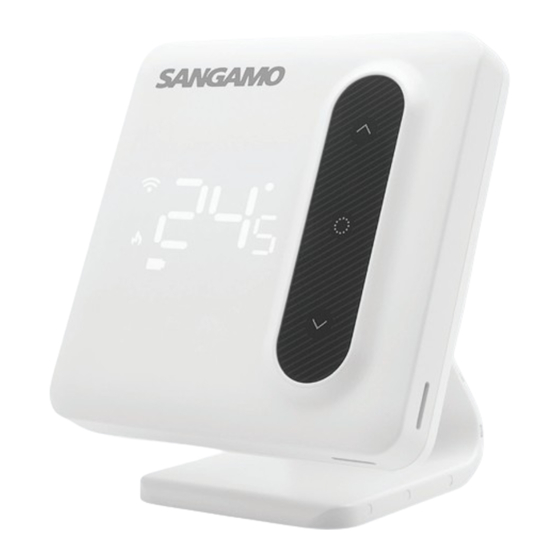
Product Overview Thermostat Wireless icon “ ” always on when paired with the receiver, flashes when connection is intermittent Frost protection icon Call for heat icon Programming mode icon Low battery alert Confirm icon Up button ON/OFF button Room temperature or setting temperature display Down button Receiver WiFi Status Indicator... -
Page 5: Thermostat Functions
Thermostat Functions Functions Switching between ON & Standby modes Press ” ” to turn the Thermostat into the ON mode. Press and hold ” ” again to switch the thermostat into standby mode. When in standby mode the Thermostat will display ” ”. -
Page 6: Thermostat Configuration
Thermostat Configuration To configure the thermostat using its controls you will need to do the following: (1) In standby mode indicated by the Thermostat displaying “ ”, long press “ ” to enter the configuration menu. (2) The first item will display “ ”, press “ ” to enter the configuration for the first item. (3) You can adjust the setting by pressing “... -
Page 7: Thermostat Installation
Thermostat Installation Battery Installation 1. Take off cover 2. Install AA Batteries 3. Complete Installation Note: Ensure the batteries are correctly installed, and the polarities are correctly aligned. 1. Desk mounted 1. Hang Thermostat on stand 2. Complete 2. Wall mounted all mounted 1. -
Page 8: Installation Plan A
Installation Plan A Our products are designed to comply with the recommended codes of practice and is to be installed and serviced by competent persons in accordance with the relevant wiring regulations. Warning: Before any installation or maintenance, ensure that the electrical supply is switched off at the breaker. -
Page 9: Installation Plan B
Installation Plan B Our products are designed to comply with the recommended codes of practice and is to be installed and serviced by competent persons in accordance with the relevant wiring regulations. Warning: Before any installation or maintenance, ensure that the electrical supply is switched off at the breaker. -
Page 10: Pairing The Thermostat And Receiver
Pairing the Thermostat and Receiver As default, the Thermostat & Receiver are pre-paired The LED will stay illuminat- ed yellow 1. Press “ ” to turn off the receiver, 2. On the Thermostat 3. The Thermostat will then show “ ”. -
Page 11: Product Description, Preparation For Use & Installation Instructions
Product Description The WiFi Smart Thermostat (CHPWIFI) forms part of the ESP Fort range of smart products, and can also be used in conjunction with Scolmores ClickSmart+ range of products. Users are able to control the Smart Thermostat using the ClickSmart+ app, manually and using voice controls (once correctly configured). -
Page 12: How To Intergrate The Chpwifi Into Alexa
How to integrate the CHPWIFI into Alexa Once the CHPWIFI has been configured with the ClickSmart+ App, you can then control the thermostat using voice commands. 3. Press the 1. Open the Alexa 2. Press “Skills & 4. Search for “Click Smart +”, and click on... -
Page 13: How To Intergrate The Chpwifi Into Google Home
How to integrate the CHPWIFI into Google Home Once the CHPWIFI has been configured with the ClickSmart+ App, you can then control the thermostat using voice commands. 1. Open the Google 2. Press “Add 3. Press “Works 4. Press on the magnifying glass, then Home app and Device”... -
Page 14: Voice Commands
Voice Commands After waking up the Alexa device or Google Home/Assistant Device, you can use the below voice commands: Amazon Alexa Turn On <DEVICE NAME> Turn Off <DEVICE NAME> What is the temperature of <DEVICE NAME> Make it warmer in <DEVICE NAME> Make it cooler in <DEVICE NAME>... -
Page 15: Notes
Notes... - Page 16 E&OE - Errors and Omissions Excepted. K23 Telephone: 01527 51 51 50 Elite Security Products Fax: 01527 51 51 43 Unit 7, Target Park, Shawbank Rd w w w . e s p u k . c o m email: sales@espuk.com Lakeside, Redditch B98 8YN...


Need help?
Do you have a question about the CHPWIFI and is the answer not in the manual?
Questions and answers