Table of Contents
Advertisement
Quick Links
Advertisement
Table of Contents

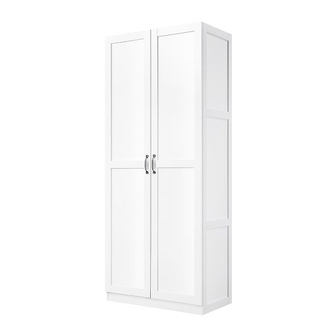
Summary of Contents for Manhattan Comfort 3GLF
- Page 1 Assembly Guide 3GLF V.10102022...
-
Page 2: For Best Results
• Assemble item on a soft surface, such as cardboard or carpet, to protect finish. • Proper assembly requires two people. TOOLS REQUIRED View our assembly video online: WWW.MANHATTANCOMFORT.COM Stuck? Question? We are here to help. tel: 908-888-0818 e-mail: help@manhattancomfort.com Page 2 3GLF... -
Page 3: Included In This Package
B. SHELF (1) C. BOTTOM (1) D. LEFT END (1) E. RIGHT END (1) F. BACK (1) G. ROD (2) J. FRONT SKIRT (1) K. MOLDING (1) L. BACK SKIRT (1) O. LEFT DOOR (1) P. RIGHT DOOR (1) Page 3 3GLF... -
Page 4: Hardware Identification
Hardware Identifi cation FURNITURE TIPPING RESTRAINT KIT -1pc Page 4 3GLF... -
Page 5: Warranty Policy
WARRANTY POLICY All Manhattan Comfort furniture products are warranted, to the original purchaser at the time of purchase and for a period of 30 days thereafter. Our warranty is limited to new products purchased in factory sealed cartons. This warranty is valid in the United States of America and Canada. - Page 6 Fasten four L BRACKETS (5) to the SHELF(B) and the TOP (A). ◆ Use eight HEX HEAD SCREWS (11).Using L-WRENCH(4). Fasten the RODS (G) to the L BRACKETS (5). ◆ Use four HEX HEAD SCREWS (7).Using L-WRENCH(4). Page 6 3GLF...
- Page 7 Step 2 Fasten the MOLDING (K) to the TOP (A). Use four FLAT HEAD SCREWS (6). ◆ Fasten the FRONT SKIRT (J) and the BACK SKIRT (L) to the BOTTOM (C). ◆ Use four FLAT HEAD SCREWS (6). Page 7 3GLF...
- Page 8 Step 3 Fasten the TOP (A) to the RIGHT END (E). ◆ Use five FLAT HEAD SCREWS (6). Page 8 3GLF...
- Page 9 Step 4 Fasten the RIGHT END (E) to the SHELF (B) and the BOTTOM (C). ◆ Use eight FLAT HEAD SCREWS (6). Unfinished edge Page 9 3GLF...
- Page 10 Step 5 Fasten the LEFT END (D) to the TOP (A), SHELF (B), and the BOTTOM (C). ◆ Use thirteen FLAT HEAD SCREW (6). Page 10 3GLF...
- Page 11 Using your hammer, fasten the BACK (F) to your unit using the NAILS (9) ◆ NOTE : Be sure to tap NAILS into the holes that line up over the SHELF (B). ◆ ! Caution ! Do not stand the unit upright without the BACK fastened. The unit may collapse Page 11 3GLF...
- Page 12 Step 7 Fasten the HINGES (2) to the DOORS (O and P). Use twelve FLAT HEAD SCREWS (10). ◆ Fasten the PULLS (1) to the DOORS (O and P). Use four MACHINE SCREWS (8). ◆ Page 12 3GLF...
- Page 13 Fasten the DOORS (O and P) to the ENDS (D and E). Secure the hinges with twenty-four the FLAT HEAD SCREWS (10) . ◆ You should start each SCREW a few turns before completely tightening any of them. ◆ Page 13 3GLF...
- Page 14 2nd- Drill a 1/8" hole on the mark and into the stud in your wall. ◆ 3rd- Fasten the unit to the wall. Use the LONG SCREW through the other end of the SAFETY STRAP and into the 1/8'' hole. Mark and drill a 1/8" hole into the wall stud. Page 14 3GLF...
- Page 15 NOTE: You will need to turn the LONG SCREW multiple turns to completely tighten and secure your ◆ unit. Peel the APPLIQUES (3) from the applique card and stick them over the heads of the SCREWS ◆ in the ENDS. Mark and drill a 3/8" hole into the wall stud. Page 15 3GLF...
- Page 16 Step 11 No Load 25 lbs 25 lbs 25 lbs 60 lbs Page 16 3GLF...


Need help?
Do you have a question about the 3GLF and is the answer not in the manual?
Questions and answers