Table of Contents
Advertisement
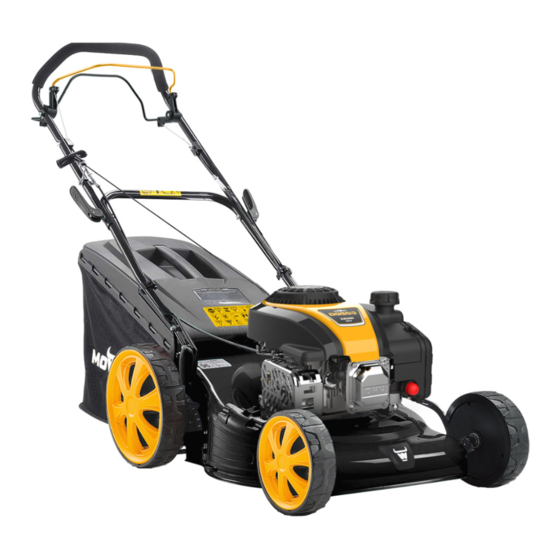
Petrol lawn mower
PM
PM
PM
PM
PM
PM
PM
PM
4030 P
4650 S
4650 SHW
5165 SHW
5175 S
5175 SHW
5690 SHW
5690 SZT
(DYM161702)
(DYM1666E)
(DYM1626ECQ)
(DYM1660E2Q)
(DYM1668EC)
(DYM1666E3Q)
(DYM1669EQ)
(DYM1679B)
Original Operating Instructions (EN)
Manufacturer
Importer
Ningbo Daye Garden Machinery Co., Ltd.
Daye Europe GmbH
No. 58 Jinfeng Road, Yuyao
Parkstraße 1a
Zhejiang 315403, PR China
66450 Bexbach, Germany
www.mowox.com
Rev 1
Advertisement
Table of Contents

Related Manuals for Mowox PM 4030 P


Summary of Contents for Mowox PM 4030 P
- Page 1 (DYM161702) (DYM1666E) (DYM1626ECQ) (DYM1660E2Q) (DYM1668EC) (DYM1666E3Q) (DYM1669EQ) (DYM1679B) Original Operating Instructions (EN) Manufacturer Importer Ningbo Daye Garden Machinery Co., Ltd. Daye Europe GmbH No. 58 Jinfeng Road, Yuyao Parkstraße 1a Zhejiang 315403, PR China 66450 Bexbach, Germany www.mowox.com Rev 1...
-
Page 2: Intended Use
You are well versed in your new lawnmower. Because you entirely read this user manual. Read these operating instructions for your own safety before commissioning the device. Failure to follow the instructions can lead to serious injuries. Familiarize yourself with the device before each use. -
Page 3: Table Of Contents
Wheels and moving parts (wire rope hoists) ............31 Garden hose connection....................31 Storage out of season ....................32 7.10 Upright storage ......................34 Troubleshooting .................... 35 Mowox® Warranty conditions ..............36 Environmentally friendly disposal ............. 37 10.1 Packaging ........................37 10.2 Device ..........................37 EC Declaration of Conformity .............. -
Page 4: Safety Instructions
Read the operating instructions before using the device. The device can cause dangerous situations if used improperly. Read and internalize the op-er- ating instructions before using the device. Inherent danger to other persons. Risk of injury to hands and feet. Combustible petrol. -
Page 5: Safe Use
The device complies with strong safety test norms. Warning for your safety. You may be dangerously injured, or even possibly killed, if you don’t follow the safety instructions. The safety symbols on the device must always be clean and clearly visible. Replace them if they are missing or unreadable. - Page 6 operation. Don’t use the machine with any loose or damaged parts. Check the fuel and oil level before operation. 10. Check the air filter before operation, and, if necessary, clean it.# Replace damaged silencers. Gasoline is highly flammable. Store gasoline in airtight canisters specifically designed for this purpose.
- Page 7 10. Special care should be taken when reversing or pulling the lawn mower towards you. Stop the operation of the knives if the lawn mower needs to be tipped over when crossing soils other than grassy areas and while transporting the lawn mower to or from the place of use.
- Page 8 If the fuel tank needs to be emptied, do so outdoors and let it cool for at least 15 minutes first. 10. Improper maintenance, non-compliant spare parts, or the removal or modification of safety devices can cause damage to the lawn mower and cause serious or even fatal injuries.
-
Page 9: Your Lawn Mower At A Glance
4030 P only Guide bar Brake handle Handle for man- Quicklock levers Grass bag Height adjust- ual start ment lever Petrol valve Oil Filler Neck Mower housing Spark plug con- Filler cap Cable clamp (only 5690 SHW/ & Oil Dipstick nector -ZT) Side ejection... -
Page 10: Technical Data
Model PM 4030 P PM 4650 S PM 4650 SHW PM 5165 SHW (DYM161702) (DYM1666E) (DYM1626ECQ) (DYM1660E2Q) Engine Type DG 300 DG 500 DG 650 Engine design 4-stroke engine, overhead valve, 1 cylinder Displacement; bore × stroke 80 cm ; 52 × 38 mm 135 cm ;... - Page 11 Model PM 5175 S PM 5175 SHW PM 5690 SHW PM 5690 SZT (DYM1668EC) (DYM1666E3Q) (DYM1669EQ) (DYM1679B) Engine Type DG 750 DG 900 Engine design 4-stroke engine, overhead valve, 1 cylinder Displacement; bore × stroke 171 cm ; 67 × 48 mm 196 cm ;...
-
Page 12: Assembly
5.1.1 For all models except P 4030 P and 5690 SZT Fasten the guide bar (1) to the mower housing (9) with the consigned screws (19), washers and bolts. Washer Bolt 5.1.2 For model 5690 SZT Fasten the guide bar (1) to the mower housing (9) with the consigned screws (19), washers and bolts. -
Page 13: Assembly Of The Upper Part Of The Handle
Turn the levers (4) clockwise to fix the lower handlebar in its workinng position. Figure 4 5.2.1 For all models except P 4030 P Fold the upper handle to its upright position and then close the quick release levers (4). If the levers do not close properly, please tighten the hex nuts on the opposite sides. -
Page 14: Adjustment To The Operator's Body Size
’ ’ PM 5690 ONLY The round plastic parts under the locking levers (4) are folding joints with which you can adjust the angle of inclination of the upper spar part can be set. This allows you to adapt the device to your body size. Angle adjustment for working height Attach the wire rope hoists at the displayed position with the consigned cable clamps. -
Page 15: Starter Handle
To hang it on, liftthe back cover and attach the grass bag (5) on the rear of the housing (9), right next to the hinges of the rear cover flap. Pull and hold the engine brake handle (2). Then slowly pull the starter handle (3) carefully from the motor to the rope guide. The position in the rope guide is the resting position of the starter handle. -
Page 16: Usage
Starter handle Rope guide Figure 12 Figure 11 Before you start the engine, read chapter 6. 6.1.1 Fill engine oil No oil is filled in ex works.The engine will be destroyed if you start it without oil. Fill the engine with four-stroke engine oil before starting. Use clean, high-quality oil in minimum classification API SG or higher and in viscosity SAE30, or better, 15W40. -
Page 17: Adjustment Of The Cutting Height
Please check the required filling quantity in Chapter 4 (Tech- nical data). 6.1.2 Check oil level Check the oil level while the engine is turned off. Remove the oil filler lid/dipstick and wipe it off. Insert the oil filler cap/dipstick into the oil filler neck without tightening it. Pull it out again to read the oil level. - Page 18 and 75 mm. Press the lever (6) on the right rear wheel outwards to release it. Move the lever for- ward or backward to adjust the cutting height accordingly. This single lever setting ap- plies to all 4 wheels. PM 4650 PM 5165 10 = High PM 5175...
- Page 19 1 = Low (25 mm) T = Transport po- sition (0 mm) 6 = High (75 mm) PM 4030 P 1 = Low (25 mm) The lever position on the far right is only for maximum space-saving stowage and transport. Height...
-
Page 20: Start Of The Engine
6.3.1 Cold start pump („primer pump“) (engine DG 300, DG 500) PM 4030 P, 4650 S/ -HW For a cold start, press the primer pump (21) min. 5×. Note: With a warm engine (up to 1 minute after stopping the engine), pumping is... - Page 21 usually not required to restart the engine. 6.3.2 Fuel valve (engine DG 900) PM 5690 SHW, SZT The models PM 5690 SHW and -ZT have got a fuel valve (7) on the hose between the tank and the carburettor. Prior to starting, open this valve. 6.3.3 Recoil starter Stand behind the device, pull the brake handle (2) against the handlebar (1) and...
-
Page 22: Stopping The Engine
Slowly pull out the starter handle (3) until you feel resistance on the rope. Then pull the rope out completely with a steady swing. When the motor is running, let the rope slowly return to the rope guide. Do not let the starter handle (3) snap back against the engine. Slowly lower the handle into the retaining clip on the guide rail to avoid damaging the starter. -
Page 23: Rear Wheel Drive
PM 4030 P OR ALL MODELS EXCEPT Pull the drive handle (14) forward. The lawn mower then travels at a speed of approx. 4 km/h independently forward. The speed is not variable. Release lever 14 to turn off the traction. -
Page 24: Achieve Optimal Results With The Lawn Mower
When full Transparent window PM 4650 SHW, 5165 SHW, Visibly full of grass clippings 5690 SHW, 5175 SHW Movable layer of fabric PM 4030 P, 4650 S, 5175 S Fabric stops flapping Plastic flap PM 5190 SZT Flap stops moving (EN) -
Page 25: Function "3 In 1
Check the ejection opening in the chassis (9) for blockages. Remove those if necessary. “ ” “ ” PM 4030 P, 4650 S OT FOR Your lawn mower has accessories that can be attached to the device depending on the application: Normal function... - Page 26 Do not mow wet grass. Regularly clean the mulch insert, the inside of the case and the knife. Lift the rear cover and remove the grass collection bag #5. Slide the mulching insert #22 into the housing #9. Lock the mulching insert in the opening of the mower housing with the button.
-
Page 27: Maintenance And Care
Good maintenance is essential for safe, economical and trouble-free operation. It is also necessary to maintain the low emission level of the engine. Keep hands and feet away from rotating parts. Do not tilt the lawn mower after take-off. When you turn on the lawnmower, it must be on a flat surface and there must be no tall grass or obstacles. -
Page 28: Air Filter
The air filter must be cleaned regularly; otherwise, the engine can be started only with difficulty or not at all. Depending on the model, the air filter is either made of foam or paper. Any air filter must not be cleaned with gasoline. A paper filter must not be cleaned with any liquid. - Page 29 Clean both filter ele- ments 1 and 2 in a deter- DG 500 gent solution. DG 650 Allow the fil- DG 750 ter elements to air dry for at least 12 hours. Knock out the paper filter against the direction of flow of the sucked-in air, DG 900...
-
Page 30: Engine Oil
Replace the filter if it is frayed, torn or damaged. The oil drain screw from the engine is hidden by the housing of the lawnmower. There- fore, place the lawn mower with the wheels on an elevation, such as a pallet or pave- ment slabs, remove the oil dipstick and tilt it to the side so that the air filter faces up- wards. -
Page 31: Spark Plug
Replace it only with a knife recommended by the manufacturer. The manufacturer is not liable for possible damage due to an asymmetrical knife or low material strength. Model Blade type PM 4030 P DAYE 2105300136[…] PM 4650 S/ -HW DAYE 2105200263[...], 263002488, 21052003402000A or... -
Page 32: Wheels And Moving Parts (Wire Rope Hoists)
The metal surface of the mower should be coated with spray oil or siclicone spray to prevent rust. PM 4030 P. OT FOR MODEL You can also clean the bottom of the device using a water hose with a standard adapter... -
Page 33: Storage Out Of Season
connection. Remove grass residues from the chassis #9 before cleaning. Connect the water hose to the hose connection #18 on the housing. Connect the other end of the hose to the faucet. Turn on the engine. The automatic cleaning now takes place. Turn off the engine after a maximum of 5 minutes. - Page 34 due to negligent storage and preparation are not covered by the warranty. Empty the fuel tank with a suction pump or using the hose between the tank and the carburetor. Do not empty the tank indoors, near open flames, or the like. Do not smoke! Gasoline fumes can cause explosions or fires.
-
Page 35: Upright Storage
Be careful not to bend or bend the cables. PM 4030 P DG 300) ONLY ENGINE The mower can be stored vertically against a wall, thus occupying less space. To do this, proceed in reverse as described in chapter 5.1.3. -
Page 36: Troubleshooting
PROBLEM POSSIBLE CAUSE REMEDY Engine does not Engine brake cable Check the cable tension against the lever and ad- start. loose. just the wire tension if necessary. Gas-air mixture too lean. Press the primer pump (21) several times before re- starting. -
Page 37: Mowox® Warranty Conditions
"memory effect" is excluded with this technology. Like all batteries, the Mowox® battery pack is subject to wear and tear due to use. In order to be able to use your battery pack for a long time, please note the following in- structions: Do not expose the battery pack to moisture, heat or extreme cold. -
Page 38: Environmentally Friendly Disposal
Local, state or national guidelines prohibit disposal via normal household waste. For disposal, the regulations applicable in your country or municipality must be com- plied with. Contact your local waste management company about available recycling and disposal procedures. The packaging is made of cardboard and separately labelled PE film. It must be reused or recycled. -
Page 39: Ec Declaration Of Conformity
Ningbo Daye Garden Machinery Co., Ltd. We herewith declare No.58 Jinfeng Road, Yuyao, Zhejiang 315403, China The following machine, in design and type as sold by us, complies with the corresponding essential health and safety requirements of the EC directives. In the case of modifications that have not been approved by us, the validity of this declaration expires.
Need help?
Do you have a question about the PM 4030 P and is the answer not in the manual?
Questions and answers