Table of Contents
Advertisement
Quick Links
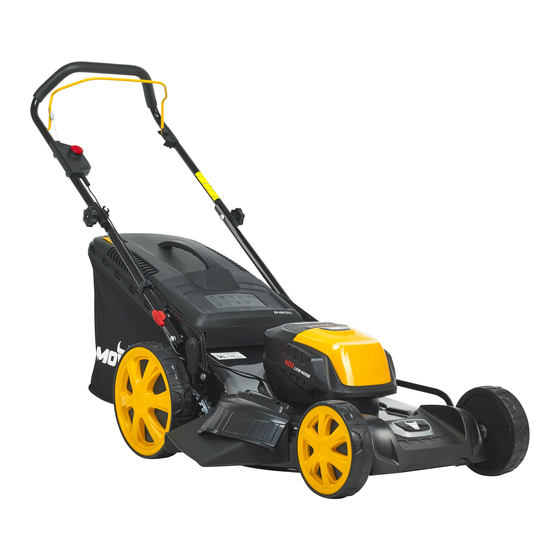
Electric 40 V battery lawn mower
EM 4640 PX-Li
DYM192115
Original operating instructions (EN)
riginal operating instructions (E
Read this manual carefully prior to installing and operating
is manual carefully prior to installing and ope
the mower. It is dangerous to operate this product without
wer. r r It is dangerous to operate this product w
being familiar with these instructions. Keep this manual in a
amiliar with these instructions Keep this man
safe place and have it ready for future reference.
Manufacturer
Ningbo Daye Garden Machinery
Co., Ltd.
No. 58 Jinfeng Road, Yuyao
Zheijiang 315403, P.R. China
www.daye-garden.com
EM 4640 SX-Li
DYM192215
1
EM 4140 PX-Li
DYM191715
Importer
Daye Europe GmbH
Parkstraße 1a
66450 Bexbach, Germany
www.mowox.com
Advertisement
Table of Contents

Related Manuals for Mowox EM 4640 PX-Li


Summary of Contents for Mowox EM 4640 PX-Li
- Page 1 Electric 40 V battery lawn mower EM 4640 PX-Li EM 4640 SX-Li EM 4140 PX-Li DYM192115 DYM192215 DYM191715 Original operating instructions (EN) riginal operating instructions (E Read this manual carefully prior to installing and operating is manual carefully prior to installing and ope the mower.
-
Page 2: Table Of Contents
“3 IN 1” ......................19 safety precautions ..................22 starting ......................23 maintenance and care ................... 26 troubleshooting .................... 29 Warranty conditions for Mowox® gardening power tools and accessories ..30 environmentally friendly disposal ..............32 EC-declaration of conformity ................. 33... -
Page 3: Symbols Marked On The Product
Read this instruction book carefully before using the lawn mower and keep it in a safe place for future reference. Keep bystanders away. Beware of sharp blades. Blades continue to rotate after the motor is switched off. Switch off isolator key before adjusting, cleaning and before leaving the product unattended for any period. - Page 4 Do not operate on inclines steeper than 15°. Mow parallelly to slopes, never up and down. Electric shock hazard. Wait until all machine components have completely stopped before touching them. CE Marking The product meets demands and regulations set by the European Community.
-
Page 5: Instructions For Your Safety
Li-lon Do not dispose of batteries into household waste, water or fire. Battery packs/ batteries must be collected, recycled or disposed of in an environmentally friendly way. Only for EC countries: Defective or dead batteries must be recycled according to the directive 2006/66/EC Noise level marking Your tool noise is not more than 92dB. - Page 6 IMPORTANT READ CAREFULLY BEFORE USE. KEEP FOR FUTURE REFERENCE. Read the instructions carefully. Be familiar with the controls and the correct use of the machine. Never allow children or people unfamiliar with these instructions to use the machine. Local regulations can restrict the age of the operator Never operate the machine while people, especially children, or pets are nearby.
- Page 7 Always be sure of your footing on slopes. Walk, never run. Mow parallelly to slopes, never up and down. Exercise extreme caution when changing direction on slopes. Do not mow excessively steep slopes. Use extreme caution when reversing or pulling the machine towards you. Stop the motor if the machine has to be lifted or tilted or when crossing surfaces other than grass.
- Page 8 If the machine starts to vibrate abnormally, inspect for damage, replace or repair any damaged parts, check for and tighten any loose parts. Keep all nuts, bolts and screws tight to be sure the machine is in safe working condition. Check the grass collector frequently for wear or deterioration.
- Page 9 Remove the battery from the mower after each use and charge it. Do not store it in the mower. Charge the battery between 0ºC and +30ºC in a dry place. Store the battery between -20°C and +30° in a dry place, as cold as possible. 10.
-
Page 10: Packaging Contents And Controls
upper handle cover flap of side- discharge on/ off button battery cover flap switch box cable clamp locking nut self-propulsion control handle grass catcher brake control handle height adjustment side-discharge lever deflector wheel mulching wedge P P arts 8 & 13 only for EM 4640. Part 11 only for SX. -
Page 11: Technical Data
EM 4640 SX-Li EM 4640 PX-Li EM 4140 PX-Li Model (DYM192215) (DYM192115) (DYM191715) rated voltage 40 V DC no load speed 3000 min 3100 min grass catcher capacity 60 l 50 l cutting width 460 mm 460 mm 410 mm net weight (without 23.6 kg... -
Page 12: Assembly
Turn the latch a quarter of a circle to release the lower guide rail (Fig. 2A – 2C). Rotate the handle upwards (Fig. 2D). Turn the latch back to lock it to the chassis (Fig. 2E). Mount the upper to the lower guide rail with the consigned washers, bolts and locking nuts (Fig. - Page 13 bolt Locking nut washer Fig. 2E Fig. 2F Cable clamp Fig. 2G Turn the latch a quarter of a circle to release the guide rail (Fig. 3A). The three holes in the brackets correspond to three heights of the lever according to your size (Fig.
- Page 14 Locking knob Fig. 3A Fig. 3B Mount and remove Raise the rear cover and hitch the grass catcher on the mounting holes on the rear of mower (Fig. 4A - 4C). Do vice versa to remove. Filling indicator There is a level indicator on the top of the grass catcher that shows whether the catcher is empty or full.
- Page 15 Fig. 4C Fig. 4D Fig.4E Additionally to the visible switch on the guide rail, there is a second switch in the motor housing operated with a key. It must be turned on, like in a car, before engaging the other switch.
- Page 16 Fig. 5A Fig. 5B Fig. 5C Lift up the battery cover. Make sure the isolator key is switched off. Switch mark ”1” is ON”, “0” is “OFF” (Fig. 6A). Insert the battery pack into battery holder (Fig. 6B). Make sure the latch on bottom of battery pack snaps in place and that the battery pack is fully seated (Fig.
- Page 17 Fig. 6A Fig. 6B Fig. 6C Fig. 6D Lift and hold up the battery door. Press and hold the battery latch button at the bottom of the battery pack (Fig. 7). Remove the battery pack from the cabinet.
- Page 18 Fig. 7 Apply outward pressure to disengage the lever from the rack. Move it forward and back to adjust the height. The central adjustment operates all wheels at the same time. You adjust the distance of the blade to the ground, thus the cutting height. It can be adjusted from 25 mm grass length (position 1) to 75 mm grass length (position 7), Cf.
-
Page 19: In 1
“ ” “ ” This formula describes 3 functions: Collection of clippings in grass bag. Mulching. Side-discharge. What is mulching? During mulching, the grass is cut, grinded and returned onto the lawn as natural fertilizer; all at the same time. Hints for mulch-mowing: Cut max. - Page 20 Fig .9A Fig. 9B Fig.9C Retrofitting for side-discharge mowing (only for EM 4640 models) WARNING: O O nly with a stopped motor and standstill cutter. Lift the rear cover and remove the grass catcher. Mount the mulching wedge (cf. description above). Lift the sideward flap for side discharge (Fig.
- Page 21 Fig. 9D Fig. 9E Fig. 9F Mowing with the grass catcher WARNING: O O nly with a stopped motor and standstill cutter. For mowing with the grass catcher, remove the mulching wedge and discharge channel for side discharge and mount the grass catcher. Removing the mulching wedge: Lift rear cover and remove the mulching wedge.
-
Page 22: Safety Precautions
Mount the grass catcher. Always operate with the deflector or grass catcher in the correct position. Always stop the motor before removing the grass catcher or adjusting the height of cutting position. Before mowing, remove all foreign objects from the lawn which may be thrown by the machine. -
Page 23: Starting
Fig. 10B Fig. 10C Start the motor as follows: Assemble the isolator key and battery (cf. chapter “assembly”). Turn the isolator key from position ”0” to position “1”, as shown in Fig.11 A. Press the On-/ Off button (Fig.11 B.) Pull the brake control handle (Fig. - Page 24 Fig. 11A Fig. 11B Caution! T T he blade starts turning as soon as the motor is started. Warning! Cutting elements continue to rotate after the motor is switch off. Grip the Self-drive control handle, the lawnmower will move forward automatically with about 3.5 km/h.
- Page 25 Do not attempt to mow through unusually tall dry or wet grass (e.g. pasture) or piles of dry leaves. Debris may build up on the mower deck or contact the engine exhaust presenting a potential fire hazard. The status of charge can be read directly from the battery in your hands. battery pack capacity no.
-
Page 26: Maintenance And Care
(1), unscrew the blade screw (2). When reassembling, make sure that the cutting edges face in the direction of the motor rotation. The blade screw (2) must be torque to 20 Nm. For service, replace the blade with an original Mowox® blade:... - Page 27 DAYE 263003499 for EM 4640 SX-Li, PX-Li DAYE 263003498 for EM 4140 PX-Li Fig. 13 WARNING: Remove the battery from the machine. WARNING: Protect hands by using heavy gloves or a rag to grasp the cutting blades when replace the blade.
- Page 28 It is suggested that moving the cutting-height adjustment lever toward the front and engage it in the “2” position. Unscrew the locking knobs that fix the lower handle, rotate the lower handle from working position to folding position. Make sure that the pin on the handle is seated in the individual bore-hole on the machine (Fig.
-
Page 29: Troubleshooting
Problem Possible cause Possible solution Power turned off Turn power on Increase the height of cut and move Grass too long machine to shorter grass Motor does not run Blade blocked Remove the obstacle Thermal protection Allow motor to cool switch activated Blade blocked Remove the obstacle... -
Page 30: Warranty Conditions For Mowox® Gardening Power Tools And Accessories
T T hank you for purchasing a Mowox®-quality product! You have decided for a gardening power tool on the state of the art of engineering, which suits the toughest quality standards. All Mowox® products are produced according to the norms ISO 9001, ISO 14001, OHSAS 18001 and BSCI. - Page 31 The notorious „memory effect“ is debarred with that technology. Like all accumulators, the Mowox® battery is subject to a normal usage attrition. In order to use your accumulator pack for a long time, follow these guidelines: Do not expose the accumulator pack to any humidity, heat or extreme cold.
-
Page 32: Environmentally Friendly Disposal
According to EU directive 2012/19/EU on electric and electronic equipment and its implementation into national law, all electric tools must be separately collected and environmentally friendly recycled. Alternative disposal: If the owner of the power tool does not return the tool to the manufacturer, he is responsible for proper disposal at a designated collection point that prepares the device for recycling according to national recycling laws and regulations. -
Page 33: Ec-Declaration Of Conformity
EC Declaration of Conformity We herewith declare, Ningbo Daye Garden Machinery Co., Ltd. No.58 Jinfeng Road, Yuyao, Zhejiang 315403, P. R. China That the following machine complies with the appropriate basic safety and health requirements of the EC Directive based on its design and type, as brought into circulation by In case of alteration of the machine, not agreed upon by us, this declaration will lose its validity Product Cordless Lawn Mower...
Need help?
Do you have a question about the EM 4640 PX-Li and is the answer not in the manual?
Questions and answers