Magnavox MSB3610 - 2.1ch Soundbar with Wired Subwoofer Manual
- Owner's manual (24 pages)
Advertisement
MAINTENANCE
Servicing
- Please refer to relevant topics on the "Troubleshooting Guide". If you cannot find any solution there, our service center is pleased to assist you.
- Even if this unit becomes inoperative, Do Not open the cabinet to repair it by yourself. There are No user-serviceable parts inside.
Turn Off the unit, unplug the AC Power cord and then call our support center mentioned on the front page. Before calling, please check Model and Serial number on the unit.
Cleaning the Cabinet
- Wipe the front panel and other exterior surfaces of the unit with a soft cloth.
- Never use a solvent, thinner, benzene or alcohol to clean the unit. Do not spray insecticide liquid near the unit.
Such chemicals may discolor the surface or damage the unit.
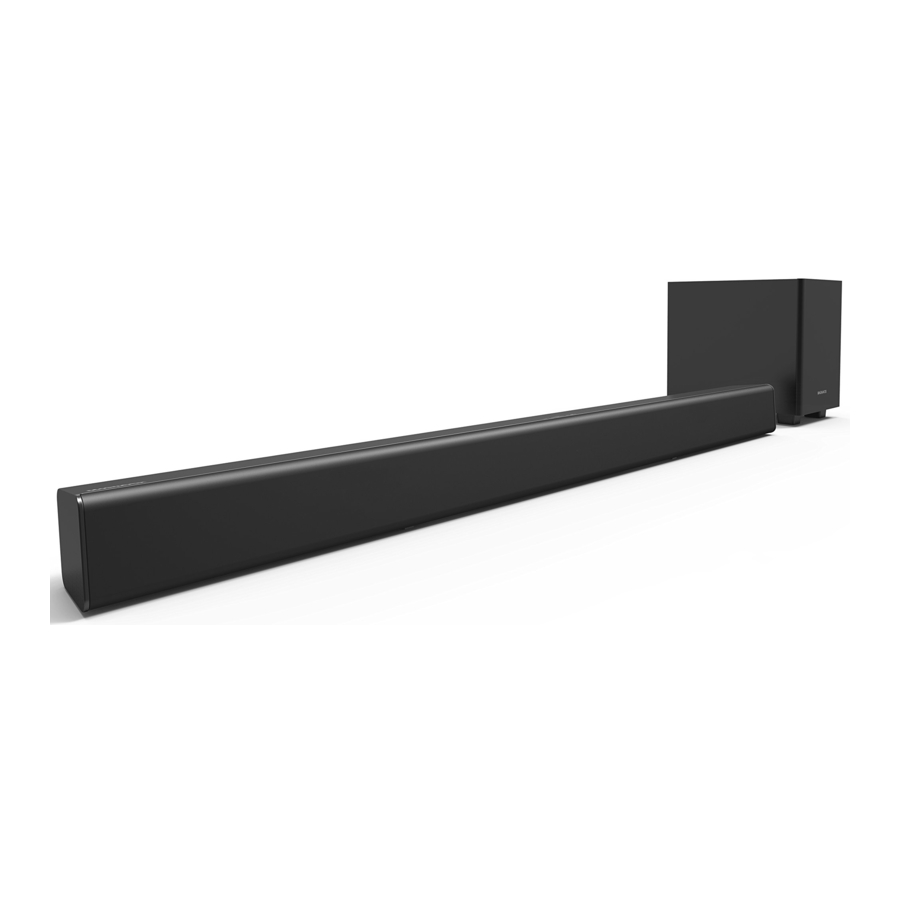
ABOUT THE DEVICE
Soundbar
Top/Front panels of Soundbar

| INPUT source | LED color | Description |
| LINE INPUT |  orange orange | Lights up when you switch to Line-In source (3.5mm jack). |
| USB INPUT | orange | Lights up when you switch to USB Input source. Blinks when pausing of playback or recognition error. |
| OPTICAL INPUT | orange | Lights up when you switch to Optical Input source. Blinks when unsupported optical signals are input. |
| AUX(iliary) INPUT | orange | Lights up when you switch to Analog Input source. |
 PAIR(ing) INPUT (Bluetooth) PAIR(ing) INPUT (Bluetooth) |  blue blue | Lights up when you switch to Bluetooth Mode and Bluetooth compatible Devices are paired. Blinks when Bluetooth pairing is activated and pairing failed. |
Back Connectors on Soundbar

| Connectors | Description | |
 | Wall mount hooks | Install on a wall if desired. |
 | AUX(iliary) IN(put) | Connect to an Analog Audio output on the TV or an Analog device. |
 | USB IN(put) | Insert a USB Memory Stick. |
 | OPTICAL IN(put) | Connect to an Optical Digital Audio output on the TV or a Digital device. |
 | LINE IN(put) | Connect to a TV or an MP3 player. |
 | Subwoofer terminal | Connect a Connection cable from Subwoofer |
 | AC Power cord | Connect to an electric outlet. |
Subwoofer

Rear of Subwoofer
| Connectors | Description | |
| Connection cable | Connect to a Soundbar. |
NOTE(S)
- The feet of the Subwoofer cannot be removed. Do not apply force to them.
- Do not touch the speaker part of the Subwoofer or put Metallic/Magnetic objects close to it. Doing so may cause a malfunction.
Remote Control
Installing the Batteries for the Remote Control

Install 2 AAA (1.5V) batteries matching the polarity indicated inside battery compartment of the Remote Control.
- The maximum operable ranges from the Unit are as follows.
| approx. 23 feet (7m) |
| approx. 16 feet (5m) within 30° |
| approx. 16 feet (5m) within 15° |
| approx. 10 feet (3m) within 30° |
NOTE(S)
- Do not mix alkaline, standard (carbon-zinc), or rechargeable (ni-cad, ni-mh, Li-ion, etc) batteries.
- Do not mix old and new batteries.
- Always remove batteries from the Remote Control if they are dead or if the Remote Control is not to be used for an extended period of time. This will prevent battery acid from leaking into the battery compartment.
Operating with the Remote Control

| Buttons | Description | |
|  | (POWER/Standby) Press to Turn On the Unit, or to switch the Unit into Standby mode. ( To completely Turn Off the Unit, you must unplug the AC Power cord.) |
|  | Press to switch to the Standard preset sound. |
|  | Press to switch to the preset sound for Sports scene. |
|  | Press to switch to the preset sound for Music. |
|  | Press to Mute the Sound and press again to Unmute the Sound. |
|  | Press to select Optical Input of the connected device to this Soundbar. |
|  | Press to select Line Input of a connected device to this Soundbar. |
 |  | Press to select USB Input of a connected device to this Soundbar. |
 |  | Press to select Auxiliary Input of a connected device to this Soundbar. |
 |  | Press to adjust Volume Up / Down on the Soundbar. |
 |  | Press to switch to the preset sound for a Movie. |
 |  | Press to switch to the preset sound for News scene. |
 |  | Press to turn Night Mode On/Off. |
 |  | Press to turn Surround On/Off. |
 |  | Press to select Bluetooth signal of a connected device to this Soundbar. |
 |  | Press to disconnect the currently connected Bluetooth compatible Device and start pairing mode to establish a new connection to another Bluetooth compatible Device. If no Bluetooth compatible Device is connected within 2 minutes, press this button to restart pairing mode. Pairing mode can only be started when Bluetooth is selected. |
 |  | Press to Skip Forwards in a music file. (Bluetooth Mode and USB Mode only) |
 |  | Press to Play or Pause a music file. (Bluetooth Mode and USB Mode only) |
 |  | Press to Skip Backwards in a music file. (Bluetooth Mode and USB Mode only) |
CONNECTIONS
Supplied Cables used in this Connection are as follows:
- Line-In cable × 1
- Connect to a device
Connect to TV

Most modern digital TV's do not have Red and White Coaxial Analog Audio Outputs, but do have Red and White Coaxial Analog Audio Inputs. If you plan to use Red and White Analog Coaxial Cables to Connect your TV to this Soundbar, please ensure that your TV does indeed have Red and White Coaxial Analog Audio OUT. Refer to your TV's User Manual for details.
To Connect Soundbar directly to other devices (Blu-ray player, Game System, etc.), see your Device's User Manual.

Use a Coaxial (RCA) to Optical Toslink Digital Audio Converter (not supplied) for our Soundbar which only has an optical input.

Connect Audio from other Device

NOTE(S)
- Make sure the Soundbar is Turned Off when Connecting Cables.
- Check whether all Connection Cables are properly connected.
- If you Connect from the Headphone Output on the Device's Source to the Line-Input on the Soundbar, make sure the Volume from the Headphone Output on the Device's Source is set to an appropriate mid-level sound. Setting it too Low will produce weak output from the Soundbar or setting it too High could cause distortion.
- If a Line / Optical / AUX Connection fails when connected to a TV, check the Audio settings on the devices.
- Connect Connection cable from Subwoofer to the Soundbar.

- Connect AC Power cords from Soundbar and Wireless Subwoofer to an electric outlet.


NOTE(S)
- Carefully wire the Subwoofer cable where you will not trip over it.
- DO NOT pull the Subwoofer cable hard, or apply excessive force to it. Doing so may cause damage to the cable.
USING YOUR DEVICE
Turning On the Soundbar
- Press
![]() on the Remote Control.
on the Remote Control.

- Select Input source.

e.g.) When![]() was pressed the OPTICAL INPUT (Orange LED) was selected.
was pressed the OPTICAL INPUT (Orange LED) was selected.


- One of the INPUT indicators will light up when you switch to your Connected Source.
- For Bluetooth connections, refer to "Playing back a music file through Bluetooth" section.
Adjust the Volume
- To increase or decrease the Volume, press VOL +/- on the Remote Control.
| Volume levels | LED lighting patterns | LED behavior |
| 0 - 5 (6 levels) |  | Lights up for 3 seconds (default: level 13) |
| 6 - 11 (6 levels) |  | |
| 12 - 17 (6 levels) |  | |
| 18 - 23 (6 levels) |  | |
| 24 - 29 (6 levels) |  |
- When pressing VOL+/-, the Indicator(s) will show the current Volume. Pressing VOL+/- while the current Volume is shown will increase/decrease the Volume.
- Pressing and holding VOL+ or VOL- will increase or decrease the Volume and the Indicator(s) will blink. When the Volume has reached the maximum or minimum, the Indicator(s) will stop blinking.
- To Mute the Sound, press
![]() on the Remote Control.
on the Remote Control.

| Volume levels | LED lighting patterns | LED behavior |
| Mute |  | The 3 LEDs in the middle blink continuously. |
- To Restore the Sound, press
![]() again or press VOL +/-.
again or press VOL +/-.
 again or press VOL +/-.
NOTE(S)
- The Volume might be influenced by MP3 or Bluethooth player. If the Volume is too low, adjust the Volume on the Connected device.
- If the Volume level is Set Above 18 when the Soundbar is turned Off, the Volume will automatically be Reset to 18 when the Soundbar is turned back On.
Experiencing the Surround Sound
- Press
![]() on the Remote Control to activate the Surround sound.
on the Remote Control to activate the Surround sound. - The LEDs blink in a spread manner, from the center (OPTICAL) to both sides.

| Surround status | LED lighting patterns | Sound effects |
| ON |  | Outputs high realistic sounds. |
- If you want to set Surround sound to Off, press
![]() on the Remote Control once again.
on the Remote Control once again. - The 2 LEDs (USB and AUX) blink twice.

| Surround status | LED lighting patterns | Sound effects |
| OFF |  | Outputs the original sound. |
NOTE(S)
- The Default setting is Off.
- This Setting will remain while the Soundbar is in Standby mode.
Choosing Preset Sound
- Press either
![]() ,
, ![]() ,
, ![]() ,
, ![]() , or
, or ![]() on the Remote Control to select the desired preset sound suitable for the Audio that is playing.
on the Remote Control to select the desired preset sound suitable for the Audio that is playing. - The 2 LEDs (LINE and
![]() PAIR) blink once.
PAIR) blink once.
 ,
,  ,
,  ,
,  ,
, 

| Sound mode | LED lighting patterns |
| STANDARD SPORTS MUSIC MOVIE NEWS |  |
- When the preset sound setting is set, LED indicators go back to the current Input.
NOTE(S)
- Select any Preset Sound according to your preference, regardless of categories.
- The default Preset Sound is MOVIE.
- This setting will remain while the Soundbar is in Standby mode.
Night Mode
Night Mode 1
Turns down the Volume on the Subwoofer. It is useful late at night.
- To switch the unit to Night Mode 1, press
![]() .
.
 .
.Night Mode 2* (Dynamic Range Control)
Adjusts for clarity even when the Volume is Low, by compressing the range of the lowest sound level and the highest sound level.
- To switch the unit to Night Mode 2, press and hold
![]() .
.
* This function is only effective for Dolby Digital sounds.
* This function is only available when the Soundbar is connected via Optical.
| Mode | LED lighting patterns | LED behavior | Sound effects |
| Night Mode 1 |  | On: Flashes 4 times Off: Flashes twice | On: Lowers the Volume of the Subwoofer. Off: Outputs the Sound at the same Volume at the original. |
| Night Mode 2 |  | On: Flashes 4 times Off: Flashes twice | On: Turns down loud sounds and turns up soft sounds in order to keep voices at a comfortable Volume. Off: Output the Sound at the same Volume as the original. |
| Input Source | Night Mode 1 | Night Mode 2 | |
| OPTICAL | Dolby Digital |  | |
| PCM | | - | |
| LINE | | - | |
| AUX | | - | |
| USB | | - | |
| BLUETOOTH | | - | |
NOTE(S)
- The Default setting of both Night Modes is Off.
- These Settings will remain while the Soundbar is in Standby mode, so again use
![]() to turn the mode from current mode to the next mode.
to turn the mode from current mode to the next mode.
MAKING MORE USE WITH YOUR DEVICE
Using a Bluetooth compatible Device
Pairing a Bluetooth compatible Device with this Unit
- Press
![]() BLUETOOTH on the Remote Control to switch the Soundbar to Bluetooth Mode.
BLUETOOTH on the Remote Control to switch the Soundbar to Bluetooth Mode. - Turn your Bluetooth compatible Device On and activate the Bluetooth setting. (See the User Manual of the Bluetooth compatible Device on how to enable Bluetooth.)
- On your Bluetooth compatible Device search for and select "MAGNAVOX_Soundbar" to pair (or register) your Soundbar with your Bluetooth compatible device.
- If a Passcode is requested, enter "0000".
- If the Soundbar name does not appear on the Bluetooth compatible device, press
![]() PAIR on the Remote Control.
PAIR on the Remote Control.
- When the Pairing is complete, your Bluetooth compatible Device may show "Connected" on the display.
 BLUETOOTH on the Remote Control to switch the Soundbar to Bluetooth Mode.
 PAIR on the Remote Control.
Playing back a music file through Bluetooth
- Press
![]() BLUETOOTH on the Remote Control to switch the Soundbar to Bluetooth Mode.
BLUETOOTH on the Remote Control to switch the Soundbar to Bluetooth Mode. - The
![]() PAIR (Bluetooth) indicator will light up.
PAIR (Bluetooth) indicator will light up.
![]()
- The
- Turn your Bluetooth compatible Device On and activate the Bluetooth setting. (See the User Manual of the Bluetooth compatible Device on how to enable Bluetooth.)
- If you have already paired your Bluetooth compatible Device and the device's Bluetooth is On then the Soundbar should connect to it automatically.
- If the Soundbar name does not appear on the Bluetooth compatible Device, press
![]() PAIR on the Remote Control.
PAIR on the Remote Control.
- Playback a music file on the connected Bluetooth compatible Device.
- You may use,
![]() ,
, ![]() and
and ![]() on the Soundbar's Remote Control once the Bluetooth compatible Device is properly connected to this Soundbar.
on the Soundbar's Remote Control once the Bluetooth compatible Device is properly connected to this Soundbar.
- You may use,
- To Exit Bluetooth Mode, press one of the other INPUT Source buttons on the Remote Control.

 ,
,  and
and  on the Soundbar's Remote Control once the Bluetooth compatible Device is properly connected to this Soundbar.
The following chart describes behavior of the  PAIR indicator and To-Do's for playback, according to each behavior sequence of the PAIR indicator.
| PAIR indicator behavior (The arrow indicates the passage of time.) | The current status of Bluetooth and the procedures to complete Bluetooth connection for Bluetooth playback. | ||
| 1 |  | Blinks twice  Light off Repeats | Waiting for a new Bluetooth compatible Device to connect (Status: Pairing). On the Bluetooth compatible Device to connect, select the (*1) |
| 2 |  | Remains lit | Soundbar's name, then connect. A Bluetooth compatible Device is connected. Music can be played from the connected Bluetooth compatible Device (*2). |
| 3 |  | Blinks slowly | No Bluetooth compatible Device is connected. To reconnect with the last connected Bluetooth compatible Device, press  BLUETOOTH (*2). BLUETOOTH (*2). |
| 4 |  | Blinks rapidly | Trying to connect with the last connected Bluetooth compatible Device. Enable Bluetooth on the last connected Bluetooth compatible Device and wait a moment (*2). |
| 5 |  | Remains unlit | Either another audio input is selected or the Soundbar is in Standby. If all indicators are Off, press  to turn On the Soundbar. When all indicators except the blue LED are lighting up or blinking, press BLUETOOTH. The (Bluetooth) indicator will start blinking or light up. Follow 1-4 in this chart. to turn On the Soundbar. When all indicators except the blue LED are lighting up or blinking, press BLUETOOTH. The (Bluetooth) indicator will start blinking or light up. Follow 1-4 in this chart. |
*1 This Soundbar's name is "MAGNAVOX_Soundbar". If this Soundbar has already been registered to a Bluetooth compatible Device and the connection fails, delete it (or deactivate it), then press  PAIR and select this Sound bar's name to connect.
*2 To play music from a different Bluetooth compatible Device, press PAIR , then select this Soundbar's name on the Bluetooth compatible Device to connect (*1).
NOTE(S)
- If reconnecting the Bluetooth compatible device to the Soundbar fails, delete the registered profile of this Soundbar from the Bluetooth compatible device, then perform pairing again.
This unit can store up to 9 device profiles. - The music streaming may be interrupted by obstacles between the device and Soundbar, such as wall, metallic casing that covers the device, or other devices nearby that operate in the same frequency.
- If you want to connect your Soundbar with another Bluetooth compatible device, press
![]() PAIR to disconnect the current connection.
PAIR to disconnect the current connection. - Depending on your Bluetooth compatible device, different behaviors may appear. See your Bluetooth compatible device's User Manual for details.
- The operational range between the Soundbar and a Bluetooth compatible device is approximately 30 feet (10m), if there is no interference or obstacles.
Playing back a music file through USB Memory Stick
You can enjoy playback of music files which are stored on a USB Memory Stick on this Unit.
Preparing for USB Memory Stick playback
You require the following equipment:
- A FAT(FAT16)/FAT32 formatted USB Memory Stick
- A music file which has extension of "WAV"
NOTE(S)
- WAV files stored in the root directory, or in a folder in the root directory, can be played.
- Playback is in Alphabetical/Numerical order (Folder/File) names. Files in the same folder will be played continuously.
- Playable format is: up to 96KHz/24bit, Stereo, LPCM.
- Only FAT(FAT16)/FAT32 formatted portable memory is supported.
- When a music file is playing back, do not remove a USB Memory Stick. This may cause the corruption of the music file or damage to the USB Memory Stick.
- If you cannot play music file after the USB Memory Stick is inserted, retry the procedure or please contact Call Center for further assistance.
- Some music files stored on some USB Memory Sticks with this unit may not play back.
Playing back a music file
- Connect your USB Memory Stick with a music file to the USB terminal on the rear of the Soundbar.
- Press
![]() on the Remote Control to switch the Soundbar to USB Mode.
on the Remote Control to switch the Soundbar to USB Mode. - When the Soundbar connects the USB Memory Stick, the USB and
![]() PAIR indicator will lightup while loading.
PAIR indicator will lightup while loading.
![]()
If the Soundbar successfully completed loading the USB Memory Stick and the music files, the USB indicator will blink slowly.
![]()
- When the Soundbar connects the USB Memory Stick, the USB and
- Press
![]() on the Remote Control to play a music file on the connected USB Memory Stick.
on the Remote Control to play a music file on the connected USB Memory Stick. - Press
![]() if you want to Pause playback. To go back to playback, press
if you want to Pause playback. To go back to playback, press ![]() again.
again. - You can also use
![]() to Skip Backward in a music file and
to Skip Backward in a music file and ![]() to Skip Forward in a music file.
to Skip Forward in a music file. - If you press
![]() twice, the music file will go back to the previous music file. Press it repeatedly to go to the previous music files. The music files will move backward one at a time.
twice, the music file will go back to the previous music file. Press it repeatedly to go to the previous music files. The music files will move backward one at a time.
- Press
- To Exit USB Mode, press one of the other INPUT source buttons on the Remote Control.
 on the Remote Control to switch the Soundbar to USB Mode.
  PAIR indicator will lightup while loading.

 on the Remote Control to play a music file on the connected USB Memory Stick.
  if you want to Pause playback. To go back to playback, press
  to Skip Backward in a music file and
  to Skip Forward in a music file.
| USB indicator behavior (The arrow indicates the passage of time.) | The current status of the USB device | ||
| 1 |  | Remains lit | No USB device is connected or during playback. |
| 2 |  | Blinks slowly | Playback has been Stopped. |
| 3 |  | Blinks twice  Light off Repeats | A USB device is connected; no playable file is found or an unrecognizable USB device. Make sure that the USB Memory Stick has been formatted (FAT(FAT16)/FAT32) or supported music files (".WAV") are stored correctly. |
| 4 |  | Remains unlit | USB Input is not selected or the Soundbar is in Standby. |
USEFUL TIPS
Resetting to the Factory Default mode
You can reset each settings, or delete the Bluetooth profiles that stored on the Unit by resetting the factory default.
- Press
![]() to turn the Soundbar On.
to turn the Soundbar On. - Press
![]() to select the LINE input.
to select the LINE input. - Press
![]() 5 times within 3 seconds.
5 times within 3 seconds. - After completing Reset, the Soundbar will be Shut Down and go into Standby mode.
 to turn the Soundbar On.
 to select the LINE input.
 5 times within 3 seconds.
 Upgrading the Software
MAGNAVOX continuously tries to improve its products and we strongly recommend that you Upgrade the Soundbar Software when Upgrades are available. New Software can be downloaded on our website at www.magnavox.com/support/ using the Model Number from your Soundbar to find information.
Preparing for the Software Upgrade
You require the following equipment:
- A PC with web browsing capability
- An archive utility that supports the ZIP-format (e.g. WinZip for Windows or StuffIt for Mac OS)
- A Blank empty clean FAT(FAT16)/FAT32 formatted USB Memory Stick
NOTE(S)
- Only FAT(FAT16)/FAT32 formatted portable memory is supported.
- Use only Software Upgrades that can be found on the MGNAVOX web site.

During Software Upgrade is running, DO NOT do the following:
- Unplugging the Soundbar's AC Power cord.
- Pressing any buttons.
- Removing the USB Memory Stick from the Soundbar.
Upgrading the Software
Find information and Software related to your Soundbar and Download the Latest Software Upgrade file to your PC.
- On your PC, open a web browser and go to www.magnavox.com/support/
- Enter the Model Number in the "Type the Model Number..." field.
- Click the desired Software to be Downloaded.
- Download to your PC and then Decompress the ZIP-file.
- Copy the Upgrade file to the Empty root directory on the clean formatted USB Memory Stick.
- Unplug the Soundbar's AC Power cord from the AC outlet.
- Connect your USB Memory Stick with the Upgrade file to the USB terminal on the rear of the Soundbar.
- Plug the AC Power cord into the AC co d outlet, then Press
![]() .
. - Press
![]() on the Remote Control to switch to USB Mode.
on the Remote Control to switch to USB Mode. - Wait until loading completes. (After loading completion, the USB indicator will light up and the AUX indicator blinks.)
- Press each button in the following order within 3 seconds.

- Software Upgrade will start.
- The indicators show the Upgrade progress.
- All indicators will go unlit if Upgrade is completed successfully.
- If Indicators keep lighting or blinking after 10 minutes have passed, the Upgrade has failed. Unplug the AC Power cord, remove the USB Memory Stick from the Soundbar, confirm that the correct Upgrade file is saved to the USB Memory Stick, then retry from step 6 on.
- Press
![]() .
.
 .
. on the Remote Control to switch to USB Mode.
Auto Standby Function
- This Soundbar will automatically go into Standby mode for Energy Saving if no Audio Signal has been input for more than 20 minutes.
- In order to use the Soundbar again while it is in Standby mode, press
![]() on the Remote Control.
on the Remote Control.
Installing the Soundbar on a Wall
OPTIONAL
- Purchase the screws (x 2) by length/diameter below, now make screw holes on the vertical interior Wall.

- Hang the Soundbar over the screws.

- There is a Wall Mounting Template or in the Setup Manual.


NOTE(S)
Funai is not liable for these types of accidents or injury noted below.
![]()
Do not mount the Soundbar onto the Wall while your Soundbar is plugged in or Turned On. It may result in an electrical shock injury.- Install the screws on a sturdy vertical Wall. If installed onto a Ceiling or slanted Wall, the Soundbar may fall which could result in a severe injury.
- Make sure that the Wall where you are mounting the Soundbar is appropriate. Some mounts are not designed to be mounted to Walls with steel studs or cinder block construction. If you are unsure, contact a professional installer.
- Do not fasten the screws using excessive force. This may damage the product or cause the product to fall, leading to an injury.
- Never allow children to climb on or play on the Soundbar.

TROUBLESHOOTING GUIDE
If the Unit does not perform properly when operated as instructed in this Owner's Manual, refer to the following.
| Problem | Corrective action |
| No Power (no LED lights will be seen) |
|
| No Sound |
|
| Distorted sound |
|
| No Sound from Subwoofer |
|
| Low Sound or Low Bass Sound from Subwoofer |
|
| Abnormal noise is generated. |
|
| Echo Sound is heard when both the TV and Soundbar Sound are On. |
|
| Intermittent or No reaction to the Remote Control. |
|
| An external Device cannot connect with the Soundbar via Bluetooth. |
|
| Poor sound quality from the connected Bluetooth compatible Device. |
|
| Unstable connection between the Bluetooth compatible Device and the Soundbar. |
|

PRECAUTIONS
Supplied Accessories
- Setup Manual
![]()
- Remote Control (NC307UH)
![]()
- Batteries (AAA, 1.5V x 2)
![]()
- Line-In cable
![]()


Register Online at www.magnavox.com/support/ today to get the most benefits from your purchase.
Registering your model with MAGNAVOX makes you eligible for all of the valuable benefits such as Software Upgrades and important product notifications. Register Online at www.magnavox.com/support/
The Model and Serial Numbers of this Unit may be found on the cabinet. You should Record and Retain those Letters/Numbers for future reference.


TO REDUCE THE RISK OF FIRE OR ELECTRIC SHOCK, DO NOT EXPOSE THIS APPARATUS TO RAIN OR MOISTURE. APPARATUS SHALL NOT BE EXPOSED TO DRIPPING OR SPLASHING AND NO OBJECTS FILLED WITH LIQUIDS, SUCH AS VASES, SHALL BE PLACED ON THE APPARATUS.

RISK OF ELECTRIC SHOCK
DO NOT OPEN
TO REDUCE THE RISK OF ELECTRIC SHOCK, DO NOT REMOVE COVER (OR BACK). NO USER SERVICEABLE PARTS INSIDE. REFER SERVICING TO QUALIFIED SERVICE PERSONNEL.
 | The lightning flash with arrowhead symbol, within an equilateral triangle, is intended to alert the user to the presence of uninsulated "dangerous voltage" within the product's enclosure that may be of sufficient magnitude to constitute a risk of electric shock to persons. |
 | The exclamation point within an equilateral triangle is intended to alert the user to the presence of important operating and maintenance (servicing) instructions in the literature accompanying the appliance. |
The important note and rating are located on the rear or bottom of the cabinet.
 The symbol for CLASS ll (Double Insulation)
IMPORTANT SAFETY INSTRUCTIONS
- Read these instructions.
- Keep these instructions.
- Heed all warnings.
- Follow all instructions.
- Do not use this apparatus near water.
- Clean only with dry cloth.
- Do not block any ventilation openings. Install in accordance with the manufacturer's instructions.
- Do not install near any heat sources such as radiators, heat registers, stoves, or other apparatus (including amplifiers) that produce heat.
- Do not defeat the safety purpose of the polarized or grounding-type plug. A polarized plug has two blades with one wider than the other. A grounding type plug has two blades and a third grounding prong. The wide blade or the third prong are provided for your safety. If the provided plug does not fit into your outlet, consult an electrician for replacement of the obsolete outlet.
- Protect the power cord from being walked on or pinched particularly at plugs, convenience receptacles, and the point where they exit from the apparatus.
- Only use attachments/accessories specified by the manufacturer.
- Use only with the cart. stand, tripod, bracket, or table specified by the manufacturer, or sold with the apparatus.
When a cart is used, use caution when moving the cart / apparatus combination to avoid injury from tip-over.
![]()
- Unplug this apparatus during lightning storms or when unused for long periods of time.
- Refer all servicing to qualified service personnel. Servicing is required when the apparatus has been damaged in any way, such as power-supply cord or plug is damaged, liquid has been spilled or objects have fallen into the apparatus, the apparatus has been exposed to rain or moisture, does not operate normally, or has been dropped.

Disconnect the AC Power Plug to shut Off the Unit when Trouble is found or not in Use. The AC Power Plug shall remain readily operable and available.
Danger of explosion if battery is incorrectly replaced. Replace only with the same or equivalent type.

Batteries (Battery pack or battery installed) shall not be exposed to excessive heat such as sunshine, fire or the like.
Do not place the unit on the furniture that is capable of being tilted by a child and an adult leaning, pulling, standing or climbing on it. A falling unit can cause serious injury or even death.
This apparatus should not be placed in a built-in installation such as a bookcase or rack unless proper ventilation is provided. Make sure to leave a space of 3.9 inches (10cm) or more around this apparatus.
Never use a gas duster on this unit. The gas trapped inside of this unit may cause ignition and explosion.
This transmitter must not be co-located or operated in conjunction with any other antenna or transmitter.
Mounting Soundbar on a Wall
- The recommended screw (sold separately) allows the mounting of the Soundbar on the Wall.
- Funai is not liable for any accident, damage or injury due to any improper installation, lack of strength of installation or improper use.
- Drill screw holes into the wall. Depending on the wall material, use Molly Anchor inserts to make sure the screws will not fall out. Although the Soundbar weighs approximately 4.4 lb/2 kg, it is recommended that the wall be able to support 13.2 lb/6 kg (three times the weight of the Soundbar) for extra safety. Recommended measurements are as follows:
Wall thickness of 1/2"/1.3 cm or more, Screw diameter of 5/32"/4 mm and Screw length of 1-3/16"/30mm or more. - Screw and Molly Anchor are sold separately and is not supplied.
Funai is not liable for these types kinds of accidents or injury noted below.
- Install two screws on a steady vertical wall.
- If installed onto a ceiling or slanted wall, the Soundbar and screws may fall which could result in a several injury.
- Do not use screws that are longer of shorter than their specified length. If screws too long or short are used this may cause the Soundbar to fall.
- Do not fasten screws by excessive force, this may damage the wall or cause the Soundbar to fall, leading to an injury.
![shock hazard]() Do not mount the Soundbar onto screws while the Soundbar is plugged in or turned on. It may result in an electrical shock injury.
Do not mount the Soundbar onto screws while the Soundbar is plugged in or turned on. It may result in an electrical shock injury.
When installing the Soundbar on the wall, allow this much space.
| Top: | 4"(10 cm) |
| Left and right sides: | 4"(10 cm) |
| Bottom: | 4"(10 cm) |
| Space between Mounting Screw and Wall: | 9/64" ~ 5/32"/3.5 ~ 4mm |

To Avoid the Hazards of Electrical Shock and Fire
- Do not handle the AC Power cord with wet hands.
- Do not pull on the AC Power cord when disconnecting it from an AC outlet. Grasp it by the plug.
- Do not put your fingers or objects into the unit.
Location and Handling
- Do not install the unit in direct sunlight, near strong magnetic fields, or in a place subject to dust or strong vibration.
- Avoid a place with drastic temperature changes.
- Install the unit in a horizontal and stable position. Do not place anything directly on top or bottom of the unit. Depending on your external devices, noise or disturbance of the picture and / or sound may be generated if the unit is placed too close to them. In this case, please ensure enough space between the external devices and the unit.
- Depending on the environment, the temperature of this unit may increase slightly. This is not a malfunction.
- Be sure to Unplug the AC Power cord from the AC outlet before Removing the Unit.
Dew Condensation Warning
- Dew condensation may form inside the unit in the following conditions. If so, do not use this unit at least for a few hours until its inside gets dry.
- The unit is moved from a cold place to a warm place.
- Under conditions of high humidity.
- After heating a cold room.

Documents / ResourcesDownload manual
Here you can download full pdf version of manual, it may contain additional safety instructions, warranty information, FCC rules, etc.
Download Magnavox MSB3610 - 2.1ch Soundbar with Wired Subwoofer Manual
Advertisement


Need help?
Do you have a question about the MSB3610 and is the answer not in the manual?
Questions and answers