
Subscribe to Our Youtube Channel
Related Manuals for Magnavox MSB3610


Summary of Contents for Magnavox MSB3610
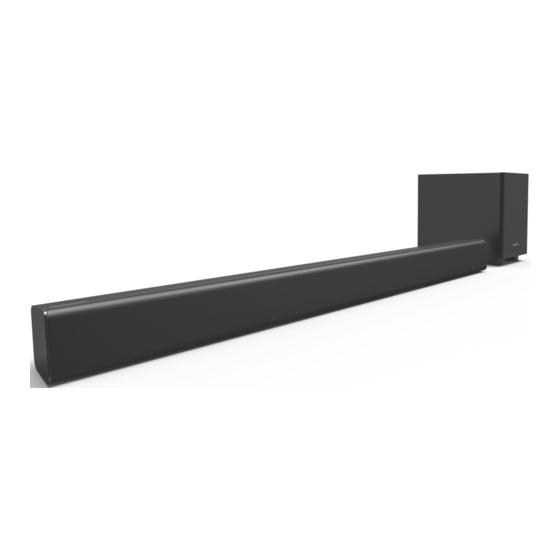
- Page 1 Owner’s Manual Manual del Propietario MSB3610 2.1ch Soundbar with Wired Subwoofer INSTRUCCIONES SIMPLIFICADAS Y GRANTíA INCLUIDOS EN ESPAÑOL. © 2016 Funai Electric Co., Ltd.
-
Page 2: Table Of Contents
PRECAUTIONS Supplied Accessories Contents PRECAUTIONS IMPORTANT SAFETY INSTRUCTIONS ............3 ABOUT SOUNDBAR Soundbar ....................6 Top / Front panels of Soundbar ........... 6 Back Connectors on Soundbar ..........6 (NC307UH) ( AAA x 2 ) • Setup Manual • Remote Control • Line-In cable Subwoofer ....................7 •... -
Page 3: Important Safety Instructions
Register Online at www.magnavox.com/support/ today to get the most benefits from your purchase. Registering your model with MAGNAVOX makes you eligible for all of the valuable benefits such as Software Upgrades and important product notifications. Register Online at www.magnavox.com/support/ The Model and Serial Numbers of this Unit may be found on the cabinet. - Page 4 • This unit’s packaging materials are recyclable and can be reused. Please dispose of any materials in accordance with your local recycling regulations. • Batteries should never be thrown away or incinerated but disposed of in accordance with your local regulations concerning chemical wastes. • For product recycling information, please visit - www.magnavox.com/support/ – 4 –...
- Page 5 Do not spray insecticide liquid near the unit. Such chemicals may discolor the surface or damage the unit. MAGNAVOX and SMART. VERY SMART are registered trademarks of Koninklijke Philips N.V. and are used under license from Koninklijke Philips N.V.
-
Page 6: About Soundbar
ABOUT SOUNDBAR Soundbar Top / Front panels of Soundbar INPUT LINE PAIR OPTICAL INPUT source LED color Description LINE INPUT orange Lights up when you switch to Line-In source (3.5mm jack). Lights up when you switch to USB Input source. USB INPUT orange Blinks when pausing of playback or recognition error. -
Page 7: Subwoofer
Subwoofer Rear of Subwoofer Connectors Description Connect to a Soundbar. Connection cable NOTE(S) • The feet of the Subwoofer cannot be removed. Do not apply force to them. • Do not touch the speaker part of the Subwoofer or put Metallic/Magnetic objects close to it. Doing so may cause a malfunction. -
Page 8: Remote Control
Remote Control Installing the Batteries for the Remote Control Install 2 AAA (1.5V) batteries matching the polarity indicated inside battery compartment of the Remote Control. • The maximum operable ranges from the Unit are as follows. – Line of sight: approx. -
Page 9: Connections
CONNECTIONS Supplied Cables used in this Connection are as follows: • Line-In cable × 1 Connect to a device Connect to TV Rear of Soundbar Rear of TV LINE OPTICAL Line-In cable HEADPHONE Good Good AUDIO OUT supplied Digital Audio Optical cable Best Best DIGITAL AUDIO... - Page 10 Connect Connection cable from Subwoofer to the Soundbar. Rear of Soundbar Rear of Subwoofer Connect AC Power cords from Soundbar and Wireless Subwoofer to an electric outlet. Rear of Soundbar NOTE(S) • Carefully wire the Subwoofer cable where you will not trip over it. •...
-
Page 11: Using Your Soundbar
USING YOUR SOUNDBAR Turning On the Soundbar Press on the Remote Control. Select Input source. e.g.) When was pressed the OPTICAL INPUT (Orange LED) was selected. INPUT LINE OPTICAL PAIR • One of the INPUT indicators will light up when you switch to your Connected Source. •... -
Page 12: Adjust The Volume
Adjust the Volume To increase or decrease the Volume, press VOL +/- on the Remote Control. Volume levels LED lighting patterns LED behavior INPUT LINE PAIR OPTICAL 0 - 5 (6 levels) INPUT LINE OPTICAL PAIR 6 - 11 (6 levels) INPUT LINE PAIR... -
Page 13: Experiencing The Surround Sound
Experiencing the Surround Sound Press on the Remote Control to activate the Surround sound. • The LEDs blink in a spread manner, from the center (OPTICAL) to both sides. Surround status LED lighting patterns Sound effects INPUT LINE OPTICAL PAIR ... -
Page 14: Choosing Preset Sound
Choosing Preset Sound Press either , or on the Remote Control to select the desired preset sound suitable for the Audio that is playing. The 2 LEDs (LINE and PAIR) blink once. Sound mode LED lighting patterns STARNDARD INPUT SPORTS LINE OPTICAL PAIR... -
Page 15: Making More Use With Your Soundbar
MAKING MORE USE WITH YOUR SOUNDBAR Using a Bluetooth compatible Device Pairing a Bluetooth compatible Device with this Unit Press BLUETOOTH on the Remote Control to switch the Soundbar to Bluetooth Mode. Turn your Bluetooth compatible Device On and activate the Bluetooth setting. (See the User Manual of the Bluetooth compatible Device on how to enable Bluetooth.) On your Bluetooth compatible Device search for and select “MAGNAVOX_Soundbar”... - Page 16 The following chart describes behavior of the PAIR indicator and To-Do’s for playback, according to each behavior sequence of PAIR indicator. The current status of Bluetooth and the procedures to PAIR indicator behavior complete Bluetooth connection for Bluetooth playback. (The arrow indicates the passage of time.) Waiting for a new Bluetooth compatible Device to connect (Status: Blinks twice ...
-
Page 17: Playing Back A Music File Through Usb Memory Stick
Playing back a music file through USB Memory Stick You can enjoy playback of music files which are stored on a USB Memory Stick on this Unit. Preparing for USB Memory Stick playback You require the following equipment: – A FAT(FAT16)/FAT32 formatted USB Memory Stick –... -
Page 18: Useful Tips
• After completing Reset, the Soundbar will be Shut Down and go into Standby mode. Upgrading the Software MAGNAVOX continuously tries to improve its products and we strongly recommend that you Upgrade the Soundbar Software when Upgrades are available. New Software can be downloaded from our website at www.magnavox.com/support/ using the Model Number from your Soundbar to find information. -
Page 19: Auto Standby Function
Auto Standby Function • This Soundbar will automatically go into Standby mode for Energy Saving if no Audio Signal has been input for more than 20 minutes. • In order to use the Soundbar again while it is in Standby mode, press on the Remote Control. -
Page 20: Information
INFORMATION Troubleshooting Guide If the Unit does not perform properly when operated as instructed in this Owner’s Manual, refer to the following. Problem Corrective action – Check if the AC Power cord is properly connected. No Power (no LED lights will be –... -
Page 21: Specifications
Specifications Power requirements 120 V AC + / - 10%, 60 Hz + / - 0.5% Output power 50W (Front L/R speaker: 24W, Subwoofer: 26W) Dimensions Soundbar: 39.3 x 3.1 x 3.1 inches (999 x 77 x 77 mm) Subwoofer: 7.0 x 9.7 x 9.6 inches (176 x 244 x 242 mm) (width x height x depth) Weight Soundbar:... -
Page 22: Limited Warranty
LIMITED WARRANTY Limited Warranty NINETY (90) DAY LABOR / ONE (1) YEAR PARTS WARRANTY COVERAGE: This warranty does not apply (a) to damage caused by This warranty obligation is limited to the terms as set forth accident, abuse, misuse, neglect, misapplication, or non- below. -
Page 23: Español
Español Conexiones Reproducción Para conectar a una TV, consulte “CONNECTIONS (CONEXIONES)” en la página 9 y verifique las Presione para encender su Sound- bar. terminales de la TV, después conecte su Soundbar a la TV, y conecte el cable de energía CA. Para reproducir audio a través de un dispositivo Bluetooth, consulte Presione el botón de fuente INPUT (En- “Playing back a music file through Bluetooth (Reproducir... - Page 24 GARANTÍA LIMITADA NOVENTA (90) DÍAS EN MANO DE OBRA / UNA (1) AÑO EN PARTES COBERTURA DE GARANTÍA: Esta garantía no aplica (a) a daños causados por accidente, La obligación de ésta garantía se limita a los términos abuso, mal uso, negligencia, mala aplicación o por productos establecidos a continuación.
Need help?
Do you have a question about the MSB3610 and is the answer not in the manual?
Questions and answers