Table of Contents
Advertisement
Available languages
Available languages
Quick Links
Advertisement
Table of Contents

Related Manuals for universalblue IGUAZU

Summary of Contents for universalblue IGUAZU
- Page 1 MANUAL DE INSTRUCCIONES INSTRUCTION MANUAL UTE30L-18 / UTE50L-18 / UTE80L-18 / UTE100L-18 Termo eléctrico 30l / 50l /80l / 100l Electric wáter heater 30l / 50l / 80l /100l www.universalblue.es C/Decenio, 1 P.I. Media Legua 30565 Las Torres de Cotillas (Murcia)
-
Page 2: Table Of Contents
Termo eléctrico 30l /50l /80l / 100l Electric wáter heater 30l / 50l / 80l /100l ÍNDICE ESPAÑOL INSTRUCCIONES DE SEGURIDAD ..............3 DESCRIPCIÓN Y CARACTERÍSTICAS ............... 6 INSTALACIÓN ....................... 6 LLENANDO DEL TERMO ................... 10 CONEXIÓN ELÉCTRICA ..................11 INSTRUCCIONES DE USO ................. -
Page 3: Español
ESPAÑOL Le felicitamos por haber adquirido este producto. Le recomendamos que dedique algún tiempo a leer cuidadosamente este Manual de Instrucciones / Instalación con el fin de hacer un buen uso del mismo. Lea cuidadosamente todas las instrucciones de seguridad antes de utilizar el aparato y conserve este Manual de Instrucciones / Instalación para poder consultarlo en el futuro. - Page 4 utilizarse, se deberá vaciar el agua del tanque. Para ello desenchufe el termo de la corriente y desenrosque la tuerca en el puerto de drenaje. A continuación abra la entrada de agua caliente o gire la válvula combinada a la posición de agua caliente, y el agua podrá...
- Page 5 instale una válvula adicional en la línea de suministro de agua, pero instálela lejos del calentador. Por ejemplo, en el lugar por donde entra el suministro de agua. • Cuando la unidad está encendida, puede haber gotas de agua que salen de la válvula de seguridad unidireccional. No se preocupe, esto es una situación habitual.
-
Page 6: Descripción Y Características
del aparato por parte de esas personas no suponga ningún peligro ni para ellos mismos ni para el entorno. • Los elementos del embalaje como bolsas de plástico, poliestireno o bandas plásticas no deben dejarse al alcance de los niños puesto que son fuente potencial de peligro. - Page 7 • La conexión eléctrica debe cumplir con lo especificado en la sección correspondiente. • La válvula de seguridad de agua debe estar correctamente instalada y no alterada. • Al instalar las tuberías de agua siga las reglas básicas para la prevención de la corrosión: "No emplee cobre antes de hierro o acero, en el sentido de la circulación del agua".
- Page 8 Después de comprobar que la pared es lo suficientemente fuerte, fije 2 ganchos de tamaño adecuado (8mm; no suministrados) ella, asegurándose de que un anclado seguro. (Véase la figura 3.1) Fig 3.1 Para conectar el termo al agua, note que la entrada y la salida del agua están marcadas como sigue: - Anillo azul para la entrada de agua fría - Anillo rojo para la salida de agua caliente...
- Page 9 Válvula de control de presión de agua. (No suministrado) Manguitos electrolíticos (Suministrados) Los componentes antes mencionados son necesarios para el funcionamiento del aparato. El ajuste de presión nominal de la válvula de seguridad de agua debe ser 0,85 Mpa (8,5bar). Al instalar la unidad de seguridad de agua, asegúrese de no forzarla ni manipularla.
-
Page 10: Llenando Del Termo
3. El drenaje del calentador de agua se realiza levantando la palanca según fig.3.3, y si la válvula de seguridad está sin palanca, hay que desmontar la válvula de seguridad del calentador de agua y eliminar los depósitos. Fig 3.3 4. -
Page 11: Conexión Eléctrica
caldera y preservar la eficiencia de la resistencia y la unidad de seguridad de agua. Para llenar el aparato siga las siguientes instrucciones: 1. Llevar la válvula de parada a la posición de servicio; Para permitir el llenado del aparato. La válvula evita el retorno de agua caliente. -
Page 12: Instrucciones De Uso
plástico especial hasta el termostato. La conexión eléctrica se realiza conectando el cable directamente a los terminales L (L1) y N (L2) del termostato. El aparato debe estar conectado a tierra y el cable de tierra (amarillo / verde) debe fijarse al terminal de tierra especial. A continuación se muestra la clave del diagrama de cableado y el circuito eléctrico de la fig.3.4. - Page 13 indicador luminoso permanece encendido sólo durante la fase de calentamiento. Goteo de la válvula de seguridad de agua El goteo de la unidad de seguridad de agua es normal durante la fase de calentamiento. Con el calentamiento, el agua se expande y no puede comprimirse.
- Page 14 Dispositivo de seguridad Los aparatos están equipados con un termostato con limitador de seguridad de acuerdo a las normativas europeas actuales. El dispositivo limitador interviene en caso de calentamiento de agua anormal, desconectándose automáticamente. El reseteo de la potencia se realiza de forma manual. (Ver fig. 3.4). Para resetear, siga los siguientes pasos: Desconecte la Fuente de alimentación Quite los tornillos de fijación de la cubierta de protección...
- Page 15 principal - Abrir un grifo de agua caliente para permitir la entrada de aire - Girar la palanca de vaciado de la válvula de seguridad de agua (fig.3.2 & fig.3.3) a la posición de drenaje - Asegurarse de que la unión de descarga a la unidad de seguridad de agua está...
- Page 16 - Vacie el depósito. - Retire la cubierta de protección eléctrica desatarnillando los tornillos de fijación. - Desconecte los cables eléctricos de los terminales respectivos y retire el termostato. - Retire el termostato. - Retire la resistencia con una llave hexagonal adecuada. - Elimine la cal, teniendo cuidado de no dañar la armadura de la resistencia.
-
Page 17: Resolución De Problemas
7. RESOLUCIÓN DE PROBLEMAS Soluciones Posibles causas Problema Reconecte la lámpara y el termostato Lámpara no conectada La luz indicadora no se enciende (Hay agua caliente) Reemplace la lámpara Lámpara defectuosa Reemplace la red de alimentación No hay corriente La luz indicadora no se enciende (No hay agua Reinicie el termostato. -
Page 18: Servicio Postventa
8. SERVICIO POSTVENTA Este termo cuenta con una garantía de 2 a 3 años contados a partir de la fecha de compra del producto siempre y cuando el ánodo de magnesio haya sido sustituido cada 6 meses por un profesional autorizado. -
Page 19: Informacion Inherente Al Medioambiente
- A través del email sat@universalblue.es, adjuntando la factura de compra e indicando sus datos de contacto y brevemente qué problema presenta su termo eléctrico. o A través del teléfono (0034) 968 893691. - Page 20 que el producto al final de su vida útil no se debe tratar como basura doméstica normal, sino que se debe llevar a los centros de recogida diferenciada de desperdicios eléctricos y electrónicos o bien entregar al vendedor en el momento de comprar un nuevo aparato. La adecuada recogida de este aparato contribuye a evitar posibles repercusiones negativas para el ambiente o la salud de las personas.
- Page 21 Puedes descargar este manual en nuestra página web: www.universalblue.es...
-
Page 22: English
ENGLISH Congratulations on the purchase of your product. We recommend you to spend some time to read this Instruction Manual in order to fully understand how to use it correctly. Read all the safety instructions carefully before use and keep this Instruction / Installation Manual for future reference. - Page 23 the hot water position and the water will flow out. • When the power cord is damaged, call a qualified technician and replace with the power cord supplied by the factory. • The outlet must be properly grounded, and it is prohibited to use tap water as an earthing.
- Page 24 • Do not use an extension cord as a power source for the heater. • If any malfunction is found in the thermostat, please stop using the heater immediately and remove the power cable or disconnect the connection to the supply circuit. Contact your service provider.
-
Page 25: Description And Features
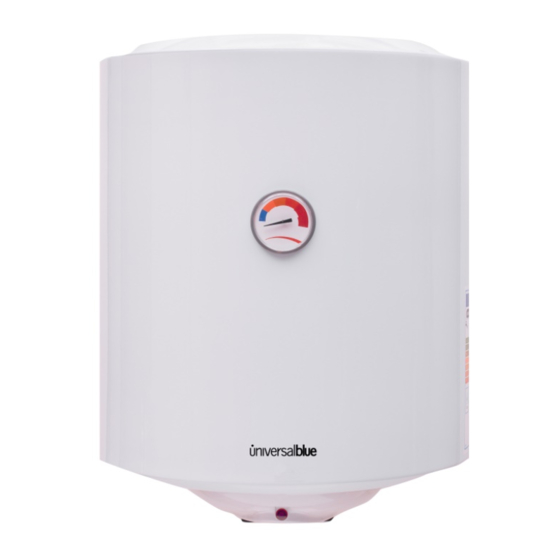
2. DESCRIPTION AND FEATURES Model UTE30L-18 UTE50L-18 UTE80L-18 UTE100L-18 Capacity 30 litres 50 litres 80 litres 100 litres Energy class Height (mm) Width (mm) Depth (mm) 3. INSTALATION Installation is the customer's responsibility. The manufacturer declines any liability for damage due to incorrect installation or non compliance with the instructions contained in this user's handbook, and in particular: Instalation should be carried out by proffesionals. - Page 26 and functioning properly and replace defective ones if necessary. Any leakage in the hot water taps will increase the electricity • consumption. Installation and maintenance must be carried out by qualified • personnel compliance with current regulations; maintenance instructions must be respected. The appliance must be installed in a suitable closed room (to •...
- Page 27 - Blue ring for the cold water inlet. - Red ring for the hot water outlet It is advisable to place the appliance near the main hot water drawing point in order to avoid heat loss along the piping, and possibly near a drain to facilitate emptying operations.
- Page 28 Fig 3.2 1. Install the electrolytic sleeve between the cold water inlet (marked with a blue ring) at the bottom of the water heater and the safety valve, and this to the pipe. (Maximum Pressure of Safety valve is 0.85 MPa 8.5 bars) 2.
-
Page 29: Filling The Appiance
4. The water may drip from the discharge pipe of the safety valve, so that pipe must be left open to atmosphere and must be installed in a continuously downward direction in a frost-free environment. (See fig.3.2). 5. Connect a good quality hose (flexible pipe) to the safety valve and connect its other end to the cold water source. -
Page 30: Electric Connection
4. Check for any leaks in the various plumbing connections; It is recommendable to clean the pipes before installation. The electrical connection can only be made after this operation. Switching the appliance on when not completely filled with water will seriously damage the electric heating element. 5. -
Page 31: Using The Appliance
IMPORTANT: Before fitting the electrical protection cover, make sure the safety device located on the thermostat is on (Safety limiting device). Switching the appliance on when not completely filled with water will seriously damage the electric heating element. 6. USING THE APPLIANCE Switching on Before switching the appliance on check correct electrical connection and water filling. - Page 32 Keep the hot water inside the appliance at a temperature of not below 50°C. In case a prolonged absence, adjust to max. for at least 24 hours. Keep showers and taps clean of scale. The thermostat is factory-set to max. Value: to change the setting Disconnect the power supply then remove the protection cover, turn the thermostat towards "+"...
- Page 33 Water safety valve efficiency check The efficiency of the water safety valve is very important for preventing overpressures inside the tank (damaging it) and allows safe use of the appliance. Periodically check the efficiency of the water safety unit by following the manufacturer's instructions. When checking, also clean and remove any scale.
- Page 34 Decaling (Periodical) To ensure good appliance efficiency it is recommendable to periodically decaled the heating element. The frequency of this operation depends on the water hardness; proceed as follows: - Switch off the power to the appliance. - Empty the tank. - Remove the electrical protection cover by undoing the fixing screws.
-
Page 35: Trouble Shooting
7. TROUBLE SHOOTING Cures and explanations Possible causes Fault Reconnect the lamp and thermostat Lamp not connected Indicator light does not come on (hot water comes) Replace lamp Faulty lamp Reinstate the mains power super No current Indicator light does not come on (hot water does Reset the thermostat. -
Page 36: After Sales Services
8. AFTER SALES SERVICES This water heater has a guarantee of 2 or 3 years to start on the purchase date and always considering that anode has been replaced every 6 months by a professional. Warranty conditions as below: • This warranty covers during a period of 6 months all repair costs, considering that the appliance has not been installed in an approachless or difficult place. -
Page 37: Environmental Information
To make use of the guarantee go to the store where you purchased this product or contact us by: • Email, sat@universalblue.es, attaching invoice, contact details and explaining briefly what the issue is. • By phone (0034) 968 893691. • Contacting us in the following address: UNIVERSAL FOR ENGINEERING INDUSTRIES SPAIN, SL C/ Decenio 1, Polígono Industrial Media Legua. - Page 38 For devices containing batteries or rechargeable batteries, these parts must be removed and disposed of in clearly marked recycling bins. Please go to the nearest recycling bin in your location or common store. Download this manual in our web site: www.universalblue.es...
- Page 39 www.universalblue.es...
Need help?
Do you have a question about the IGUAZU and is the answer not in the manual?
Questions and answers