Endress+Hauser RIA15 Operating Instructions Manual
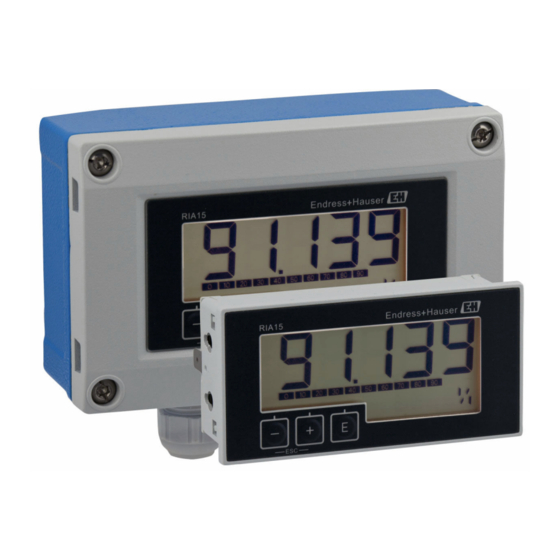
Process indicator
Hide thumbs
Also See for RIA15:
- Operating instructions manual (64 pages) ,
- Brief operating instructions (32 pages) ,
- Technical information (17 pages)

Related Manuals for Endress+Hauser RIA15


Summary of Contents for Endress+Hauser RIA15
- Page 1 Products Solutions Services BA01073K/09/EN/07.23-00 71625013 2023-04-23 Valid as of firmware version: ISU00XA (Standard): 01.06.xx Operating Instructions RIA15 Process indicator Loop-powered 4 to 20 mA process indicator...
-
Page 2: Table Of Contents
Table of contents RIA15 Table of contents About this document ....3 Repair ......23 Document conventions . -
Page 3: About This Document
RIA15 About this document About this document Document conventions 1.1.1 Safety symbols DANGER This symbol alerts you to a dangerous situation. Failure to avoid this situation will result in serious or fatal injury. WARNING This symbol alerts you to a dangerous situation. Failure to avoid this situation can result in serious or fatal injury. -
Page 4: Documentation
For an overview of the scope of the associated Technical Documentation, refer to the following: • Device Viewer (www.endress.com/deviceviewer): Enter the serial number from the nameplate • Endress+Hauser Operations app: Enter serial number from nameplate or scan matrix code on nameplate. Endress+Hauser... -
Page 5: Safety Instructions
RIA15 Safety Instructions 1.2.1 Document function The following documentation may be available depending on the version ordered: Document type Purpose and content of the document Technical Information (TI) Planning aid for your device The document contains all the technical data on the device and provides an overview of the accessories and other products that can be ordered for the device. -
Page 6: Workplace Safety
Safety Instructions RIA15 • The manufacturer accepts no liability for damages resulting from improper or non- intended use. The device must not be converted or modified in any way. • Panel-mounted device: The device is designed for installation in a panel and must only be operated in an installed state. -
Page 7: Incoming Acceptance And Product
(www.endress.com/deviceviewer): All the information on the device and an overview of the Technical Documentation provided is displayed. • Enter the serial number on the nameplate into the Endress+Hauser Operations App or scan the 2-D matrix code (QR code) on the nameplate with the Endress+Hauser Operations App: all the information about the device and the technical documentation pertaining to the device is displayed. -
Page 8: Certificates And Approvals
Mounting RIA15 3.2.2 Name and address of manufacturer Name of manufacturer: Endress+Hauser Wetzer GmbH + Co. KG Address of manufacturer: Obere Wank 1, D-87484 Nesselwang or www.endress.com Certificates and approvals For certificates and approvals valid for the device: see the data on the nameplate Approval-related data and documents: www.endress.com/deviceviewer... - Page 9 RIA15 Mounting A0017762 1 Installation instructions for the panel housing Installation in a panel with a panel cutout 92x45 mm (3.62x1.77 in), max. panel thickness 13 mm (0.51 in) 1. Slot the device into the panel cutout from the front.
- Page 10 Mounting RIA15 TX20 A0017789 2 Mounting the process indicator on a pipe Mounting plate for pipe/wall mounting Weather protection cover (optional) 1. Release the 4 housing screws. 2. Open the housing. 3. Secure the mounting plate to the rear of the device with 4 screws supplied. The optional weather protection cover can be secured between the device and the mounting plate.
-
Page 11: Post-Installation Check
RIA15 Wiring A0017803 3 Mounting the process indicator on a wall 1. Use the mounting plate as a stencil for 2 6 mm (0.24 in) bore holes, 82 mm (3.23 in) apart, and secure the plate on the wall with 2 screws (not supplied). -
Page 12: Quick Wiring Guide
Wiring RIA15 Only certified devices (optionally available) may be connected in the hazardous area ‣ Observe the corresponding notes and wiring diagrams in the Ex-specific supplement to these Operating Instructions. NOTICE Device destroyed if current too high ‣ The device must be powered only by a power unit with an energy-limited circuit in accordance with UL/EN/IEC 61010-1, Section 9.4 and the requirements in Table 18. -
Page 13: Wiring With Switchable Backlighting
RN product family) is required to implement switchable backlighting. This power source is used to supply the LED backlighting of up to seven RIA15 process indicators without generating an additional voltage drop in the measuring loop. The backlighting can be switched on and off using an external switch. - Page 14 3-wire connector, e.g. WAGO 221 series 2-wire sensor Terminal block on DIN rail Active barrier (e.g. RN product family from Endress+Hauser) 4 to 20 mA output to the control unit Power supply Power source (e.g. RN product family from Endress+Hauser)
- Page 15 3-wire connector, e.g. WAGO 221 series 2-wire sensor Terminal block on DIN rail Active barrier (e.g. RN product family from Endress+Hauser) 4 to 20 mA output to the control unit Power supply Power source (e.g. RN product family from Endress+Hauser)
-
Page 16: Inserting The Cable, Field Housing
Wiring RIA15 Inserting the cable, field housing TX20 A0017830 5 Inserting the cable, field housing Inserting the cable, field housing, connection without transmitter power supply (example) 1. Release the housing screws. 2. Open the housing. 3. Open the cable gland (M16) and insert the cable. -
Page 17: Ensuring The Degree Of Protection
RIA15 Wiring 5.4.2 Field device For EMC reasons, the functional grounding should always be connected. When used in the hazardous area (with optional Ex approval), the connection is obligatory and the field housing must be grounded via a grounding screw fitted on the outside of the housing. -
Page 18: Post-Connection Check
Operation RIA15 5.5.2 Panel housing The front of the device meets the requirements of IP65. It is absolutely essential to comply with the following points to ensure this protection is guaranteed after mounting or servicing the device: • The seal between the front of the housing and the panel must be clean and undamaged. -
Page 19: Operating Functions
RIA15 Commissioning Operating functions The operating functions of the process indicator are divided into the following menus. The individual parameters and settings are described in the "Commissioning" section. If the operating menu is disabled by means of a user code, the individual menus and parameters can be displayed but not changed. -
Page 20: Operating Matrix
Commissioning RIA15 Operating matrix Setup menu (SETUP) Parameter Values (default in Displayed when Description bold) DECIM 0 DEC Number of decimal places for the 4 to 20 mA display mode. 1 DEC 2 DEC 3 DEC 4 DEC SC__4 Numerical value 5-digit value (number of decimal places as configured under DECIM) for scaling the –19 999 to 99 999... -
Page 21: Troubleshooting
RIA15 Troubleshooting Expert menu (EXPRT); a code must be entered In addition to all the parameters in the Setup menu, the Expert menu also contains the parameters described in this table. If you call up the Expert menu, you will be asked to enter the user code (UCODE, default: 0000). -
Page 22: Firmware History
Maintenance RIA15 Diagnostic Short text Remedial action Status signal Diagnostic Priority number behavior S901 Input signal • Check transmitter output for defect and conformity error Warning too small • Check transmitter for incorrect configuration S902 Input signal Warning too large... -
Page 23: Cleaning
RIA15 Repair Cleaning A clean, dry cloth can be used to clean the device. Repair 10.1 General information The device has a modular design and repairs can be carried out by the customer' s electrotechnical personnel. For more information on service and spare parts, contact the supplier. -
Page 24: Return
Various accessories, which can be ordered with the device or subsequently from Endress +Hauser, are available for the device. Detailed information on the order code in question is available from your local Endress+Hauser sales center or on the product page of the Endress+Hauser website: www.endress.com. -
Page 25: Device-Specific Accessories
RIA15 Accessories 11.1 Device-specific accessories Weather protection 201 (7.91) 298 (11.73) cover (2.48) A0017731 11 Dimensions of protective cover, engineering unit mm (in) Mounting kit for wall/ pipe mounting 82 (3.23) 11.5 115 (4.53) (0.45) A0017801 12 Dimensions of mounting bracket, engineering unit mm (in) -
Page 26: Technical Data
Technical data RIA15 Technical data 12.1 Input Voltage drop Standard device with 4 to 20 mA communication ≤ 1.0 V Display lighting Additional 2.9 V Measured variable The 4 to 20 mA current signal is the input variable. HART ®... -
Page 27: Installation
RIA15 Technical data 12.4 Installation Mounting location Panel housing The device is designed for use in a panel. Required panel cutout 45x92 mm (1.77x3.62 in) Field housing The field housing version is designed for use in the field. The unit is mounted directly on a wall, or on a pipe with a diameter of up to 2 "... - Page 28 Technical data RIA15 12.6 Mechanical construction Design, dimensions Panel-mount housing 109.75 (4.32) 96 (3.78) 37 (1.46) 4.5 (0.18) mm (in) 89.5 (3.52) A0017721 14 Dimensions of the panel housing Required panel cutout 45x92 mm (1.77x3.62 in), max. panel thickness 13 mm (0.51 in).
- Page 29 RIA15 Technical data Field housing Aluminum or plastic (PBT with steel fibers, antistatic) 12.7 Operability Local operation The device is operated with the 3 operating keys on the front of the housing. The device setup can be disabled with a 4-digit user code. If the setup is disabled, a padlock symbol appears on the display when an operating parameter is selected.
- Page 32 *71625013* 71625013 www.addresses.endress.com...
Need help?
Do you have a question about the RIA15 and is the answer not in the manual?
Questions and answers