Table of Contents
Advertisement
Quick Links
Advertisement
Table of Contents

Related Manuals for Gaggenau BO47 1 2 Series


Summary of Contents for Gaggenau BO47 1 2 Series
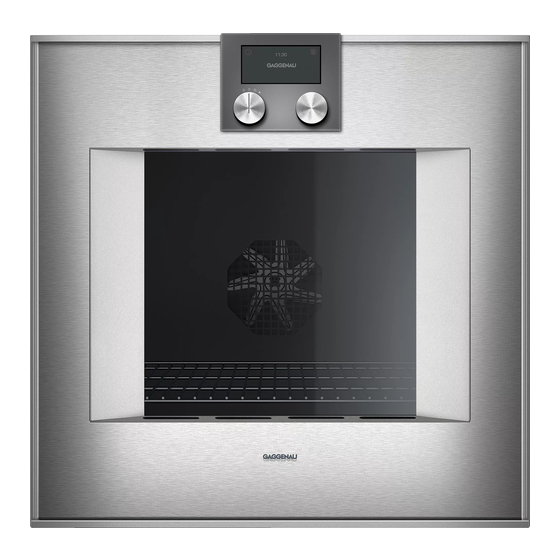
- Page 1 Gaggenau en User manual and installation instructions BO47.1.2 BO48.1.2 Oven...
-
Page 2: Table Of Contents
en Safety Table of contents ¡ Do not connect the appliance if it has been damaged in transit. INFORMATION FOR USE 1.2 Intended use Safety .............. 2 This appliance is designed only to be built into kitchen units. Read the special installation Preventing material damage ...... 5 instructions. - Page 3 Safety en Opening the appliance door creates a WARNING ‒ Risk of injury! draught. Greaseproof paper may come into Scratched glass in the appliance door may contact with the heating element and catch develop into a crack. fire. ▶ Do not use any harsh or abrasive cleaners ▶...
-
Page 4: Safety
en Safety WARNING ‒ Risk of suffocation! WARNING ‒ Risk of serious harm to Children may put packaging material over health! their heads or wrap themselves up in it and The appliance gets very hot when the clean- suffocate. ing function is in progress. The non-stick coat- ▶... -
Page 5: Preventing Material Damage
▶ for a long time with the door closed. function. Do not store food in the cooking compartment. Only clean GAGGENAU baking trays and grill trays ▶ ▶ Fruit juice dripping from the baking tray leaves stains with the pyrolytic self-cleaning function. -
Page 6: Environmental Protection And Saving En- Ergy
en Environmental protection and saving energy The heat of the grill heating element may damage the Moisture may damage the core temperature probe. core temperature probe. Do not clean the core temperature probe in the ▶ Ensure that the distance between the grill heating dishwasher. -
Page 7: Familiarising Yourself With Your Appliance
Familiarising yourself with your appliance en 4 Familiarising yourself with your appliance The accessories may tip. 4.1 Appliance Do not push the accessories between the shelf posi- ▶ You can find an overview of the parts of your appliance tions. here. 1 2 3 Door seal Rotisserie spit socket Grill element... -
Page 8: Basic Settings
en Familiarising yourself with your appliance These areas are touch-sensitive. Touch Symbol Function Touch a symbol to select the cor- fields Call up the timer menu responding function. Call up the long-term timer The display shows current settings Display Demo mode and selection options, for ex- ample. - Page 9 Familiarising yourself with your appliance en Position of the function selector Use the function selector to select the functions or types of heating. Position Function/type of heating Temperature Application Zero setting Light Switch on the interior lighting Access to other functions, e.g. auto- matic programmes, individual recipes, remote start via Home Connect 50-300 °C...
-
Page 10: Pyrolytic Self-Cleaning
en Familiarising yourself with your appliance Position Function/type of heating Temperature Application 50-300 °C For cheesecake, bread in loaf tins, Default temperature dishes in a bain marie, e.g. egg cus- 1/3 top + bottom heat 170 °C tard and crème brûlée. For braising without a lid and warming up food. - Page 11 Different displays can be shown in standby mode. The After removing your food from the appliance, keep the GAGGENAU logo and the time are preset. door closed until the appliance has cooled down. The In standby mode, the brightness of the control panel is appliance door must not be left half open as this may reduced.
- Page 12 You will find a comprehensive range of products for your appliance in our brochures and online: Pizza paddle, 2-part set BA020002 www.gaggenau.com Cast aluminium roaster GN340230 Accessories vary from one appliance to another. When GN2/3, height 165 mm, Note: Order heating ele-...
- Page 13 After connecting the appliance to the power supply, the D.M.Y, D/M/Y and M/D/Y. D.M.Y is preset. GAGGENAU logo appears for approx. 30 seconds and Use the rotary selector to set the required format. then the appliance displays the "Initial settings" menu.
- Page 14 en Basic operation Ending the initial use Heating up the appliance Requirement: The display shows "Initial set-up com- Ensure that there is no leftover packaging in the plete". cooking compartment. To eliminate the new-appliance smell, heat up the Press . ▶ empty appliance for an hour at 200 °C in the Hot air a The appliance switches to standby mode.
- Page 15 Timer functions en Press . to select the "Cooking time" function. Use the rotary selector to set the required cooking a The signal tone stops. time. Stopping the short-term timer Press to start. Press . a The appliance starts the cooking time. Touch to select the "Short-term timer"...
- Page 16 en Long-term timer Press , open the appliance door or set the func- to select the "Cooking time end" function. tion selector to . Use the rotary selector to set the required cooking- time end. a The signal tone stops. Press to start.
- Page 17 Rotisserie spit en Insert the grill tray along with the rotisserie spit into 11.1 Preparing the rotisserie spit the appliance at the bottom shelf level. Push the two supporting frames into the sockets in the grill tray. Ensure that the drive shaft engages in the opening in the rear panel of the appliance.
- Page 18 en Searing function To take off the rotisserie spit, fit the handle on the Release the retaining prongs and pull the rotisserie side. spit out of the food. Remove the rotisserie spit with the food from the Press the button on the handle to remove it. supporting frames and place on a serving platter.
- Page 19 Individual recipes en ¡ For some recipes, you need the core temperature Adding extra cooking time probe. Use the core temperature probe for these re- After the cooking time has ended, you can leave some cipes. → Page 20 dishes to continue cooking if you are not satisfied with ¡...
- Page 20 en Core temperature probe Press twice to insert a break. 14.2 Programming a recipe Press to delete a letter. Turn the function selector to . to save or to cancel, and exit the menu. Press . Use the rotary selector to select "Individual recipes" 14.4 Starting a recipe and press to confirm.
- Page 21 Core temperature probe en When using the core temperature probe with the full ▶ 15.2 Core temperature guideline values surface grill type of heating and air recirculation, set The following overview provides you with guideline val- the temperature to a maximum of 250 °C. ues for the core temperature.
- Page 22 en Core temperature probe Inserting the core temperature probe into Food Core temperature poultry guideline value in °C Insert the core temperature probe as far as it will go into the thickest point in the breast. Mutton Leg of mutton, medium rare 70-75 Leg of mutton, well done 80-85...
- Page 23 Home Connect en Once you have turned the food, check that the core Press . temperature probe is correctly positioned in the Use the rotary selector to set the desired core tem- food. perature and press to confirm. Ensure that the set core temperature is higher ‒...
- Page 24 en Home Connect Follow the instructions in the Home Connect app. 16.2 Home Connect settings You can adjust the Home Connect settings and network settings in your appliance's basic settings. Which settings the display shows will depend on whether Home Connect has been set up and whether the appliance is connected to your home network.
- Page 25 Appearance of the standby screen Off: No display. You can use this set- ¡ Clock ting to reduce the standby energy con- ¡ Clock + GAGGENAU logo sumption of your appliance. On: Multiple screens can be adjusted. ¡ Date Press to confirm "On"...
- Page 26 en Basic settings Display Basic setting Selection Description Touch field colour Grey Select the colour of the symbols on the White touch fields. Touch field tone type Tone 1 Press a touch field to select a signal Tone 2 tone. Touch field tone Levels 1, 2, 3, 4, 5 , 6, 7, 8 Set the volume of the touch field tone.
- Page 27 Cleaning and servicing en Display Basic setting Selection Description Display the estimated On: If you are using the core temperat- cooking time with ure probe, the display shows the estim- core temperature ated cooking time. probe Door lock The door lock prevents the appliance door from opening accidentally.
- Page 28 en Cleaning and servicing Appliance door Area Suitable cleaning agents Information Door panel ¡ Glass cleaner Do not use a glass scraper. Clean with a window cloth or a microfibre cloth. Door seal ¡ Hot soapy water Clean with a dishcloth. Do not remove or scrub.
- Page 29 Pyrolytic self-cleaning en Remove the shelf supports. Use a damp cloth to clean the pull-out rail. Do not remove the lubricant on the pull-out rail. ‒ It is best to clean the pull-out rail while it is pushed 18.6 Cleaning the rotisserie spit Do not clean the rotisserie spit in the dishwasher.
-
Page 30: Troubleshooting
For your safety, the appliance locks the appliance GAGGENAU Baking trays and grill trays are coated door. During cooling, the appliance unlocks the with a pyrolysis-safe enamel. Only clean GAGGENAU door opening mechanism as soon as the temperat- baking trays and grill trays with the pyrolytic self-clean- ure has fallen below 200 °C. - Page 31 Troubleshooting en WARNING ‒ Risk of electric shock! Incorrect repairs are dangerous. Repairs to the appliance should only be carried out ▶ by trained specialist staff. Only use genuine spare parts when repairing the ▶ appliance. If the power cord or the appliance power cable of ▶...
- Page 32 en Troubleshooting 20.4 Replacing the top oven light bulb Requirements ¡ The appliance is disconnected from the power sup- ply. WARNING ‒ Risk of burns! ¡ The cooking compartment has cooled down. The appliance and its parts that can be touched be- ¡ You have a new halogen bulb to replace the old one. come hot during use.
-
Page 33: Disposal
Disposal en Remove the tea towel from the cooking compart- Remove the shelf supports. ment. Connect the appliance to the power supply. 20.7 Replacing the side lamp cover If the bulb cover in the cooking compartment is dam- aged, replace the bulb cover. You can purchase the lamp cover from customer service by specifying the E number and FD number of your appliance. - Page 34 en How it works ¡ To prepare bulky food items, you can remove the cooking processes that require high temperatures. side slide-in rack. Consequently, for browning and roasting, a higher ¡ Place the rack directly onto the bottom of the cook- temperature than is actually needed on the surface ing compartment and place the food or roaster onto of the food is selected.
- Page 35 How it works en Food Accessory/ Level Temperat- Type of Cooking Comments cookware ure in °C heating time in mins Veggie burgers, Baking tray + 2 (3) 12-15 frozen greaseproof pa- Vegetable Wire rack + grill 3 (4) Shorten the wooden skewers or skewers tray leave them to soak in water...
- Page 36 en How it works ¡ Always follow the manufacturer's instructions for pre- cooked and frozen products, too. Side dishes and meals Food Accessory/cook- Leve Temperat- Type Cooking Comments ware ure in °C time in heat- mins Side dishes Baking Camem- Baking tray + 2 (3) 180 15-20 Bake until the breadcrumb coating...
- Page 37 How it works en Food Accessory/cook- Leve Temperat- Type Cooking Comments ware ure in °C time in heat- mins Goats' cheese Glass tray 2 (3) 220 8-10 Either goats' cheese or goats' wrapped in ba- camembert can be used. Baking tray Goats' cheese Glass tray 3 (4) 220 8-10...
- Page 38 en How it works Food Accessory/cook- Leve Temperat- Type Cooking Comments ware ure in °C time in heat- mins Lasagne Ovenproof dish 2 (3) 180-190 55-60 Recipe tip: Traditional or vegetarian with grilled vegetables and buffalo mozzarella. Do not preheat with ; do not open the appliance door.
- Page 39 How it works en Food Accessory/ Level Temperat- Type of Cooking Comments cookware ure in °C heating time in mins Fish kebabs Wire rack + grill 3 (4) Use firm types of fish, e.g. sal- tray mon, coley, ocean perch and cod. Fish fingers, Baking tray + 2 (3)
- Page 40 en How it works Food Accessory/ Level Temperat- Type of Cooking Comments cookware ure in °C heating time in mins Beef joint, Glass tray 2 (3) 90-120 1.5 kg Grill tray Roast beef, sir- Glass tray 2 (3) 230/180 25-35 Recipe tip: Delicious with loin, rare, 1 kg Béarnaise sauce or cold cut with Grill tray...
- Page 41 How it works en Food Accessory/ Level Temperat- Type of Cooking Comments cookware ure in °C heating time in mins Fillet of pork, Glass tray 2 (3) 230/180 20-25 Recipe tip: Marinate in a mixture whole, 400 g of oil, garlic and parsley. Grill tray Pork medallions Glass tray 2 (3)
- Page 42 en How it works Food Accessory/ Level Temperat- Type of Cooking Comments cookware ure in °C heating time in mins Saddle of ven- Glass tray, 2 (3) 165-175 ison Grill tray Roaster Saddle of ven- Glass tray, 2 (3) 165-175 20-25 ison Grill tray Roaster Wild boar joint Glass tray,...
- Page 43 How it works en Poultry Food Accessory/ Level Temperat- Type of Cooking Comments cookware ure in °C heating time in mins Duck, whole, Wire rack + grill 2 (3) 160/180 Recipe tip: Stuff with oranges, 1.5-2 kg tray apples or dried fruit. Roaster Duck breast Roaster 2 (3)
- Page 44 en How it works Food Accessory/ Level Temperat- Type of Cooking Comments cookware ure in °C heating time in mins Turkey, whole Wire rack + grill 2 (3) 160/200 120-180 tray Roaster Turkey, whole Wire rack + grill 2 (3) 160/200 120-180 tray Roaster Quail, whole, Wire rack + grill...
- Page 45 How it works en Food Accessory/ Level Temperat- Type of Cooking Comments cookware ure in °C heating time in mins Merguez saus- Wire rack + grill 3 (4) tray Prunes, Baking tray + 3 (4) 8-10 Equally delicious with dates or wrapped in ba- greaseproof pa- apricots.
- Page 46 en How it works ¡ If the cake collapses, use less liquid or set the tem- ¡ If the cake does not come away from the tin when perature 10 °C lower. Do not open the oven door you are trying to turn it out, carefully slide a knife too soon.
- Page 47 How it works en Food Accessory/ Level Temperat- Type of Cooking Comments cookware ure in °C heating time in mins Cheesecake Springform tin 1 (2) 160-165 70-75 Cheesecake Springform tin 1 (2) 160-165 85-90 Cheesecake Springform tin 1 (2) 160-165 80-90 Cheesecake Springform tin 1 (2) 160-165 40-45...
- Page 48 en How it works Food Accessory/ Level Temperat- Type of Cooking Comments cookware ure in °C heating time in mins Water sponge Springform 22-30 Preheat. cake, in accord- cake tin, dia- ance with EN meter 26 cm 60350-1, appli- ance width 76 cm Water sponge Springform...
- Page 49 How it works en Food Accessory/ Level Temperat- Type of Cooking Comments cookware ure in °C heating time in mins Biscuits, short- Baking tray 2 (3) 160-170 bread Biscuits, short- Baking tray 2 (3) 160-170 bread Small cakes, in Baking tray 25-30 Preheat. accordance with EN 60350-1, appli-...
- Page 50 en How it works Food Accessory/ Level Temperat- Type of Cooking Comments cookware ure in °C heating time in mins Shortbread, in Baking tray 26-30 Preheat. accordance with EN 60350-1, appli- ance width 60 cm Shortbread, in Baking tray 30-35 Preheat. accordance with EN 60350-1, appli- ance width...
- Page 51 How it works en Food Accessory/ Level Temperat- Type of Cooking Comments cookware ure in °C heating time in mins Bread rolls, pre- Baking tray + 2 (3) 8-10 baked greaseproof pa- Bread rolls, pre- Baking tray + 2 (3) 8-10 baked greaseproof pa- Ciabatta, pre- Baking tray + 2 (3)
- Page 52 en How it works ¡ For small quantities of dough, e.g. sweet pastry 22.9 Dough proving – leaving to rise swirls and bread rolls, you can set a temperature of Your appliance provides the ideal conditions for prov- 40-45 °C. ing dough and dough mixtures or raw pastries without ¡...
- Page 53 How it works en Food Accessory/ Level Temperat- Type of Cooking Comments cookware ure in °C heating time in mins Compote Glass tray 2 (3) 160-180 30-40 E.g. apricots or a variety of ber- ries. Grill tray Do not add any liquid; stir thor- oughly several times.
- Page 54 en How it works Defrosting Food Accessory/ Level Temperat- Type of Cooking Comments cookware ure in °C heating time in mins Berries, 500 g Glass tray 2 (3) 50-55 25-30 Grill tray Fish fillet, 150 g Wire rack 2 (3) 45-50 45-50 each Prawns Wire rack 2 (3) 45-50 20-25...
- Page 55 How it works en ¡ Place the prepared food onto a wire rack or baking 22.14 Drying tray covered with greaseproof paper. Turn the food Dry fruit, vegetables or herbs. from time to time during the drying process. ¡ Drying is a method of preserving food in which up ¡...
- Page 56 en How it works Food Accessory/ Level Temperat- Type of Cooking Comments cookware ure in °C heating time in mins Tarte flambée, Baking stone frozen Foccacia Baking stone Top with various ingredients, e.g. herbs, sea salt, olives, anchovies, onion, ham, tomatoes or cheese. Multigrain Baking stone bread...
- Page 57 How it works en Food Accessory/ Level Temperat- Type of Cooking Comments cookware ure in °C heating time in mins Ossobuco Roaster 220/140 Searing + Sear the meat and vegetables; 60-90 use the searing function for this. Pour in liquid and turn the tem- perature back down;...
-
Page 58: Customer Service
2014/53/EU. A detailed Declaration of Conformity can be found on- A detailed RED Declaration of Conformity can be found line at www.gaggenau.com/gb among the additional online at www.gaggenau.com among the additional documents on the product page for your appliance. - Page 59 Installation instructions en Sharp-edged parts may be accessible during 25.3 Appliance dimensions installation. You will find the dimensions of the appliance here ▶ Wear protective gloves. BO47. ¡ Read this instruction manual carefully. ¡ Only an appliance which has been correctly installed in accordance with these installa- tion instructions can be used safely.
- Page 60 en Installation instructions ¡ Fuse protection by means of B- or C-type circuit 25.7 Installing the appliance breakers is required. Observe the clearances when installing in a tall unit. ¡ An all-pole isolating switch with a contact gap of at least 3 mm must be fitted during installation. This must remain accessible after installation.
- Page 61 Installation instructions en Use a spirit level to adjust the appliance so that it is Aligning the appliance door perfectly level. Pull the appliance out slightly from its built-in recess. Open the appliance door. An oval opening is located on the top of the appli- ance on the hinged side.
- Page 62 en Installation instructions Tighten both screws. Slide the appliance into the built-in recess. 25.9 Combining the appliance with a combi- steam oven Requirement: The combi-steam oven is installed. Observe the installation instructions for the combi- steam oven. For an installation depth of 550 mm, position the water hoses and the connection cable in the area of the slanted edge on the corner of the housing.
- Page 64 BSH Hausgeräte GmbH Carl-Wery-Straße 34 81739 München, GERMANY www.gaggenau.com Valid within Great Britain: Imported to Great Britain by BSH Home Appliances Ltd. Grand Union House Old Wolverton Road Wolverton, Milton Keynes MK12 5PT United Kingdom...
Need help?
Do you have a question about the BO47 1 2 Series and is the answer not in the manual?
Questions and answers