
Related Manuals for TechniSat TechniStar K2 ISIO


Summary of Contents for TechniSat TechniStar K2 ISIO
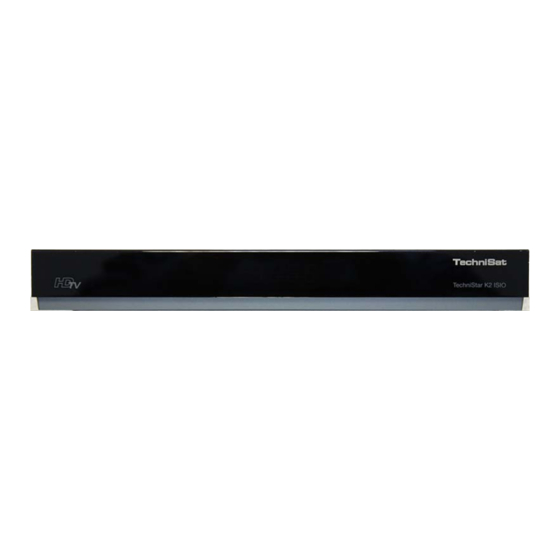
- Page 1 manual hniStar K2 ISIO hniStar K2 ISIO Digitale HD-Receiver with Internet functionality...
- Page 2 1 illustration LED-display TV/Radio ON/Standby arrow button up/down CI-slot card reader: > Insert the CONAX-Smartcard (golden Chip face down and alingned in insertion direction) till the as far as it willl go. Inserting the CI / CI+ -module: > Please refer to the manual of the manufacturer of the CI / CI+ -module and the card.
-
Page 3: Please Read This First
2 Please read this first Before connecting and using the device, first check that everything has been supplied and familiarise yourself with the safety instructions. You should have received: 1 Digital receiver, 1 Remote control, 2 Batteries (1.5V micro-cell), 1 HDMI cable, 1 mains cable. -
Page 4: Periods Of Non-Use
Before handing your receiver over to your supplier for maintenance purposes, we recommend that you remove all storage media or data carriers. Restoring data is not part of maintenance or repair work. TechniSat accepts no responsibility for the loss of, or damage to, data during repair work. -
Page 5: Disposal Advice
2.5 Disposal advice The packaging material used for your receiver consists entirely of recyclable materials. Please sort the components appropriately, and dispose of them in line with your local waste disposal regulations. At the end of its useful life span, this receiver may not be disposed of with your regular household waste. -
Page 6: Important Notice
3 Important notice Dear customer, This quick start manual describes the most important connection options and basic operation steps to enable you to quickly start using the TechniStar K2 ISIO. 4 Remote control 4.1 Changing the battery > Open the cover on the battery compartment at the rear of the remote control by pushing it in the direction of the arrow and then lifting it off. - Page 7 On/Standby Alarm Sound on/off Remote control code Numeric keypad keys Recording TV/Radio mode Stop/DVR Rewind Fast forward Pause / Play Arrow keys EPG/SFI WWW key Page up Page down Back Info Options selection Programme +/- Volume +/- Navigator / Function Function keys selection Menu...
- Page 8 5 Connection of the DVB-Receiver connnection to the power supply connection of the cable - input of the DVB-Receiver with the antenna socket of the cable network . connection of cable-out with the antenne in of the TV set. HDMI-connection of the DVB-Receiver with the TV set. Scartverbindung des DVB-Receivers mit dem Fernsehgerät.
-
Page 9: Digital Connection
Die im folgenden erscheinenden Verweise a b c usw. beziehen sich auf die Zeichnung auf Seite 18. 5.1 Connecting the power supply The digital receiver should be connected to the power supply only when the de vice is completely wired to all the required components. This prevents damage to the receiver and other components. -
Page 10: Initial Installation
6 Initial installation The first time you boot up the device, the AutoInstall installation wizard will be displayed in the startup window. Use the installation wizard to easily set up the key settings on the digital receiver. Explanations of possible setting options will appear at each step in the instal lation. - Page 11 Searching for stations To search for a station: > Using the up / down arrow keys, select "All Channels" if you want to search for all encoded and uncoded channels or "All Uncoded Channels" if you you want to search for public channels. >...
- Page 12 Loading EPG/SFI data Your digital receiver has the EPG/SFI (EPG = Electronic Programme Guide) electronic programme guide. You must first get the receiver to download the EPG/SFI data from the satellite to enable electronic programme guide data to be displayed. For this reason, the receiver will automatically start downloading the EPG/SFI data after the channel list update or channel search is completed.
-
Page 13: Basic Operation
7 Basic operation Dear customer, The following section starts by covering basic operation as well as recurring operating steps for the receiver. This should make it easier to read the instruction manual, since it avoids repeated description of identical steps at each individual stage. If a function or setting for the device has to be different from the basic operation, the difference in operation is described in detail at the relevant point in the instruction manual. -
Page 14: Switching The Device On/Off
7.1 Switching the device on/off When the receiver is on standby, you can switch it on by pressing the On/Standby > button on the remote control/device. > When operating normally you can switch the device to standby mode by pressing the On/Standby button. - Page 15 Use the up/down arrow keys to highlight the Picture settings item. > The Picture settings menu is opened by subsequently pressing the OK button. > You can also highlight the individual menu points in the same way as you highlight an item on a submenu to open it and alter the respective settings.
-
Page 16: Changing A Setting
By highlighting Accept using the right/left arrow keys and confirming with the > OK button or by pressing on the green function key (Accept), the changes are saved and you return to the next menu level up. Alternatively: Press the Back button. >... -
Page 17: Entering Numbers
Press the OK button to open the selection list. > Highlight the setting you want using the up/down arrow keys. > By pressing the up/down arrow keys it is possible to move the highlight from line to line and to move upwards and downwards page by page using the page up/down buttons. -
Page 18: Virtual Keyboard
7.4.4 Virtual keyboard is shown on the right next to the set value, the value is amended using the virtual keyboard. You have three different keyboard options when using this data entry method. You can switch the keyboard layout between the so-called QWERTY keyboard and the alphabetic keyboard;... -
Page 19: Option Selection
Once you have reached the field you want with the highlight, you can then begin selecting the next character immediately since, in this case, the character is directly added to the term. If you wish to continue directly selecting a character from the same numeric pad key, you can add the previously highlighted character to the term by pressing the right arrow key. -
Page 20: Operating The Unit
8 Operating the unit 8.1 Switching on Switch the digital receiver on by pressing the On/Stand-by button either on the > receiver panel or on the remote control. > Change to an unblocked channel If the user-dependent parental control (TechniFamily) is activated, the user selection will appear. - Page 21 You can view additional data about the current programme by pressing the Info button. > 8.3.3.1 Selecting a channel You can now highlight the channel you want using the up/down arrow keys, the > page up/down keys and the numeric keypad keys. Press the OK button to select the highlighted channel.
-
Page 22: Volume Control
8.3.5 Returning to last channel selected Press the Back button on the remote control to return to the last channel selected. > > Press the button again to return to the channel you were previously watching. 8.3.6 TV/Radio switchover You can use the TV/Radio button to switch between TV and radio mode. >... -
Page 23: Freeze Frame
8.5.1 Switching to mute To switch the sound off (mute), press the Sound on/off button - press the key again > to switch the sound back on. Throughout the time that the volume is switched to mute, the symbol appears at the upper right of the screen. -
Page 24: Page Selection
8.8.1 Page selection Use the numeric keypad keys 0 to 9 to enter the 3-digit page number of the > teletext page you want. Use the coloured function keys to call up the pages displayed in the respective fields. > 8.9 HbbTV HbbTV (Hybrid broadcast broadband TV) is a technology that enables broadcast and Internet content to be linked. - Page 25 8.13 Electronic Programme Guide (EPG/SFI) Your digital receiver has an electronic programme guide. This allows you to display channel information relating to one or more channels on your screen. You can very quickly obtain an overview of the programmes currently being broadcast, the programmes for that day or those for subsequent days.
-
Page 26: Timer Recordings
Channel name with the corresponding channel slot within the active favourites list. Progress bars or the start/stop time of the programme being shown. The current date and the time. Shows that there is further information available about the broadcast. Programmes on the channel being shown. You can access the various SFIplus views and functions using the Options >... - Page 27 LAN or WLAN. Internet access provides you with various Internet functions such as unrestricted browsing, use of interactive services, video on demand and the new ISIO Live TechniSat service portal.
-
Page 28: Switching Between Tabs
> Open the Internet list. Use the Options selection under the Internet lists item to select the Internet > list you want. 8.16.2 Calling up websites by entering an address directly (URL entry) In addition to the option of using pre-programmed web links, you can call up the websites you want by manually entering the address/URL (Uniform Resource Locator). -
Page 29: Operating The Dvr
In the Options selection, select the Refresh item. > 8.16.6 Cancelling the loading process To cancel or interrupt the loading of a web page, use the Options selection to > select the Cancel item. 8.16.7 Adding a Favourite to the Internet list Frequently used websites can be added to the Internet list to make it easier to access them later. -
Page 30: Instant Recording
The following recording modes are available for DVR recording: 1. Instant recording Select this type of recording to immediately record the programme currently being broadcast at the push of a button. 2. Timer-controlled recording This function is used to switch your digital receiver on and off to record the selected programme onto the recording medium while you are out. -
Page 31: Dvr Playback
You can, for example, select +1 hour for which the receiver should continue to record > the channel and then automatically stop recording. 9.2 Timer recordings You can use the DVR timer to record programmes to an attached recording medium while you are out. -
Page 32: Fast Forward/Rewind
9.3.1.2 From playback of a running / existing DVR recording Press the OK button to open the DVR Navigator. > In the function selection select the Movies / DVR item. > Now call up the My recordings folder on your attached recording medium. >... -
Page 33: Ending Playback
9.3.6 Jump to tags During playback you have the option of navigating directly to locations in the recording where you have set tags. Using the options selection under the Tag menu item, select the tag to skip to the > location you want in the recording. -
Page 34: Troubleshooting Guide
10 Troubleshooting guide Fault Possible cause Solution Remote control does not Wrong remote control code Apply correct remote work used. control code Batteries are spent Replace batteries Various channels not shown Wrong channel list selected Select other channel list correctly in channel list Programmes such as Interference from cordless Increase distance between... - Page 35 Fault Possible cause Solution Receiver cannot be Defective data stream --> Hold down the On/Stand- operated, switched on or off receiver blocked by button on the receiver or the remote control for approx. 5 seconds Disconnect mains plug for approx. 5 seconds, then reconnect receiver Perform Flash-Reset: Warning!
- Page 36 Fault Possible cause Solution PC cannot connect Wrong network settings Check network settings to receiver; Receiver cannot connect to network Network cable connected Check network connection wrongly DVR recording no longer Selected Delete existing possible storage medium is full recording(s) Attach and configure another storage medium Cannot delete DVR...
Need help?
Do you have a question about the TechniStar K2 ISIO and is the answer not in the manual?
Questions and answers