
Related Manuals for cecotec Conga 8090 Ultra


Summary of Contents for cecotec Conga 8090 Ultra
- Page 1 Manual de instrucciones Instruction manual Manuel d’instructions Bedienungsanleitung Manuale di istruzioni Manual de instruções Handleiding Instrukcja obsługi Návod k použití...
-
Page 3: Table Of Contents
Instrucciones de seguridad Safety instructions Instructions de sécurité Sicherheitshinweise Istruzioni di sicurezza Instruções de segurança Veiligheidsvoorschriften Instrukcje bezpieczeństwa Bezpečnostní pokyny INHALT ÍNDICE 1. Teile und Komponenten 1. Piezas y componentes 2. Vor dem Gebrauch 2. Antes de usar 3. Installation 3. - Page 4 INHOUD 1. Onderdelen en componenten 2. Voor u het toestel gebruikt 3. Installatie 4. Werking 5. Mobiele App en Wifi-verbinding 6. Schoonmaak en onderhoud 7. De batterij verwisselen en opladen 8. Probleemoplossing 9. Technische specificaties 10. Recyclage van huishoudtoestellen 11. Garantie en technische ondersteuning SPIS TREŚCI 1.
-
Page 5: Instrucciones De Seguridad
Guarde este manual para referencias futuras o nuevos usuarios. - Este producto debe utilizarse conforme a lo indicado en este manual de instrucciones. Cecotec no se hará responsable de ningún daño o accidente que sea consecuencia del uso inapropiado del producto. -
Page 6: Safety Instructions
Keep this instruction manual for future reference or new users. - This product must be used in accordance with the directions in this instruction manual. Cecotec cannot be held liable or responsible for any damages or injuries caused by improper... - Page 7 - Do not use the charging base if it has a damaged cord or plug or if it is not operating properly. In case of fault or malfunction, contact the official Technical Support Service of Cecotec. - Do not operate the device on tables, chairs or other high surfaces where it could fall.
-
Page 8: Instructions De Sécurité
Gardez bien ce manuel pour de futures références ou pour tout nouvel utilisateur. - Cet appareil doit être utilisé conformément aux instructions de ce manuel d’instructions. Cecotec ne se fera responsable d’aucun dommage ni accident qui soit dû à une utilisation inappropriée de l’appareil. - Page 9 - N’utilisez pas la base de charge si le câble ou la prise sont abîmés ou si elle ne fonctionne pas correctement. Si vous détectez un problème avec l’appareil, contactez le Service Après-Vente Officiel de Cecotec. - N’utilisez pas l’appareil sur des tables, des chaises ni surfaces élevées desquelles il pourrait tomber.
-
Page 10: Sicherheitshinweise
Benutzer oder zum Nachschlagen gut auf. - Befolgen Sie diese Anweisungen, um das Gerät zu betreiben. Cecotec übernimmt keine Haftung für Schäden bzw. Unfälle, die durch unsachgemäße Handhabung entstehen. - Vergewissern Sie sich, dass die Netzspannung mit der auf dem Typenschild des Gerätes angegebenen Spannung... - Page 11 - Verwenden Sie die Ladestation nicht, wenn das Kabel oder der Netzstecker kaputt sind oder die Ladestation nicht richtig funktioniert. Falls das Gerät kaputt ist, kontaktieren Sie den technischen Kundendienst von Cecotec. - Verwenden Sie nicht das Gerät auf Tischen, Stühlen oder erhöhten Flächen, wo es Sturzgefahr entsteht.
-
Page 12: Istruzioni Di Sicurezza
Conservare questo manuale per consultazioni future o nuovi utenti. - Questo prodotto deve essere utilizzato secondo le istruzioni di questo manuale. Cecotec non si farà responsabile di nessun danno o incidente che sia la conseguenza dell’uso inappropriato del prodotto. - Verificare che la tensione di rete coincida con la tensione specificata nell’etichetta di classificazione del prodotto e... - Page 13 - Non utilizzare la base di ricarica se il cavo o la spina sono rotti o non funziona correttamente. In caso di avaria, contattare il Servizio di Assistenza Tecnica di Cecotec. - Non utilizzare il dispositivo su tavoli, sedie o superfici in altezza dove vi sia il rischio che possa cadere.
-
Page 14: Instruções De Segurança
Guarde este manual para referências futuras ou novos utilizadores. - Este produto deve ser usado conforme indicam as instruções deste manual. Cecotec não se responsabiliza de nenhum dano ou acidente que seja consequência do uso inapropriado do produto. - Certifique-se de que a tensão de rede coincide com a tensão especificada na etiqueta de classificação do produto e de... -
Page 15: Veiligheidsvoorschriften
VEILIGHEIDSVOORSCHRIFTEN Lees de volgende instructies aandachtig voordat u het product gebruikt. Bewaar deze handleiding voor toekomstig(e) gebruik(ers). - Dit product dient gebruikt te worden in overeenkomst met de instructies in deze handleiding. Cecotec is niet aansprakelijk... - Page 16 - Gebruik het oplaadstation niet als de kabel of de stekker beschadigd zijn of niet correct werken. In geval van storingen, contacteer de technische dienst van Cecotec. - Gebruik het apparaat niet op tafels, stoelen of hoge oppervlakken waar het product vanaf zou kunnen vallen.
-
Page 17: Instrukcje Bezpieczeństwa
Zachowaj tę instrukcję do przyszłego użytku lub nowych użytkowników. - Urządzenie powinno być używane wyłącznie zgodnie z instrukcją. Cecotec nie bierze odpowiedzialności za szkody spowodowane niewłaściwym użytkowaniem produktu. - Upewnij się, że napięcie sieciowe odpowiada napięciu podanemu na tabliczce znamionowej produktu i że wtyczka jest uziemiona. - Page 18 - Nie używaj stacji ładowania, jeśli zauważysz, że nie działa poprawnie oraz gdy kabel lub wtyczka są uszkodzone. W takim przypadku skontaktuj się z oficjalnym serwisem pomocy technicznej Cecotec. - Nie używaj urządzenia do czyszczenia stołów, krzeseł ani innych po-wierzchni, z których mogłoby upaść.
-
Page 19: Bezpečnostní Pokyny
- Tento přístroj se musí používat v souladu s tímto návodem na použití. Cecotec není zodpovědný za žádné škody nebo nehody způsobené nevhodným používáním. - Ujistěte se, že elektrická síť má stejné napětí jako je uvedené... - Page 20 - Nepoužívejte nabíjecí základnu pokud má kabel nebo zásuvku poškozenou, nebo pokud nefungují správně. V případě problému kontaktujte Asistenční technický servis Cecotec. - Nepoužívejte přístroj na stolech, židlích nebo jiných vyvýšených místech, odkud by mohl spadnout. - Nepoužívejte ochranu laseru jako rukojeť na přemístění...
-
Page 21: Piezas Y Componentes
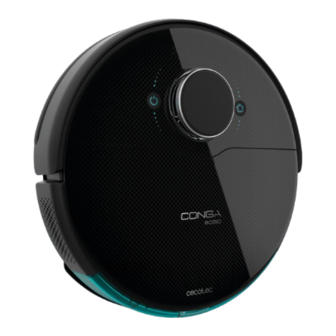
ESPAÑOL 1. PIEZAS Y COMPONENTES Robot y sensores Fig. 1. Sensor láser Tapa superior Vuelta a casa/Encendido/limpieza automática Sensor receptor de infrarrojos Sensor anticolisión Rueda omnidireccional Bornes de carga Batería Cepillo lateral 10. Parachoques Tapa del motor Cepillo central: para limpiar todo tipo de superficies Rueda izquierda 14. -
Page 22: Antes De Usar
Asegúrese de que todas las piezas y componentes están incluidas y en buen estado. Si se observara algún daño visible, contacte de forma inmediata con el Servicio de Atención Técnica oficial de Cecotec. 3. INSTALACIÓN Instalación del robot y de la base de carga. Fig. 5, 6. - Page 23 ESPAÑOL Avisos Lleve el robot a la base de carga si la batería está baja. El robot puede no encenderse si la batería está muy baja. El robot se encenderá automáticamente al colocarla en la base de carga. El robot no se puede apagar durante la carga. Instalación del depósito de agua Aviso No se recomienda utilizar la función de fregado durante el primer uso.
-
Page 24: Funcionamiento
ESPAÑOL robot reconozca todos los rincones del hogar y pueda realizar un mapeo completo. Si tiene una casa demasiado grande y el robot se queda sin batería no pasa nada. El robot vuelve a la base de carga, guarda tanto el mapa completo como los mapas incompletos, y una vez cargado, continua la limpieza en el punto donde se había quedado hasta mapear la totalidad de la superficie recorrida. - Page 25 ESPAÑOL Modo de Vuelta a casa Pulse el botón de Vuelta a casa. Este modo se puede activar durante cualquier otro ciclo de limpieza, el robot dejará de limpiar y volverá a la base de carga de forma automática. El robot tomará la ruta más corta para volver a la base de carga gracias a la memorización de mapas y la función de vuelta a casa inteligente.
- Page 26 ESPAÑOL Modo Auto. Fig. 13. Pulse el botón de encendido en el mando a distancia para que comience a limpiar automáticamente en modo Bordes y luego realice un ciclo de limpieza de forma ordenada en zig zag, mientras reconoce las áreas por las que ha limpiado y por las que no. El robot planeará...
- Page 27 ESPAÑOL Asegúrese de que la habitación está despejada para que el robot pueda acceder a la base de carga sin problemas. Funciones Pausa Mientras el robot esté en funcionamiento, pulse el botón de encendido en la aplicación, en el mando a distancia o en el robot para pausarlo, y pulse el mismo botón para reanudar la limpieza.
-
Page 28: Aplicación Móvil Y Conexión Wi-Fi
ESPAÑOL repita el paso anterior. Fig. 17. Pulse el botón de tiempo de nuevo para guardar los ajustes. Programación de tareas de limpieza Mantenga pulsado el botón de programación durante 3 segundos. Los primeros 2 dígitos, correspondientes a la hora, parpadearán. Fig. 18. Utilice los botones de dirección de arriba y abajo para configurar la hora de la programación. - Page 29 ESPAÑOL restringida, Puntual, Área inteligente, vuelta a casa y Scrubbing. Visualice cómo el robot crea un mapa interactivo a medida que va limpiando. Gestione los mapas de forma inteligente a través de la función Room Plan, que le permite juntar, dividir y nombrar las habitaciones. Además, cree y programe sus propios planes de limpieza seleccionando las habitaciones que desea limpiar, en qué...
- Page 30 ESPAÑOL Modo Espiral Al seleccionar este modo, el robot comenzará la limpieza en un punto exacto, realizará movimientos en espiral hacia afuera y luego hacia adentro a máxima potencia hasta volver al punto de inicio. Luego, volverá a la base de carga de forma directa. Puede activarse únicamente desde la aplicación.
-
Page 31: Limpieza Y Mantenimiento
ESPAÑOL Puede activarse únicamente desde la aplicación. Modo Twice Seleccione este modo para llevar a cabo una limpieza profunda de su casa. Puede combinarse con el modo Bordes, Espiral, Puntual o Área inteligente El robot llevará a cabo dos ciclos de limpieza completos y volverá a la base de carga de forma directa. Limpieza final Antes de volver a la base de carga, el robot realizará... -
Page 32: Cambio Y Carga De La Batería
7. CAMBIO Y CARGA DE LA BATERÍA No utilice baterías, cargadores o bases de carga diferentes a las proporcionadas oficialmente por Cecotec. No utilice baterías no recargables. No retire, desmonte o trate de reparar la batería ni la base de carga. -
Page 33: Resolución De Problemas
ESPAÑOL No deseche las baterías de cualquier manera. Se recomienda entregarlas a organizaciones profesionales para que sean tratadas correctamente. 8. RESOLUCIÓN DE PROBLEMAS Problema El robot no se enciende o no inicia la limpieza. El robot no se carga o no puede volver a la base de carga. El robot no funciona correctamente. -
Page 34: Especificaciones Técnicas
11. Asegúrese de que el robot y la base de carga está en una zona con buena señal Wi-Fi, reinicie el rúter y trate de conectarlo de nuevo. 9. ESPECIFICACIONES TÉCNICAS Modelo: Conga 8090 Ultra Referencia del producto: 05004 100-240 V ~ 50/60 Hz Batería: 14,6/14,8 V, 6400 mAh... -
Page 35: Garantía Y Sat
Si en alguna ocasión detecta una incidencia con el producto o tiene alguna consulta, póngase en contacto con el Servicio de Asistencia Técnica oficial de Cecotec a través del número de teléfono +34 96 321 07 28. -
Page 36: Parts And Components
ENGLISH 1. PARTS AND COMPONENTS Robot and sensors. Fig. 1. Laser sensor Top cover Back home/Power/Autocleaning mode Infrared receiver sensor Anti-collision sensor Omnidirectional wheel Charging terminals Battery Side brush 10. Bumper Motor cover Main brush: For cleaning all types of surfaces Left side wheel 14. -
Page 37: Before Use
Make sure all parts and components are included and in good conditions. If any sign of visible damage is observed, contact immediately with the official Technical Support Service of Cecotec. 3. INSTALLATION Robot and charging base installation. Fig. 5, 6. - Page 38 ENGLISH Note Take the robot to the charging base if the battery is low. The robot might not turn on if the battery is very low. The robot will automatically turn on when placed on the charging base. The robot cannot be turned off during charging. Water tank installation Note It is not suggested to use the scrubbing function for the first-time use.
-
Page 39: Operation
ENGLISH the point it has stopped until it maps the whole surface. The robot keeps on mapping constantly, therefore it adapts independently to each house’s features and continuously improves previous maps. 4. OPERATION Once the robot’s light indicator changes from oscillating orange to steady blue, the battery is fully charged and the robot is ready to operate. - Page 40 ENGLISH When a cleaning cycle has been completed or the robot’s battery is low, thanks to its Total Surface 3.0 technology, the robot will also return to the charging base to avoid running out of battery. Once the robot has recharged, it will resume cleaning from the point it has stopped.
- Page 41 ENGLISH will automatically plan the cleaning route as it is cleaning. If during this mode the robot is controlled manually, the robot will calculate the route again and could go through previously cleaned areas. In order to ensure efficient cleaning, do not operate it manually during auto mode cleaning.
- Page 42 ENGLISH While the robot is operating, press the power button on the App, the remote control or on the robot to pause it and press the same button again to resume cleaning. Standby The robot will automatically enter standby mode after 5 minutes of no operation. Press the power button on the App, the remote control or on the robot to start it up again.
-
Page 43: Mobile App And Wi-Fi Connection
ENGLISH To cancel the scheduled cleaning, follow the below steps: Set the clock on the remote control at 00:00 a.m. and save it. Switch the robot off for 1 minute and switch it on again. Note The robot will beep to indicate all settings have been saved. Warning: When the remote control’s batteries are replaced, the clock and schedule times must be set again. - Page 44 ENGLISH Create an account with your e-mail and a password. Confirm login. Add your Conga robot. Connect to Wi-Fi. Warnings The Wi-Fi name and password cannot exceed 32 bits. If the network configuration fails to connect, follow the below steps: Press the power button for 5 seconds, the robot will enter sleeping mode and the Wi-Fi light indicator will blink fast indicating connection error.
- Page 45 ENGLISH Manual mode To carry out manual cleaning, use the direction buttons on the remote control or on the App to take the robot to the specific points where you want it to clean. It can be activated from the App or the remote control. Back home mode Select this mode at any point of any cleaning cycle and during any of the modes, the robot will automatically return to the charging base.
-
Page 46: Cleaning And Maintenance
ENGLISH 6. CLEANING AND MAINTENANCE Main brush Turn the robot around and press the main brush’s release button to take the cover out. Take the main brush out and clean the compartment. Clean the main brush with the provided tools and use water and soap if necessary. Place the main brush in its position and fasten the cover’s clip. -
Page 47: Battery Replacement And Charging
7. BATTERY REPLACEMENT AND CHARGING Do not use any other battery, power adapter or charging base than the one officially provided by Cecotec. Do not use non-rechargeable batteries. Do not remove, dismantle or attempt to repair the battery or the charging base. - Page 48 ENGLISH The robot does not return to the charging base after spot cleaning or after changing starting position. The robot does not resume cleaning. 10. The robot is always offline. Connection between the mobile phone and the robot failed. Solution 1.1.
-
Page 49: Technical Specifications
The product has been used for purposes other than those intended for it, misused, beaten, exposed to moisture, immersed in liquid or corrosive substances, as well as any other fault attributable to the customer. The product has been disassembled, modified, or repaired by persons, not authorised by the Cecotec official Technical Support Service. - Page 50 The intellectual property rights over the texts, designs, photographs and illustrations in this manual belong to CECOTEC INNOVACIONES, S.L. All rights reserved. All rights reserved. The contents of this publication may not, in whole or in part, be reproduced, stored in a retrieval system, transmitted or distributed by any means (electronic, mechanical, photocopying, recording or similar) without the prior authorization of CECOTEC INNOVACIONES, S.L.
-
Page 51: Pièces Et Composants
FRANÇAIS 1. PIÈCES ET COMPOSANTS Robot et capteurs Img. 1. Capteur laser Couvercle supérieur Retour à la base/Allumer/Nettoyage automatique Capteur récepteur infrarouges Capteur antichoc Roue omnidirectionnelle Bornes de charge Batterie Brosses latérales 10. Pare-chocs Couvercle du moteur Brosse centrale : pour nettoyer tout type de surface Roue gauche 14. -
Page 52: Avant Utilisation
Assurez-vous que toutes les pièces et les composants sont inclus et en bon état. Si vous observez un dommage visible, contactez immédiatement le Service Après-Vente Officiel de Cecotec. 3. INSTALLATION Installation du robot et de sa base de charge. Img. 5, 6. - Page 53 FRANÇAIS Lumière rouge clignotante : erreur Lumière rouge fixe : pas de réservoir ou de serpillère. Notes Placez le robot sur sa base de charge si sa batterie est faible. Il ne peut pas s’allumer si sa batterie est très faible. Le robot s’allume automatiquement lorsque vous le placez sur sa base de charge.
-
Page 54: Fonctionnement
FRANÇAIS Tout d’abord, le robot devra réaliser un cycle de charge complet. Il est recommandé de le laisser charger toute la nuit. Lorsque la batterie est complètement chargée, il peut réaliser le premier nettoyage et enregistrer la première carte. Pour cela, activez le mode Auto et le niveau de puissance d’aspiration Eco. - Page 55 FRANÇAIS Avertissement Le robot nettoie de manière ordonnée par zones carrées de 4 x 4 m, il peut donc sortir d’une pièce pour délimiter une certaine zone. Mais le robot nettoiera quoi qu’il en soit toute la surface accessible. Mode Retour à la base Appuyez sur le bouton «...
- Page 56 FRANÇAIS Auto et avec la puissance Eco, de cette façon, vous vous assurez que la carte soit complètement mémorisée. Avertissement Assurez-vous que le témoin lumineux soit allumé en bleu indiquant que le robot est activé avant de l’utiliser. S’il ne l’est pas, appuyez sur n’importe quel bouton de la télécommande pour l’activer.
- Page 57 FRANÇAIS et à la fonction Retour intelligent à la base. Lorsque le robot termine un nettoyage ou lorsque la batterie est faible, grâce à la technologie Total Surface 2.0, il retourne également automatiquement à sa base de charge pour éviter de se retrouver sans batterie. Une fois chargé, il reprendra le nettoyage exactement là...
-
Page 58: App Pour Smartphone Et Connexion Wi-Fi
FRANÇAIS Avertissement Assurez-vous que le robot et le témoin lumineux sont allumés avant de programmer le nettoyage ou de configurer l’heure. Heure actuelle. Img. 16. Maintenez appuyé le bouton de temps pendant 3 secondes. Les 2 premiers chiffres correspondant à l’heure clignotent. Utilisez les boutons des directions «... - Page 59 FRANÇAIS Avantages de l’App Contrôlez votre robot facilement et intuitivement. Activez le nettoyage depuis n’importe quel endroit. Réalisez la configuration et la programmation quotidienne. Profitez des différents modes de nettoyage : Auto, Spirale, Bords, Manuel, Twice, Zone restreinte, En un point, Zone intelligente, Retour à la base et Scrubbing. Visualisez comment le robot crée une carte interactive au fur et à...
- Page 60 FRANÇAIS Avertissement Il est possible que le robot change de pièce pour terminer le nettoyage d’une des zones de 4 x 4 m. Cela est normal et n’affecte en rien le bon fonctionnement du robot. Mode Bords Lorsque vous sélectionnez ce mode, le robot nettoie le long des murs et des meubles. Vous pouvez activer ce mode depuis l’App ou depuis la télécommande.
-
Page 61: Nettoyage Et Entretien
FRANÇAIS Mode En un point Sélectionnez ce mode pour nettoyer en profondeur une zone spécifique de la carte, en profitant de la puissance maximale du robot. Le robot nettoie une zone de 2x2 m en réalisant des mouvements en zigzag et retourne directement à sa base de charge lorsqu’il termine. - Page 62 FRANÇAIS Languette Brosse centrale Compartiment Brosse en silicone. Img. 22. Pour nettoyer la brosse en silicone, veuillez suivre les étapes du paragraphe antérieur pour l’extraire et la laver avec de l’eau et du savon. Séchez-la avec soin avant de la réinstaller pour assurer son efficacité.
-
Page 63: Charger Et Remplacer La Batterie
7. CHARGER ET REMPLACER LA BATTERIE N’utilisez pas de batteries, de chargeurs ni de bases de charge différents de ceux fournis officiellement par Cecotec. N’utilisez pas de batteries non rechargeables. Ne retirez pas, ne démontez pas et ne réparez pas la batterie ni la base de charge vous- même. - Page 64 FRANÇAIS 1.2. La température de la pièce est inférieure à 0 ºC ou supérieure à 50 ºC. Utilisez le robot dans des lieux où la température ambiante est comprise entre 0 ºC et 40 ºC. 2.1. Il y a trop d’obstacles près de la base de charge, déplacez-la dans un lieu dégagé. 2.2.
-
Page 65: Spécifications Techniques
FRANÇAIS 9. SPÉCIFICATIONS TECHNIQUES Modèle : Conga 8090 Ultra Référence : 05004 100-240 V ~ 50/60 Hz Batterie : 14,6/14,8 V, 6400 mAh Bandes de fréquence : 2.412-2.472 GHz 5.150-5.250 5.250-5.350 GHz 5.470-5.725 GHz Transmission de puissance maximale : 16 dBm Made in China I Conçu en Espagne... - Page 66 FRANÇAIS Si vous détectez un incident ou un problème avec le produit, ou vous avez des doutes concernant le produit, veuillez contacter le Service Après-Vente Officiel de Cecotec au +34 9 63 21 07 28. COPYRIGHT Les droits de propriété intellectuelle des textes, conceptions, photographies et illustrations de ce manuel appartiennent à...
-
Page 67: Teile Und Komponenten
DEUTSCH 1. TEILE UND KOMPONENTEN Roboter und Sensoren Abb. 1. Lasersensor Obere Abdeckung Back-Home/ Eingeschaltet/ Automatische Reinigung Infrarotempfänger-Sensor Stoßsensor Allseitiges Rad Ladekontakte Akku Seitenbürste 10. Stoßstange Abdeckung des Motors Hauptbürste: für jede Oberfläche geeignet. Linkes Rad 14. Rechtes Rad Silikon-Bürste: für Tierhaare. Cepillo Jalisco Bürste: speziell für harte Böden Optischer Sensor: Um einen Absturz des Roboters zu verhindern 18. -
Page 68: Vor Dem Gebrauch
Nehmen Sie das Produkt aus der Verpackung und entnehmen Sie alle Verpackungsmaterial. Prüfen Sie, ob die Lieferung vollständig und in gutem Zustand ist. Falls Sie sichtbare Schäden bemerken, kontaktieren Sie sofort mit dem technischen Kundendienst von Cecotec. 3. INSTALLATION Installation des Roboters und der Ladestation. Abb. 5, 6. - Page 69 DEUTSCH Rotes Dauerlicht: kein Tank oder Mopp Hinweise Bringen Sie den Roboter zur Ladestation, wenn der Batteriestand niedrig ist. Der Roboter kann sich nicht einschalten, wenn der Akku zu niedrig ist. Der Roboter wird sich automatisch einschalten, sobald Sie ihn auf die Ladestation stellen. Der Roboter kann beim Aufladen nicht ausgeschaltet werden Wasserbehälter einsetzen Hinweis...
-
Page 70: Bedienung
DEUTSCH empfehlen, den Roboter die ganze Nacht Aufladen zu lassen. Sobald der Akku vollständig geladen ist, können Sie die erste Reinigung durchführen und die erste Karte speichern. Dazu aktivieren Sie den Auto-Modus und die Eco-Saugleistung. Es ist sehr wichtig, diese Hinweise durchzuführen, damit der Roboter jede Ecke der Wohnung erkennen kann und eine vollständige Reinigungskarte erzeugen kann. - Page 71 DEUTSCH verlassen, um diesen Bereich zu begrenzen. Machen Sie sich keine sorgen, der Roboter wird den ganzen zugänglichen Bereich reinigen. Back-Home Modus Drücken Sie die Back-Home-Taste Dieser Modus kann während einem anderen Reinigungszyklus aktiviert werden. Der Roboter stoppt die Reinigung und kehrt automatisch zur Ladestation zurück. Der Roboter folgt dem kürzesten Weg, um dank der gespeicherten Karten und der intelligenter „Back-Home“...
- Page 72 DEUTSCH Speicherung durchführen, bevor die Reinigung beginnt. Benutzen Sie den Roboter mit Auto- Modus und Eco-Leistung, um die Karte 100% zu speichern. Hinweis Stellen Sie sicher, dass die Betriebsanzeige vor der Verwendung blau leuchtet. Dies signalisiert, dass der Roboter aktiviert ist. Wenn nicht, drücken Sie eine beliebige Taste auf der Fernbedienung, um ihn zu aktivieren.
- Page 73 DEUTSCH Roboter folgt dem kürzesten Weg, um dank der gespeicherten Karten und der intelligenter „Back-Home“ Funktion zurückzukehren. Wenn ein Reinigungszyklus abgeschlossen ist oder die Batterie des Roboters niedrig ist, kehrt er automatisch dank der TotalSurface 2.0, Technologie zur Ladestation zurück, um zu vermeiden, dass die Batterie entlädt wird.
-
Page 74: App Und Wlan-Verbindung
DEUTSCH Hinweis Stellen Sie sicher, dass der Roboter aktiviert ist und dass die Betriebsanzeige leuchtet, bevor Sie die Reinigung oder die Zeit einstellen. Aktuelle Uhrzeit.Abb. 16. Halten Sie die „Zeit“-Taste 3 Sekunden lang gedrückt. Die ersten 2 Ziffern werden blinken. Verwenden Sie die Richtungstasten um die aktuelle Uhrzeit einzustellen. - Page 75 DEUTSCH Vorteile der App Kontrollieren Sie Ihren Roboter leicht und intuitiv. Aktivieren Sie die Reinigung überall. Führen Sie die Einstellung und die tägliche Programmierung durch. Genießen Sie verschiedene Reinigungsmodi: Auto, Spiral, Edge, Manuell, Twice, Sperrbereich, Spot, Intelligenter Bereich, Scrubbing und Back-Home. Schauen Sie die Erstellung einer interaktiven Karte an, während er reinigt.
- Page 76 DEUTSCH Hinweis Der Roboter könnte den Raum verlassen, um den Bereich komplett zu reinigen. Dies beeinflusst nicht den Betrieb des Roboters. Edge-Modus Der Roboter reinigt entlang der Wänden und Möbel. Der Modus kann in der App oder auf der Fernbedienung aktiviert werden. Spiral-Modus Der Roboter beginnt die Reinigung in einem bestimmten Punkt und führt spiralförmige Bewegungen nach außen durch.
-
Page 77: Reinigung Und Wartung
DEUTSCH nutzt die maximale Leistung des Roboters aus. Der Roboter wird einen Bereich 2x2m in Zig-Zag reinigen und nach der Reinigung zur Ladestation automatisch zurückkehren. Der Roboter wird die Reinigung in dem ausgewählten Bereich. Deswegen wird er zu diesem Punkt und danach zur Ladestation ohne Saugen fahren. Dieser Modus kann ausschließlich mit der App aktiviert werden. - Page 78 DEUTSCH Silikon-BürsteAbb. 22. Um die Silikon-Bürste zu reinigen, folgen Sie die Schritte im vorherigen Abschnitt, um sie zu entnehmen und waschen Sie sie mit Wasser und Seife. Trocknen Sie sie vorsichtig, bevor Sie diese wieder einsetzen, um einen ordnungsgemäßen Betrieb zu gewährleisten. Jalisco BürsteAbb.
-
Page 79: Akku Aufladen Und Ersetzen
DEUTSCH 7. AKKU AUFLADEN UND ERSETZEN Verwenden Sie keine Akkus, Ladegeräte oder Ladestationen, die nicht vom Cecotec mitgeliefert worden. Benutzen Sie keine nicht-wiederaufladbare Batterien. Entfernen, demontieren oder reparieren Sie den Akku oder die Ladestation nicht. Platzieren Sie die Ladestation in der Nähe von Wärmequellen. -
Page 80: Technische Spezifikationen
11. Vergewissern Sie sich, dass sich der Roboter und die Ladestation in Bereiche mit gutem Wi-Fi-Signal befinden. Starten Sie den Router erneut und versuchen Sie sie wieder verbinden. 9. TECHNISCHE SPEZIFIKATIONEN Modell: Conga 8090 Ultra Produktreferenz: 05004 100-240 V ~ 50/60 Hz... -
Page 81: Entsorgung Von Alten Elektrogeräten
Fehler, der dem Verbraucher zuzuschreiben ist. Das Produkt von Personen demontiert, repariert oder modifiziert wurde, die nicht vom offiziellen Technischen Kundendienst durch Cecotec autorisiert worden sind. Der Grund hierfür durch die normale Abnutzung und Verschleiß der Teile und des Zubehörs entstanden ist. - Page 82 COPYRIGHT Die geistigen Eigentumsrechte an den Texten, Entwürfen, Fotos und Abbildungen in diesem Handbuch liegen bei CECOTEC INNOVACIONES, S.L. Alle Rechte vorbehalten. Der Inhalt dieser Veröffentlichung darf weder ganz noch teilweise ohne vorherige Genehmigung von CECOTEC INNOVACIONES, S.L. vervielfältigt, in einem Datenabfragesystem gespeichert, übertragen oder auf irgendeine Weise (elektronisch, mechanisch, durch Fotokopie, Aufzeichnung oder Ähnliches) verbreitet werden.
-
Page 83: Parti E Componenti
ITALIANO 1. PARTI E COMPONENTI Robot e sensori Fig. 1. Sensore laser Coperchio superiore Ritorno alla base/Accensione/Pulizia automatica Sensore recettore infrarossi Sensore anticollisione Ruota omnidirezionale Poli di ricarica Batteria Spazzola laterale 10. Paraurti Coperchio del motore Spazzola centrale: per pulire ogni tipo di superficie Ruota sinistra 14. -
Page 84: Prima Dell'uso
Ritirare il prodotto dalla scatola e tutto il materiale presente nell’imballaggio. Verificare che tutte le parti e componenti siano incluse e in buono stato. In caso di danni visibili, contattare immediatamente il Servizio di Assistenza Tecnica ufficiale di Cecotec. 3. INSTALLAZIONE Installazione del robot e della base di ricarica Fig. - Page 85 ITALIANO Il robot non si può spegnere durante la ricarica. Installazione del serbatoio d’acqua Avviso Non si consiglia di utilizzare la funzione di lavaggio durante il primo uso. Aprire il coperchio in silicone, riempirlo d’acqua senza che fuoriesca dal serbatoio. Verificare di chiudere correttamente la linguetta in silicone per evitare che fuoriesca acqua.
-
Page 86: Funzionamento
ITALIANO 4. FUNZIONAMENTO L’indicatore luminoso cambierà da arancione oscillante a blu fisso quando la batteria sarà totalmente carica. Il robot non può funzionare con la batteria scarica. Suggerimenti Rimuovere tutti i cavi e ostacoli dal pavimento prima di mettere il robot in funzionamento per evitare incidenti e danni. - Page 87 ITALIANO Suggerimento Rimuovere il serbatoio misto durante la ricarica. Telecomando a distanza Fig. 12. Programmazione Livelli di potenza (Turbo/Normale/Eco) Ritorno alla base Controllo manuale Acceso/Pausa Modalità Bordi Collegamento del telecomando a distanza Se il robot non risponde al telecomando a distanza, effettuare i seguenti passaggi: Mantenere premuto il tasto della modalità...
- Page 88 ITALIANO robot manualmente durante la pulizia automatica. Grazie alla sua tecnologia Total Surface 3.0, il robot tornerà automaticamente alla base di ricarica quando la batteria è scarica e riprenderà la pulizia ad alta efficienza dallo stesso punto una volta terminata la ricarica. Durante la pulizia, il robot farà una piccola pausa per esaminare l’area e pianificare il percorso da pulire (questa pausa varierà...
- Page 89 ITALIANO Standby Il robot entrerà automaticamente in modalità standby dopo 5 minuti di inattività. Premere il tasto di accensione sulla App, sul telecomando a distanza o sul robot per attivarlo di nuovo. Avvertenze Dopo 12 secondi di inattività, il dispositivo si spegnerà automaticamente. Durante la ricarica, il robot non entrerà...
-
Page 90: App E Connessione Wi-Fi
ITALIANO Premere di nuovo il tasto di programmazione per salvare le impostazioni. Per cancellare la pulizia programmata, seguire i seguenti passaggi: Configurare l’ora del telecomando a distanza alle 00:00 a.m e salvare le impostazioni. Spegnere il robot dall’interruttore di accensione per 1 minuto e azionare di nuovo l’interruttore. - Page 91 ITALIANO Configurazione: Fig. 20. Scarichi la App Conga 8090 dalla App Store o Google Play. Creare un account con e-mail e password. Confermare il proprio registro. Aggiungere il suo robot Conga. Connettersi a una rete Wi-Fi. Avvertenze Il nome del Wi-Fi e la password non possono eccedere i 32 bit. Se la connessione ad una rete dà...
- Page 92 ITALIANO i movimenti reali di un mocio. Comincerà a pulire in modalità Bordi, continuando con movimenti a zig-zag e infine tornerà direttamente alla base di ricarica. Può essere attivata solamente dalla App. Modalità Manuale Utilizzare i tasti direzionali dal telecomando a distanza o dalla App per dirigere il robot verso punti specifici che si desidera pulire.
-
Page 93: Pulizia E Manutenzione
ITALIANO Pulizia totale Prima di tornare alla base di ricarica, il robot effettuerà movimenti avanti e indietro per eliminare residui di polvere dalla spazzola. 6. PULIZIA E MANUTENZIONE Spazzola centrale Girare il robot e premere il tasto di rilascio della spazzola centrale per ritirare il coperchio. Rimuovere la spazzola centrale e pulire lo scomparto. -
Page 94: Cambio E Ricarica Della Batteria
7. CAMBIO E RICARICA DELLA BATTERIA Non utilizzare batterie, caricabatterie o basi di ricarica differenti da quelle fornite ufficialmente da Cecotec. Non utilizzare batterie non ricaricabili. Non rimuovere, smontare o cercare di riparare la batteria né la base di ricarica. -
Page 95: Risoluzione Dei Problemi
ITALIANO 8. RISOLUZIONE DEI PROBLEMI Problema Il robot non si accende o non inizia la pulizia. Il robot non si carica o non può tornare alla base di carica. Il robot non funziona correttamente. Il robot emette un suono inusuale durante la pulizia. Il robot non pulisce in modo efficiente o perde lo sporco. -
Page 96: Specifiche Tecniche
11. Verificare che il robot e la base di ricarica abbiano un buon segnale Wi-Fi, riavviare il router e riprovare a connetterlo. 9. SPECIFICHE TECNICHE Modello: Conga 8090 Ultra Riferimento di prodotto: 05004 100-240 V ~ 50/60 Hz Batteria: 14,6/14,8 V, 6400 mAh Bande di frequenza: 2.412-2.472 GHz 5.150-5.250 5.250-5.350 GHz 5.470-5.725 GHz... -
Page 97: Garanzia E Sat
Non tentare di riparare il dispositivo per conto proprio, bensì contattare con il Servizio di Assistenza Tecnica di Cecotec attraverso il numero di telefono +34 96 321 07 28. COPYRIGHT I diritti di proprietà intellettuale dei testi, disegni, fotografie e illustrazioni di questo manuale appartengono a CECOTEC INNOVACIONES, S.L. -
Page 98: Peças E Componentes
PORTUGUÊS 1. PEÇAS E COMPONENTES Robot e sensores Fig. 1. Sensor laser Tampa superior Regresso à base/Ligar/Limpeza automática Sensor recetor de infravermelhos Sensor anti colisão Roda omnidirecional Bornes de carga Bateria Escova lateral 10. Para choques Tampa do motor Escova central: para limpar todos os tipos de superfícies Roda esquerda 14. -
Page 99: Antes De Usar
Certifique-se de que todas as peças e componentes estão incluídas e em bom estado. Se observar algum dano visível, entre em contacto imediatamente com o Serviço de Assistência Técnica oficial de Cecotec. 3. INSTALAÇÃO Instalação do robot e da base de carga. Fig. 5, 6. - Page 100 PORTUGUÊS Avisos Leve o robot à base de carga se a bateria estiver fraca. O robot pode não ligar se a bateria estiver muito fraca. O robot ligará automaticamente ao colocar na base de carga. O robot não pode ser desligado durante a carga. Instalar o depósito de águao Aviso Não é...
-
Page 101: Funcionamento
PORTUGUÊS Se tiver uma casa muito grande e o robot ficar sem bateria, não fax mal. Quando regressar à base de carga, o robot guarda tanto o mapa completo como os mapas incompletos, uma vez carregado, continuará a limpeza no ponto onde deixou, até fazer o mapeamento total da superfície. - Page 102 PORTUGUÊS Este modo pode ser ativado durante qualquer outro ciclo de limpeza, o robot deixará de limpar e voltará à base de carga de forma automática. O robot seguirá a rota mais curta para voltar à base de carga graças à memorização de mapas e à...
- Page 103 PORTUGUÊS Modo Auto.Fig. 13. Pressione o botão de ligar no comando a distância para que comece a limpar automaticamente no modo Bordas e depois realize um ciclo de limpeza de forma ordenada em zig zag, enquanto reconhece as áreas pelas quais está a limpar e pelas que não. O robot fará...
- Page 104 PORTUGUÊS Certifique-se de que o quarto esteja arrumado para que o robot possa aceder à base de carga sem problemas. Funções Pausa Enquanto o robot estiver em funcionamento, pressione o botão de ligar na aplicação, no comando a distância ou no robot para pará-lo e pressione outra vez para retomar a limpeza. Standby O robot entrará...
-
Page 105: Aplicação Do Telemóvel E Ligação Wi-Fi
PORTUGUÊS Programação de tarefas de limpeza Mantenha pressionado o botão de programação durante 3 segundos. Os primeiros 2 dígitos, correspondentes à hora, piscarão. Fig. 18. Utilize os botões de direção de cima e baixo para configurar a hora da programação. Depois, utilize os botões de direção de direita e esquerda para mudar de horas a minutos e repita o passo anterior. - Page 106 PORTUGUÊS seus próprios planos de limpeza selecionando os quartos que deseja, em que modo e potência. Verifique a superfície limpa e o tempo demorado. Aceda ao seu histórico de limpeza. Esta aplicação é compatível com redes 5GHz. *Este modelo é compatível com os assistentes virtuais por voz Google Assistant e Alexa. Configuração.Fig.
- Page 107 PORTUGUÊS Modo Espiral Ao selecionar este modo, o robot começará a limpeza num ponto exato e realizará movimentos em espiral para fora e depois para dentro à máxima potência até voltar ao ponto de início. Ao finalizar a limpeza, voltará à base de carga diretamente. Só...
-
Page 108: Limpeza E Manutenção
PORTUGUÊS Modo Twice Selecione este modo para levar a cabo uma limpeza profunda da sua casa. Pode combinar com o modo Bordas, Espiral, Num só ponto ou Área inteligente. O robot executará os ciclos de limpeza completos e voltará à base de carga de forma direta. Limpeza final Antes de voltar à... -
Page 109: Carga E Troca Da Bateria
Recomenda-se uma limpeza semanal do robô, dependendo do uso. 7. CARGA E TROCA DA BATERIA Não utilize baterias, carregadores ou bases de carga diferentes às proporcionadas pela Cecotec. Não utilize baterias não recarregáveis. Não retire, desmonte ou trate de reparar a bateria nem a base de carga. -
Page 110: Resolução De Problemas
PORTUGUÊS Não descarte as baterias de qualquer maneira. É recomendável entregá-las a organizações profissionais para que sejam tratadas de forma adequada. 8. RESOLUÇÃO DE PROBLEMAS Problema O robot não liga ou não inicia a limpeza. O robot não carrega ou não pode regressar à base de carga. O robot não funciona corretamente. -
Page 111: Especificações Técnicas
11. Certifique-se de que o robot e a base de carga estão numa zona com bom sinal Wi-Fi, reinicie o router e tente conectá-lo novamente. 9. ESPECIFICAÇÕES TÉCNICAS Modelo: Conga 8090 Ultra Referência do produto: 05004 100-240 V~, 50/60 Hz Bateria: 14,6/14,8 V, 6400 mAh Bandas de frequência: 2.412-2.472 GHz 5.150-5.250 5.250-5.350 GHz 5.470-5.725 GHz... -
Page 112: Garantia E Sat
Se em alguma ocasião deteta uma ocorrência com o produto ou tem alguma consulta, entre em contacto com o Serviço de Assistência Técnica oficial da Cecotec através do número de telefone +34 96 321 07 28. -
Page 113: Onderdelen En Componenten
NEDERLANDS 1. ONDERDELEN EN COMPONENTEN Robot en sensoren Fig. 1. Lasersensor Behuizing bovenkant Back home/Aan/automatische schoonmaak Infraroodsensor Botssensor Omnidirectioneel wiel Oplaadpoorten Batterij Zijborstel 10. Bumpers Behuizing van de motor Centrale borstel: om alle soorten oppervlakken schoon te maken Linkerwiel 14. Rechterwiel Rubberen borstel: speciaal voor huisdierharen Jalisco borstel: speciaal voor harde vloeren Optische sensor: om botsingen te vermijden... -
Page 114: Voor U Het Toestel Gebruikt
Controleer of alle onderdelen en componenten aanwezig en in goede staat zijn. Als u zichtbare schade waarneemt, neem dan zo snel mogelijk contact op met de officiële Technische Ondersteuningsservice van Cecotec. 3. INSTALLATIE De robot en het oplaadstation installeren. Fig. 5, 6. - Page 115 NEDERLANDS Vast wit licht: AAN/In werking/of opgeladen. Oranje oscillerend licht: aan het laden en/of back home. Knipperend rood licht: Fout Constant rood licht: geen tank of dweil Opmerkingen Breng de robot naar het oplaadstation als het batterijpercentage laag is. De robot kan niet inschakelen als het batterijpercentage zeer laag is.
-
Page 116: Werking
NEDERLANDS zal de robot de eerste schoonmaak kunnen uitvoeren en de eerste kaart kunnen opslaan. Activeer de Auto-stand en het Eco-zuigvermogen voor de eerste schoonmaak. Het is zeer belangrijk dat u deze instructies volgt, zodat de robot alle hoeken van uw huis kan herkennen en een volledige kaart kan maken. - Page 117 NEDERLANDS reden zou hij een kamer kunnen verlaten om dit vierkante gebied te begrenzen. Maak u geen zorgen, de robot zal alle toegankelijke oppervlakken schoonmaken. Back home modus Druk op de “back home” knop. U kan de robot op eender welk moment en tijdens eender welke schoonmaakcyclus naar het oplaadstation sturen.
- Page 118 NEDERLANDS memorisatieproces uitvoeren voordat hij begint met het schoonmaakproces. Gebruik de robot in de Auto-stand en met het Eco-vermogen om te verzekeren dat de kaart voor 100% wordt opgeslagen. Opmerking Controleer of het indicatielampje blauw oplicht voordat u de robot gebruikt. Dit geeft aan dat de robot geactiveerd is.
- Page 119 NEDERLANDS Back home modus.Fig. 15. Druk op de Back home-knop op de afstandsbediening om de robot naar de laadbasis te sturen. U kan de robot op eender welk moment en tijdens eender welke schoonmaakcyclus naar het oplaadstation sturen. De robot zal de kortste route volgen om terug te keren naar het oplaadstation dankzij de opgeslagen kaart en de intelligente back home-functie.
- Page 120 NEDERLANDS Het instellen van de schoonmaaktijden en de programmering moet uitgevoerd worden via de afstandsbediening. De robot zal automatisch de schoonmaakcyclus uitvoeren die u heeft geprogrammeerd op een bepaalde dag. Opmerking Zorg ervoor dat de robot geactiveerd is en dat het indicatielampje aan staat voordat u de schoonmaak programmeert of de schoonmaaktijden instelt.
-
Page 121: Mobiele App En Wifi-Verbinding
NEDERLANDS 5. MOBIELE APP EN WIFI-VERBINDING Om overal toegang te hebben tot alle functies van uw robot, raden wij u aan de App te downloaden. U zult de robot op de meest efficiënte manier kunnen bedienen en genieten van een perfecte reiniging. Voordelen van de app Bestuur uw robot op een makkelijke en intuïtieve manier. - Page 122 NEDERLANDS Auto-stand In dit menu gaat de robot gebieden van 4x4 meter schoonmaken. Binnen dit gebied gaat hij eerst de randen schoonmaken en vervolgens de binnenkant in zigzagbewegingen tot het volledige gebied schoon is. Als de robot klaar is met schoonmaken keert hij automatisch terug naar het oplaadstation.
-
Page 123: Schoonmaak En Onderhoud
NEDERLANDS zigzagbewegingen laten schoonmaken. Na de schoonmaak van de geselecteerde zone keert de robot terug naar het oplaadstation. U kan meer dan 1 gebied tegelijk selecteren op de kaart. De robot maakt in dit menu enkel schoon in het geselecteerde gebied en zal onderweg naar het oplaadstation niet stofzuigen. - Page 124 NEDERLANDS maanden te vervangen (afhankelijk van hoe en hoe vaak u de robot gebruikt). Fig. 21. Deksel van de centrale borstel Klepje Centrale borstel Compartiment Rubberen borstel. Fig. 22. Volg de stappen zoals beschreven in de vorige paragraaf om de rubberen borstel uit de behuizing te halen.
-
Page 125: De Batterij Verwisselen En Opladen
Een wekelijkse reiniging van de robot wordt aanbevolen, afhankelijk van het gebruik. 7. DE BATTERIJ VERWISSELEN EN OPLADEN Gebruik alleen batterijen, opladers of oplaadstations die officieel verstrekt worden door Cecotec. Gebruik nooit niet-oplaadbare batterijen. Probeer de batterij en het oplaadstation niet uit elkaar te halen, te openen of te repareren. - Page 126 NEDERLANDS Oplossing 1.1. De robot kan niet werken met een laag batterijpercentage. Laat de robot opladen voordat u hem opnieuw gebruikt 1.2. De temperatuur van de kamer is lager dan 0 ºC of hoger dan 50 ºC. Gebruik de robot op plaatsen waar de temperatuur binnen de aangegeven waarden ligt.
-
Page 127: Technische Specificaties
11. Zorg ervoor dat de robot en het oplaadstation zich in een zone met een goed wifisignaal bevinden, start de router opnieuw op en probeer de robot nogmaals te verbinden. 9. TECHNISCHE SPECIFICATIES Model: Conga 8090 Ultra Referentie van het product: 05004 100-240 V ~ 50/60 Hz Batterij: 14,6/14,8 V, 6400 mAh Frequentie: 2.412-2.472 GHz 5.150-5.250 5.250-5.350 GHz 5.470-5.725 GHz... - Page 128 Mocht u op een bepaald moment een incident met het product vaststellen of vragen hebben, dan kunt u contact opnemen met de officiële Cecotec Technical Support Service op +34 96 321 07 28.
-
Page 129: Części I Komponenty
POLSKI 1. CZĘŚCI I KOMPONENTY Robot i czujniki Rys. 1. Czujnik laserowy Górna pokrywa Powrót do stacji/Włączony/Sprzątanie automatyczne Czujnik podczerwieni Czujnik antykolizyjny Kółko wielokierunkowe Złącza ładowania Bateria Szczotka boczna 10. Zderzak Osłonka silnika Główna szczotka: Do sprzątania powierzchni każdego typu Kółko lewe 14. -
Page 130: Przed Użyciem
Wyjmij produkt z pudełka i usuń wszystkie elementy opakowania. Upewnij się, że wszystkie części i komponenty są włączone i są w dobrym stanie. W przypadku zauważenia widocznych uszkodzeń należy natychmiast skontaktować się z oficjalną obsługą techniczną Cecotec. 3. INSTALACJA Instalacja ściennej podstawy ładującej Rys. 5, 6. - Page 131 POLSKI Ostrzeżenie Umieść robota w stacji ładowania, kiedy widzisz, że jego bateria się wyczerpuje. Robot nie uruchomi się, jeśli bateria jest za słaba. Robot uruchomi się automatycznie, kiedy tylko zostanie umieszczony w stacji ładowania. Nie jest możliwe wyłączenie urządzenia w trakcie jego ładowania. Robot może wyłączyć...
-
Page 132: Funkcjonowanie
POLSKI zarówno pełną mapę, jak i niekompletne mapy, a po załadowaniu kontynuuje czyszczenie w punkcie, w którym pozostał, aż do zmapowania całej powierzchni. Robot cały czas przeprowadza mapowanie, dlatego potrafi dostosować swoją pracę do każdej przestrzeni i nieustannie ulepsza zapisane mapy. 4. - Page 133 POLSKI najkrótszą trasę powrotu do stacji ładującej. Po zakończeniu cyklu czyszczenia lub w przypadku niskiego poziomu naładowania baterii, dzięki technologii TotalSurface 3.0, robot automatycznie powróci również do bazy ładującej, aby uniknąć wyczerpania baterii. Po naładowaniu rozpocznie czyszczenie dokładnie od miejsca, w którym zostało przerwane. Rekomendacje Podczas ładowania usunąć...
- Page 134 POLSKI już posprzątane obszary od tych pozostałych do posprzątania. Robot automatycznie planuje i wyznacza trasę w trakcie pracy. Ręczne sterowanie robotem w tym trybie spowoduje ponowne obliczenie trasy, aby mógł przejść przez obszary, które są już czyste. Aby zapewnić skuteczne czyszczenie, nie steruj robotem ręcznie podczas czyszczenia automatycznego.
- Page 135 POLSKI Funkcje Pausa Gdy robot działa, naciśnij przycisk zasilania w aplikacji, na pilocie lub na robocie, aby go wstrzymać, i naciśnij ten sam przycisk, aby wznowić czyszczenie. Standby Robot automatycznie przejdzie w tryb czuwania po 5 minutach bezczynności. Naciśnij przycisk zasilania w aplikacji, na pilocie lub na robocie, aby ponownie go aktywować.
-
Page 136: Aplikacja Mobilna I Wifi
POLSKI cyfry odpowiadające godzinie. Rys. 18. Za pomocą przycisków kierunkowych w górę i w dół ustaw harmonogram. Następnie użyj prawego i lewego przycisku kierunkowego, aby zmienić godziny na minuty i powtórz poprzedni krok. Rys. 19. Naciśnij ponownie przycisk programowania, aby zapisać ustawienia. Aby anulować... - Page 137 POLSKI Ta aplikacja jest kompatybilna z sieciami 5GHz. * Ten model jest kompatybilny z asystentami głosowymi Google Assistant i Alexa. Konfiguracja.Rys. 20. Pobierz aplikację Conga 8090 z App Store lub Google Play. Utwórz konto, używając swojego adresu e-mail i hasła. Zatwierdź...
- Page 138 POLSKI Program Scrubbing Aktywując ten tryb, robot wykonuje ruchy do przodu i do tyłu, symulując rzeczywiste ruchy mopa. Rozpocznie się czyszczenie w trybie Borders, będzie kontynuowało ruchy zygzakowate, a na koniec powróci bezpośrednio do bazy ładującej. Można go aktywować tylko z poziomu aplikacji. Tryb ręczny Aby wykonać...
-
Page 139: Czyszczenie I Konserwacja
POLSKI Sprzątanie końcowe Przed powrotem do stacji ładującej robot wykona kilka ruchów tam iz powrotem, aby usunąć wszelkie pozostałości kurzu ze szczotki. 6. CZYSZCZENIE I KONSERWACJA Centralna szczotka Odwróć robota i naciśnij przycisk zwalniania środkowej szczotki, aby zdjąć pokrywę. Wyjmij szczotkę centralną i wyczyść ją. Wyczyść... -
Page 140: Zmiana I Ładowanie Baterii
W zależności od zastosowania zalecane jest cotygodniowe czyszczenie robota. 7. ZMIANA I ŁADOWANIE BATERII Nie używaj baterii, ładowarek ani baz ładujących innych niż oficjalnie dostarczone przez Cecotec. Nie używaj baterii jednorazowych. Nie wyjmuj, nie demontuj ani nie próbuj naprawiać akumulatora lub bazy ładującej. -
Page 141: Rozwiązywanie Problemów
POLSKI 8. ROZWIĄZYWANIE PROBLEMÓW Problem Robot nie uruchamia się lub nie rozpoczyna sprzątania. Robot nie ładuje się lub nie może wrócić do bazy ładującej. Robot nie działa prawidłowo. Robot podczas czyszczenia emituje dziwny dźwięk. Robot nie czyści skutecznie lub gubi brud. Robot nie mógł... -
Page 142: Dane Techniczne
11. Upewnij się, że robot i podstawka ładująca znajdują się w obszarze z dobrym sygnałem Wi-Fi, uruchom ponownie router i spróbuj go ponownie podłączyć. 9. DANE TECHNICZNE Model Conga 8090 Ultra Referencja produktu: 05004 100-240 V ~ 50/60 Hz Akumulator: 14,6/14,8 V, 6400 mAh Częstotliowść: 2.412-2.472 GHz 5.150-5.250 5.250-5.350 GHz 5.470-5.725 GHz... -
Page 143: Gwarancja I Serwis Pomocy Technicznej
W przypadku wykrycia incydentu z produktem lub w razie jakichkolwiek pytań prosimy o kontakt z oficjalną pomocą techniczną Cecotec pod numerem telefonu +34 96 321 07 28. COPYRIGHT Prawa własności intelektualnej do tekstów, projektów, zdjęć i ilustracji w tym podręczniku należą... -
Page 144: Části A Složení
ČEŠTINA 1. ČÁSTI A SLOŽENÍ Robot a senzory Obr. 1. Laserový senzor Horní víko Návrat domů/Zapnutí/Automatický úklid Přijímací infračervený senzor Antikolizní senzor Kolo do všech směrů Nabíjecí terminál Baterie Boční kartáč 10. Nárazník Kryt motoru Centrální kartáč: čistí všechny typy povrchů Levé... -
Page 145: Před Použitím
Vyjměte přístroj z krabice a odstraňte všechny obaly. Ujistěte se, že jsou obsaženy všechny části a díly, a že jsou v dobrém stavu. Pokud najdete nějaké viditelné poškození, okamžitě kontaktujte oficiální Technický servis Cecotec. 3. INSTALACE Instalace robota a nabíjecí základny. Obr. 5, 6. - Page 146 ČEŠTINA Upozornění Odneste robota na nabíjecí základnu, pokud je baterie takřka vybitá. Robot se nemusí zapnout, pokud je baterie příliš vybitá. Robot se automaticky zapne po vložení do nabíjecí základny. Robot se nedá vypnout během nabíjení. Instalace nádoby nádrž na vodu Upozornění...
-
Page 147: Fungování
ČEŠTINA 4. FUNGOVÁNÍ Světelný indikátor se změní z blikající oranžové na nepřerušovanou modrou v momentě, kdy bude baterie nabitá. Robot nemůže fungovat s nízkým stupněm nabití. Doporučení Odstraňte všechny kabely a překážky z podlahy před tím, než robot začne pracovat, abyste se vyhnuli nehodám a škodám. - Page 148 ČEŠTINA Programování Stupně síly (Turbo/Normal/Eco) Návrat domů Manuální kontrola Zapnutí/Pauza Program Okraje Spárování dálkového ovládání Pokud robot nereaguje na dálkové ovládání, následujte tyto kroky: Držte na ovládání stisknuté tlačítko Okraje po dobu 5ti vteřin, ovládání se dostane do módu spárování. Obrazovka zobrazí 8888. Přijímač...
- Page 149 ČEŠTINA Program Okraje. Obr. 14. Stiskněte na dálkovém ovládání tlačítko Okraje a robot začne uklízet kolem okrajů. Automaticky uklidí kolem celého povrchu a pak se automaticky vrátí rovnou na nabíjecí základnu. Pokud robot nevyrazil z nabíjecí základny, vrátí se na výchozí místo. Upozornění...
- Page 150 ČEŠTINA Programování Upozornění Robota není možné programovat z více jak jednoho zařízení najednou. Ujistěte se, že ho programujete z aplikace a nebo z dálkového ovládání. Robota je možné naprogramovat, aby zajistil co nejvyšší efektivitu úklidu. Nastavení hodiny a programu úklidu by se mělo udělat přes dálkové ovládání. Po naprogramování bude robot uklízet každý...
-
Page 151: Mobilní Aplikace A Připojení Wi-Fi
ČEŠTINA Zapnutí/aktualizace firmware: bílé blikající světlo. Chyba: červené rychle blikající světlo. Bez nádržky nebo mopu: stálé červené světlo. 5. MOBILNÍ APLIKACE A PŘIPOJENÍ WI-FI Chcete-li mít přístup ke všem funkcím robota odkudkoli, doporučujeme stáhnout si aplikaci. Budete moci robota ovládat tím nejefektivnějším způsobem a užívat si dokonalého úklidu. Výhody aplikace Kontrolujte svého robota jednoduše a intuitivně. - Page 152 ČEŠTINA Z aplikace můžete používat následující programy Program Auto Po zvolení tohoto programu začne robot uklízet čtverce 4x4 m. V tomto prostoru dokončí jeden cyklus náhodného úklidu a následně další v programu okraje. Po skončení úklidu se automaticky vrátí na nabíjecí základnu. Je možné...
-
Page 153: Čištění A Údržba
ČEŠTINA na místo a vrátí se na základnu bez vysávání. Je možné ho aktivovat pouze z aplikace. Program Přesný Vyberte tento program pro vyčištění jednoho místa na mapě do hloubky. Využijte maximální síly robota. Robot bude čistit vybrané místo 2x2 m náhodným pohybem a po dokončení... - Page 154 ČEŠTINA Centrální kartáč Přihrádka Kartáč ze silikonu. Obr. 22. Pro vyčištění silikonového kartáče, následujte kroky v předchozím odstavci pro jeho vyjmutí a vyčistěte ho vodou a mýdlem. Opatrně ho usušte a před novou instalací se ujistěte, že funguje správně. Kartáč Jalisco. Obr. 23 Při čištění...
-
Page 155: Výměna A Nabití Baterie
ČEŠTINA 7. VÝMĚNA A NABITÍ BATERIE Nepoužívejte baterie, nabíječky nebo nabíjecí základny odlišné od těch poskytnutých firmou Cecotec. Nepoužívejte baterie, které se nedají znovu nabít. Nevytahujte, nerozebírejte nebo se nesnažte baterie ani nabíjecí základnu opravit. Neumisťujte nabíjecí základnu blízko zdrojů tepla. -
Page 156: Technické Specifikace
11. Ujistěte se, že robot a nabíjecí základna jsou v dobrém dosahu Wi-Fi, restartujte router a zkuste ho připojit znovu. 9. TECHNICKÉ SPECIFIKACE Model: Conga 8090 Ultra Reference produktu: 05004 100-240 V ~ 50/60 Hz Baterie: 14,6/14,8 V, 6400 mAh Kmitočtová... -
Page 157: Recyklace Elektrospotřebičů
V případě špatného zacházení ze strany spotřebitele není záruční servis odpovědný za opravu. Pokud při jakékoli příležitosti zjistíte nehodu s výrobkem nebo máte jakékoli dotazy, obraťte se na oficiální technickou asistenční službu Cecotec prostřednictvím telefonního čísla +34 96 321 07 28. COPYRIGHT Práva duševního vlastnictví... - Page 158 13/14 Fig./Img./Abb./Rys./Obr. 1 Fig./Img./Abb./Rys./Obr. 2 Fig./Img./Abb./Rys./Obr. 3 Fig./Img./Abb./Rys./Obr.4 Fig./Img./Abb./Rys./Obr.5...
- Page 159 Fig./Img./Abb./Rys./Obr.6 Fig./Img./Abb./Rys./Obr.7 Fig./Img./Abb./Rys./Obr.8 Fig./Img./Abb./Rys./Obr.9 Fig./Img./Abb./Rys./Obr.10 Fig./Img./Abb./Rys./Obr.11...
- Page 160 Fig./Img./Abb./Rys./Obr.13 Fig./Img./Abb./Rys./Obr.12 Fig./Img./Abb./Rys./Obr.14 Fig./Img./Abb./Rys./Obr.15 Fig./Img./Abb./Rys./Obr.16 Fig./Img./Abb./Rys./Obr.17...
- Page 161 Fig./Img./Abb./Rys./Obr.18 Fig./Img./Abb./Rys./Obr.19 Fig./Img./Abb./Rys./Obr.20 Fig./Img./Abb./Rys./Obr.21 Fig./Img./Abb./Rys./Obr.22 Fig./Img./Abb./Rys./Obr.23 Fig./Img./Abb./Rys./Obr.24...
- Page 162 Fig./Img./Abb./Rys./Obr.26 Fig./Img./Abb./Rys./Obr.25 Fig./Img./Abb./Rys./Obr.27...
- Page 164 Cecotec Innovaciones S. L. C/de la Pinadeta s/n, 46930 Quart de Poblet, Valencia, Spain...
Need help?
Do you have a question about the Conga 8090 Ultra and is the answer not in the manual?
Questions and answers