Table of Contents
Advertisement
Advertisement
Table of Contents

Related Manuals for Revopoint MIRACO


Summary of Contents for Revopoint MIRACO
- Page 1 MIRACO 3D SCANNER Quick Start Guide V1.1...
- Page 2 If MIRACO's software functions are updated, the Quick Start Guide will be updated to reflect the changes. Please scan the QR code and visit the official support page to download the latest version. www.revopoint3d.com/pages/ support-miraco...
-
Page 3: Table Of Contents
Contents About MIRACO What’s in the Box? First Use Unboxing and Setup Helpful Screen Gestures Scan Model Edit Software Update Skills Using Single Shot Mode Using Marker Mode File Transfers Via USB Cable Connecting to an External Screen... -
Page 4: About Miraco
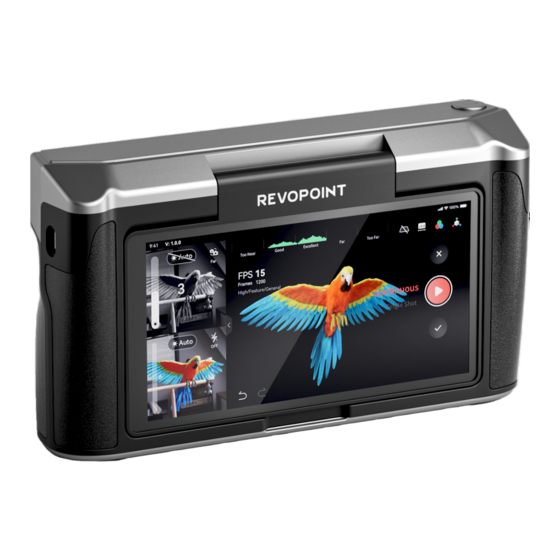
MIRACO Quick Start Guide About MIRACO MIRACO is a versatile, all-in-one 3D scanner designed for professionals. Featuring a robust quad-depth camera system, it offers accuracy ranging from ultra-fine detail capture with a single-frame accuracy up to 0.05 mm to broader area scans with still remarkable accuracy. -
Page 5: What's In The Box
Cleaning Cloth ×1 Note: 1. The MIRACO Pro (32 GB RAM) package also includes the Far-mode Calibration Board ×4, Large Calibration-board Sheet ×1 and a USB Type-C to HDMI Adapter. 2. The Power Adapter may vary depending on the country or region. -
Page 6: First Use
MIRACO Quick Start Guide First Use Unboxing and Setup Step 1: For the first use, please charge the MIRACO to more than 60%. Step 2: Long-press the Power Button (5s) to turn on. Power Button MIRACO �D SCANNER 2023 REVOPOINT 3D ALL RIGHTS RESERVED... - Page 7 Step 6: Tap Next to enter the Scan Interface. The elements in this interface are displayed below. ➀ ➅ ➂ Excellent Good ➇ ➄ ➆ ➃ ➈ Continuous Auto ➁ Near ➉ Auto Model 2023 REVOPOINT 3D ALL RIGHTS RESERVED...
-
Page 8: Helpful Screen Gestures
2. Screen Gestures for the Home or Post-processing page are as below: One-finger Swipe: Two-finger Drag: Rotates the model on the screen. Moves the model. Pinch to Zoom: One-finger Drag: Together to zoom out; apart to zoom in. Model selection. 2023 REVOPOINT 3D ALL RIGHTS RESERVED... -
Page 9: Scan
MIRACO Quick Start Guide Scan Step 1: Instructions. Read the instructions for [Scan Settings] and [Exposure Adjustment] on MIRACO when it is first activated. Step 2: Set up a scanning environment. For the first scan, it is recommended to scan the Sample Bust included in the package. Find a tabletop free of any clutter, put the Sample Bust on the turntable, and ensure no unwanted objects are within the scanning area. - Page 10 It is recommended to disable [Auto] exposure for the Depth Cameras and manually adjust the exposure bar until there are minimal red or blue areas in the preview. Auto Auto Auto Correct Exposure Underexposed Overexposed 2023 REVOPOINT 3D ALL RIGHTS RESERVED...
-
Page 11: Model Edit
MIRACO Quick Start Guide 4) Scan Distance Adjustment Move MIRACO to adjust the distance between the scanner and the target object, ensuring the scanning distance indicator bar displays green. Excellent Good Continuous 100% Auto Step 5: Start scanning. ontinuous Tap the button to Start, and tap it again to pause your scan as needed. -
Page 12: Software Update
Textured Texture < < Refer to Revopoint Official Website (https://www.revopoint3d.com/pages/support-miraco) for MIRACO’s User Manual for detailed parameter adjustment. Software Update Step 1: Swipe down from the top of the screen, tap [Settings] > [WLAN], and connect to a network. Storage... -
Page 13: Skills
Step 2: Tap [Software Update] to check if a new version is available. If yes, tap [Download and Install] to update it. Step 3: The update will install automatically. After the update, MIRACO will restart. Procedure: [Settings] > [WLAN] > Connect to a network > [Software Update] > [Download and Install] > MIRACO restarts Excelle Skills Using Single Shot Mode Step 1: Tap [Single Shot] to switch to it. -
Page 14: Using Marker Mode
MIRACO Quick Start Guide Using Marker Mode Scanning objects with simple geometric features, like a football or wine bottle, requires using Magic Mat, markers, or reference objects and scanning in Marker Alignment. Adjust Scan Settings on MIRACO as below: Scan Settings Accuracy Standard... -
Page 15: File Transfers Via Usb Cable
Windows: Right-click the Windows icon on the toolbar, then click File Explorer. Expand This PC, and locate your hard drive. Then, find the MIRACO. Copy MIRACO’s data to your PC. Path: Windows icon —> File Explorer —>This PC —> MIRACO —> Internal shared storage —> Copy MIRACO's data This PC >... -
Page 16: Connecting To An External Screen
Connecting to an External Screen MIRACO supports the DisplayPort (DP) interface by using the USB Type-C port. Method 1: A monitor or TV can be connected to MIRACO's DisplayPort (DP) via its USB Type-C port. A monitor or TV MIRACO �D SCANNER... - Page 17 Online Support WE ARE HERE FOR YOU Scan the QR code left with your phone and contact us for help. Contact Us Follow Us Forum This content is subject to change. COPYRIGHT © 2023 REVOPOINT 3D ALL RIGHTS RESERVED.
Need help?
Do you have a question about the MIRACO and is the answer not in the manual?
Questions and answers