Table of Contents
Advertisement
Quick Links
Advertisement
Table of Contents

Related Manuals for Revopoint POP


Summary of Contents for Revopoint POP
- Page 1 POP 3D SCANNER User Manual V2.2.0 2021.09...
- Page 2 POP 3D Scanner Visit our official website www.revopoint3d.com for the latest software and documents. COPYRIGHT ©2021 REVOPOINT 3D ALL RIGHTS RESERVED...
- Page 3 POP 3D Scanner User Manual Using This Manual Read/Watch Before the First Scan Read/Watch the following documents/tutorials before using the Revopoint POP 3D scanner: User Manual Quick Start Guide Advanced Scanning Tips Videos Tutorials www.revopoint3d.com/support/ Frequently Asked Questions (FAQ) Join our Official Forum To get Software Updates &...
-
Page 4: Table Of Contents
Undo scan .......................................... 20 Continue Scan ........................................21 Keyboard Shortcuts ......................................22 Handy Studio (Windows only)..............................23 Process (Single Model processing) ...................................... 23 Merge (Multiple Models Processing) ....................................24 Frequently Asked Questions (FAQ) .............................. 25 COPYRIGHT ©2021 REVOPOINT 3D ALL RIGHTS RESERVED... -
Page 5: Product Profile
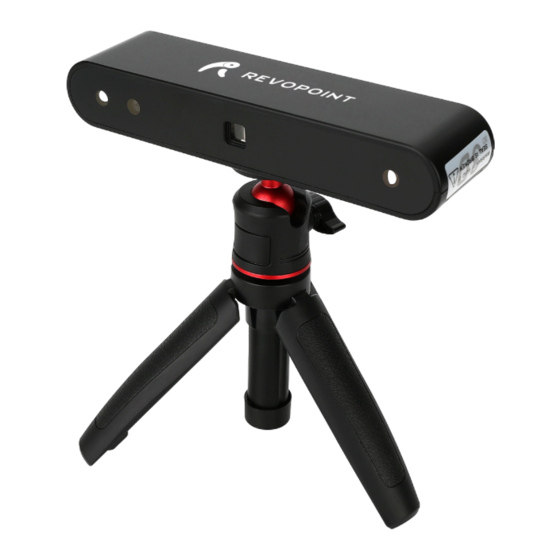
Introduction The POP handheld 3D scanner adopts a proprietary 3D camera module and an embedded chip to deliver accurate and fast 3D scans. This scanner is designed to be compact and portable, with multi-mode scanning capabilities. It meets the requirements for product development, prototyping, 3D printing and artistic creation. -
Page 6: Specifications
Windows 8/10, 64-bit, Android, iOS, MAC Required computer configurations 2.4 GHz Wi-Fi 2.4 GHz Bluetooth *The aforesaid accuracy is acquired in a standard lab environment. Note Results may vary, depending on the actual operating environment. COPYRIGHT ©2021 REVOPOINT 3D ALL RIGHTS RESERVED... -
Page 7: Packing List
POP 3D Scanner User Manual Packing List Hardware Connection Laptop Connection Make sure the POP scanner is connected to a USB 3.0+ port, because USB 2.0 will not supply sufficient operating current. An indicator of this is repeated power resets and lost connections. -
Page 8: Wireless Connection To A Smartphone
� The POP 3D scanner can only connect to one device at a time. � � If the POP is already connected to another device, it will not connect to your phone’s Hotspot. COPYRIGHT ©2021 REVOPOINT 3D ALL RIGHTS RESERVED... -
Page 9: Indicator Legend
Android iOS/iPad USB Mode Coming Soon… Wi-Fi Mode Install Software Android, iOS, Mac: The Handy Scan installation package Windows 8/10: The Handy Scan installation package also only installs Handy Scan. installs Handy Studio. COPYRIGHT ©2021 REVOPOINT 3D ALL RIGHTS RESERVED... -
Page 10: Scan Software: Handy Scan
2. Scanning Distance: Too near, Excellent, Good, Too Far. Placing the POP so that it is in the Excellent zone will have the best balance of coverage and resolution. Adjust the optimal distance according to the prompt. 3. RGB Image Display: Display the image captured by the RGB Texture camera. - Page 11 Display the frame count of acquired 3D model data. The maximum number of frames that can be scanned in one batch is determined by the memory of the computer or mobile phone. 11. Point Cloud RGB Preview: Check Color/No-color point cloud data. COPYRIGHT ©2021 REVOPOINT 3D ALL RIGHTS RESERVED...
-
Page 12: Scan Mode Introduction
·Feature mode: Designed to scan objects with unique shapes such as sculptures and easily-identifiable features. ·Marker mode: Designed to scan objects that have large, smooth areas or regularly-repeating features that could fool the POP’s internal pattern recognition capabilities. Flat planes like a board or symmetrical objects like balls or bowls are usually suitable to scan with this mode. - Page 13 The top area of the 3D model preview window shows the distance. Place the POP scanner or the object to confirm an "Excellent" distance and keep it during scanning. If you want better details than the standard, you can move the POP closer to the object, but tracking can be a problem.
-
Page 14: Operation Workflow
POP 3D Scanner User Manual Operation Workflow Place an object on a table → Connect POP to your PC → Start Handy Scan → Click "New" to start a new project → Select "Scan Mode" and "Texture" → Adjust the distance to "Excellent"... -
Page 15: Start/Pause Scan
Already-scanned sections of the model are displayed in blue. Unless there are holes in the scan, there is no advantage to continuing to scan a blue area (and it will waste memory and processing time). COPYRIGHT ©2021 REVOPOINT 3D ALL RIGHTS RESERVED... -
Page 16: Stop Scan
The currently-scanned area (lower left window) will not display the already-scanned portion of the model that is seen in the 3D Model preview window. Stop Scan Click and the "Complete" button in the popup to fuse the point cloud data, or press the “Restart” button to delete the data and return to the Preview section. COPYRIGHT ©2021 REVOPOINT 3D ALL RIGHTS RESERVED... -
Page 17: Meshing
Handy Scan was designed to process at a lower resolution on computers and smartphones to reduce processing time and to increase workflow. COPYRIGHT ©2021 REVOPOINT 3D ALL RIGHTS RESERVED... -
Page 18: Texture
POP 3D Scanner User Manual Texture The Texture function only applies to scans made with the "Color" option selected (see section “Start a New Project”). Click to apply texturing to the model. COPYRIGHT ©2021 REVOPOINT 3D ALL RIGHTS RESERVED... -
Page 19: Export
NAME.stl (Point Cloud) NAME_mesh_tex.mtl & NAME_mesh.stl (Mesh no color) NAME_mesh_tex.jpg are the three components of a color 3D model in the OBJ file format. **color models are not saved in the STL file format COPYRIGHT ©2021 REVOPOINT 3D ALL RIGHTS RESERVED... -
Page 20: Operation Tips
Too Few Points If the "Point Amount Few" prompts appear, check whether the distance between POP and the object is too close or too far and adjust the distance between the POP and the object so that the distance indicator highlights “Excellent” before scanning is continued. -
Page 21: Detect Plane
Detect Plane This prompt appears when a plane or object with too few features is scanned and the POP cannot properly relate the frame’s point cloud to the other frames. If no usable data has been scanned, the best course of action is to Stop scanning, select Restart to clear out the useless data, then start a new project, this time selecting Marker mode after attaching markers to the scanning surface or the surrounding area to solve this problem. -
Page 22: Continue Scan
This process can be repeated as needed until the model meets your requirements. · Open a model file to scan over holes: 3D model files with defects can be fixed by continuing the scanning process: COPYRIGHT ©2021 REVOPOINT 3D ALL RIGHTS RESERVED... -
Page 23: Keyboard Shortcuts
3D model. *** This process can be repeated several times until the 3D model meets your requirements. Keyboard Shortcuts Press the "Space Bar" on your computer keyboard to toggle between Start and Pause. COPYRIGHT ©2021 REVOPOINT 3D ALL RIGHTS RESERVED... -
Page 24: Handy Studio (Windows Only)
Export the model (PLY / STL / OBJ) Files may be accessed from local drives or from a cloud server. To select, click on the drop-down menu arrow on the right side of the Model button. COPYRIGHT ©2021 REVOPOINT 3D ALL RIGHTS RESERVED... -
Page 25: Merge (Multiple Models Processing)
Identify three points on each model that should overlap and click on the same point on each model until the three points are identified on each object. Select “Align”. 10. If this technique fails, consider re-scanning one or more objects for a sequence of alignment operations. COPYRIGHT ©2021 REVOPOINT 3D ALL RIGHTS RESERVED... -
Page 26: Frequently Asked Questions (Faq)
POP 3D Scanner User Manual Frequently Asked Questions (FAQ) If you need any help, please visit our official website or official Forum: www.revopoint3d.com/support/ https://forum.revopoint3d.com/ COPYRIGHT ©2021 REVOPOINT 3D ALL RIGHTS RESERVED... - Page 27 Follow Revopoint 3D Technologies Facebook Instagram Twitter YouTube This content is subject to change. Download the latest version from https://www.revopoint3d.com/download/3d-scanner-app/ If you have any questions about this document, please contact support@revopoint3d.com COPYRIGHT ©2021 REVOPOINT 3D ALL RIGHTS RESERVED...
Need help?
Do you have a question about the POP and is the answer not in the manual?
Questions and answers