Table of Contents
Advertisement
Quick Links
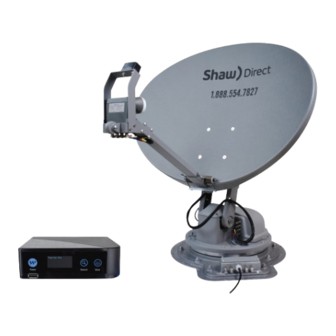
Installation Manual
Model SK2SHAW
Trav'ler
Pro Shaw
®
For help, send an email to help@winegard.com or call 1-800-788-4417.
For more product details,
visit winegard.com/shaw-travler-pro
Winegard Company
2736 Mt. Pleasant St.
Printed in U.S.A. © 2022 Winegard Company
Automatic Multi-Satellite TV Antenna
Antenna
®
|
Burlington, IA 52601
2452487 REV 6-22
Advertisement
Table of Contents

Subscribe to Our Youtube Channel
Related Manuals for Winegard Trav'ler Pro


Summary of Contents for Winegard Trav'ler Pro
- Page 1 Installation Manual Model SK2SHAW Trav'ler Pro Shaw Antenna ® ® For help, send an email to help@winegard.com or call 1-800-788-4417. For more product details, visit winegard.com/shaw-travler-pro Winegard Company 2736 Mt. Pleasant St. Burlington, IA 52601 2452487 REV 6-22 Printed in U.S.A. © 2022 Winegard Company...
-
Page 2: Specifications
This manual provides important information on the installation of your Trav'ler Pro antenna on an RV. Please take time to read the manual in its entirety before installing or operating your antenna. -
Page 3: Clearance Requirements
Parts Reflector /LNB arm Mount base with 30' power/control cable Preinstalled on transition plate Interface box (IDU) Interface box power supply Mounting Cable entry 24” AC power cord 30’ Black coax cable screw (20) plate Clearance Requirements The arm of the Trav’ler Pro antenna extends 33" from the center of the base and may operate only 6"... - Page 4 Keep in mind turret base the following: 1. The Trav'ler Pro interface box (IDU) must plug into a 110 V outlet, and requires adequate ventilation. 2. The 24" AC power cord must be long enough to extend from the outlet to the IDU power supply, which will then connect to the IDU.
-
Page 5: Install The Antenna
New Installation (for upgrade instructions go to pg 7) Mount on or parallel to centerline of RV 1. Place the Trav'ler Pro antenna on the roof where you plan to install it. On the mount base, the transition plate is marked "FRONT" and "BACK." Rotate the Trav'ler... - Page 6 Overall Setup 1. Drill a 1" hole in the roof, and push the power/control cable and Mounting coax cables through the hole. Place the supplied cable entry screw (8) plate over the hole and cables, and screw the plate in place using eight of the supplied mounting screws.
- Page 7 Install the Reflector, LNBF, & Feed Arm (New Install) Note that the reflector, LNBF, and feed arm are packaged separately as SKA-733. 1. Once the power cord (48 V DC) is applied to back of the IDU, the IDU will automatically power on. Powering on the IDU will not raise the antenna.
- Page 8 Upgrade Installation Upgrade to Trav'ler Pro Raise the Antenna. 1. Power on the IDU by pressing and holding the Power button for three seconds, then press and hold the Enter button to enter the USER MENU (figure 11.1). Enter User Menu? Installation 2.
- Page 9 Remove the Reflector (optional) Once the IDU has been powered off and the power/control cable and power cord have been disconnected you are ready to remove the reflector. The tools needed are a ½" wrench or socket. 1. To remove the reflector, carefully unscrew the p-clamp on the front of the lift arm (figure 15.A).
- Page 10 Replace IDU and Power Supply 1. At this point replace the original IDU and power supply with the Trav'ler Pro IDU and power supply. Make sure the power/ control cable and the 48 VDC power cord are connected before connecting the power supply to a 110 V outlet.
- Page 11 Upgrade Reflector Installation cont. 7. Insert the two longer screws into the top two holes in the front of the reflector. 8. Slide a wedge-shaped clamp onto each screw sticking out the back of the reflector. 9. Thread a nut onto each screw; make sure the nut is tight to keep the clamp from falling.
- Page 12 The dealer or Customer must contact Winegard Support in advance for pre-approval of the service. Approval of the service is at the sole discretion of Winegard Company. If approval is granted, an RMA will be issued for the claim to be submitted against and a Labor Claim Application can be requested by the party intending to submit the request.
Need help?
Do you have a question about the Trav'ler Pro and is the answer not in the manual?
Questions and answers