Table of Contents
Advertisement
Quick Links
AR
AR- - - - 727HB
AR
AR
AR
AR- - - - 716E
AR
AR
EAR- - - - 727HB
EAR
EAR
EAR
Series of Controllers
Series of Controllers
Series of Controllers
Series of Controllers
Installation and Programming Guide
Installation and Programming Guide
Installation and Programming Guide
Installation and Programming Guide
AR-716E-RAY
EAR-727HB-RAY
Southern Office:
Southern Office:
Southern Office:
Southern Office:
Raytel House
Tel: (01268) 749311
Fax: (01268) 749315
727HB- - - - RAY
727HB
727HB
716E- - - - RAY
716E
716E
727HB
727HB
727HB- - - - RAY
25th October
25th October
25th October
25th October
Version 1.00
Brook Road
Rayleigh
Essex,
SS6 7XH
RAY
RAY
RAY
RAY
RAY
RAY
RAY
RAY
RAY
AR-727HB-RAY
Northern Office:
Northern Office:
Northern Office:
Northern Office:
20-23 Woodside Place,
Glasgow,
Strathclyde,
G3 7QF.
Tel:(0141) 5821275
Advertisement
Table of Contents

Related Manuals for Soyal AR-727HB-RAY Series


Summary of Contents for Soyal AR-727HB-RAY Series
- Page 1 AR- - - - 727HB 727HB- - - - RAY 727HB 727HB AR- - - - 716E 716E- - - - RAY 716E 716E EAR- - - - 727HB 727HB 727HB 727HB- - - - RAY Series of Controllers Series of Controllers Series of Controllers Series of Controllers Installation and Programming Guide...
-
Page 2: Table Of Contents
Restoring Factory Settings..............26 Changing Master Code and Time and Date ..........27 Changing Language and Time and Attendance ........28 Setting Lock Times................. 29 Setting Latch Mode ................30 Setting Reader Node ID ................31 RSSD AR-727HB-RAY Series Installation and Programming Manual... - Page 3 Open Time Zones ................... 52 Resetting Master Code ................54 Upgrading Firmware ................55 Table Of Users Table Of Users..................................56 Table Of Users Table Of Users ..................................RSSD AR-727HB-RAY Series Installation and Programming Manual...
-
Page 4: System Overview
If the DIP switch is set differently to the example below, the switch needs to be changed, and if the readers are powered up, they need to be powered down for the changes to take effect. Please read “Setup Reader” on page 31. RS485 OUTPUT OUTPUT OUTPUT OUTPUT RS485 RSSD AR-727HB-RAY Series Installation and Programming Manual... -
Page 5: Ar-727Hb-Ray Box Contents And Installation
Common 24VDC 1A Colour Coding Relay 2 Yellow/White Normally Closed 24VDC 1A Red/White Normally Open 24VDC 1A White Common 24VDC 1A Relay 1 Purple/White Normally Closed 24VDC 1A Blue/White Normally Open 24VDC 1A RSSD AR-727HB-RAY Series Installation and Programming Manual... -
Page 6: Ar-716E-Ray Box Contents And Installation
Common 24VDC 1A Colour Coding Relay 2 Yellow/White Normally Closed 24VDC 1A Red/White Normally Open 24VDC 1A White Common 24VDC 1A Relay 1 Purple/White Normally Closed 24VDC 1A Blue/White Normally Open 24VDC 1A RSSD AR-727HB-RAY Series Installation and Programming Manual... -
Page 7: Ear-727Hb-Ray Box Contents And Installation
Common 24VDC 1A Colour Coding Relay 2 Yellow/White Normally Closed 24VDC 1A Red/White Normally Open 24VDC 1A White Common 24VDC 1A Relay 1 Purple/White Normally Closed 24VDC 1A Blue/White Normally Open 24VDC 1A RSSD AR-727HB-RAY Series Installation and Programming Manual... -
Page 8: Connections For Ar-727Hb-Ray With Two Magnetic Locks
CONNECTIONS FOR AR- - - - 727HB 727HB- - - - RAY CONNECTIONS FOR AR CONNECTIONS FOR AR 727HB 727HB WITH TWO MAGNETIC LOCKS WITH TWO MAGNETIC LOCKS WITH TWO MAGNETIC LOCKS WITH TWO MAGNETIC LOCKS RSSD AR-727HB-RAY Series Installation and Programming Manual... -
Page 9: Connections For Ar-727Hb-Ray With Two Fail Safe Releases
727HB- - - - RAY CONNECTIONS FOR AR CONNECTIONS FOR AR 727HB 727HB WITH TWO FAIL SAFE RELEASES WITH TWO FAIL SAFE RELEASES WITH TWO FAIL SAFE RELEASES WITH TWO FAIL SAFE RELEASES RSSD AR-727HB-RAY Series Installation and Programming Manual... -
Page 10: Connections For Ar-727Hb-Ray With Two Fail Secure Releases
727HB- - - - RAY WITH RAY WITH CONNECTIONS AR CONNECTIONS AR 727HB 727HB RAY WITH RAY WITH TWO FAIL SECURE RELEASES TWO FAIL SECURE RELEASES TWO FAIL SECURE RELEASES TWO FAIL SECURE RELEASES RSSD AR-727HB-RAY Series Installation and Programming Manual... -
Page 11: Connections For Ar-727Hb-Ray With Clean Contact Outputs
CONNECTIONS FOR AR CONNECTIONS FOR AR- - - - 727HB 727HB 727HB- - - - RAY 727HB WITH CLEAN CONTACT OUTPUTS WITH CLEAN CONTACT OUTPUTS WITH CLEAN CONTACT OUTPUTS WITH CLEAN CONTACT OUTPUTS RSSD AR-727HB-RAY Series Installation and Programming Manual... -
Page 12: Connections For Ar-727Hb-Ray With Two Solenoid Bolts
CONNECTIONS FOR AR- - - - 727HB 727HB- - - - RAY CONNECTIONS FOR AR CONNECTIONS FOR AR 727HB 727HB WITH TWO SOLENOID BOLTS WITH TWO SOLENOID BOLTS WITH TWO SOLENOID BOLTS WITH TWO SOLENOID BOLTS RSSD AR-727HB-RAY Series Installation and Programming Manual... -
Page 13: Connections For Ar-716E-Ray With Two Magnetic Locks
CONNECTIONS FOR AR CONNECTIONS FOR AR- - - - 716E 716E 716E 716E- - - - RAY WITH TWO MAGNETIC LOCKS WITH TWO MAGNETIC LOCKS WITH TWO MAGNETIC LOCKS WITH TWO MAGNETIC LOCKS RSSD AR-727HB-RAY Series Installation and Programming Manual... -
Page 14: Connections For Ar-716E-Ray With Two Fail Safe Releases
CONNECTIONS FOR AR- - - - 716E 716E 716E 716E- - - - RAY WITH TWO FAIL SAFE RELEASES WITH TWO FAIL SAFE RELEASES WITH TWO FAIL SAFE RELEASES WITH TWO FAIL SAFE RELEASES RSSD AR-727HB-RAY Series Installation and Programming Manual... -
Page 15: Connections For Ar-716E-Ray With Two Fail Secure Releases
CONNECTIONS FOR AR- - - - 716E 716E 716E 716E- - - - RAY WITH TWO FAIL SECURE RELEASES WITH TWO FAIL SECURE RELEASES WITH TWO FAIL SECURE RELEASES WITH TWO FAIL SECURE RELEASES RSSD AR-727HB-RAY Series Installation and Programming Manual... -
Page 16: Connections For Ar-716E-Ray With Clean Contact Outputs
CONNECTIONS FOR AR CONNECTIONS FOR AR- - - - 716E 716E 716E 716E- - - - RAY WITH CLEAN CONTACT OUTPUTS WITH CLEAN CONTACT OUTPUTS WITH CLEAN CONTACT OUTPUTS WITH CLEAN CONTACT OUTPUTS RSSD AR-727HB-RAY Series Installation and Programming Manual... -
Page 17: Connections For Ar-716E-Ray With Two Solenoid Bolts
CONNECTIONS FOR AR CONNECTIONS FOR AR- - - - 716E 716E 716E 716E- - - - RAY WITH TWO SOLENOID BOLTS WITH TWO SOLENOID BOLTS WITH TWO SOLENOID BOLTS WITH TWO SOLENOID BOLTS RSSD AR-727HB-RAY Series Installation and Programming Manual... -
Page 18: Connections For Ear-727Hb-Ray With Two Magnetic Locks
CONNECTIONS FOR EAR CONNECTIONS FOR EAR- - - - 727HB 727HB 727HB 727HB- - - - RAY WITH TWO MAGNETIC LOCKS WITH TWO MAGNETIC LOCKS WITH TWO MAGNETIC LOCKS WITH TWO MAGNETIC LOCKS RSSD AR-727HB-RAY Series Installation and Programming Manual... -
Page 19: Connections For Ear-727Hb-Ray With Two Fail Safe Releases
CONNECTIONS FOR EAR- - - - 727HB 727HB 727HB 727HB- - - - RAY WITH TWO FAIL SAFE RELEASES WITH TWO FAIL SAFE RELEASES WITH TWO FAIL SAFE RELEASES WITH TWO FAIL SAFE RELEASES RSSD AR-727HB-RAY Series Installation and Programming Manual... -
Page 20: Connections For Ear-727Hb-Ray With Two Fail Secure Releases
CONNECTIONS FOR EAR CONNECTIONS FOR EAR- - - - 727HB 727HB 727HB 727HB- - - - RAY WITH FAIL SECURE RELEASES WITH FAIL SECURE RELEASES WITH FAIL SECURE RELEASES WITH FAIL SECURE RELEASES RSSD AR-727HB-RAY Series Installation and Programming Manual... -
Page 21: Connections For Ear-727Hb-Ray With Clean Contact Outputs
CONNECTIONS FOR EAR CONNECTIONS FOR EAR- - - - 727HB 727HB 727HB 727HB- - - - RAY WITH CLEAN CONTACT OUTPUTS WITH CLEAN CONTACT OUTPUTS WITH CLEAN CONTACT OUTPUTS WITH CLEAN CONTACT OUTPUTS RSSD AR-727HB-RAY Series Installation and Programming Manual... -
Page 22: Connections For Ear-727Hb-Ray With Two Solenoid Bolts
CONNECTIONS FOR EAR CONNECTIONS FOR EAR- - - - 727HB 727HB 727HB 727HB- - - - RAY WITH TWO SOLENOID BOLTS WITH TWO SOLENOID BOLTS WITH TWO SOLENOID BOLTS WITH TWO SOLENOID BOLTS RSSD AR-727HB-RAY Series Installation and Programming Manual... -
Page 23: Programming Menu Tree
Exit Programming mode by pressing * to step back through the menu until the display reads 6.Quit, then enter # to confirm. If no keys are pressed for 30 seconds, programming mode will time out and the unit will re- turn to normal operation. RSSD AR-727HB-RAY Series Installation and Programming Manual... -
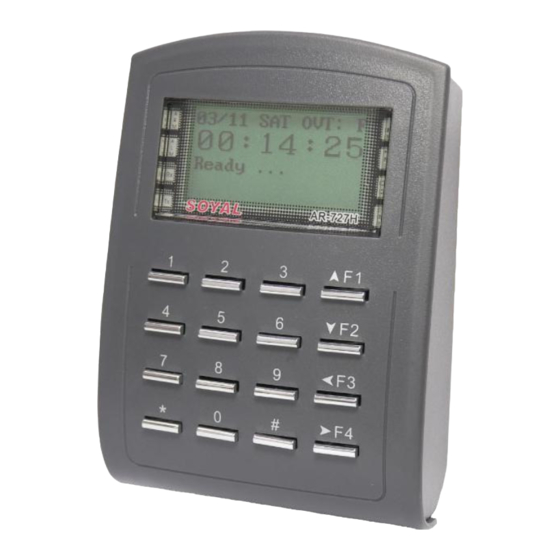
Page 24: Display And Keypad Layout
- Navigates down the menu. - Navigates up the menu. - Navigates down the menu. - Press to escape current menu screen. - Press to enter data. - Press together to lock/unlock Keypad. & RSSD AR-727HB-RAY Series Installation and Programming Manual... -
Page 25: Display Messages
Before attempting a Factory Reset make a record programming will be lost. Before attempting a Factory Reset make a record of all necessary programming. of all necessary programming. of all necessary programming. of all necessary programming. RSSD AR-727HB-RAY Series Installation and Programming Manual... -
Page 26: Entering/Exiting Programming
Table of Users at the end of this manual. the end of this manual. the end of this manual. the end of this manual. RSSD AR-727HB-RAY Series Installation and Programming Manual... -
Page 27: Changing Master Code And Time And Date
Enter 2 digits for the year, month, day, hour (in 24 Hour format), minutes and seconds. The Display will show:- Month/Day Format 1:DD/MM 2:MM/DD Current Data: Enter depending on preference and press Succeeded! The Display will now show RSSD AR-727HB-RAY Series Installation and Programming Manual... -
Page 28: Changing Language And Time And Attendance
Use F1 or F2 to scroll to and press 2. Attendance Use F1 or F2 to scroll to and press The Display will show:- Time Attendance 1: YES 2: NO Data: Enter Succeeded! The Display will now show RSSD AR-727HB-RAY Series Installation and Programming Manual... -
Page 29: Setting Lock Times
Enter the required activation time and press The Display will show:- Input: (0~600) Relay 0 Current Data: 002 This is for Door 2. Enter the required activation time and press The Display will now show Succeeded! RSSD AR-727HB-RAY Series Installation and Programming Manual... -
Page 30: Setting Latch Mode
This is for Door 1. Enter and press The Display will show:- Input: (0~600) Relay 0 Current Data: 002 This is for Door 2. Enter and press The Display will now show Succeeded! RSSD AR-727HB-RAY Series Installation and Programming Manual... -
Page 31: Setting Reader Node Id
Current Data: 001 This selects whether or not the Green LED flashes when a valid token is presented. Enter 1 for the LED to flash or 0 for no LED flash. Continued Over RSSD AR-727HB-RAY Series Installation and Programming Manual... - Page 32 If uncertain about a readers ID connect one reader at a time and program one as node 1 and the other as node 2. Then connect both readers and follow the programming for SCAN READERS on the following page. RSSD AR-727HB-RAY Series Installation and Programming Manual...
-
Page 33: Setting Up Readers
Node ID has been assigned to them. Enter for 1 reader with Node ID 1. Enter for 1 reader with Node ID 2. Enter for 2 readers with Node IDs 1 & 2. The Display will now show Succeeded! RSSD AR-727HB-RAY Series Installation and Programming Manual... -
Page 34: Checking Available Memory Locations
Use F1 or F2 to scroll to and press 1. Add Card ID Use F1 or F2 to scroll to and press The Display will show:- User Address : F3: Prev F4: Next (0-01023):00000 Continued Over RSSD AR-727HB-RAY Series Installation and Programming Manual... - Page 35 RSSD AR-727HB-RAY Series Installation and Programming Manual...
-
Page 36: Adding A Single Token Only Using The Token Id
The Display will now show:- Set 00000 Site: 00000:00000 (1-65535) 00000 Enter the FIRST five digit number on the bottom line of the token/card Using this token as an example, type in 00012 Continued Over RSSD AR-727HB-RAY Series Installation and Programming Manual... - Page 37 Set ***** Code: 00012:62362 Scan Data: XXXX **** XXXX Scan Data: will quickly scroll through 00001 to 65535 The Display will now show:- Completed! Address: 00000 ID: 00012:62362 The token/card has been programmed successfully. RSSD AR-727HB-RAY Series Installation and Programming Manual...
-
Page 38: Add Rf-Learn To Enter A Single Token/Card
Into RF Area Present the token/card to the bottom of the controller. The Display will now show:- Close Tag Into RF Area 00001 - 00001 OK ! The token/card has been programmed successfully. RSSD AR-727HB-RAY Series Installation and Programming Manual... -
Page 39: Add Rf-Learn To Enter Sequential Tokens/Cards
The Display will now show:- Close Tag Into RF Area Present the token or card with the lowest Card Code number to the bottom of the controller. Continued Over RSSD AR-727HB-RAY Series Installation and Programming Manual... - Page 40 ADD/DELETE ADD/DELETE ADD/DELETE ADD/DELETE Add RF-Learn To Enter Sequential Tokens/Cards The Display will now show:- Close Tag Into RF Area 00001 - 00010 OK ! All tokens/cards have been successfully programmed. RSSD AR-727HB-RAY Series Installation and Programming Manual...
-
Page 41: Add Rf-Learn To Enter Non Sequential Tokens/Cards
The Display will now show:- Tag Units (pcs) Must Be Sequence (1-01023): 00001 Press together. The Display will now show:- Close Tag Into RF Area Present the first token/card to the bottom of the controller. Continued Over RSSD AR-727HB-RAY Series Installation and Programming Manual... -
Page 42: Suspend And Recovering Addresses And Id's
ID’s of the tokens. The method of doing this is shown on the following pages. Complete deletion of tokens can be carried out in a similar manner as shown on pages 47 and 48. RSSD AR-727HB-RAY Series Installation and Programming Manual... -
Page 43: Suspend Address
E.g. To suspend 25 addresses starting with address 00012:- Input Start Address (0-01023): 00000 Enter 00012 and press The Display will now show:- Input End Address (˜-01023): 00012 Enter and press 00036 The Display will now show Succeeded! RSSD AR-727HB-RAY Series Installation and Programming Manual... -
Page 44: Recover Address
E.g. To recover 25 addresses starting with address 00012:- Input Start Address (0-01023): 00000 Enter 00012 and press The Display will now show:- Input End Address (˜-01023): 00012 Enter and press 00036 The Display will now show Succeeded! RSSD AR-727HB-RAY Series Installation and Programming Manual... -
Page 45: Suspend Id
The Display will now show:- Code: 00012:xxxxx (1-65535) 62362 Enter the SECOND five digit number on the bottom line of the token/card Using the above example, type in 62362 The Display will now show Succeeded! RSSD AR-727HB-RAY Series Installation and Programming Manual... -
Page 46: Recover Id
The Display will now show:- Code: 00012:xxxxx (1-65535) 62362 Enter the SECOND five digit number on the bottom line of the token/card Using the above example, type in 62362 The Display will now show Succeeded! RSSD AR-727HB-RAY Series Installation and Programming Manual... -
Page 47: Delete Address
E.g. To delete 25 addresses starting with address 00012:- Input Start Address (0-01023): 00000 Enter 00012 and press The Display will now show:- Input End Address (˜-01023): 00012 Enter and press 00036 The Display will now show Succeeded! RSSD AR-727HB-RAY Series Installation and Programming Manual... -
Page 48: Delete Id
The Display will now show:- Code: 00012:xxxxx (1-65535) 62362 Enter the SECOND five digit number on the bottom line of the token/card Using the above example, type in 62362 The Display will now show Succeeded! RSSD AR-727HB-RAY Series Installation and Programming Manual... -
Page 49: Anti-Passback
F4: Next (0-01023): 00000 Enter the User Address for the token/card and press or use F3 or F4 to scroll to the next User Address and press The Display will now show Succeeded! RSSD AR-727HB-RAY Series Installation and Programming Manual... - Page 50 2: NO Data: Enter and press The Display will now show Succeeded! NOTICE NOTICE NOTICE NOTICE The Anti-Passback function will only work if it has been enabled following the programming on the previous page. RSSD AR-727HB-RAY Series Installation and Programming Manual...
-
Page 51: Auto Open Zone
To disable Auto Open Zones press The Display will now show Succeeded! NOTICE NOTICE NOTICE NOTICE This will only enable the Auto Open Zone function. To set times, refer to the programming details on the following pages. RSSD AR-727HB-RAY Series Installation and Programming Manual... -
Page 52: Open Time Zones
Enter a 1 for on and a 0 for off, see table below. Number Number Number Number Sunday 1000000 Monday 0100000 Tuesday 0010000 Wednesday 0001000 Thursday 0000100 Friday 0000010 Saturday 0000001 Weekdays 0111110 Continued Over RSSD AR-727HB-RAY Series Installation and Programming Manual... - Page 53 Type of Open Zone Type of Open Zone Type of Open Zone Type of Open Zone Doors open immediately Doors open after valid token/card has been presented Succeeded! The Display will now show RSSD AR-727HB-RAY Series Installation and Programming Manual...
-
Page 54: Resetting Master Code
Open ISP Tools and select RAY727H from the list on the left hand side, then select the relevant COM Port and Node Number of the controller. Click on the Reset Master Code button and the master code will be reset to *123456#. RSSD AR-727HB-RAY Series Installation and Programming Manual... -
Page 55: Upgrading Firmware
RSSD AR-727HB-RAY Series Installation and Programming Manual... -
Page 56: Table Of Users
TABLE OF USERS TABLE OF USERS TABLE OF USERS TABLE OF USERS ____________________________________________________________________ Name of On-Site Programmer(s): ____________________________________________________________________________ Installation Company: ____________________________ Tel: DEFAULT MASTER CODE:- *123456# __________________________ Date: ______________________ Lock Time: USER MASTER CODE: ______________________ Lock Type: User Address User Address Users Name Users Name Card ID...
Need help?
Do you have a question about the AR-727HB-RAY Series and is the answer not in the manual?
Questions and answers