Table of Contents
Advertisement
Quick Links
Advertisement
Table of Contents

Related Manuals for Echo DPPF-2100


Summary of Contents for Echo DPPF-2100
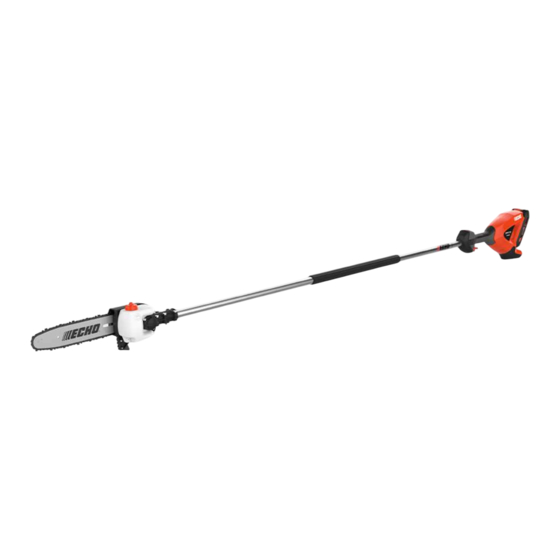
- Page 1 DPPF-2100 Power Pruner ® Read and understand all provided literature before use. Failure to do so could result in serious injury. Cancer and Reproductive Harm www.P65Warnings.ca.gov Note: This product complies with CAN ICES-003(B) / NMB-003(B) X7508310400 © 8/23 ECHO Incorporated...
-
Page 2: Table Of Contents
Handling the Product ..................8 Equipment ......................14 General Safety Warnings and Instructions for the following ECHO tools: Curved Shaft Edger, Straight Shaft Edger, Tiller Cultivator, or Pole Pruner, or DPAS unit configured as a Curved Shaft Edger, Straight Shaft Edger, Tiller Cultivator, or Pole Pruner. -
Page 3: Introduction
SERVICING INFORMATION Parts and Serial Number Genuine ECHO parts and assemblies for your ECHO products are available only from an Authorized ECHO Dealer. When you do need to buy parts, always have the model number and serial number of the unit with you. For future reference write them in the space provided below. -
Page 4: Service
Register your ECHO equipment online at www.echo-usa.com or by filling out the product registration sheet included in this manual. Registering your product confirms warranty coverage and provides a direct link to ECHO if we find it necessary to contact you. -
Page 5: Safety
Note: This enclosed message provides tips for use, care and maintenance of the unit. CIRCLE AND SLASH SYMBOL This symbol means the specific action shown is prohibited. Ignoring these prohibitions can result in serious or fatal injury. X7508310400 © 8/23 ECHO Incorporated... -
Page 6: International Symbols
15 m (50 ft.) while the unit is in use. Keep a Firm Grip • Always hold throttle handle and support handle with thumbs and fingers tightly encircling the handles. X7508310400 © 8/23 ECHO Incorporated... -
Page 7: Kickback
Power Pruner which could result in serious personal injury. With a basic understanding of kickback, you can reduce or eliminate the element of surprise which contributes to accidents. X7508310400 © 8/23 ECHO Incorporated... -
Page 8: Handling The Product
Power tools create sparks which may ignite the dust or fumes. • Keep children and bystanders away while operating a power tool. Distractions can cause you to lose control. X7508310400 © 8/23 ECHO Incorporated... - Page 9 • Remove any adjusting key or wrench before turning the power tool on. A wrench or a key left attached to a rotating part of the power tool may result in personal injury. X7508310400 © 8/23 ECHO Incorporated...
- Page 10 • Do not use the power tool if the switch does not turn it on and off. Any power tool that cannot be controlled with the switch is dangerous and must be repaired. X7508310400 © 8/23 ECHO Incorporated...
- Page 11 Battery Tool Use and Care ® • Recharge batteries only with ECHO eFORCE 56V battery series chargers. A charger that is suitable for one type of battery may create a risk of fire when used with another battery.
- Page 12 Environmentally Safe Battery Disposal R B R C Li - ion ® Recycle your ECHO ECHO eFORCE 56V battery FOR FREE at Rechargeable Battery Recycling Corporation (RBRC) recycling locations. Call 1-800-822-8837 or visit https://www.call2recycle.org for details. The toxic and corrosive materials below are in the batteries used in this machine: Lithium-Ion, a toxic material.
- Page 13 This device complies with Part 15 of the FCC Rules. Operation is subject to the following two conditions: • This device may not cause harmful interference. • This device must accept any interference received, including interference that may cause undesired operation. X7508310400 © 8/23 ECHO Incorporated...
-
Page 14: Equipment
Incorporated will not be responsible for the failure of cutting devices, attachments or accessories which have not been tested and approved by ECHO. Read and comply with all safety instructions listed in this manual and safety manual. Check unit for loose and missing nuts, bolts, and screws. -
Page 15: Pole Pruner
DPPF-2100 SAFETY • Use only one ECHO extension on the pruner. • Do not hit rocks, stones, tree stumps, and other foreign objects with the saw chain. • Do not cut into the ground with the saw chain. • If cutting attachment end strikes an obstruction, stop unit immediately and inspect saw chain for damage. - Page 16 13. Maintain Tool with Care - Keep cutting edge sharp and clean for best performance and to reduce the risk of injury. Follow instructions for lubricating and changing accessories. Keep handles dry, clean, and free from oil and grease. X7508310400 © 8/23 ECHO Incorporated...
- Page 17 • Always use two hands when operating the extended-reach pruner. Hold the extended-reach pruner with both hands to avoid loss of control. • Always use head protection when operating the extended-reach pruner overhead. Falling debris can result in serious personal injury. X7508310400 © 8/23 ECHO Incorporated...
-
Page 18: Description
Locate these safety decal(s) or etching(s) on your unit. Make sure they are legible, and that you understand and follow the instructions. If any cannot be read, replacements can be ordered from your ECHO dealer. Images shown below are for example only. Those on your unit might appear slightly different. -
Page 19: Contents
Due to packaging restrictions, some assembly may be necessary. After opening the carton, check for damage. Immediately notify your retailer or ECHO Dealer of damaged or missing parts. Use the contents list to check for missing parts. Power Head and Drive Shaft Assembly Cutting Attachment with Guide Bar and Saw Chain Operator’s Manual... -
Page 20: Assembly
Insert locator screw (B) into hole (C) and tighten to snug. Tighten bolts (A), clamping the cutting attachment onto the housing. X7508310400 © 8/23 ECHO Incorporated... -
Page 21: Saw Chain Adjustment
When chain is properly tensioned, tighten guide bar nuts securely. Tighten guide bar nuts to 8 - 9 N•m (71 - 80 in. lbs.). DO NOT over- tighten nuts or damage may result. X7508310400 © 8/23 ECHO Incorporated... -
Page 22: Temperature Information
(39° F (4°C)) - 104°F (40°C)). Hot batteries in high ambient temperatures require longer charge times. To maximize life of batteries being stored more than 3 months, ECHO recommends batteries being stored at 3 green lights on the battery capacity indicator (BCI) and at room temperature. -
Page 23: Battery Charging
Battery Charging Note: See separate operator’s manuals packaged with battery and charger. ® • Use only with ECHO eFORCE 56V battery series batteries and chargers. • Keep charger and battery away from damp conditions and all liquids. • Do not operate the charger on an easily combustible surface (e.g. paper, textiles) or in an environment with a high risk of fire. - Page 24 If charger detects a problem, LED will blink RED. Remove battery from charger, clear obstructions from contacts and reinstall battery into charger. If battery is outside acceptable temperature range (See Recommended Ambient Temperature chart) LED will remain RED. X7508310400 © 8/23 ECHO Incorporated...
-
Page 25: Battery Installation
Keep movable parts of the attachment off the ground and away from objects that could become entangled or thrown. Note: The battery comes partially charged from the factory and needs to be fully charged before first use. X7508310400 © 8/23 ECHO Incorporated... -
Page 26: Battery Removal
(B) snaps into place and battery is secure before beginning operation. Assure battery latch is fully engaged before using unit. Battery Removal To remove battery, depress battery latch release (C) slide battery out of power head. X7508310400 © 8/23 ECHO Incorporated... -
Page 27: Operation
If oil is leaking from the bar cover area, reduce the oil discharge volume. Refill the oil reservoir with each tank of fuel. Note: Very little visible oil on the saw chain will provide sufficient lubrication. X7508310400 © 8/23 ECHO Incorporated... -
Page 28: Starting Unit
(B) forward to free power switch (C), and then depress power switch to increase RPM. Stopping Unit The cutting attachment continues to run for a short period after the unit is switched off. X7508310400 © 8/23 ECHO Incorporated... -
Page 29: Pruning Techniques
• Plan cut carefully. Check direction branch will fall. • Plan retreat path from falling branch. Cut branches bounce when striking ground. • Long branches should be removed in several pieces. • Do not stand directly beneath branch being cut. X7508310400 © 8/23 ECHO Incorporated... - Page 30 1. Under cut 1/4 limb diameter near tree trunk. 2. Finish top cut slightly farther out on limb. Blade hits rear branch 3. Flush cut stub at trunk. • DO NOT use for felling or bucking. X7508310400 © 8/23 ECHO Incorporated...
-
Page 31: Maintenance
Skill Levels Level 1 = Easy to do. Common tools may be required. Level 2 = Moderate difficulty. Some specialized tools may be required. Level 3 = See your dealer. Click HERE or go to http://www.echo-usa.com/products/maintenance-kit Maintenance Intervals SKILL COMPONENT/SYSTEM... -
Page 32: Maintenance And Care
Time intervals shown are maximum. Actual use and your experience will determine the frequency of required maintenance. If you continuously use vegetable based chain oil, inspect and do maintenance often. When you find anything wrong, ask your ECHO dealer for repair. Maintenance and Care Remove battery before performing maintenance procedures. -
Page 33: Lubrication
Remove flex cable (C), wipe clean and apply 15 ml (0.5 oz.) of lithium based grease. Slide the flexible cable back in the drive housing. DO NOT get dirt on the flex cable. Install and secure cutting attachment assembly. X7508310400 © 8/23 ECHO Incorporated... -
Page 34: Guide Bar And Saw Chain Replacement
Turn tension adjustment screw (C) clockwise to take up slack in saw chain. Install guide bar cover (D), and tighten guide bar nuts finger tight and install guide bar cover screw (B). Adjust chain tension. X7508310400 © 8/23 ECHO Incorporated... -
Page 35: Guide Bar Cover Cleaning
Hold the bar nose up. Install guide bar cover (D). Install the guide bar nuts (A). Tighten the rear nut first, then tighten the front nut. Install and tighten the guide bar cover screw (B) X7508310400 © 8/23 ECHO Incorporated... -
Page 36: Filing Standard Saw Chain
Side Plate Guard Link Depth Gauge Right Hand Cutter Important points for proper maintenance of saw chain: • Keep the cutters sharp at all times. • Keep the left and the right cutters properly aligned. X7508310400 © 8/23 ECHO Incorporated... - Page 37 • Place depth gauge tool firmly on Depth Gauge Tool guide bar so that depth gauge protrudes. Then file top of depth gauge with the flat file until flat with top of the depth gauge tool. X7508310400 © 8/23 ECHO Incorporated...
- Page 38 • If the saw chain becomes soiled with resin, for instance, Parallel depth gauge clean it with kerosene and soak in it oil. To sharpen other chains, follow chain manufacturer’s instructions. X7508310400 © 8/23 ECHO Incorporated...
-
Page 39: Troubleshooting
For spare parts and consumables, please use only genuine parts and designated products and components. Using parts from other manufacturers or non-designated components may result in a malfunction. X7508310400 © 8/23 ECHO Incorporated... -
Page 40: Storage
Store in temperatures consistent with recommended ambient temperature chart. Charge battery according to ambient temperature chart. Charger Remove battery from charger. Disconnect charger from power supply. Store in a dry, dust-free place, out of the reach of children. X7508310400 © 8/23 ECHO Incorporated... -
Page 41: Disposal
• Battery contains lithium. Dispose of only at a designated collection point. • Lithium-ion batteries must be disposed of properly. • Please contact your dealer in case you do not know how to dispose of or recycle waste plastic parts. X7508310400 © 8/23 ECHO Incorporated... -
Page 42: Specifications
Green - battery is fully charged Green blinking Red - Battery is too warm. Green Remove for approximately 30 minutes to cool down Red blinking - Defective battery. Remove and replace with new blinking battery X7508310400 © 8/23 ECHO Incorporated... -
Page 43: Warranty
ECHO brand 56 Volt outdoor prod- This warranty gives you specific legal rights, and you may also uct. -
Page 44: Product Registration
Please go to http://www.echo-usa.com/Warranty/Register-Your-ECHO to register your new product on-line. It's FAST and EASY! NOTE: your information will never be sold or misused by ECHO, Incorporated. Registering your purchase enables us to contact you in the unlikely event of a service update or product recall, and verifies your ownership for warranty consideration. - Page 45 DPPF-2100 PRODUCT REGISTRATION X7508310400 © 8/23 ECHO Incorporated...
-
Page 46: Notes
NOTES DPPF-2100 NOTES X7508310400 © 8/23 ECHO Incorporated... - Page 47 DPPF-2100 NOTES X7508310400 © 8/23 ECHO Incorporated...
- Page 48 E60700001001 - E60700999999 ECHO INCORPORATED 400 Oakwood Road Lake Zurich, IL 60047 www.echo-usa.com...
Need help?
Do you have a question about the DPPF-2100 and is the answer not in the manual?
Questions and answers