Echo SHC-1700 - Type 1, SHC-1700 - Type 1E, SHC-2100 - Type 1, SHC-2100 - Type 1E, SHC-2400 - Type 1, SHC-2400 - Type 1E, HCA-2400 - Operator's Manual
Echo shaft hedge clipper operator's manual
Hide thumbs
Also See for SHC-1700 - Type 1, SHC-1700 - Type 1E, SHC-2100 - Type 1, SHC-2100 - Type 1E, SHC-2400 - Type 1, SHC-2400 - Type 1E, HCA-2400 -:
- Operator's manual (36 pages)
Table of Contents
Advertisement
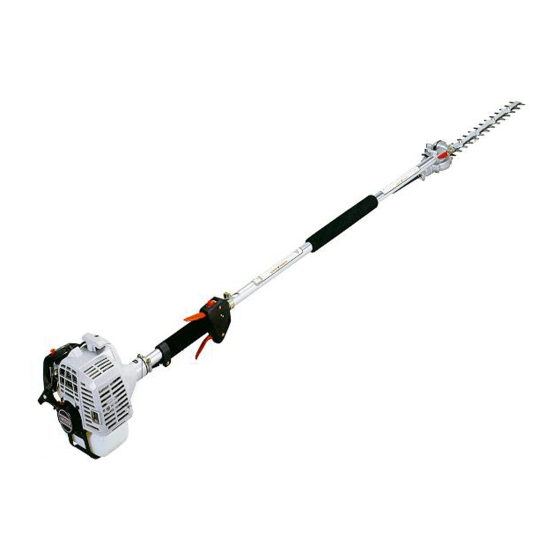
Shaft Hedge Clipper
Operator's Manual
MODELS:
SHC-1700
- Type 1
SHC-1700
- Type 1E - S/N 501001 - 504767
SHC-2100
- Type 1
SHC-2100
- Type 1E - S/N 501001 - 506455
SHC-2400
- Type 1
SHC-2400
- Type 1E - S/N 00501001 &Up
HCA-2400
Read rules for safe operation and instructions carefully. ECHO provides an Operator's Manual and a
Safety Manual. Both must be read and understood for proper and safe operation. Failure to do so could
result in serous injury.
X7502248800
- S/N 001001 & Up
- S/N 001001 & Up
- S/N 001001 & Up
- Type 1E - S/N 00501001 &Up
WARNING
The engine exhaust from this
product contains chemicals known
to the State of California to cause
cancer, birth defects or other
reproductive harm.
WARNING
H
EDGE
O
PERATOR
DANGER
C
LIPPER
'
M
S
ANUAL
99922202875
04/97
1
Advertisement
Table of Contents

Related Manuals for Echo SHC-1700 - Type 1, SHC-1700 - Type 1E, SHC-2100 - Type 1, SHC-2100 - Type 1E, SHC-2400 - Type 1, SHC-2400 - Type 1E, HCA-2400 -


Summary of Contents for Echo SHC-1700 - Type 1, SHC-1700 - Type 1E, SHC-2100 - Type 1, SHC-2100 - Type 1E, SHC-2400 - Type 1, SHC-2400 - Type 1E, HCA-2400 -
- Page 1 - Type 1E - S/N 00501001 &Up WARNING Read rules for safe operation and instructions carefully. ECHO provides an Operator's Manual and a Safety Manual. Both must be read and understood for proper and safe operation. Failure to do so could result in serous injury.
-
Page 2: Table Of Contents
NTRODUCTION Welcome to the ECHO family. This ECHO product was designed and manufactured to provide long life and on-the-job- dependability. Read and understand this manual and the SAFETY MANUAL you found in the same package. You will find both easy to use and full of helpful operating tips and SAFETY messages. -
Page 3: Manual Safety Symbols And Important Information
ANUAL AFETY YMBOLS AND Throughout this manual and on the product itself, you will find safety alerts and helpful, information messages preceded by symbols or key words. The following is an explanation of those symbols and key words and what they mean to you. This symbol accompanied by the words WARNING and DANGER calls attention to an act or condition that can lead to serious personal injury to operator and bystanders. -
Page 4: Decals
Make sure the decals are legible and that you understand and follow the instructions on them. If a decal cannot be read, a new one can be ordered from your ECHO dealer. See PARTS ORDERING instructions for specific information. -
Page 5: Equipment
EQUIPMENT Before operation a complete check of the unit must be performed; - Check unit for loose/missing nuts, bolts and screws. Tighten and/or replace as needed. - Inspect fuel lines, tank and area around carburetor for fuel leaks. DO NOT operate unit if leaks are found. - Inspect hand guard for damage. -
Page 6: Personal Condition And Safety Equipment
Echo's Pro-Comfort are designed to provide additional comfort. Hearing Protection Wear hearing protection. OSHA requires the use of hearing protection if this unit is used 2 hours per day or more. ECHO recommends wearing hearing protection whenever unit is used. Proper Clothing Wear snug fitting, durable clothing;... -
Page 7: Safe Operation
Hot Humid Weather Heavy protective clothing can increase operator fatigue which may lead to heat stroke. Schedule heavy work for early morning or late afternoon hours when temperatures are cooler. SAFE OPERATION Determine Operation Area - Review the area to be trimmed. Look for hazards that could contribute to unsafe conditions. -
Page 8: Extended Operation/Extreme Conditions
• Limit the hours of operation. Try to fill each day with jobs where operating the trimmer or other hand-held power equipment is not required. • If you experience discomfort, redness and swelling of the fingers followed by whitening and loss of feeling, consult your physician before further exposing yourself to cold and vibration. -
Page 9: Description
Models SHC-2100, SHC-2400 and HCA-2400 is required. After opening the carton, check for damage. Immediately notify your retailer or ECHO Dealer of damaged or missing parts. Use the contents list to check for missing parts. CONTENTS LIST... - Page 10 SHC-1700, 2100 POWERHEAD SHC-2400, HCA-2400 POWERHEAD SHC-1700 SHC-2100 SHC-2400 HCA-2400...
- Page 11 24. HEDGE CLIPPER SAFETY VIDEO - P/N 99922202800 (Not included with unit and English version only) is available for your review and purchase at a cost of $5.00 from ECHO, INC. or any authorized ECHO dealer. The video over- views safety precautions and proper operating techniques provided in detail in the Safety Manual, and is supple- mental to the Safety Manual.
-
Page 12: Specifications
PECIFICATIONS . t i i r t l f f & - r i . l f... -
Page 13: Assembly
SSEMBLY ( HCA-2400, SHC-2100, 2400) SHC-1700 is Factory Assembled in the box. Gear Box/Drive Shaft (SHC-2100, 2400, HCA-2400) Tools Required: 8MM Open End Wrench, Screwdriver Parts Required: Power Head/Drive Shaft Assembly and Gear Box/Blade Assembly. NOTE Hedge Clipper Blades are very sharp. Wear gloves to protect hands. -
Page 14: Pre-Operation
(wood alcohol) is NOT approved. Two Stroke Oil - A two-stroke engine oil meeting ISO-L-EGD Standard (ISO/CD 13738), must be used. Echo brand Premium 50:1 oil meets this standard. Engine problems due to inadequate lubrication caused by failure to use an ISO-L-EGD approved oil, such as Echo Premium 50:1 Two-stroke Oil, will void the two-stroke engine warranty. -
Page 15: Equipment Check
• Review the area to be trimmed. Look for hazards that could contribute to unsafe conditions. • Spectators and fellow workers must be warned, and children and animals prevented from coming nearer than 50 ft. (15 M) while the trimmer is in use. EDGE LIPPER PERATOR... -
Page 16: Operation
Models) PERATION - Before starting the unit, equip yourself and any other person working within the 50 ft. (15 M) Safety Zone with the required Protective Equipment and clothing. - During operation, the complete unit, especially the gear box, drive shaft housing and power head muffler area may become very hot, too hot to touch. -
Page 17: Starting Cold Engine
WARNING Blades should not move at idle. If blades move, readjust carbure- tor according to Carburetor Adjustment instructions in the manual or see your ECHO dealer, otherwise serious personal injury may result. Ignition Switch - Start/Run. (All Models) Move Ignition Switch lever/ button away from the STOP position. -
Page 18: Starting Warm Engine
Blades should not move at idle. If blades move, readjust carburetor according to Carburetor Adjustment instructions in the manual or see your ECHO dealer, otherwise serious personal injury may result. Ignition Switch - Start/Run. (All Models) Move Ignition Switch lever/ button away from the STOP position. -
Page 19: Stopping Engine
WARNING If engine does not stop during step 2, close choke - COLD START position - to stall engine. Have your ECHO dealer repair Stop Switch before using hedge clipper again or serious personal injury may result. -
Page 20: Maintenance
ECHO Service Dealer for maintenance. To help you decide whether you want to DO-IT-YOURSELF or have the ECHO Dealer do it, each maintenance task has been graded. If the task is not listed, see your ECHO Dealer for repairs. SKILL LEVEL Level 1 = Easy to do. -
Page 21: Air Filter
AIR FILTER Level 1. Tools required: Cleaning brush, 1" or 2" medium bristle paint brush. Parts required: (SHC Models) 90008 REPOWER KIT. (HCA-2400) 90030 REPOWER KIT. 1. Close choke (Cold Start Position). This prevents dirt from entering the carburetor throat when the air filter is removed. Brush accumu- lated dirt from the air cleaner area. -
Page 22: Spark Plug
SPARK PLUG Level 2. Tools Required: T-Wrench. Feeler gauge. Preferably a wire gauge. Brush. Parts Required: Spark Plug, Champion CJ-7Y or NGK BPM-7A 1. Remove spark plug and check for fouling, worn and rounded center electrode. 2. Clean the plug or replace with a new one. DO NOT sand blast to clean. -
Page 23: Cooling System Cleaning
Spark Arrestor Screen Remove screen holder and gasket from muffler body. Clean carbon deposits from screen and muffler components. Replace screen if it is cracked, plugged or has holes burned through. COOLING SYSTEM CLEANING Level 3. Tools required: Cross Head Screwdriver, 3 mm Hex wrench, 4 mm Hex wrench, Pointed Wood Stick, Cleaning Brush, 1"-2"... -
Page 24: Carburetor Adjustment Emission
CARBURETOR ADJUSTMENT Type 1E Models Level 2. Tools required: Screwdriver, Tachometer (ECHO P/N 99051130017). Parts required: None. NOTE Every unit is run at the factory and the carburetor is set in compli- ance with EPA Phase 1 and California Emission Regulations. -
Page 25: Carburetor Adjustment Non Emission
Turn LO needle (B) out, CCW 1-1/4 turns. Turn HI needle (A) out CCW 2-3/4 turns. Fine Tuning (Requires Accurate Tachometer ECHO P/N 99051130017) Start engine and allow to warm to operating temperature (minimum 2 - 3 minutes) varying engine speed from idle to full throttle. -
Page 26: Lubrication
c. Final setting - Set needle at mid point between lean rich drop-off points. (3) d. Turn 1/8 turn CCW (out) making mixture slightly richer. (4) High speed adjustment. Adjust HI needle (A) with tachometer to achieve the specifications found on page 12 "Specifications" of this manual. Check idle speed and reset if necessary. -
Page 27: Drive Shaft Assembly
SHC-1700, 2100, 2400, HCA-2400 Tools required: Grease Gun with Lithium Grease, Rag. Parts required: Lithium Based Grease. Clean dirt from grease fittings. Carefully pump grease in each fitting. DO NOT force grease. Too much pressure will force grease past seals and cause damage. Apply 1-2 pumps of grease every 15-20 hours of operation. -
Page 28: Sharpening Blades
STARTER ROPE REPLACEMENT Level 3. Tools required: SAFETY GOGGLES, Screwdriver, 3mm Allen Wrench. Parts Required: 890 mm (35 in.) ECHO Starter Rope, Lithium based grease. Remove four (4) screws holding starter assembly and rear handle on engine. Remove rear handle and starter. - Page 29 Remove the old starter rope and prepare the new rope by first heating both ends to prevent fraying. Pass one end of the rope through the opening of the drum and tie a knot. Press knot and end of rope in cavity of drum. Thread the rope through the eyelet in the housing (C) then through the starter handle (D).
-
Page 30: Storage
13. Pull rope out all the way. Drum must be able to turn an additional 1/ 2 turn counter clockwise. If drum does not turn, see your Autho- rized ECHO Service Dealer. 14. Install starter and rear handle and test. - Page 31 Remove accumulation of grease, oil, dirt and debris from exterior of unit. Perform all periodic lubrication and services that are required. Tighten all the screws and nuts. Drain the fuel tank completely and pull the recoil starter handle several times to remove fuel from the carburetor. Remove the spark plug and pour 1/4 oz.
-
Page 32: Servicing Information
Operator's Manual made payable to ECHO, INCORPORATED. State on a sheet of paper the model number and serial number of the ECHO unit you have, part number of the manual (if known), your name and address and mail to address above.
Need help?
Do you have a question about the SHC-1700 - Type 1, SHC-1700 - Type 1E, SHC-2100 - Type 1, SHC-2100 - Type 1E, SHC-2400 - Type 1, SHC-2400 - Type 1E, HCA-2400 - and is the answer not in the manual?
Questions and answers