Advertisement
Quick Links
Advertisement

Related Manuals for Gram IN 8284 TFI


Summary of Contents for Gram IN 8284 TFI
- Page 1 IN 8284 TFI INSTRUCTION MANUAL INDUCTION HOB IO-HOB-1305 / 8510174 (04.2020 / v1)
- Page 2 Congratulations on the new GRAM hob Your hob combines exceptional ease of use with excellent effectiveness. Once you have read the instructions, operating your hob will not be a problem. Before being packed and leaving the factory, the safety and functions of this hob were ca- refully tested.
-
Page 3: Table Of Contents
CONTENTS Basic Information....................2 Safety instructions.....................4 Description of the appliance..................9 Installation......................10 Operation.......................15 Cleaning and maintenance..................24 Troubleshooting......................26 Specification......................28... -
Page 4: Safety Instructions
SAFETY INSTRUCTIONS Warning: The appliance and its accessible parts become hot during use. Care should be taken to avoid touching heating elements. Children less than 8 years of age shall be kept away unless continuously supervised. This appliance can be used by children aged from 8 years and above and persons with reduced physical, sensory or mental capabilities or lack of experience and knowledge if they have been given supervision or... - Page 5 SAFETY INSTRUCTIONS Warning: If the surface is cracked, switch off the ap- pliance to avoid the possibillity of electric shock. Metallic objects, such as knives, forks, spoons and lids should not be placed on the hob surface since they can get hot. After use, switch off the hob element by its control and do not rely on the pan detector.
- Page 6 SAFETY INSTRUCTIONS FOR USE ● Before using the induction hob for the first time, carefully read its user manual. This will ensure user safety and prevent damage to the appliance. ● If the induction hob is operated in immediate vicinity to the radio, television set or other radio-frequency-emitting device, make sure that the hob’s touch sensor controls operate correctly.
- Page 7 SAFETY INSTRUCTIONS FOR USE ● When cooking on induction hob only use pots and pans with a flat base having no sharp edges or burrs as these can permanently scratch the cooking surface. ● Induction hob cooking surface is resistant to thermal shock. It is not sensitive to cold nor hot.
- Page 8 HOW TO SAVE ELECTRICITY UNPACKING Using the electricity in a re- The appliance was protected sponsible manner not only from damage at the time of saves money, but also helps transport. After unpacking, protect the environment. So please dispose of all ele- let’s save electricity! This is ments of packaging in a way how it’s done:...
-
Page 9: Description Of The Appliance
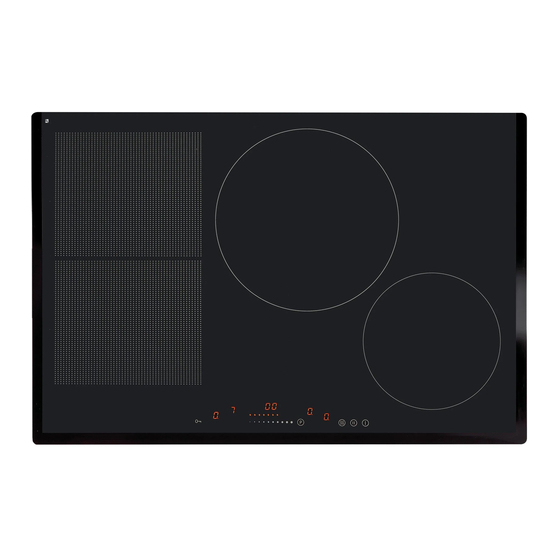
DESCRIPTION OF THE APPLIANCE Description of hob Induction cooking zone booster (rear right) Induction cooking zone booster (rear left) Induction cooking zone booster (front left) Induction cooking zone booster (front right) Control Panel Booster sensor field On/off sensor field Stop'n go function sensor field Heat setting selection sensor field Keep Warm function sensor field Cooking zone indicator... -
Page 10: Installation
INSTALLATION Making the worktop recess hob l Worktop thickness should be 28 - 40 mm, while its width at least 600 mm. The worktop must be flat and level. Edge of the worktop near the wall must be sealed to prevent ingress of water or other liquids. - Page 11 INSTALLATION Fig.2 5 10mm ÷ 25mm 30mm Installing hob in kitchen cabinet worktop. 500x10mm 5 10mm ÷ Installing hob in kitchen worktop above oven with ventilation. 500x20mm Do not install the hob above the oven without ventilation.
- Page 12 INSTALLATION Installing hob ● Using an electrical cord, connect the hob according to electrical diagram provided. ● Remove dust from the worktop, insert hob into the opening and press in firmly (Figure 3). Fig. 3 1 - Worktop 2 - Hob flange gasket 3 - Ceramic hob...
- Page 13 INSTALLATION Connecting to electrical mains The hob is designed to be connected to one-phase 230V 1N~ mains power supply. Before connecting the appliance to the mains power supply, the user must ensure that the mains data corresponds to the information given on the manufacturer's data plate, which can be found on either the back or the right-hand side of the hob or the copy of this plate which is enclosed with this guidance.
- Page 14 INSTALLATION WIRING DIAGRAM Important! Heating elements operate at 230V. Fuse Type / Important! For each connection the protective conductor must be connected protec- Conductor to the terminal marked tion cross sec- tion 1 For a 230 V single phase connec- tion with a neutral lead, terminals L1, L2 are bridged, neutral lead is HO5VV-FG...
-
Page 15: Operation
OPERATION Before using the appliance for the first time ● thoroughly clean your induction hob first. The induction hob should be treated with the same care as a glass surface. ● switch on the ventilation in the room or open a window, as the appliance could emit an unpleasant smell during first use. - Page 16 OPERATION The high-quality cookware is an essential condition for efficient induction cooking. Select cookware for induction cooking Cookware characteristics. ● Always use high quality cookware, with perfectly flat base. This prevents the formation of local hot spots, where food might stick.Pots and pans with thick steel walls provide superior heat distribution.
- Page 17 OPERATION For induction cooking us only ferromagnetic base materials such as: ●enamelled steel ● cast iron ● special stainless steel cookware designed for induction cooking. Marking of kitchen Check for marking indicating that the cookware cookware is suitable for induction cooking.
- Page 18 OPERATION Control Panel • Immediately after the appliance is connected to electrical mains, all displays will light up briefly. Your induction hob is then ready for use. • The induction hob is equipped with electronic touch control sensor fields, which are operated by touching with a finger for at least 1 second.
- Page 19 OPERATION Deactivate cooking zones Deactivate cooking zone by doing one of the following: • Turn off the hob with the sensor. • Touch and hold the sensor for 3 seconds • Touch to activate the cooking zone and slide to the left to reduce the heat setting "0."...
- Page 20 OPERATION Booster function can be activated on two cooking zones at the same time, i.e. on two horizontal or two vertical cooking zones. This function cannot be activated on cooking zones in opposite corners ("crosswise"). The Child Lock function Child lock function disables all hob controls, for example, to prevent using the ap- pliance by children or for cleaning.
- Page 21 OPERATION Limit the operating time In order to increase efficiency, the induction hob is fitted with operating time limiter for each of the cooking zones. Cooking heat Maximum operat- setting ing time The maximum operating time is determined in- dividually depending on the heat setting when cooking.
- Page 22 OPERATION Timer Timer function makes cooking easier by making it possible to set Duration. It can also be used as a Kitchen Timer. You can activate the Timer function only when cooking (when heat setting is greater than "0"). You can use the Timer function on all cooking zones at the same time.
- Page 23 OPERATION Stop’n go function (pause II) Stop’n go function acts like a pause. The Stop’n go function simultaneously sus- pends operation of all cooking zones and then resumes at the heat settings that were previously set. In order to activate the Stop’n go function, at least one cooking zone must be in use.
- Page 24 OPERATION You can always turn on the Bridge function manually. In order to activate the Bridge function touch sensor of the cooking zone and then simultaneously touch two sensors of the cooking zones on the left or right side. The rear cooking zone display will show " ", while the front cooking zone display will show "0".
-
Page 25: Cleaning And Maintenance
CLEANING AND MAINTENANCE Proper routine maintenance and cleaning of the appliance can significantly extend its trouble-free operation. When cleaning induction hobs, the same principles apply as for glass surfaces. Do not use under any cir- cumstances any abrasive or caustic cleaners or scouring powders or pads! Do not use steam or pressure cleaners. - Page 26 Otherwise, it can be corrosive. fuse and contact customer GRAM service. Warranty will be void if you do not follow the above guidelines!
-
Page 27: Troubleshooting
● have the appliance repaired ● Based on the instructions given in the table below, some minor issues can be corrected by the user. Please check the consecutive points in the table before you refer the repair to customer GRAM service. PROBLEM POSSIBLE CAUSE REMEDY 1.The appliance does not... - Page 28 TROUBLESHOOTING PROBLEM POSSIBLE CAUSE REMEDY 6.Residual heat indicator - a power outage or the - residual heat indicator will extinguished even though appliance has been discon- be shown again the next the cooking zones are hot nected time the appliance is turned on and off again 7.Hob cooking surface is Danger! Immediately unplug the appliance or...
-
Page 29: Specification
SPECIFICATION Rated voltage 230/400V 2N~50 Hz Rated power: 7,4 kW Model: IN 8284 TFI - induction cooking zone : 220x190 mm 2200/3500 W - induction cooking zone: 160 mm 1400 W /2100 W - induction cooking zone: 200 mm 2300 W /3000 W... - Page 31 Gram A/S Gram A/S Gram A/S Tel.: 22 07 26 30 Tel.: 040 38 08 40 Tel.: 020 7756 350 www.gram.no www.gram.se www.gram.fi Gram A/S Gejlhavegård 2B DK-6000 Kolding +45 73 20 10 00 www.gram.dk...
Need help?
Do you have a question about the IN 8284 TFI and is the answer not in the manual?
Questions and answers