Table of Contents
Advertisement
Quick Links
Advertisement
Table of Contents

Related Manuals for Ciara Horizon D13560


Summary of Contents for Ciara Horizon D13560
- Page 1 User Guide Horizon D13560 / T13560...
- Page 2 Intel and Core are trademarks or registered trademarks of Intel Corporation Asus is a trademark of ASUSTeK COMPUTER INC. All other names, brands, and trademarks are trademarks of their respective companies Third printing December 2023 Printed in Canada All rights reserved - © Hypertechnologie CIARA inc. - 2 -...
-
Page 3: Table Of Contents
1.3.2 Windows Recovery from Startup Settings ................12 1.3.3 Corrupted BIOS recovery ...................... 16 1.3.4 System maintenance ......................16 1.3.5 Using the CIARA Horizon D13560 / T13560 ................17 1.4 Troubleshooting your system after first install ................18 1.4.1 Helpful hints ........................18 1.5 Solving general problems ...................... - Page 4 CIARA Horizon D13560 / T13560 4.0 TECHNICAL PRODUCT SPECIFICATION CIARA HORIZON D13560 / T13560....53 4.1 Upgrading ..........................55 4.2 Networking ..........................55 4.3 The CIARA Horizon D13560 / T13560 BIOS .................. 56 4.3.1 BIOS configuration and installation ..................56 4.3.2 BIOS set-up program menu bar .....................
-
Page 5: About This Guide
With proper care and operating procedures your CIARA Horizon D13560 / T13560 will give you many years of service and high performance computing. NOTE This User's guide uses Horizon D13560 / T13560 designation where T13560 refers to the tower model and D13560 refers to the compact desktop model. - 5 -... -
Page 6: Installing And Upgrading Your System
CIARA Horizon D13560 / T13560 1.0 Installing and upgrading your system 1.1 Unpacking your computer Your PC is packed with ecologic moulded boxboard on four sides to keep it in place during transit. The keyboard is on the top of the box, the other accessories are completely underneath. -
Page 7: Choosing A Site For The System
NOTE The Horizon D13560 and T13560 models come either with or without a power supply On/OFF switch. For those systems that do not have a switch, make sure to shut down the system through Windows before proceeding to any repair or replacement work inside the system. -
Page 8: Peripheric Installation
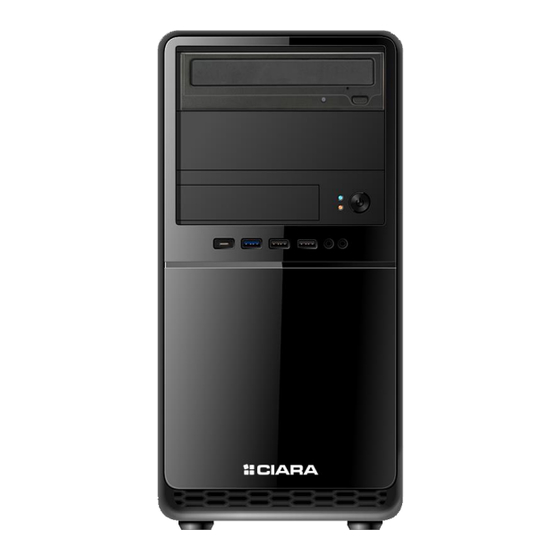
CIARA Horizon D13560 / T13560 1.3 Peripheric installation Mouse DisplayPort VGA port USB 3.2 gen 1 Audio out Audio in Network RJ-45 devices Microphone HDMI DisplayPort USB 2.0 Keyboard devices - 8 -... -
Page 9: Recovery From Ciara Recovery Dvd
CIARA Horizon D13560 / T13560 1.3.1 Recovery from CIARA recovery DVD 1.3.1.1 Recovery from CIARA Window 10 Pro recovery DVD Before you start this procedure, please back up all your important information, the recovery media will erase all data on HDD before installation. - Page 10 CIARA Horizon D13560 / T13560 1.3.1.2 Recovery from CIARA Window 11 Home recovery DVD Before you start this procedure, please back up all your important information, the recovery media will erase all data on HDD before installation. Insert the Windows 11 Home Recovery DVD and restart the system.
- Page 11 CIARA Horizon D13560 / T13560 1.3.1.3 Recovery from CIARA Window 11 Pro recovery DVD Before you start this procedure, please back up all your important information, the recovery media will erase all data on HDD before installation. Insert the Windows 11 Pro Recovery DVD and restart the system.
-
Page 12: Windows Recovery From Startup Settings
CIARA Horizon D13560 / T13560 1.3.2 Windows Recovery from Startup Settings 1.3.2.1 Windows 10 Recovery from Startup Settings With the Windows Startup Settings screen (formerly advanced boot options) you can start Windows in different advanced troubleshooting modes so you can find and fix problems on your PC. In previous versions of Windows, you could get to this screen by pressing F8 before Windows started up. - Page 13 CIARA Horizon D13560 / T13560 Choose Reset your PC Choose Remove everything Press Reset Then follow the regular Windows 10 Installation process. - 13 -...
- Page 14 CIARA Horizon D13560 / T13560 1.3.2.2 Windows 11 Recovery from Startup Settings With the Windows Startup Settings screen (formerly advanced boot options) you can start Windows in different advanced troubleshooting modes so you can find and fix problems on your PC. In previous versions of Windows, you could get to this screen by pressing F8 before Windows started up.
- Page 15 CIARA Horizon D13560 / T13560 Choose Remove everything Press Next Set Clean data to Yes and press Confirm Press Reset Then follow the regular Windows 11 Installation process. - 15 -...
-
Page 16: Corrupted Bios Recovery
CIARA Horizon D13560 / T13560 1.3.3 Corrupted BIOS recovery The ASUS CrashFree BIOS 3 is an auto recovery tool that allows you to restore the BIOS file when it fails or gets corrupted during the updating process. You can restore a corrupted BIOS file using the motherboard support DVD or a USB flash drive that contains the updated BIOS file. -
Page 17: Using The Ciara Horizon D13560 / T13560
1.3.5.1 Introduction The CIARA Horizon D13560 / T13560 is a powerful personal computer that has the ability to run a variety of operating systems. Unless you have specified something different, your system comes configured with a Windows operating system pre-loaded onto the hard drive. -
Page 18: Troubleshooting Your System After First Install
CIARA Horizon D13560 / T13560 1.4 Troubleshooting your system after first install 1.4.1 Helpful hints If you encounter some minor problems with the computer, monitor, or software, see the following list of general suggestions before taking further action: • Check that the computer and monitor are plugged into a working electrical outlet. -
Page 19: Solving General Problems
You should be able to easily resolve the general problems described in this section. If a problem persists and you are unable to resolve it, or if you feel uncomfortable about performing the operation, contact CIARA at 1-877-242-7272 and ask for the Customer Service department. -
Page 20: Solving Power Supply Problems
Solving power supply problems Problem Cause Solution Power supply shuts down Power supply will not turn Contact CIARA for the replacement of the power supply. intermittently. on because of internal power supply fault. Computer powered off Processor thermal protection Ensure that the computer air vents are not blocked and... -
Page 21: Solving Hard Drive Problems
CIARA Horizon D13560 / T13560 1.5.2 Solving hard drive problems Solving hard drive problems Problem Cause Solution Hard drive error occurs. Hard disk has bad sectors or has Use a utility to locate and block usage of bad failed. sectors. If necessary, reformat the hard disk. -
Page 22: Solving Display Problems
1. Reseat the graphics card. Power on the second pause, and the computer system. beeps six times. 2. If the problem persists, contact CIARA since the problem may necessitate the replacement of the graphics card or the motherboard. Dim characters. -
Page 23: Solving Audio Problems
CIARA Horizon D13560 / T13560 1.5.4 Solving audio problems Solving audio problems Problem Cause Solution Sound does not come out of the Software volume control is Double-click the Speaker icon on the taskbar, speaker or headphones. turned down. and then make sure that Mute is not selected and use the volume slider to adjust the volume. -
Page 24: Solving Keyboard And Mouse Problems
Keyboard connector is not Connect keyboard correctly keyboard commands and typing. properly connected. Keyboard needs repairs. Contact CIARA so that we may proceed to repairs. Computer is in Last State mode. Press the power button to resume from Last State mode. -
Page 25: Solving Hardware Installation Problems
3. If a faulty module is found, Contact CIARA for the replacement of the module. 4. 4. If the problem persists, Contact CIARA for this may necessitate the replacement of the motherboard. -
Page 26: Solving Memory Problems
3. If a faulty module is found, Contact CIARA for the replacement of the module. 4. 4. If the problem persists, Contact CIARA for this may necessitate the replacement of the motherboard. -
Page 27: Solving Optical Drive Problems
Movie will not play in the DVD Decoder software is not installed. Install decoder software. drive. Note : All CIARA systems equipped with a DVD drive at plant assembly include the necessary Decoder software. Cannot eject disc from tray. Disc not properly seated in the Turn off the computer and insert a thin metal drive. -
Page 28: Component Installation Guide
CIARA Horizon D13560 / T13560 1.6 Component installation guide 1.6.1 Precautions against static electricity ATTENTION: Components such as processors and memory may be permanently damaged by shocks arising from static electricity. It is hence important to wear antistatic, smock, gloves, shoes and ankle during the installation process. -
Page 29: Opening And Accessing The Chassis
CIARA Horizon D13560 / T13560 1.6.2 Opening and accessing the chassis 1.6.2.1 Opening and accessing the Horizon T13560 chassis This picture shows the back of the casing, the back panel connectors for peripheral installation, the back plate area for which connectors related to the motherboard will be accessed, and the power supply area. - Page 30 CIARA Horizon D13560 / T13560 1.6.2.2 Opening and accessing the Horizon D13560 chassis To remove the cover, simply press the release button and slide the panel back and then remove The cover is then removed from the chassis allowing for modular installation and chassis preparations.
-
Page 31: Insertion Of The Processor
CIARA Horizon D13560 / T13560 1.6.3 Insertion of the processor ATTENTION : Components such as the processor may be permanently damaged by shocks arising from static electricity. It is hence important to wear an antistatic bracelet during the installation process. - Page 32 CIARA Horizon D13560 / T13560 Insert fan and heat sink module, aligning the four pins with the holes. Fasten the fan module by turning the four thumbs. Then plug the fan unit into proper header. Attach properly the fan power cable.
-
Page 33: Installation Of The Memory Modules
Random Access Memory (DDR5 SDRAM) is packaged only in 288-pin Dual In-Line Memory Modules (DIMMs). Your CIARA Horizon D13560 / T13560 uses only DIMM memory modules. Each DIMM module can have a capacity of 8 GB, 16 GB or 32 GB. The minimum system capacity is 8 GB and the maximum system capacity is 128 GB. Your system supports only DDR5 4800 MHz memory speeds. - Page 34 CIARA Horizon D13560 / T13560 You may install varying memory sizes in Channel A and Channel B. The system maps the total size of the lower-sized channel for the dual-channel configuration. Any excess memory from the higher-sized channel is then mapped for single-channel operation.
- Page 35 CIARA Horizon D13560 / T13560 You can install one or two DIMMM of DDR5 memory. 1. To install a DIMM, first release the locking tab. 2. Slide the module into the socket at a 90-degree angle to the main board. Align the module so that the pin 1 marking on the module corresponds to the DIMM socket pin 1 marking.
-
Page 36: Installation Of The Optical Drive Module
CIARA Horizon D13560 / T13560 1.6.5 Installation of the optical drive module 1.6.5.1 Installation of the optical drive module – Horizon T13560 The optical drive is removed or inserted into the front end of the chassis. To remove the drive, lift the locking tab. To secure the drive, clip down the locking tab. - Page 37 CIARA Horizon D13560 / T13560 1.6.5.2 Installation of the optical drive module – Horizon D13560 Push the latch and lift the bays that can accommodate the drives and the optical drive. Install the slide on the right side of the optical drive.
- Page 38 CIARA Horizon D13560 / T13560 Connect the power cable and the SATA cable. Lower the array. - 38 -...
-
Page 39: Installation Of The Hard Drive
CIARA Horizon D13560 / T13560 1.6.6 Installation of the hard drive 1.6.6.1 Installation of the hard drive – Horizon T13560 The hard drive must be removed or inserted from inside of the casing. First remove the side panel. To remove the drive, lift the locking tab. To secure the drive, clip down the locking tab. - Page 40 CIARA Horizon D13560 / T13560 1.6.6.2 Installation of the hard drive – Horizon D13560 Push the latch and lift the bays that can accommodate the drives and the optical drive. The hard disk or SSD is inserted without tools into its plastic disk holder.
- Page 41 CIARA Horizon D13560 / T13560 Slide the tool less disk holder in the 2.5” bay for the SSD or 3.5” bay for the hard drive. To release the disc, squeeze the latch and pull the handle. Connect the drive to the power supply and to the SATA controller.
- Page 42 CIARA Horizon D13560 / T13560 1.6.6.3 Installation of the M.2 SSD drive – Horizon D13560 and T13560 Locate the M.2 slot to insert the M.2 SSD. The M.2 SSD is inserted with an angle in the slot and then lowered down.
-
Page 43: Chassis Characteristics
CIARA Horizon D13560 / T13560 1.6.7 Chassis Characteristics 1.6.7.1 Horizon T13560 Chassis Characteristics Mid-Tower Specifications Motherboard Type : Micro ATX (226.2 x 185.5 mm) (8.9"x 7.3") Drive Bay Space : 2 external 5.25", 1 external 3.5" and 2 internal 3.5"... - Page 44 CIARA Horizon D13560 / T13560 Horizon D13560 Chassis Characteristics Small Form Factor Specifications Type of Motherboard : Micro ATX (244 x 244 mm) (9.6"x 9.6") Drive bay space : Ext. 1 x 5.25", Int. 1 x 3.5" and 1 x 2.5"...
-
Page 45: Certification And Declaration
Windows software and a manual is included with the CIARA Horizon D13560 / T13560. If you have purchased a Windows license with your CIARA Horizon D13560 / T13560 system, please abide by the Copyright and License terms and conditions that are enclosed with this software package. -
Page 46: Declaration Of Conformity
CIARA Horizon D13560 / T13560 2.2 Declaration of conformity We, Manufacturer/Importer CIARA 9300 Trans-Canada Highway Montreal, Quebec H4S 1K5 Tel : (514) 798-8880 Fax : (514) 798-8889 Declare that the product Personal Computer System CIARA Horizon D13560 / T13560 is in conformity with ICES-003 and Part 15 subpart B of the FCC Rules. -
Page 47: Fcc Information To User
Warning Changes or modifications not expressly approved by CIARA could void the user’s authority to operate the equipment. This equipment is equipped with a shielded 3-wire power cord and plug. Use this power cord in conjunction with a properly grounded electrical outlet to avoid electrical shock and to reduce radio frequency interference that may emanate from the power cord. -
Page 48: Energy Star
The CIARA Horizon D2160/ T13560 computers deliver the features and performance demanded by consumers, in addition to increased energy efficiency. • If the CIARA Horizon D13560 / T13560 computers cost more than a conventional, less-efficient computer, purchasers will recover their investment in increased energy efficiency through utility bill savings, within a reasonable period of time. •... -
Page 49: One Year Limited Warranty
"Date of Delivery". The warranty covers any optional product(s) manufactured and sold by CIARA and installed by CIARA in a Horizon D13560 / T13560 series system unit. This one-year limited warranty, however, does not apply to any other item not internally installed in the System Unit by CIARA, or to any subsequent owners. -
Page 50: Procedures To Be Followed For Service During The Warranty Period
Make a back-up copy of all of the files on your hard disk before returning your computer for service. CIARA is not responsible for the loss or damage of any data on the returned system. In some cases, hard disks may need to reformatted or replaced. It is the responsibility of the user to ensure data is backed up prior to shipment to CIARA. -
Page 51: Limited Warranty
User’s Guide which accompanies the Product or other misuse, abuse or negligence to the Product ; (ii) by the use of parts not manufactured or sold by CIARA ; (iii) by modification of the Product ; (iv) as a result of service by anyone other than CIARA or an Authorized CIARA Service Provider ;... -
Page 52: Documenting Your Computer
Please keep your equipment log up to date and include a copy of it whenever your equipment is returned to CIARA for servicing. The equipment log is also helpful if your CIARA computer is lost, stolen, or damaged. It can serve as your record of when the equipment was placed in service, and the dates of all equipment upgrades and configuration changes. -
Page 53: Technical Product Specification Ciara Horizon D13560 / T13560
LGA1700 package. All versions have one PCI Express 4.0 x16 video (x16 mode) slot and two PCI 3.0 x1 slots. All CIARA Horizon D13560 / T13560 versions use an Asus® BIOS, up to 128 GB of main memory DDR5 type, 4800 MHz. The Set-Up and Configuration procedures for all versions are identical. - Page 54 3 ½” bay and two internal 3 ½” bays. Horizon D13560 : Desktop, 300 W power supply (80 PLUS® Bronze), one external 5 ¼” bay and one external 3 ½” bay in the front, two internal 3 ½” bays.
-
Page 55: Upgrading
4.1 Upgrading As the purchaser of a powerful state of the art CIARA Horizon D13560 / T13560 computer you have no doubt decided on the features and upgrade capabilities that you might wish to add to your computer. There are many exciting possibilities for upgrading your CIARA Horizon D13560 / T13560. -
Page 56: The Ciara Horizon D13560 / T13560 Bios
The purpose of this section is to describe the procedures to set up the BIOS configuration options of your CIARA Horizon D13560 / T13560 computer. All this work is done for you at the CIARA factory enabling the system to be ready to start on Power on. However, we are describing this procedure as a means of transparency. -
Page 57: Bios Set-Up Program Function Keys
CIARA Horizon D13560 / T13560 4.3.3 BIOS set-up program function keys BIOS Set-up Program Function Key Description 4.3.4 PCI auto configuration The BIOS can automatically configure PCI devices. PCI devices may be onboard or add-in cards. Autoconfiguration lets a user insert or remove PCI cards without having to configure the system. -
Page 58: Legacy Usb Support
CIARA Horizon D13560 / T13560 4.3.5 Legacy USB support Legacy USB support enables USB devices to be used even when the operating system’s USB drivers are not yet available. Legacy USB support is used to access the BIOS Setup program, and to install an operating system that supports USB. By default, Legacy USB support is set to Enabled. -
Page 59: Bios Recovery
CIARA Horizon D13560 / T13560 4.3.8 BIOS recovery It is unlikely that anything will interrupt a BIOS update; however, if an interruption occurs, the BIOS could be damaged. The following table lists the drives and media types that can and cannot be used for BIOS recovery. The BIOS recovery media does not need to be made bootable. -
Page 60: Adjusting Boot Speed
CIARA Horizon D13560 / T13560 4.3.9.4 Changing the default boot device during POST Pressing the <F8> key during POST causes a boot device menu to be displayed. This menu displays the list of available boot devices (as set in the BIOS setup program’s Boot Device Priority Submenu). The following table lists the boot device menu options. -
Page 61: Bios Security Features
CIARA Horizon D13560 / T13560 4.3.11 BIOS security features The BIOS includes security features that restrict access to the BIOS Setup program and who can boot the computer. A supervisor password and a user password can be set for the BIOS Setup program and for booting the computer, with the following restrictions : •... -
Page 62: Motherboard Configuration & Layout - Pro H610M-A D4-Csm Main Board
CIARA Horizon D13560 / T13560 4.4 Motherboard configuration & layout – PRO B660M-C D4-CSM main board Figure 4.4 Major board components - 62 -... - Page 63 CIARA Horizon D13560 / T13560 Board components shown in Figure 4.4 Item/callout from Figure Description Intel® LGA1700 CPU socket DDR5 DIMM slots Expansion slots Fan headers Power connectors M.2 slots (Key M) SATA 6 Gb/s ports USB 3.2 Gen 1 header (supports USB type C) USB 3.2 Gen 1 header...
-
Page 64: Back Panel Connectors
CIARA Horizon D13560 / T13560 4.4.1 Back panel connectors Description PS/2 Mouse port DisplayPort Video Graphics Adapter (VGA) port USB 3.2 Gen 1 (up to 5 Gbps) ports Ethernet port Line In port (light blue) Line Out port (lime) PS/2 Keyboard port (purple) HDMI™... -
Page 65: The Pci Express And Pci Bus
4.6.2 Optical drives The CIARA Horizon D13560 / T13560 model may be supplied with a SATA DVD drive. The DVD drive is a half-height 5-¼ inch wide storage device, capable of holding 4.7 to 8.5 Gbytes of data. The system may be equipped with either a DVD-ROM drive, a DVD writer, a Blu-ray drive or Blu-ray writer. -
Page 66: Keyboard
CIARA Horizon D13560 / T13560 4.7 Keyboard Your keyboard has a set of function keys, cursor keys and a numeric keypad. The figure below shows a typical keyboard. Under the rear of the keyboard are two small legs that can be pulled out or pushed in to change the keyboard angles. -
Page 67: Graphics Subsystem
CIARA Horizon D13560 / T13560 4.8 Graphics subsystem ® The board supports system graphics through Intel Graphics Technology and a PCI Express x16 add-in graphics card. 4.8.1 Integrated graphics ® ® The computer supports integrated graphics through the Intel Flexible Display Interface (Intel FDI) since processors integrate Intel Graphics Technology. -
Page 68: Audio Subsystem
CIARA Horizon D13560 / T13560 4.9 Audio subsystem The CIARA Horizon D13560 / T13560 computer supports Intel High Definition Audio through a Realtek® ALC897 audio codec. The Realtek® based audio subsystem provides the following features : • 8-channel (6 + 2) audio with independent multi-streaming stereo •... -
Page 69: Lan Subsystem
CIARA Horizon D13560 / T13560 4.11 LAN subsystem The LAN subsystem consists of the following : • Realtek 1 Gigabit Ethernet Controller (10/100/1000 Mbits/s) • One RJ-45 LAN connector with integrated status LEDs 4.11.1 Intel®I219V 1 Gigabit Ethernet controller The Intel® I219V 1 Gigabit Ethernet Controller supports the following features : •... -
Page 70: Replacing The System Battery
4.12 Replacing the system battery In all CIARA Horizon D13560 / T13560 models the battery is a standard 3.3 V Lithium battery model CR-2032. This type of battery should last at least 3 years, if the system is not in use. When the computer is plugged in, the standby current from the power supply extends the life of the battery. -
Page 71: Configuration Jumper Block
CIARA Horizon D13560 / T13560 4.15 Configuration jumper block NOTE Always turn off the power and unplug the power cord from the computer before shorting the two pins. Shorting the pins with the power on may result in unreliable computer operation. -
Page 72: Installing An Upgrade Flash Bios
B760M-CT-CSM Several methods exist to update the BIOS of your CIARA Horizon D13560 / T13560 system, and they are as follows : • Recovery BIOS Update - A .CAP file to be used for BIOS recovery process, regardless of operating system. In the unlikely event that a BIOS update is interrupted, it is possible the BIOS may be left in an unusable state. -
Page 73: Glossary
CIARA Horizon D13560 / T13560 GLOSSARY 32-Bit -- In computer architecture, 32-bit integers, memory addresses, or other data units are those that are at most 32 bits (4 octets) wide. Also, 32-bit CPU and ALU architectures are those that are based on registers, address buses, or data buses of that size. 32-bit is also a term given to a generation of computers in which 32-bit processors were the norm. - Page 74 CIARA Horizon D13560 / T13560 Clock -- A circuit that sends a consistent, periodic signal that is used to step logic information through a computer circuit. CMOS RAM -- Complementary Metal Oxide Semiconductor. CMOS RAM stores basic configuration information about your computer.
- Page 75 CIARA Horizon D13560 / T13560 Jumper -- On a printed circuit board, a patch connector, wire, or cable used to establish a circuit. LCD -- A liquid crystal display (LCD) is a thin, flat electronic visual display that uses the light modulating properties of liquid crystals (LCs).
- Page 76 CIARA Horizon D13560 / T13560 ROM -- An acronym for "read-only memory." The type of computer memory that is used to permanently store the information vital to computer operation, including some parts of the operating system. ROM is permanent and the contents will not be lost when the computer is turned off.
- Page 77 CIARA Horizon D13560 / T13560 NOTES : - 77 -...
Need help?
Do you have a question about the Horizon D13560 and is the answer not in the manual?
Questions and answers