Table of Contents
Advertisement
Quick Links
Advertisement
Table of Contents

Related Manuals for Vermeiren Carpo 3D


Summary of Contents for Vermeiren Carpo 3D
- Page 1 VERMEIREN Carpo 3/3D, Carpo 4/4D INSTALLATION MANUAL...
-
Page 3: Table Of Contents
Carpo 3, Carpo 4, Carpo 3D, Carpo 4D 2021-05 Content Content Content ........................1 Preface........................2 This product ....................3 Scope of delivery ..................4 Assembly and adjustments ................. 5 Tools ....................... 5 Adjusting the scooter to the user ..............6 Changing the batteries .................. -
Page 4: Preface
Carpo 3, Carpo 4, Carpo 3D, Carpo 4D 2021-05 Preface Preface To support you on the installation and repairs of this scooter, we provide you with this installation manual. Please read it carefully. If you still have questions after reading this manual, do not hesitate to contact Vermeiren. -
Page 5: This Product
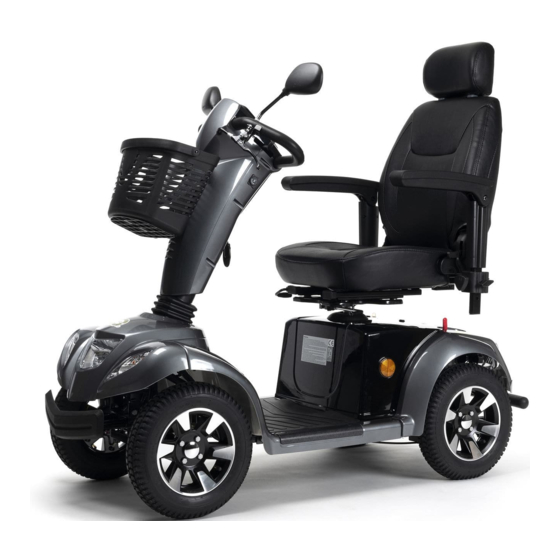
Carpo 3, Carpo 4, Carpo 3D, Carpo 4D 2021-05 Content This product Carpo 3, Carpo 3D 1. Headrest 2. Backrest 3. Armrest / Armpad 4. Seat 5. Rear wheel 6. Footplate 7. Front wheel 8. Front light 9. Indicator lights 10. -
Page 6: Scope Of Delivery
Carpo 3, Carpo 4, Carpo 3D, Carpo 4D 2021-05 Scope of delivery Scope of delivery The following items are part of the delivery: • Frame with armrests, steering unit, rear and front wheels • Footplate • Seat + backrest • Batteries (2x), motor •... -
Page 7: Assembly And Adjustments
Carpo 3, Carpo 4, Carpo 3D, Carpo 4D 2021-05 Content Assembly and adjustments CAUTION Risk of injuries or damage • The scooter needs to be (dis)assembled and adjusted by a specialist dealer according to the instructions in this chapter. • Only use parts and tools described in this manual. -
Page 8: Adjusting The Scooter To The User
Carpo 3, Carpo 4, Carpo 3D, Carpo 4D 2021-05 Assembly and adjustments Adjusting the scooter to the user 3.2.1 Seat height adjustment The seat can be adjusted in 2 different seat heights (distance: 25 mm). 1. Remove the seat. 2. Remove the bolt (3) and nut (5). -
Page 9: Tyre Changing
Carpo 3, Carpo 4, Carpo 3D, Carpo 4D 2021-05 Content To disassemble: • Switch the scooter off. • Remove the seat (see user manual). • Lift off the rear plastic cover of the batteries. • Loosen the straps used to keep the batteries in place. - Page 10 Carpo 3, Carpo 4, Carpo 3D, Carpo 4D 2021-05 Assembly and adjustments 3.4.2 Rear tyre Carpo 3, Carpo 3D ; all tyres Carpo 4, Carpo 4D DISMANTLING 1. Unscrew and remove the 4 screws that attach the wheel to the flange.
- Page 12 No part of this manual may be reproduced in any form what so ever (print, photocopy, microfilm or any other process) without written permission of the publisher, or processed, duplicated or distributed by using electronic systems. © Vermeiren Group 2021...
Need help?
Do you have a question about the Carpo 3D and is the answer not in the manual?
Questions and answers