Table of Contents
Advertisement
Quick Links
Advertisement
Table of Contents

Related Manuals for Vermeiren CARPO


Summary of Contents for Vermeiren CARPO
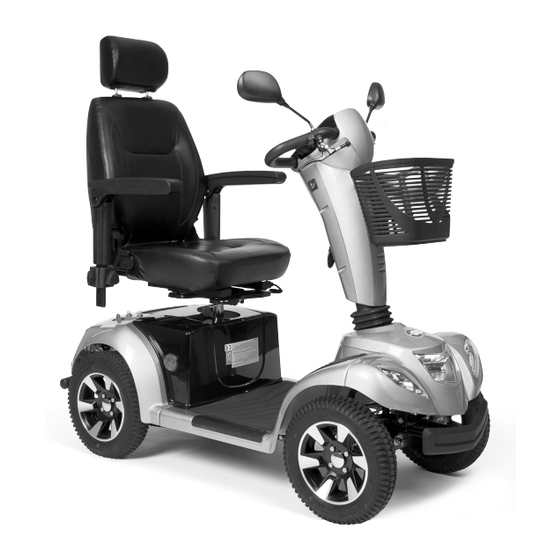
- Page 1 V RM IR N Carpo 3 / Carpo 4 I N S T R U C T I O N...
- Page 2 No part of this manual may be reproduced in any form what so ever (print, photocopy, microfilm or any other process) without written permission of the publisher, or processed, duplicated or distributed by using electronic systems. © Vermeiren GROUP 2017...
-
Page 3: Table Of Contents
SCOOTER Instruction Manual Last updated: 2017-02 CONTENTS Section Page Preface ..............................2 General notes ............................2 Allowed and disallowed usages ......................2 For your safety ............................3 Remarks on electromagnetic compatibility (EMC) ................4 Learning how to use your scooter ......................4 ... -
Page 4: Preface
This instruction manual reflects the latest level of development of the product. However, our firm, Vermeiren, reserves the right to introduce changes without any obligation to adapt or replace previously delivered models. -
Page 5: For Your Safety
SCOOTER Instruction Manual Last updated: 2017-02 When putting your electric scooter to use body size and weight physical and psychological condition residential circumstances and the environment should also be taken into consideration. In principle, the electric scooters are limited to uses on sidewalks. Only the models with an operating permit complying with road traffic licensing regulations (exceeding 6km/h) may be used on urban roads. -
Page 6: Remarks On Electromagnetic Compatibility (Emc)
SCOOTER Instruction Manual Last updated: 2017-02 If your scooter has pneumatic tyres, be careful to pump them to the correct pressure (see pressure indication on the tyres). We advise not to use power strip and extension cord. Use the battery charger directly on the supply socket. -
Page 7: Handling After Usage
SCOOTER Instruction Manual Last updated: 2017-02 First insert the key and turn 90° to the right (depending on the model there can be an ON / OFF switch – please see the relevant Operating Manual). Make sure that the motor is engaged. See to it that your seat is at a height best suited to yourself. -
Page 8: Going Uphill
SCOOTER Instruction Manual Last updated: 2017-02 GOING UPHILL When you go uphill, be careful that the slope does not exceed the maximum gradient your scooter is capable of climbing (see “Technical Details” in your scooter’s manual). Always approach slopes directly from the front and, to avoid tipping over, see to it that all four wheels stay in contact with the ground at all times (ramps, driveways, etc.) Your scooter is powered through a differential. -
Page 9: Charging The Batteries
SCOOTER Instruction Manual Last updated: 2017-02 CHARGING THE BATTERIES The light emitting diode (LEDs) in the steering unit indicates the remaining capacity of your batteries. Recharge the batteries on a daily basis. If you do not do that and you keep on driving, the output of your scooter will drop very significantly (uphills, bends, dim headlights). -
Page 10: Changing The Battery
SCOOTER Instruction Manual Last updated: 2017-02 CHANGING THE BATTERY Risk of burns - Do not come in contact with the acid from the batteries. See for a good ventilation of the battery compartment. Replace both batteries at once and not one battery. Change the batteries of your electric wheelchair, scooter with the same type batteries (Type: "AGM- Absorbed glass mat"... -
Page 11: Tip Protector
Observe the instructions on the maximum load of the ramps used. We shall decline all liability for injury or damage caused by an improper choice of ramps. MAINTENANCE For the maintenance manual of the scooters refer to the Vermeiren website: www.vermeiren.com. -
Page 12: Statement Of Conformity
SCOOTER Instruction Manual Last updated: 2017-02 STATEMENT OF CONFORMITY... - Page 13 Manual Carpo 3 Carpo 4...
- Page 14 Instruction manual Carpo 3 / Carpo 4 Last updated: 2017-02 TECHNICAL DETAILS (given in terms of the standard adjustments when delivered) Carpo XD MEASUREMENTS Carpo 3 Carpo 4 Length 1400 mm 1450 mm 1450 mm Width 660 mm 660 mm...
-
Page 15: Adjusting The Steering Unit
Instruction manual Carpo 3 / Carpo 4 Last updated: 2017-02 STEERING Put the ON/OFF key switch on. The battery level indicator shows the current level of your batteries. Now turn the speed control to the desired driving speed. - Page 16 Instruction manual Carpo 3 / Carpo 4 Last updated: 2017-02 NEUTRAL Put the motor stop lever on neutral (see label). This separates the motor from the gears. You will now be able to push the scooter. Put the motor stop lever on drive. This will again interlock the motor and gears. You will now be able to again drive the scooter.
- Page 17 Instruction manual Carpo 3 / Carpo 4 Last updated: 2017-02 Fig. C 1 = Seat lever 2 = Seat 3 = Seat depth adjustment lever 4 = Seat depth rails 5 = Adjustment bar Seat height adjustment (Fig. D) The seat can be adjusted in 4 different seat heights (increments: 25 mm).
- Page 18 Instruction manual Carpo 3 / Carpo 4 Last updated: 2017-02 BACK A tilt lever has been added to the side of the back rest (transition to seat upholstery). Press this lever down to release the backrest and fold it forward.
- Page 19 Instruction manual Carpo 3 / Carpo 4 Last updated: 2017-02 ARMRESTS The width of the seat can be changed by adjusting the arm rests. Loosen the screws under the seat. Now pull or push the entire arm rests to the desired position.
- Page 20 Instruction manual Carpo 3 / Carpo 4 Last updated: 2017-02 Front tyre Carpo 3: DISMANTLING 1. Unscrew and remove the middle screw that attach the tyre (1), (2), (3), (4) to the front fork of the scooter. 2. Let the air out of the wheel by lightly pressing the pressure pin on the valve.
- Page 21 Instruction manual Carpo 3 / Carpo 4 Last updated: 2017-02 Carpo 4: DISMANTLING 1. Remove the cover cap for scooter rim. 2. Unscrew and remove the middle screw that attach the wheel and flange to the scooter. 3. Let the air out of the wheel by lightly pressing the pressure pin on the valve.
-
Page 22: Troubleshooting
Instruction manual Carpo 3 / Carpo 4 Last updated: 2017-02 The following diagram illustrates how the front and rear parts of the chassis are connected (fig J): Pull out the safety pins. Pull apart the front and rear frames. - Page 23 Instruction manual Carpo 3 / Carpo 4 2017-02 SERVICE The scooter was serviced: Dealer´s stamp: Dealer´s stamp: Date: Date: Dealer´s stamp: Dealer´s stamp: Date: Date: Dealer´s stamp: Dealer´s stamp: Date: Date: Dealer´s stamp: Dealer´s stamp: Date: Date: Dealer´s stamp: Dealer´s stamp:...
- Page 24 Fax: +41(0)33 335 14 67 website: www.vermeiren.it website: www.vermeiren.ch e-mail: info@vermeiren.it e-mail: info@vermeiren.ch Poland Spain / Portugal Vermeiren Polska Sp. z o.o Vermeiren Iberica, S.L. Carratera de Cartellà, Km 0,5 Łączna PL-55-100 Trzebnica Sant Gregori Parc Industrial Edifici A Tel: +48(0)71 387 42 00...
Need help?
Do you have a question about the CARPO and is the answer not in the manual?
Questions and answers