Table of Contents
Advertisement
Available languages
Available languages
Quick Links
/ Perfect Charging / Perfect Welding / Solar Energy
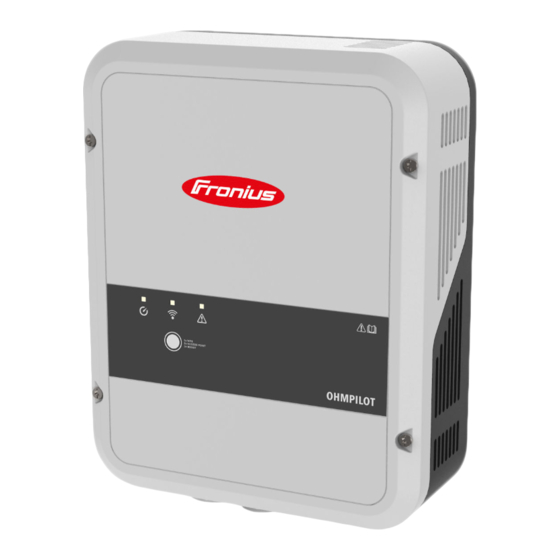
Fronius Ohmpilot
Fronius Ohmpilot
Fronius Ohmpilot
42,0410,2141
Fronius prints on elemental chlorine free paper (ECF) sourced from certified sustainable forests (FSC).
003-09072020
Bedienungsanleitung
Balance of System
Operating instructions
Balance of System
Istruzioni per l'uso
Balance of System
Advertisement
Chapters
Table of Contents

Related Manuals for Fronius PVI1903OHM


Summary of Contents for Fronius PVI1903OHM
- Page 1 / Perfect Charging / Perfect Welding / Solar Energy Bedienungsanleitung Fronius Ohmpilot Balance of System Operating instructions Fronius Ohmpilot Balance of System Istruzioni per l'uso Fronius Ohmpilot Balance of System 42,0410,2141 003-09072020 Fronius prints on elemental chlorine free paper (ECF) sourced from certified sustainable forests (FSC).
-
Page 3: Table Of Contents
EMV-Maßnahmen Datensicherheit Urheberrecht Allgemeine Informationen Allgemeines Bestimmungsgemäße Verwendung Warnhinweise am Gerät Fronius Smart Meter Fronius Smart Meter einbinden Zählerposition Anschluss des Smart Meter am Datamanager 2.0 Bedienelemente und Anschlüsse Anzeigen/Bedienelemente am Gerät Anschlussbereich Auswahl der Heizung 1 - phasige Heizung 3 - phasige Heizung: Beispiel für die Berechnung der Ladedauer... - Page 4 Webinterface Status Anzeigen am Webinterface Optionale Einstellungen Manuelle Einstellungen HEIZUNG 1 Legionellenschutz aktivieren Tagesverlauf anpassen Temperaturbegrenzung Anhang Statusmeldungen Statusmeldungen Technische Daten Eingangsdaten Schnittstellen Ausgangsdaten Allgemeine Daten Prüfungen / Angaben Prüfungen/Angaben Garantiebedingungen und Entsorgung Fronius Werksgarantie Entsorgung Berücksichtigte Normen und Richtlinien...
-
Page 5: Sicherheitsvorschriften
Sicherheitsvorschriften Erklärung Sicher- GEFAHR! heitshinweise Bezeichnet eine unmittelbar drohende Gefahr. ▶ Wenn sie nicht gemieden wird, sind Tod oder schwerste Verletzungen die Folge. WARNUNG! Bezeichnet eine möglicherweise gefährliche Situation. ▶ Wenn sie nicht gemieden wird, können Tod und schwerste Verletzungen die Folge sein. -
Page 6: Umgebungsbedingungen
Schutzeinrichtungen niemals umgehen oder außer Betrieb setzen. Die Positionen der Sicherheits- und Gefahrenhinweise am Gerät sind aus dem Kapitel „Allgemeines“ der Bedienungsanleitung des Gerätes zu entnehmen. Störungen, die die Sicherheit beeinträchtigen können, vor dem Einschalten des Gerätes beseitigen. Es geht um Ihre Sicherheit! Umgebungsbe- Betrieb oder Lagerung des Gerätes außerhalb des angegebenen Bereiches gilt als nicht dingungen... -
Page 7: Datensicherheit
Datensicherheit Für die Datensicherung von Änderungen gegenüber den Werkseinstellungen ist der Anwender verantwortlich. Im Falle gelöschter persönlicher Einstellungen haftet der Her- steller nicht. Urheberrecht Das Urheberrecht an dieser Bedienungsanleitung verbleibt beim Hersteller. Text und Abbildungen entsprechen dem technischen Stand bei Drucklegung. Änderun- gen vorbehalten. -
Page 9: Allgemeine Informationen
Allgemeine Informationen... -
Page 11: Allgemeines
Allgemeines Bestimmungs- Mit der „24h Sonne“-Vision verfolgt Fronius das Ziel, seinen Kunden Lösungen anzubie- gemäße Verwen- ten, um Energie intelligent und kosteneffizient zu erzeugen, zu speichern, zu verteilen dung und zu verbrauchen. Die Nutzung überschüssiger Energie zur Warmwasseraufbereitung stellt eine einfache, mit geringen Investitionskosten verbundene Möglichkeit dar, Strom in Form von Wärme zu speichern und zu einem beliebigen Zeitpunkt zu verbrauchen. -
Page 12: Warnhinweise Am Gerät
Bei einem Heizstab mit 9 kW Leistung wird die überschüssige Leistung von 0 - 3 kW auf Phase 1 stufenlos geregelt. Steht darüber hinaus noch mehr Leistung zur Verfügung, schaltet der Ohmpilot Phase 2 dazu und Phase 1 kann erneut zwischen 3 – 6 kW stufen- los regeln. - Page 13 Sicherheitssymbole: Gefahr von schwerwiegenden Personen- und Sachschäden durch Fehlbedie- nung Beschriebene Funktionen erst anwenden, wenn folgende Dokumente vollständig gelesen und verstanden wurden: diese Bedienungsanleitung sämtliche Bedienungsanleitungen der Systemkomponenten der Photovol- taikanlage, insbesondere Sicherheitsvorschriften Gefährliche elektrische Spannung Vor dem Öffnen des Geräts, Entladezeit der Kondensatoren abwarten! Heiße Oberfläche Text der Warnhinweise: WARNUNG!
-
Page 14: Fronius Smart Meter
Fronius Smart Meter Fronius Smart Für den Betrieb des Ohmpilots ist ein Fronius Smart Meter notwendig, sodass die Über- Meter einbinden schussenergie gemessen werden kann. Für die Einbindung des Fronius Smart Meter ist ein Wechselrichter mit Datamanager 2.0 oder höher ab V3.8.1-x bzw. eine Datamanager Box ab V3.8.1-x notwendig. -
Page 15: Bedienelemente Und Anschlüsse
Drücken der WPS Taste am Router wird dem Ohmpilot das WLAN Passwort übermittelt. 2x drücken WLAN Access Point wird für 30 Minuten aktiviert, sodass über die Fronius Solar Web App Einstellungen am Ohmpilot vorgenommen werden können. 3x drücken Boostmode - Dimmerstufe wird für 4 Stunden mit 100% angesteuert, L2 und L3 wird durchgeschalten. -
Page 16: Anschlussbereich
Anschlussbe- reich LED grün LED blau LED rot Taster Ethernet RJ45 mind. CAT5, geschirmt Modbus RTU (Defaultadresse 40) Federzug 0,2 - 1,5 mm , max. 1000m, geschirmt und verdrillt Anschluss Klemme Temperatursensor PT 1000, Federzug 0,2 - 1,5 mm EINGANG - Zuleitung Netz 1x 230 V, oder 3x 230 V, Federzug 1,5 - 2,5 mm AUSGANG - Heizstab L3 Federzug 1,5 - 2,5 mm... -
Page 17: Auswahl Der Heizung
Auswahl der Heizung 1 - phasige Hei- Es wird von 0 bis 3 kW stufenlos geregelt zung 0,3 bis 3 kW Rein Ohmscher Verbrauch (kein elektronischer Temperaturbegrenzer, Lüfter,...) 3 - phasige Hei- Es wird von 0 bis 9 kW stufenlos geregelt. zung: 0,9 bis 9 kW gleiche Lastaufteilung auf alle 3 Phasen (z.B. -
Page 19: Installation Und Inbetriebnahme
Installation und Inbetriebnahme... -
Page 21: Standort-Wahl Und Montagelage
Standort-Wahl und Montagelage Standort-wahl all- Bei der Standort-wahl für den Ohmpilot folgende Kriterien beachten: gemein Installation nur auf festem Untergrund. Max. Umgebungstemperaturen: 0 °C / +40 °C relative Luftfeuchte: 0 - 99% Die Luftstrom-Richtung innerhalb des Ohmpilot verläuft von unten nach oben. Bei Einbau des Ohmpilot in einen abgeschlossenen Raum durch Zwangsbelüftung für eine ausreichende Wärmeabfuhr sorgen. -
Page 22: Symbolerklärung - Montagelage
Den Ohmpilot nicht montieren: im Einzugsbereich von Ammoniak, ätzenden Dämpfen, Säuren oder Salzen (z.B. Düngemittel-Lagerplätze, Lüftungsöffnungen von Viehstallungen, chemische Anlagen, Gerberei-Anlagen, etc.) Den Ohmpilot nicht montieren in: Räumen mit erhöhter Unfallgefahr durch Nutztiere (Pferde, Rin- der, Schafe, Schweine, etc.) Ställen und angrenzenden Nebenräumen Lager- und Vorratsräumen für Heu, Stroh, Häcksel, Kraftfutter, Düngemittel, etc. - Page 23 Den Ohmpilot nicht in Schräglage an einer senkrechten Wand montie- ren. Den Ohmpilot nicht in Horizontallage an einer senkrechten Wand montieren. Den Ohmpilot nicht überhängend mit den Anschlüssen nach oben montieren. Den Ohmpilot nicht überhängend mit den Anschlüssen nach oben montieren.
-
Page 24: Wandmontage
Wandmontage Sicherheit WARNUNG! Gefahr durch Restspannung von Kondensatoren Ein elektrischer Schlag kann tödlich sein ▶ Entladezeit der Kondensatoren abwarten. Die Entladezeit beträgt 15 Sekunden. WARNUNG! Verbrennungsgefahr am Kühlkörper im offenen Zustand. Personenschäden können die Folge sein. ▶ Kühlkörper auskühlen lassen. ▶... -
Page 25: Ohmpilot An Der Wand Montieren
Ohmpilot an der Wand montieren... -
Page 26: Installation
Installation Abisolierlängen Abisolierlänge Klemmen am Leistungsteil (L1,L2,..) Abisolierlänge Klemmen am Steuerungs- print (D+,D-, - und PT1000) Elektrischer WARNUNG! Anschluss Gefahr durch unzureichende Schutzleiter-Verbindung. Schwerwiegende Personen- oder Sachschäden können die Folge sein. ▶ Schutzleiter-Verbindung ausreichend dimensionieren. WICHTIG! Der elektrische Anschluss darf nur von einem Fachmann durchgeführt wer- den. -
Page 27: 1-Phasiger Heizstab Bis 3 Kw
1-phasiger Heizstab bis 3 kW Anwendungsbei- spiel 1 EINGANG - Zuleitung von Netz 1x 230V, Federzug 1,5 - 2,5 mm² AUSGANG bis 3 kW regelbar, max. 13A ohmsche Last, Federzug 1,5 - 2,5 mm² Warmwasser Boiler Temperatursensor PT1000 Fremdquelle (z.B. Gastherme) Heizstab (max. - Page 28 WICHTIG! Plug & Play - Bei dieser Anwendung sind nach erfolgreicher Verbindung zum Wechselrichter keine weiteren Einstellungen notwendig. Der Fronius Smart Meter erfasst am Einspeisepunkt die aktuelle Leistung und überträgt die Daten an den Datamanager. Der Datamanger regelt durch Ansteuerung des Ohmpi- lot eine zur Verfügung stehende Überschussenergie auf Null aus.
-
Page 29: 3-Phasiger Heizstab 900 W Bis 9 Kw
3-phasiger Heizstab 900 W bis 9 kW Anwendungsbei- spiel 2 EINGANG - Zuleitung Netz 3x 230 V, Federzug 1,5 - 2,5 mm² AUSGANG - Heizstab L3 AUSGANG - Heizstab L2 AUSGANG bis 3 kW regelbar, max. 13 A, ohmsche Last, Federzug 1,5 - 2,5 mm²... - Page 30 WICHTIG! Plug & Play - Bei dieser Anwendung sind nach erfolgreicher Verbindung zum Wechselrichter keine weiteren Einstellungen notwendig. Der Fronius Smart Meter erfasst am Einspeisepunkt die aktuelle Leistung und überträgt die Daten an den Datamanager. Der Datamanger regelt durch Ansteuerung des Ohmpi- lot eine zur Verfügung stehende Überschussenergie auf Null aus.
-
Page 31: 1-Phasiger Heizstab Bis 3 Kw Mit Wärmepumpen-Ansteuerung
1-phasiger Heizstab bis 3 kW mit Wärmepumpen- Ansteuerung Anwendungsbei- spiel 3 EINGANG - Zuleitung Netz 1x 230 V, Federzug 1,5 - 2,5 mm² Multifunktions-Relaisausgang WARNUNG! Gefährliche Spannungen. Ein Draht löst sich und berührt gefährliche Spannungen. ▶ Werden Signalkabel angeschlossen, müssen die einzelnen Drähte unmittelbar vor der Klemme mit einem Kabelbinder zusammengebunden werden. - Page 32 (10) Ferrit (im Lieferumfang) Der Fronius Smart Meter erfasst am Einspeisepunkt die aktuelle Leistung und überträgt die Daten an den Datamanager. Der Datamanager regelt durch Ansteuerung des Ohmpi- lot eine zur Verfügung stehende Überschussenergie auf Null aus. Dies geschieht im Detail durch stufenlose Ansteuerung des angeschlossenen Heizstabes am Ohmpilot und durch gezieltes Zuschalten der Wärmepumpe.
-
Page 33: Einstellungen Im Menübereich
Einstellungen im Menübereich Website des Ohmpiloten öffnen Unter Kapitel Datenanbindung einrichten auf Seite ist beschrieben, wie die Webseite des Ohmpiloten zu erreichen ist. Unter HEIZUNG 2 bei Verbraucher „SG Ready Wärmepumpe“ auswählen Bei Einschaltschwelle „Einspeisung“ auswählen und die gewünschte Leistung in Watt eintragen, bei der die Wärmepumpe eingeschaltet werden soll. -
Page 34: 1-Phasiger Heizstab Bis 3 Kw Und Fremdquelle
1-phasiger Heizstab bis 3 kW und Fremdquelle Anwendungsbei- spiel 4 EINGANG - Zuleitung Netz 1x 230 V, Federzug 1,5 - 2,5 mm Multifunktions-Relaisausgang WARNUNG! Gefährliche Spannungen. Ein Draht löst sich und berührt gefährliche Spannungen. ▶ Werden Signalkabel angeschlossen, müssen die einzelnen Drähte unmittelbar vor der Klemme mit einem Kabelbinder zusammengebunden werden. - Page 35 (10) Ferrit (im Lieferumfang) Der Fronius Smart Meter erfasst am Einspeisepunkt die aktuelle Leistung und überträgt die Daten an den Datamanager. Der Datamanger regelt durch Ansteuerung des Ohmpi- lot eine zur Verfügung stehende Überschussenergie auf Null aus. Dies geschieht im Detail durch stufenlose Ansteuerung des angeschlossenen Heizstabes am Ohmpilot.
-
Page 36: Einstellungen Im Menübereich
Einstellungen im Menübereich Website des Ohmpiloten öffnen Unter Kapitel Datenanbindung einrichten auf Seite ist beschrieben, wie die Webseite des Ohmpiloten zu erreichen ist. Das Feld „Temperatursensor vorhanden“ aktivieren Das Feld „Tagesverlauf anpassen“ aktivieren Einstellungen unter „Zeit ab“, „Zeit bis“ und „Mindesttemperatur“ wie gewünscht ein- stellen Nähere Infos im Kapitel Tagesverlauf anpassen... -
Page 37: Zwei Heizstäbe - 3-Phasig Und 1-Phasig
Zwei Heizstäbe - 3-phasig und 1-phasig Anwendungsbei- spiel 5 EINGANG - Zuleitung Netz 3x 230 V, Federzug 1,5 - 2,5 mm AUSGANG - Heizstab L3 AUSGANG - Heizstab L2 Multifunktions-Relaisausgang AUSGANG bis 3 kW regelbar, max. 13 A ohmsche Last, Federzug 1,5 - 2,5 Warmwasser Boiler Temperatursensor PT1000 Fremdquelle (z.B. - Page 38 Puffer, sodass eine maximale PV Überschussenergie gespeichert werden kann. Der Fronius Smart Meter erfasst am Einspeisepunkt die aktuelle Leistung und überträgt die Daten an den Datamanager. Der Datamanager regelt durch Ansteuerung des Ohmpi- lot eine zur Verfügung stehende Überschussenergie auf Null aus. Dies geschieht im Detail durch stufenlose Ansteuerung des angeschlossenen Heizstabes am Ohmpilot.
-
Page 39: Einstellungen Im Menübereich
Einstellungen im Menübereich Website des Ohmpiloten öffnen Unter Kapitel Datenanbindung einrichten auf Seite ist beschrieben, wie die Webseite des Ohmpiloten zu erreichen ist. Unter HEIZUNG 1 „manuell“ und „1 oder 3 phasig“ auswählen Unter HEIZUNG 2 „1 oder 3 phasig“ auswählen und die Leistung des Verbrauchers eingeben... -
Page 40: Zwei 3-Phasige Heizstäbe Bis 9 Kw
Zwei 3-phasige Heizstäbe bis 9 kW Anwendungsbei- spiel 6 EINGANG - Zuleitung Netz 3x 230 V, Federzug 1,5 - 2,5 mm AUSGANG - Heizstab L3 AUSGANG - Heizstab L2 Multifunktions-Relaisausgang AUSGANG bis 3 kW regelbar, max. 13 A ohmsche Last, Federzug 1,5 - 2,5 Schütz Umschaltung Warmwasser Boiler Temperatursensor PT1000... - Page 41 Puffer, sodass eine maximale PV Überschussenergie gespeichert werden kann. Der Fronius Smart Meter erfasst am Einspeisepunkt die aktuelle Leistung und überträgt die Daten an den Datamanager. Der Datamanager regelt durch Ansteuerung des Ohmpi- lot eine zur Verfügung stehende Überschussenergie auf Null aus. Dies geschieht im Detail durch stufenlose Ansteuerung des angeschlossenen Heizstabes am Ohmpilot.
-
Page 42: Einstellungen Im Menübereich
Einstellungen im Menübereich Website des Ohmpiloten öffnen Unter Kapitel Datenanbindung einrichten auf Seite ist beschrieben, wie die Webseite des Ohmpiloten zu erreichen ist. Unter HEIZUNG 2 „3 phasig“ auswählen und die Leistung des Verbrauchers einge-... -
Page 43: Datenanbindung Einrichten
Jeder Wechselrichter mit Fronius Smart Meter koppelt sich automatisch mit dem Ohmpi- mit Ohmpilot lot. Wenn jedoch mehr als ein Wechselrichter mit Fronius Smart Meter im Netzwerk vor- koppeln handen ist, ist es möglich dass sich der falsche Wechselrichter koppelt. In diesem Fall kann der Ohmpilot auf der Webseite des zu koppelnden Wechselrichters unter Systemin- formationen manuell gekoppelt werden. -
Page 44: Verbindung Über Modbus Rtu Einrichten
Bevor der Access Point geöffnet wird, wird nach verfügbaren WLAN Netzen gesucht. Auf Ihrem Smart Device oder PC das WLAN Netz „Ohmpilot“ aktivieren. Im Browser die Webseite http://192.168.250.181 oder http://ohmpilotW.local einge- ben. Alternativ kann der Ohmpilot auch mit der Fronius Solar Web App im Netzwerk gesucht werden. -
Page 45: Verbindung Über Lan Einrichten
HINWEIS! Ohmpilot über Netzwerk erreichen. In Netzwerken mit einem DNS-Suffix ist der Ohmpilot unter http://ohmpilotW.<DNS-Suf- fix> zu erreichen. z.B. http://ohmpilotW.fronius.com Einstellungen vornehmen. Verbindung über Standardmäßig bezieht der Ohmpilot seine IP Adresse automatisch vom DHCP Server, LAN einrichten sodass grundsätzlich keine Einstellungen notwendig sind. - Page 46 Auf Ihrem Smart Device oder PC das WLAN Netz „Ohmpilot“ aktivieren. Im Browser die Webseite http://192.168.250.181 oder http://ohmpilotW.local einge- ben. Alternativ kann der Ohmpilot auch mit der Fronius Solar Web App im Netzwerk gesucht werden. Im Register Netzwerk WLAN das gewünschte Netzwerk auswählen.
- Page 47 Über das Webinterface kann dem Ohmpilot eine statische IP Adresse eingestellt werden. Der Ohmpilot ist somit über http://ohmpilotW.local oder der fix vergebenen IP Adresse erreichbar. Alternativ kann der Ohmpilot auch mit der Fronius Solar Web App im Netz- werk gesucht werden.
-
Page 49: Weboberfläche Des Ohmpilots
Weboberfläche des Ohmpilots... -
Page 51: Webinterface
Webinterface Status Anzeigen am Webinterface Status Ohmpilot arbeitet im Normalbetrieb. Mindesttemperatur Mindesttemperatur wurde unterschritten. Heizung 1 heizt mit 100%. Legionellenschutz Legionellenaufheizung ist aktiv. Heizung 1 heizt mit 100%. Boost Der Ohmpilot wurde manuell in den Boostmode versetzt. Hei- zung 1 heizt mit 100%. Fehler Ein Fehler wurde erkannt. -
Page 52: Optionale Einstellungen
Optionale Einstellungen Manuelle Einstel- HINWEIS! lungen HEIZUNG Einstellungen nicht zwingend notwendig. Die hier beschriebenen Einstellungen können für alle zuvor dargestellten Anwendungs- beispiele vorgenommen werden. Wenn sie nicht beim jeweiligen Beispiel beschrieben sind, sind diese nicht zwingend notwendig. Die Leistung von HEIZUNG 1 manuell einstellen: Unter HEIZUNG 1 „manuell“... -
Page 53: Tagesverlauf Anpassen
Warmwasserverbrauch, sollte der Legionellenschutz regelmäßig durchgeführt werden. Für diese Funktion ist ein PT1000 Temperatursensor notwendig, welcher von Fronius unter der Artikelnummer 43,0001,1188 bezogen werden kann. Trotz eingestellter Funktion „Legionellenschutz“ ist eine Verunreinigung des Wassers mit Legionellen nicht garantiert ausgeschlossen. -
Page 54: Temperaturbegrenzung
Handelt es sich bei der Heizung 1 um die primäre Heizquelle, so ist der Tagesverlauf jedenfalls anzupassen, um die gewünschte Mindest temperatur sicherzustellen. Für diese Funktion ist ein PT1000 Temperatursensor notwendig, welcher von Fronius unter der Artikelnummer 43,0001,1188 bezogen werden kann. Die Position des Tempera- turfühlers im Boiler sollte so gewählt werden, dass ausreichend Warmwasser verfügbar... -
Page 55: Anhang
Anhang... -
Page 57: Statusmeldungen
Statusmeldungen Statusmeldungen Fehlerversand Fehler werden im Datamanager 2.0 gespeichert und können über Solar Web ver- sendet werden. Mögliche Fehlerausgaben (Stand 7.12.2015): Code Beschreibung Ursache Behebung Heizstab 1 defekt - Kurz- Die Last auf L1 ist höher als 3 kW. Kurz- Heizstab 1 überprüfen. - Page 58 FQ konnte Mindesttempe- FQ ausgeschalten/defekt. FQ mit Ohmpi- FQ einschalten. FQ mit ratur innerhalb von 5h lot nicht verbunden. TS falsch montiert. Relais 1 verbinden. TS nicht erreichen. Heizsystem falsch dimensioniert (zu viel über dem Heizregister der Warmwasserverbrauch, etc.) TS defekt. FQ montieren.
- Page 59 Nach einem Stromausfall Der Ohmpilot weist sich nach einem Ohmpilot Neustarten, arbeitet der Ohmpilot nicht Stromausfall, sofern er keine IP Adresse damit die WLAN Verbin- mehr nach 40s bekommt, automatisch eine fixe dung neu aufgebaut wird. IP Adresse zu 169.254.0.180 (nur gültig wenn der Ohmpilot via WLAN am Router angebunden ist).
-
Page 60: Technische Daten
Technische Daten Eingangsdaten Frequenz 50 Hz Nennspannung 230 V / 400 V Max. Eingangsstrom 1 X 16 A / 3 x 16 A Schnittstellen Modbus RTU RS 485, max 1000m, geschirmt und ver- drillt WLAN Ethernet mind. CAT5, geschirmt Temperatursensor IEEE 802.11 b/g/n PT1000 (max. -
Page 61: Prüfungen / Angaben
Prüfungen / Angaben Prüfungen/Anga- Prüfungen / Angaben laut EN60730 Abschnitt 1 Tabelle 7.2 Konstruktion Elektronische RS 2.5.5 unabhängig montiertes RS Schraubenlose Klemmen 2.10.6.1 Befestigungsart Typ X Einteilung des RS, nach Schutz Schutzklasse I 6.8.3 gegen elektrischen Schlag Abschnitt Art der Abschaltung oder Unterbre- Micro Unterbrechung laut 2.4.4. -
Page 62: Garantiebedingungen Und Entsorgung
Fronius Werksga- Detaillierte, länderspezifische Garantiebedingungen sind im Internet erhältlich: rantie www.fronius.com/solar/garantie Entsorgung Sollte Ihr Ohmpilot eines Tages ausgetauscht werden, nimmt Fronius das Altgerät zurück und sorgt für eine fachgerechte Wiederverwertung. Berücksichtigte CE-Kennzeichen Normen und Alle erforderlichen und einschlägigen Normen sowie Richtlinien im Rahmen der einschlä- Richtlinien gigen EU-Richtlinie werden eingehalten, sodass die Geräte mit dem CE-Kennzeichen... - Page 63 General information General Intended use Warning notices on the device Fronius Smart Meter Integrating the Fronius Smart Meter Meter position How to connect the Smart Meter to the Datamanager 2.0 Control elements and connections Indicators/controls on the device Connection area...
- Page 64 Manual settings for HEATER 1 Activating legionella prevention Adapting the day curve Temperature limitation Appendix Status Codes Status codes Technical data Input data Interfaces Output data General data Tests/specifications Tests/specifications Warranty terms and conditions, and disposal Fronius manufacturer's warranty Disposal Applicable standards and directives...
-
Page 65: Safety Rules
Safety rules Explanation of DANGER! safety notices Indicates immediate danger. ▶ If not avoided, death or serious injury will result. WARNING! Indicates a potentially hazardous situation. ▶ If not avoided, death or serious injury may result. CAUTION! Indicates a situation where damage or injury could occur. ▶... -
Page 66: Environmental Conditions
For the location of the safety and danger notices on the device, refer to the section hea- ded "General remarks" in the Operating Instructions for the device. Any equipment malfunctions which might impair safety must be remedied before the device is turned on. This is for your personal safety! Environmental Operation or storage of the device outside the stipulated area will be deemed as not in... -
Page 67: Copyright
Copyright Copyright of these operating instructions remains with the manufacturer. The text and illustrations are all technically correct at the time of printing. We reserve the right to make changes. The contents of the operating instructions shall not provide the basis for any claims whatsoever on the part of the purchaser. -
Page 69: General Information
General information... -
Page 71: General
General Intended use With its "24 hours of sun" vision, Fronius is aiming to offer its customers solutions for generating, storing, distributing and using energy in an intelligent and cost efficient man- ner. The use of surplus energy for hot water preparation constitutes a simple option, with low investment costs, for storing electricity in the form of heat and using it at a time of the customer's choosing. -
Page 72: Warning Notices On The Device
For a heating element with 9 kW output, the surplus power of 0 - 3 kW is controlled in a continuously variable manner in phase 1. If even more power is available, the Ohmpilot also activates phase 2 and phase 1 can again control the surplus in a continuously varia- ble manner between 3 –... - Page 73 Safety symbols: Danger of serious injury and damage due to incorrect operation Do not use the functions described here until you have fully read and unders- tood the following documents: These Operating Instructions All the Operating Instructions for the system components of the photovol- taic system, especially the safety rules Dangerous electrical voltage Before opening the machine, wait for the capacitors to discharge!
-
Page 74: Fronius Smart Meter
Fronius Smart Meter Integrating the A Fronius Smart Meter is required to operate the Ohmpilot so that the surplus energy Fronius Smart can be measured. An inverter with Datamanager 2.0 or higher from V3.8.1-x onwards or Meter a Datamanager Box from V3.8.1-x onwards is required to integrate the Fronius Smart Meter. -
Page 75: Control Elements And Connections
Ohmpilot. Press 2x WLAN access point is activated for 30 minutes so that settings can be imple- mented on the Ohmpilot via the Fronius Solar.web app. Press 3x Boost mode - dimmer level is activated for 4 hours at 100%, L2 and L3 are swit- ched through. -
Page 76: Connection Area
Connection area Green LED Blue LED Red LED Button Ethernet RJ45 At least CAT5, screened Modbus RTU (default address 40) Spring balancer 0.2 - 1.5 mm , max. 1000 m, screened and twisted Temperature sensor terminal connection PT 1000, spring balancer 0.2 - 1.5 mm INPUT - grid supply 1x 230 V, or 3x 230 V, spring balancer 1.5 - 2.5 mm OUTPUT - L3 heating element... -
Page 77: Selection Of Heater
Selection of heater 1-phase heater Controlled in a continuously variable manner from 0 to 3 kW 0.3 to 3 kW Purely resistive load (no electronic temperature limiters, fans, etc.) 3-phase heater: Controlled in a continuously variable manner from 0 to 9 kW. 0.9 to 9 kW Equal load distribution on all 3 phases (e.g. -
Page 79: Installation And Commissioning
Installation and commissioning... -
Page 81: Installation Location And Position
Installation location and position General Please note the following criteria when choosing a location for the Ohmpilot: comments regar- ding choice of Install only on a solid surface. location Max. ambient temperatures: 0 °C / +40 °C Relative humidity: 0 - 99% The airflow within the Ohmpilot is from the bottom to the top. -
Page 82: Explanation Of Symbols - Installation Position
Do not install the Ohmpilot in: in areas where ammoniac, corrosive vapours, acids or salts are present (e.g. fertiliser stores, ventilation openings from cattle sheds, chemical plants, tanneries, etc.) Do not install the Ohmpilot in: places where there is an increased risk of damage from farm ani- mals (horses, cattle, sheep, pigs, etc.) Stables or adjoining areas Storage areas for hay, straw, chaff, animal feed, fertilisers, etc. - Page 83 Do not install the Ohmpilot at an angle on a vertical wall. Do not install the Ohmpilot horizontally on a vertical wall. Do not install the Ohmpilot such that it overhangs with its connection sockets facing upwards. Do not install the Ohmpilot such that it overhangs with its connection sockets facing upwards.
-
Page 84: Wall Mounting
Wall mounting Safety WARNING! Danger due to residual voltage from capacitors. An electric shock can be fatal! ▶ Wait for the capacitors to discharge. The discharge time is 15 seconds. WARNING! Risk of burns from the heat sink when open. This can result in personal injury. -
Page 86: Installation
Installation Stripping lengths Stripping length of terminals on power stage set (L1, L2, etc.) Stripping length of terminals on control board (D+, D-, - and PT1000) Electrical con- WARNING! nection Danger from inadequate ground conductor connection. This can result in severe personal injury or damage to property. ▶... -
Page 87: 1-Phase Heating Element Up To 3 Kw
1-phase heating element up to 3 kW Application example 1 INPUT - grid supply 1x 230V network, spring balancer 1.5 - 2.5 mm² OUTPUT up to 3 kW variable, max. 13 A resistive load, spring balancer 1.5 - 2.5 mm² Hot water boiler Temperature sensor PT1000 External source (e.g. - Page 88 IMPORTANT! Plug & Play - no further settings are required for this application after suc- cessful connection to the inverter. The Fronius Smart Meter records the current power at the feed-in point and transfers the data to the Datamanager. By controlling the Ohmpilot, the Datamanager adjusts any sur- plus energy that is available to zero.
-
Page 89: 3-Phase Heating Element 900 W Up To 9 Kw
3-phase heating element 900 W up to 9 kW Application example 2 INPUT - grid supply 3x 230 V, spring balancer 1.5 - 2.5 mm² OUTPUT - L3 heating element OUTPUT - L2 heating element OUTPUT up to 3 kW variable, max. 13 A resistive load, spring balancer 1.5 - 2.5 mm²... - Page 90 IMPORTANT! Plug & Play - no further settings are required for this application after suc- cessful connection to the inverter. The Fronius Smart Meter records the current power at the feed-in point and transfers the data to the Datamanager. By controlling the Ohmpilot, the Datamanager adjusts any sur- plus energy that is available to zero.
-
Page 91: 1-Phase Heating Element Up To 3 Kw With Heat Pump Control
1-phase heating element up to 3 kW with heat pump control Application example 3 INPUT- grid supply 1x 230 V, spring balancer 1.5 - 2.5 mm² Multifunctional relay output WARNING! Dangerous voltages. A wire detaches and touches dangerous voltages. ▶ If signal cables are connected, the individual wires must be tied together with a cable tie directly upstream of the terminal. - Page 92 (10) Ferrite (included in scope of supply) The Fronius Smart Meter records the current power at the feed-in point and transfers the data to the Datamanager. By controlling the Ohmpilot, the Datamanager adjusts any sur- plus energy that is available to zero. In detail, this takes place by continuously adjusting the heating element connected to the Ohmpilot and by targeted switching on of the heat pump.
-
Page 93: Settings In The Menu Area
500 W. NOTE! The heat pump must be connected to the same Fronius Smart Meter. Between the switch-on and switch-off thresholds, the self-consumption of the heat pump must also be taken into consideration. For example, if the heat pump consumes 3000... -
Page 94: 1-Phase Heating Element Up To 3 Kw And External Source
1-phase heating element up to 3 kW and external source Application example 4... - Page 95 (10) Ferrite (included in scope of supply) The Fronius Smart Meter records the current power at the feed-in point and transfers the data to the Datamanager. By controlling the Ohmpilot, the Datamanager adjusts any sur- plus energy that is available to zero. In detail, this takes place by continuously adjusting the heating element connected to the Ohmpilot.
-
Page 96: Settings In The Menu Area
Settings in the menu area Open the Ohmpilot website Chapter Establishing the data connection on page describes how you can access the Ohmpilot website. Activate the "Temperature sensor present" field Activate the "Adapt day curve" field Adjust settings under "Time from", "Time to" and "Minimum temperature" as desired More information can be found in chapter Adapting the day curve on page... -
Page 97: Two Heating Elements - 3-Phase And 1-Phase
Two heating elements - 3-phase and 1-phase Application example 5 INPUT - grid supply 3x 230 V, Spring balancer 1.5 - 2.5 mm OUTPUT - L3 heating element OUTPUT - L2 heating element Multifunctional relay output OUTPUT up to 3 kW variable, max. 13 A resistive load, spring balancer 1.5 - 2.5 Hot water boiler Temperature sensor PT1000 External source (e.g. - Page 98 The Fronius Smart Meter records the current power at the feed-in point and transfers the data to the Datamanager. By controlling the Ohmpilot, the Datamanager adjusts any sur- plus energy that is available to zero.
-
Page 99: Settings In The Menu Area
Settings in the menu area Open the Ohmpilot website Chapter Establishing the data connection on page describes how you can access the Ohmpilot website. Under HEATER 1, select "Manual" and "Single-phase or Three-phase" Under HEATER 2, select "Single-phase or Three-phase" and enter the output of the load... -
Page 100: Two 3-Phase Heating Elements Up To 9 Kw
Two 3-phase heating elements up to 9 kW Application example 6 INPUT - grid supply 3x 230 V, Spring balancer 1.5 - 2.5 mm OUTPUT - L3 heating element OUTPUT - L2 heating element Multifunctional relay output OUTPUT up to 3 kW variable, max. 13 A resistive load, spring balancer 1.5 - 2.5 Contactor switching Hot water boiler Temperature sensor PT1000... - Page 101 The Fronius Smart Meter records the current power at the feed-in point and transfers the data to the Datamanager. By controlling the Ohmpilot, the Datamanager adjusts any sur- plus energy that is available to zero.
-
Page 102: Settings In The Menu Area
Settings in the menu area Open the Ohmpilot website Chapter Establishing the data connection on page describes how you can access the Ohmpilot website. Under HEATER 2, select "Three-phase" and enter the output of the load... -
Page 103: Establishing The Data Connection
Each inverter with a Fronius Smart Meter automatically connects itself to the Ohmpilot. inverter to the However, if there is more than one inverter with Fronius Smart Meter in the network, the Ohmpilot wrong inverter can be connected. In this case, the Ohmpilot can be manually connected under System Information on the website of the inverter to be connected. -
Page 104: Establishing A Connection Via Modbus Rtu
Before the access point is opened, it searches for available WLAN networks. Activate the "Ohmpilot" WLAN network on your smart device or PC. In the browser, enter the website http://192.168.250.181 or http://ohmpilotW.local. Alternatively, the Ohmpilot can also be searched on the network using the Fronius Solar.web app. NOTE! Access the Ohmpilot via the network. -
Page 105: Establishing A Connection Via Lan
Almost every router displays its connected devices (clients) on its web interface. Apps such as Fing can help you find the automatically assigned IP address. Alterna- tively, the Ohmpilot can also be searched on the network using the Fronius Solar.web app. - Page 106 Activate the "Ohmpilot" WLAN network on your smart device or PC. In the browser, enter the website http://192.168.250.181 or http://ohmpilotW.local. Alternatively, the Ohmpilot can also be searched on the network using the Fronius Solar.web app. Select the desired network in the WLAN network tab.
- Page 107 Alternatively, the Ohmpilot can also be searched on the network using the Fro- nius Solar.web app. NOTE! Device connections. Only one device can connect to the Ohmpilot. NOTE! Access the Ohmpilot via the network. In networks with a DNS suffix, the Ohmpilot can be accessed at http:// ohmpilotW.<DNS- Suffix>, e.g. http://ohmpilotW.fronius.com...
-
Page 109: Web Interface Of The Ohmpilot
Web interface of the Ohmpilot... -
Page 111: Web Interface
Web interface Status indicator on web interface Status Ohmpilot is operating in normal mode. Minimum temperature The minimum temperature has been exceeded. Heater 1 heats up to 100%. Legionella prevention Legionella heating is active. Heater 1 heats up to 100%. Boost The Ohmpilot has been switched to boost mode manually. -
Page 112: Optional Settings
Optional settings Manual settings NOTE! for HEATER 1 Settings not absolutely necessary. The settings described here can be made for all the application examples shown above. If they are not described for the respective example, they are not absolutely necessary. Setting the output of HEATER 1 manually: Under HEATER 1, select "Manual"... -
Page 113: Adapting The Day Curve
Activate the "Temperature sensor present" field Activate the "Legionella prevention (h)" field Enter the desired legionella prevention cycle NOTE! If no hygienic storage tank is being used, measures must be taken to kill legionella bacteria. If the boiler is operated at a temperature <60 °C for a relatively long period of time and no hygienic storage tank is being used, measures must be taken to kill the legionella bacteria. -
Page 114: Temperature Limitation
A PT1000 temperature sensor is required for this function and can be sourced from Fronius under item number 43,0001,1188. The position of the temperature sensor in the boiler should be selected so that sufficient hot water is avail- able. -
Page 115: Appendix
Appendix... -
Page 117: Status Codes
Status Codes Status codes Sending of errors Errors are saved in the Datamanager 2.0 and can be sent via Solar Web. Possible error outputs (as at 07/12/2015): Code Description Cause Remedy Heating element 1 faulty - The load on L1 is higher than 3 kW. Short Check heating element 1. - Page 118 Time not synchronised Time not synchronised in the last 24 Check connection bet- hours. Router has been switched off/ ween Ohmpilot and inver- reconfigured. ter. Switch on router. Check network settings. No connection to inverter No connection between inverter and Ohm- Check connection.
-
Page 119: Technical Data
Technical data Input data Frequency 50 Hz Nominal Voltage 230 V / 400 V Max. Input current 1 X 16 A / 3 x 16 A Interfaces Modbus RTU RS 485, max 1000 m, screened and twis- WLAN Ethernet min. CAT5, screened Temperature sensor IEEE 802.11 b/g/n PT1000 (max. -
Page 120: Tests/Specifications
Tests/specifications Tests/specificati- Tests/information according to EN60730 Section 1 Table 7.2 Construction Electronic RS 2.5.5, independently mounted RS Screwless terminals 2.10.6.1 type X mounting Classification of the RS according to Protection class I 6.8.3 protection against electric shock, Sec- tion 6.8 Type of shutdown or open circuit for Micro interruption according to 2.4.4. -
Page 121: Warranty Terms And Conditions, And Disposal
Detailed, country-specific warranty conditions are available on the internet turer's warranty www.fronius.com/solar/garantie Disposal If you decide in the future to replace your Ohmpilot, Fronius will take back the old device and arrange for it to be recycled in an appropriate manner. Applicable stan- CE mark... - Page 123 Uso prescritto Avvertenze riportate sull'apparecchio Fronius Smart Meter Integrazione di Fronius Smart Meter Posizione contatore Collegamento di Fronius Smart Meter a Fronius Datamanager 2.0 Elementi di comando e collegamenti Spie/elementi di comando presenti sull'apparecchio Scatola dei collegamenti Scelta del riscaldamento...
- Page 124 Configurazione della connessione mediante Modbus RTU Configurazione della connessione mediante LAN Configurazione della connessione mediante WLAN Interfaccia Web di Fronius Ohmpilot Interfaccia Web Indicazioni di stato sull'interfaccia Web Impostazioni opzionali Impostazioni manuali di "RISCALDAMENTO 1" Attivazione della protezione antilegionelle Adatta andamento giornaliero:...
-
Page 125: Norme Di Sicurezza
Norme di sicurezza Spiegazione delle AVVISO! avvertenze per la sicurezza Indica un pericolo diretto e imminente che, ▶ se non evitato, provoca il decesso o lesioni gravissime. PERICOLO! Indica una situazione potenzialmente pericolosa che, ▶ se non evitata, può provocare il decesso o lesioni gravissime. PRUDENZA! Indica una situazione potenzialmente dannosa che, ▶... -
Page 126: Condizioni Ambientali
Mai disattivare o eludere i dispositivi di protezione. Per conoscere l'esatta posizione delle avvertenze relative alla sicurezza e ai possibili pericoli presenti sull'apparecchio, consultare il capitolo "In generale" nelle istruzioni per l'uso dell'apparecchio stesso. Prima di accendere l'apparecchio, eliminare tutti i problemi che potrebbero pregiudicare la sicurezza. -
Page 127: Protezione Dei Dati
Protezione dei L'utente è responsabile dell'esecuzione del backup dei dati relativi alle modifiche appor- dati tate alle impostazioni di fabbrica. Il produttore non si assume alcuna responsabilità in caso di perdita delle impostazioni personali. Diritti d'autore I diritti d'autore delle presenti istruzioni per l'uso sono di proprietà del produttore. Il testo e le illustrazioni corrispondono alla dotazione tecnica dell'apparecchio al momento della stampa. -
Page 129: Informazioni Generali
Informazioni generali... -
Page 131: In Generale
0 e 100% (o 0 e 3 kW). Fronius Ohmpilot è inoltre dotato di 2 uscite aggiuntive per attivare altre fasi, consentendo così di regolare in... -
Page 132: Avvertenze Riportate Sull'apparecchio
3 e 6 kW. Se la potenza disponibile è superiore a 6 kW, Fronius Ohmpilot attiva anche la fase 3, mentre la fase 1 regola di nuovo in continuo la potenza tra 6 e 9 kW. - Page 133 Simboli di sicurezza: Pericolo di gravi lesioni personali e danni materiali dovuto al cattivo uso dell'apparecchio. Utilizzare le funzioni descritte solo dopo aver letto integralmente e compreso i seguenti documenti: le presenti istruzioni per l'uso tutte le istruzioni per l'uso dei componenti del sistema dell'impianto fotovol- taico, in particolare le norme di sicurezza.
-
Page 134: Fronius Smart Meter
Fronius Smart Meter Integrazione di Per il funzionamento di Fronius Ohmpilot è necessario un Fronius Smart Meter, così da Fronius Smart poter misurare l'energia in eccesso. Per integrare Fronius Smart Meter è necessario un Meter inverter dotato di Fronius Datamanager 2.0 o versione successiva a partire dalla ver- sione V3.8.1-x o una Fronius Datamanager Box a partire dalla versione V3.8.1-x. -
Page 135: Collegamento Di Fronius Smart Meter A Fronius Datamanager
Collegamento di Fronius Smart Meter a Fronius Datamanager 2.0... -
Page 136: Elementi Di Comando E Collegamenti
Il WPS (Wi-Fi Protected Setup) viene volta aperto per 2 minuti o fino alla riuscita dell'accoppiamento con il router. Pre- mendo il tasto WPS sul router, a Fronius Ohmpilot verrà trasmessa la password WLAN. Premendo 2 Il punto di accesso WLAN viene attivato volte per 30 minuti, così... -
Page 137: Scatola Dei Collegamenti
Connessione all'inverter assente volta con luce Misurazione della temperatura non rius- rossa cita Lampeggiante 2 Riscaldatore a immersione difettoso volte con luce Fronius Ohmpilot difettoso rossa Temperatura minima non raggiunta Lampeggiante 3 volte con luce rossa Lampeggiante 4 volte con luce... - Page 138 INGRESSO - Alimentazione rete 1x 230 V o 3x 230 V, dispositivo di trazione a molla 1,5-2,5 mm USCITA - Riscaldatore a immersione L3 Dispositivo di trazione a molla 1,5-2,5 mm (10) USCITA - Riscaldatore a immersione L2 Dispositivo di trazione a molla 1,5-2,5 mm (11) Uscita relè...
-
Page 139: Scelta Del Riscaldamento
Limitazione della temperatura Un interruttore termico meccanico sempli- fica la messa in funzione e l'uso. Se non è disponibile alcun interruttore termico meccanico, è possibile collegare a Fronius Ohmpilot anche un sensore termico che limiti la temperatura massima. (Vedere capitolo "Limitazione della... - Page 140 AVVERTENZA! Adattamento della potenza Per utilizzare in maniera ottimale la potenza in eccesso ed eseguire rapidamente il ris- caldamento successivo dell'acqua calda, la potenza del riscaldamento dovrebbe essere adattata alla potenza dell'impianto fotovoltaico. Esempio: 5 kWp => 4,5 kW di riscalda- mento.
-
Page 141: Installazione E Messa In Funzione
Installazione e messa in funzione... -
Page 143: Scelta Dell'ubicazione E Posizione Di Montaggio
Non montare Fronius Ohmpilot in esterni. Fronius Ohmpilot è conforme alla classe di protezione IP 54 ed è pro- tetto contro gli spruzzi d'acqua provenienti da qualsiasi direzione. Per ridurre il più possibile il riscaldamento di Fronius Ohmpilot, non esporlo all'irraggiamento solare diretto. -
Page 144: Spiegazione Dei Simboli - Posizione Di Montaggio
Spiegazione dei Fronius Ohmpilot è adatto al montaggio in verticale su una parete ver- simboli - Posi- ticale. zione di montag- Non montare Fronius Ohmpilot in orizzontale. - Page 145 Non montare Fronius Ohmpilot in posizione obliqua su una parete verticale. Non montare Fronius Ohmpilot in posizione orizzontale su una parete verticale. Non montare Fronius Ohmpilot a strapiombo con i collegamenti rivolti verso l'alto. Non montare Fronius Ohmpilot a strapiombo con i collegamenti rivolti verso l'alto.
-
Page 146: Montaggio A Parete
Fronius Ohmpilot deve essere montato con quattro viti. Assicur- arsi che le viti siano ben fissate e che la parete sia solida. Viti consigliate Per il montaggio di Fronius Ohmpilot, il produttore consiglia di utilizzare viti con un dia- metro di 4-6 mm. PRUDENZA! La presenza di impurità... -
Page 147: Montaggio A Parete Di Fronius Ohmpilot
Montaggio a parete di Fronius Ohmpilot... -
Page 148: Installazione
IMPORTANTE! Il collegamento con il conduttore di terra deve essere posizionato alla perfezione e collegato in maniera affidabile. IMPORTANTE! Fronius Ohmpilot deve essere dotato sul lato rete di un impianto di pro- tezione contro le sovracorrenti di massimo B16 A e di un interruttore automatico per cor- renti di guasto. -
Page 149: Riscaldatore A Immersione Monofase Fino A 3 Kw
Riscaldatore a immersione monofase fino a 3 kW Esempio di appli- cazione 1 INGRESSO - Alimentazione rete 1 x 230 V, dispositivo di trazione a molla 1,5-2,5 mm² USCITA fino a 3 kW, carico resistivo regolabile max. 13 A, dispositivo di trazione a molla 1,5-2,5 mm²... - Page 150 IMPORTANTE! Plug & Play: una volta eseguita correttamente la connessione all'inver- ter, questa applicazione elimina la necessità di ulteriori impostazioni. Fronius Smart Meter registra la potenza attuale sul punto di alimentazione e trasmette i dati a Fronius Datamanager. Fronius Datamanager, azionando Fronius Ohmpilot, stabi- lizza l'energia in eccesso disponibile su zero.
-
Page 151: Riscaldatore A Immersione Trifase Da 900 W A 9 Kw
Riscaldatore a immersione trifase da 900 W a 9 kW Esempio di appli- cazione 2 INGRESSO - Alimentazione rete 3 x 230 V, dispositivo di trazione a molla 1,5-2,5 mm² USCITA - Riscaldatore a immersione L3 USCITA - Riscaldatore a immersione L2 USCITA fino a 3 kW, carico resistivo regolabile max. - Page 152 IMPORTANTE! Plug & Play: una volta eseguita correttamente la connessione all'inver- ter, questa applicazione elimina la necessità di ulteriori impostazioni. Fronius Smart Meter registra la potenza attuale sul punto di alimentazione e trasmette i dati a Fronius Datamanager. Fronius Datamanager, azionando Fronius Ohmpilot, stabi- lizza l'energia in eccesso disponibile su zero.
-
Page 153: Riscaldatore A Immersione Monofase Fino A 3 Kw Con Azionamento Della Pompa Di Calore
Riscaldatore a immersione monofase fino a 3 kW con azionamento della pompa di calore Esempio di appli- cazione 3 INGRESSO - Alimentazione rete 1 x 230 V, dispositivo di trazione a molla 1,5-2,5 mm² Uscita relè multifunzione PERICOLO! Tensioni pericolose. Un filo si allenta e tocca tensioni pericolose. - Page 154 (10) Ferrite (compresa nella fornitura) Fronius Smart Meter registra la potenza attuale sul punto di alimentazione e trasmette i dati a Fronius Datamanager. Fronius Datamanager, attivando Fronius Ohmpilot, stabi- lizza l'energia in eccesso disponibile su zero. Nel dettaglio, ciò avviene grazie all'attiva- zione in continuo del riscaldatore a immersione collegato a Fronius Ohmpilot e all'attiva- zione mirata della pompa di calore.
-
Page 155: Impostazioni Nell'area Dei Menu
Configurazione della connessione dati pagina165 è descritto come è possibile raggiungere il sito Web di Fronius Ohmpilot. Alla voce "RISCALDAMENTO 2", selezionare "Pompa di calore SG Ready" per "Apparecchio di consumo". Alla voce "Soglia di attivazione", selezionare "Alimentazione" e specificare la potenza desiderata in watt a partire dalla quale la pompa di calore deve essere accesa. -
Page 156: Riscaldatore A Immersione Monofase Fino A 3 Kw E Sorgente Esterna
Riscaldatore a immersione monofase fino a 3 kW e sorgente esterna Esempio di appli- cazione 4... - Page 157 Fronius Ohmpilot. L'energia in eccesso viene consumata in continuo con il riscaldatore a immersione. La temperatura viene misurata da Fronius Ohmpilot. Se la temperatura è al di sotto della temperatura minima, viene azionata una sorgente esterna (ad es. un impianto gaster- mico) fino a raggiungere nuovamente la temperatura minima in modo che Fronius Ohm- pilot utilizzi solo l'energia in eccesso, senza prelevare energia dalla rete.
-
Page 158: Impostazioni Nell'area Dei Menu
Configurazione della connessione dati pagina165 è descritto come è possibile raggiungere il sito Web di Fronius Ohmpilot. Selezionare il campo "Sensore termico presente". Selezionare il campo "Adatta andamento giornaliero". Configurare come desiderato le impostazioni alle voci "Dalle ore", "Alle ore" e "Tem- peratura minima". -
Page 159: Due Riscaldatori A Immersione: Trifase E Monofase
Due riscaldatori a immersione: trifase e monofase Esempio di appli- cazione 5 INGRESSO - Alimentazione rete 3 x 230 V, dispositivo di trazione a molla 1,5-2,5 mm USCITA - Riscaldatore a immersione L3 USCITA - Riscaldatore a immersione L2 Uscita relè multifunzione Uscita fino a 3 kW, carico resistivo regolabile max. -
Page 160: Esempio Di Applicazione
Fronius Smart Meter registra la potenza attuale sul punto di alimentazione e trasmette i dati a Fronius Datamanager. Fronius Datamanager, attivando Fronius Ohmpilot, stabi- lizza l'energia in eccesso disponibile su zero. -
Page 161: Impostazioni Nell'area Dei Menu
Configurazione della connessione dati pagina165 è descritto come è possibile raggiungere il sito Web di Fronius Ohmpilot. Alla voce "RISCALDAMENTO 1" selezionare "manuale", "monofase" o "trifase". Alla voce "RISCALDAMENTO 2" selezionare "monofase" o "trifase" e specificare la potenza dell'apparecchio di consumo. -
Page 162: Due Riscaldatori A Immersione Trifase Fino A 9 Kw
Due riscaldatori a immersione trifase fino a 9 kW Esempio di appli- cazione 6 INGRESSO - Alimentazione rete 3 x 230 V, dispositivo di trazione a molla 1,5-2,5 mm USCITA - Riscaldatore a immersione L3 USCITA - Riscaldatore a immersione L2 Uscita relè... - Page 163 Fronius Smart Meter registra la potenza attuale sul punto di alimentazione e trasmette i dati a Fronius Datamanager. Fronius Datamanager, attivando Fronius Ohmpilot, stabi- lizza l'energia in eccesso disponibile su zero.
-
Page 164: Impostazioni Nell'area Dei Menu
Aprire il sito Web di Fronius Ohmpilot. Al capitolo Configurazione della connessione dati pagina165 è descritto come è possibile raggiungere il sito Web di Fronius Ohmpilot. Alla voce "RISCALDAMENTO 2" selezionare "trifase" e specificare la potenza dell'apparecchio di consumo. -
Page 165: Configurazione Della Connessione Dati
Ogni inverter dotato di Fronius Smart Meter si accoppia automaticamente con Fronius dell'inverter con Ohmpilot. Se però nella rete è presente più di un inverter dotato di Fronius Smart Meter, Fronius Ohmpilot è possibile che si accoppi con l'inverter sbagliato. In questo caso è possibile accoppiare manualmente Fronius Ohmpilot sul sito Web dell'inverter da accoppiare alla voce "Infor-... -
Page 166: Configurazione Della Connessione Mediante Modbus Rtu
Fronius Smart Meter e l'inverter Fronius o Fronius Datamanager 2.0). ante Modbus RTU Scollegare il bus RS485 con una resistenza sul primo e sull'ultimo apparecchio. Su Fronius Ohmpilot è possibile attivare la resistenza con il numero 5 del dip-switch. Vedere (A). Impostare l'indirizzo Modbus con l'ausilio dei numeri 1-3. -
Page 167: Configurazione Della Connessione Mediante Lan
LAN L'inverter cerca automaticamente Fronius Ohmpilot (la procedura di ricerca può durare fino a 5 minuti). Se il LED rosso è spento e il LED verde lampeggia, Fronius Ohmpilot funziona correttamente. L'interfaccia Web consente a Fronius Ohmpilot di impostare un indirizzo IP statico. -
Page 168: Configurazione Della Connessione Mediante Wlan
Il LED blu lampeggia (una volta) fintanto che WPS è attivo. Premere il pulsante WPS sul router entro 2 minuti. Se il LED blu su Fronius Ohmpilot è acceso con luce fissa, la connessione in rete è riuscita. L'inverter cerca automaticamente Fronius Ohmpilot (la procedura di ricerca può dur- are fino a 5 minuti). - Page 169 Fare clic su "Salva e connetti"; digitare la password WLAN. Se il LED blu su Fronius Ohmpilot è acceso con luce fissa, la connessione in rete è riuscita. L'inverter cerca automaticamente Fronius Ohmpilot (la procedura di ricerca può dur- are fino a 5 minuti). Se il LED rosso è spento e il LED verde lampeggia, Fronius Ohmpilot funziona correttamente.
-
Page 171: Interfaccia Web Di Fronius Ohmpilot
Interfaccia Web di Fronius Ohmpilot... -
Page 173: Interfaccia Web
Il riscaldamento con antilegionelle è attivo. Il riscaldamento 1 nelle riscalda al 100%. Boost Fronius Ohmpilot è stato fatto passare manualmente alla modalità Boost. Il riscaldamento 1 riscalda al 100%. Errore È stato rilevato un errore. Per maggiori informazioni, vedere su Fronius Solar.web. -
Page 174: Impostazioni Opzionali
Impossibile misurare automaticamente il riscaldatore a immersione 1. Per le applicazioni con un riscaldatore a immersione monofase e un riscaldatore a immersione trifase, Fronius Ohmpilot non può misurare automaticamente il riscaldatore a immersione 1 per via del cablaggio. In questo caso occorre eseguire manualmente la... -
Page 175: Attivazione Della Protezione Antilegionelle
Selezionare il campo "Sensore termico presente". Selezionare il campo "Adatta andamento giornaliero". Alla voce "Dalle ore", specificare l'ora a partire dalla quale Fronius Ohmpilot deve ini- ziare a riscaldare fino alla nuova temperatura minima. Alla voce "Alle ore", specificare l'ora fino alla quale Fronius Ohmpilot deve riscaldare fino alla nuova temperatura minima. -
Page 176: Limitazione Della Temperatura
Se "Riscaldamento 1" è la sorgente di riscaldamento primaria, occorre adattare comun- que l'andamento giornaliero per assicurare la temperatura minima desiderata. Per questa funzione è necessario un sensore termico PT1000, acquistabile presso Fronius con il codice articolo 43,0001,1188. La posizione del sensore termico all'interno del boiler dovrebbe essere scelta in modo da rendere disponibile acqua calda a sufficienza. -
Page 177: Appendice
Appendice... -
Page 179: Messaggi Di Stato
Messaggi di stato Messaggi di stato Invio degli errori Gli errori vengono salvati in Fronius Datamanager 2.0 e possono essere inviati mediante Fronius Solar.web. Possibili messaggi di errore (aggiornati al 07/12/2015): Codi Descrizione Causa Risoluzione RI 1 difettoso - Corto cir- Il carico su L1 è... - Page 180 Ohmpilot e inverter. Accendere il router. Con- trollare le impostazioni di rete. Connessione all'inverter Connessione tra IV e Fronius Ohmpilot Controllare la con- assente assente. IV spento. Fronius Ohmpilot nessione. Accendere l'IV. necessita di connessione all'IV anche di Aggiornare il software.
- Page 181 Dopo un blackout Fronius Dopo un blackout, se non riceve alcun Riavviare Fronius Ohmpi- Ohmpilot non funziona più indirizzo IP dopo 40 secondi, Fronius lot per ristabilire la con- assegna automaticamente un indirizzo IP nessione WLAN. fisso a "169.254.0.180" (vale solo se Fro- nius Ohmpilot è...
-
Page 182: Dati Tecnici
Dati tecnici Dati di entrata Frequenza 50 Hz Tensione nominale 230 V / 400 V Corrente di entrata max. 1 X 16 A / 3 x 16 A Interfacce Modbus RTU RS 485, max. 1000 m, schermato e intrecciato WLAN Ethernet almeno CAT5, schermato Sensore termico IEEE 802.11 b/g/n... -
Page 183: Prove/Indicazioni
Prove/indicazioni Prove/indicazioni Prove/indicazioni secondo la norma EN60730 paragrafo 1 tabella 7.2 Costruzione Dispositivo di comando elettronico 2.5.5 Dispositivo di comando montato indipendente Morsetti senza vite 2.10.6.1 Fissaggio di tipo Y Classificazione del dispositivo di Classe di protezione I 6.8.3 comando secondo la protezione con- tro le scosse elettriche paragrafo 6.8. -
Page 184: Condizioni Di Garanzia E Smaltimento
Le Condizioni di garanzia dettagliate specifiche per paese sono disponili in Internet truttore Fronius all'indirizzo www.fronius.com. Smaltimento Qualora un giorno si dovesse sostituire Fronius Ohmpilot, Fronius ritirerà l'apparecchio usato e provvederà a riciclarlo correttamente. Norme e direttive Marcatura CE considerate Tutte le norme e direttive necessarie ed attinenti nell'ambito della Direttiva UE pertinente vengono rispettate affinché... - Page 188 FRONIUS INTERNATIONAL GMBH Froniusstraße 1 A-4643 Pettenbach AUSTRIA contact@fronius.com www.fronius.com Under www.fronius.com/contact you will find the addresses of all Fronius Sales & Service Partners and locations.
Need help?
Do you have a question about the PVI1903OHM and is the answer not in the manual?
Questions and answers