Table of Contents
Advertisement
Quick Links
Advertisement
Table of Contents

Related Manuals for Matsusada Precision RKT Series


Summary of Contents for Matsusada Precision RKT Series
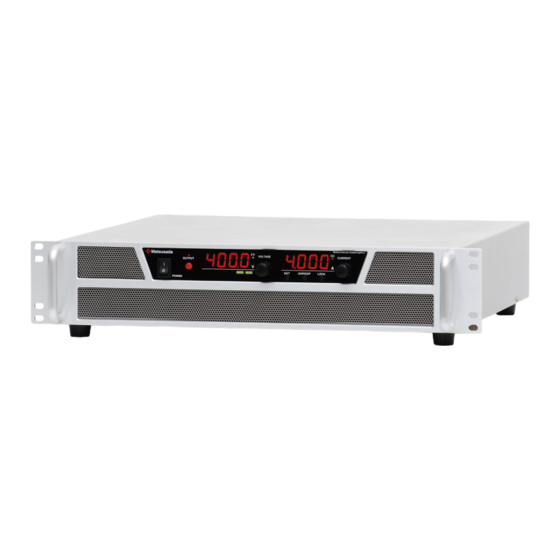
- Page 1 Instruction Manual RKT series MODEL *224.9.013* B/N: 224.9.013 Rev 1.3...
-
Page 4: For Safe Use
For Safe Use ◆ Introduction This product generates high voltage and energy. In order to use the product safely and prior to using the product, please read the instruction manual to the end before use in order to use the product safely, because there is a danger of death or serious injury due to electric shock. - Page 5 If the product does not have a fuse holder externally, the user cannot replace the fuse. If the fuse blows out, do not open the case or panel. Please contact our sales representative. ◆ Do not modify or damage the cable. It may cause electric shock and fire. MATSUSADA Precision Inc.
- Page 6 WARNING ◆ Designed for indoor use Use the product indoors. Do not use it outdoors or indoors where there is a possibility of water leakage, flooding, or crown. ◆ About operating temperature and humidity Use within the range of operating temperature and humidity stated in the instruction manual. Do not use it in a place where the ambient temperature becomes higher than the operation temperature of the product or in a narrow closed place.
- Page 7 For replacement, please contact our sales office (replacement require separate repair charges). Do not exchange fans with other users because there is a danger of electric shock, etc. MATSUSADA Precision Inc.
-
Page 9: Table Of Contents
・ 2-4-3 RKT(400W) Series Rear Panel .................. 6 ・ 2-4-4 RKT(800W) Series Rear Panel .................. 6 ・ 2-4-5 RKT(1600W) Series Rear Panel ................6 ・ 2-4-6 RKT Series Dimensions(mm) ..................9 2-5 Connection .......................... 10 ・ 2-5-1 Connecting with load ....................10 ・... - Page 10 ・ 6-5-4 Setting the current program with external resistance..........70 6-6 Remote programming function by fail-safe mode ..............71 ・ 6-6-1 Setting the voltage program with external resistance ..........71 ・ 6-6-2 Setting the current program with external resistance..........71 MATSUSADA Precision Inc.
- Page 11 6-7 Monitor/status output ......................72 ・ 6-7-1 Monitor output ......................72 6-7-2 Status output ......................72 ・ 7 Troubleshooting ..........................74 viii MATSUSADA Precision Inc.
-
Page 12: 1 Features And Specifications
(LCD, semiconductors and etc.) or system power supplies. With high frequent switching technology, RKT series enable high power and low noise output in such a compact body. -
Page 13: 2 Installation And Operation
・ Do not install the power supply unit in a place subject to dew condensation ・ In case welding process is present around power supply, disconnect all the wires from power supply. ! MUST ・ Install the unit horizontally when use. MATSUSADA Precision Inc. -
Page 14: Ventilation
POWER switch and so forth. * If the POWER switch is turned ON/OFF repeatedly in a short period, “Err7”ACF (input voltage drop) may be displayed to protect the internal circuits. MATSUSADA Precision Inc. -
Page 15: Connection Of Ac Input Cord
Secure the connection of AC input cord on terminal board or inlet tightly. INPUT AC100V-240V 50/60Hz Black L White N Green GND Example of terminal board Example of 1φ terminal board (more than RKT1.6kW) INPUT AC100V-240V Φ1 50/60Hz MATSUSADA Precision Inc. -
Page 16: Overview Of Panels
*Model over 350V has no monitor terminal. ⑰ ⑤ *FINE switch may not be attached by a model. 2-4-2 RKT(1600W) Series Front Panel ⑯ ⑭ ⑧ ⑮ ⑨ ③ ① ② ⑰ ⑪ ⑥ ⑫ ⑬ ⑩ ⑦ ③ MATSUSADA Precision Inc. -
Page 17: Rkt(400W) Series Rear Panel
2-4-4 RKT650-5(800W) Series Rear Panel RKT(800W) Series Rear Panel ③ ⑥ ③ ⑦ ④ ⑤ ⑧ ⑥ ⑦ ④ ⑤ ⑧ ② ② ⑨ ⑨ ① ① 2-4-5 RKT(1600W) Series Rear Panel ① ⑨ ⑩ ⑦⑥ ⑤④ ③ ② MATSUSADA Precision Inc. - Page 18 2 Installation and Operation 2-4-6 RKT Series Dimensions(mm) RKT(400W) Series Dimensions MATSUSADA Precision Inc.
- Page 19 2 Installation and Operation RKT(800W) Series Dimensions RKT650-5(800W) other models (terminal board) RKT650-5(800W) Dimensions MATSUSADA Precision Inc.
-
Page 20: Rkt Series Dimensions(Mm)
2 Installation and Operation 2-4-6 RKT(1600W) Series Dimensions(mm) Low voltage type of below 80V models (Bus bar output) High voltage type of over 100V models (terminal board) MATSUSADA Precision Inc. -
Page 21: Connection
2 Installation and Operation 2-5 Connection It is important to have correct connection and grounding in order to use RKT series power supply with high performance, high reliability and low ripple. For safe operation make sure to attach output terminal cover. -
Page 22: Connection Of Remote Sensing Wire
When used for a load which has arc or short circuit of faster than 1 per second without such additional protection, there is a possibility of smoke or liquid leakage from power supply. In such case contact our sales office for a solution before operation. MATSUSADA Precision Inc. -
Page 23: When Connecting To A Capacitive Load With Energy
By turning off NSC (Not Sink Current) switch on rear panel of RKT series, the function to sink the current from load shall be OFF, which is useful when the protection diode cannot be placed in series. -
Page 24: Tb1 Connector And Sw1 Switch
・Use caution since this may cause a dangerous situation. ・However, pins 6,11,12,13 and 19 are insulated from the other pins. ・For details, (see section “6-7-2 Status output”) ! ・Attach the cover for D-Sub connector provided before use. MUST MATSUSADA Precision Inc. -
Page 25: Sw1 Switch
( “Volt”: External Voltage / ON : External resistance ) “reSi”:External resistance ) Fail-safe mode (OFF/ON) “F.SaF” ( “OFF” : Disable / “ON” : Enable ) Power failure protection “PFP” ( “OFF”: Disable / “ON” : Enable ) MATSUSADA Precision Inc. -
Page 26: Instructions On The Connection Of Tb1 (Connector For Remote Control)
(NOTE:)In case above condition cannot be obtained, combination of –LGob (GP-IB/RS232C, Interface board) is recommended. Do not connect power supplies in series to connect Do not connect pin5 or 10 of TB1 to –output. the commons of the control voltage. 5 TB1 LOAD LOAD MATSUSADA Precision Inc. -
Page 27: 3 Outputting
Otherwise, the load to be connected may be damaged. Load Set OVP/OCP values Set voltage/current protection values to the maximum. (RKT80-20) Set voltage/current values Set voltage/current values to output. Start the output Press the OUTPUT switch to start the output. MATSUSADA Precision Inc. -
Page 28: 4 Normal Operation
4 Normal Operation 4-1 Description of Operation Modes The RKT Series power supply units are provided with two operation modes (constant voltage and constant current modes) and two control modes (local and remote modes). This section describes the constant voltage and constant current modes in the local modes. -
Page 29: Output Switch
Release in PRESET mode pushes PRESET switch once again. If a preset switch is pushed when an OUTPUT ON/OFF switch is ON, a setting voltage value and a setting current value will be displayed on a display for about 2 seconds. MATSUSADA Precision Inc. -
Page 30: Fine Switch
If a FINE switch is pushed continuously, the beam which can be changed will move. Release of FINE is canceled by pushing a FINE switch several times. In OVP/OCP, please push a FINE switch after pushing an OVP/OCP switch. MATSUSADA Precision Inc. -
Page 31: Power Failure Protection
Switch for power failure protection * When there is no functional alteration switch in a rear panel. It can change by power failure protection of a starting menu. ( "PFP" OFF (disable) / ON (Enable) ) (RKT400W/800W) MATSUSADA Precision Inc. -
Page 32: Output Voltage, Output Current Preset Button
650.0V 1.290A RKT80-100 80.0V 22.0A RKT650-8 650.0V 2.700A [Cuttenr Set] Variable voltage Current setting (400W/800W/1600W) setting Series RKT80-20 21.00V 20.00A RKT80-50 16.81V 50.00A RKT330-13.5 62.2V 13.50A RKT330-25 70.4V RKT650-5 16.81V 5.000A RKT80-100 17.60V 100.0A RKT650-8 220.0V 8.000A MATSUSADA Precision Inc. -
Page 33: Over Voltage Protection)/ O.c.p(Over Current Protection)
・ Display get back to normal from “Err 2” ・ Turn on OUTPUT ON/OFF switch(after temperature of inside the power supply get down) to resume the output or turn ON the LS (remote switch).(OUTPUT LED light on) MATSUSADA Precision Inc. -
Page 34: Lock
Press and hold down the LOCK switch How to cancel (for approx. 2 sec.) in Normal LOCK state. (for approx. 2 sec.) in Full LOCK state. How to check Not applicable when Multi-set function is Remarks enabled. MATSUSADA Precision Inc. -
Page 35: Remote Sense Function
* To cancel, turn OFF the OUTPUT ON/OFF switch or turn OFF the LS (remote switch) and reset. RKT(400W) series Remote sensing connection diagram +output wire (or output terminal on front panel) + +sense line Load -sense line Shield - -output wire (or output terminal on front panel) MATSUSADA Precision Inc. -
Page 36: Ld(Door Switch)
Pin7 on rear side becomes usable. Use it between attached D-Sub 25-pin male connectors 7 and 10. 【See section 5-3 Start Menu】(RKT(400W),RKT(800W)) VOLTAGE REMOTE CURRENT Change ON/OFF of LD OUTPUT OVP/ (inter lock) function with current setting dial. LOCK MATSUSADA Precision Inc. -
Page 37: Master/Slave Setting(The Option Nothing)
Start Menu“M_S” “MSt” “SLV” “OFF” * If you set the power to the Slave, Remote LED lights. If Remote LED dose not light even when the Master/Slave switch Slave, please check the “M_S” (Master/Slave Setting) of the StartMenu. MATSUSADA Precision Inc. -
Page 38: Master/Slave Function
Please to disable the sink current by the NSC switch to ON. (Parallel connection, please refer to 5-1-2.) Master/Slave connection When Master/Slave connection, unit of same model number can be connected. Master/Slave connection of different model could cause malfunction or failure. MATSUSADA Precision Inc. -
Page 39: Master/Slave
The StartMenu “M_S” is set rear panel made to “MSt”. Master. Slave REMOTE REMOTE OUTPUT OUTPUT OVP/ OVP/ LOCK LOCK The Master/Slave switch of The StartMenu “M_S” is set the rear panel is made Slave. to “SLV”. MATSUSADA Precision Inc. -
Page 40: Local Programming Mode Operation
・Try to avoid existence of high frequency power supply nearby wiring of remote function. (Especially important in case of high voltage floating) ・Although the unit integrates full protection circuits, there might be the possibility of failure when operated with excessive voltage or energy. MATSUSADA Precision Inc. -
Page 41: Remote Mode (Voltage, Current, Ovp)
User connection Internal circuit TTL signal -S (common) 10kΩ 100Ω External relay -S (common) ② Remote mode of output current Power supply unit User connection Internal circuit TTL signal -S (common) 10kΩ 100Ω External relay -S (common) MATSUSADA Precision Inc. - Page 42 ③ Remote programming of OVP Power supply unit User connection Internal circuit 10kΩ TTL signal 100Ω (common) External relay (common) ④ Remote programming of OCP Power supply unit Internal circuit User connection 10kΩ TTL signal 100Ω (common) (common) External relay MATSUSADA Precision Inc.
-
Page 43: Acf (Ac Fault Insufficient Ac Input Voltage)
・To cancel, turn OFF the OUTPUT ON/OFF switch or turn OFF the LS (remote switch) and reset. To resume the output turn on the output switch or turn ON the LS (remote switch). (after adjusting output POWER of O.P.P voltage / current value) (OUTPUT LED light on) MATSUSADA Precision Inc. -
Page 44: 5 Useful Operation
* The mode “a”, “b” or “c” is displayed only when the corresponding “SET”, “OVP/OCP”, or “LOCK” is pressed. You can check the present memory through the blink interval of SET LED. Mode No. Blink interval Memory “a” Memory “b” Memory “c” MATSUSADA Precision Inc. - Page 45 The “SET LED” stops blinking and the Multi-set mode is cancelled. *When the POWER ON/OFF switch of this unit is turned on, the Multi-set function restores to the state being kept when the power was turned off. MATSUSADA Precision Inc.
-
Page 46: Internal Resistance Function
Press down SET Press down SET OUTPUT OUTPUT OVP/ OVP/ LOCK LOCK Preset value are indicate Internal resistance value are indicate REMOTE REMOTE OUTPUT OVP/ OUTPUT OVP/ LOCK LOCK Turning current setting dial CURRENT (0 to maximum internal resistance) MATSUSADA Precision Inc. -
Page 47: Start Menu
*2: When there is no function-settings switch in a rear panel *3: When FINE switch is on a front *4: -LEt Option. Our SCPI commands are not supported the connecting between commands. ! CAUTION Command please sends a single unit. MATSUSADA Precision Inc. - Page 48 “def”. REMOTE REMOTE Press and hold down SET OUTPUT OUTPUT OVP/ OVP/ LOCK LOCK POWER ON Version is indicated ※It is able to enter into the start menu by holding down OVP/OCP switch at normal operation, MATSUSADA Precision Inc.
- Page 49 Power failure protection setting. setting Encoder setting FIX / ACCEL setting. LAN setting LAN setting. *1: -LDe Option *2: When there is no function-settings switch in a rear panel *3: When FINE switch is on a front *4: -LEt Option MATSUSADA Precision Inc.
- Page 50 *If “dEF”: default is displayed, all settings are initialized to the factory default. *Please notice that “dly” delay trigger function does not operate if “Pls” pulse sequence is functioned. Register settings. REMOTE OUTPUT OVP/ Press and hold down LOCK LOCK MATSUSADA Precision Inc.
-
Page 51: Menu Modes
The OFF delay time can be changed with either the voltage or current setting dial. (0.0 – 99.9 secs) Change OFF delay time by pressing OVP/OCP switch. VOLTAGE Voltage setting dial REMOTE Current setting dial CURRENT OUTPUT OVP/ Press down OVP/OCP Either can be used to change. LOCK MATSUSADA Precision Inc. - Page 52 Voltage setting dial REMOTE CURRENT Current setting dial OUTPUT OVP/ Either can be used Press LOCK to change. LOCK e. LOCK switch (press and hold down): register settings Register settings. REMOTE OUTPUT OVP/ Press and hold down LOCK LOCK MATSUSADA Precision Inc.
- Page 53 (0 – 31). REMOTE CURRENT Change unit numbers OUTPUT OVP/ with current setting LOCK dial. b. LOCK switch (press and hold down): register settings Register settings. REMOTE OUTPUT OVP/ Press and hold down LOCK LOCK MATSUSADA Precision Inc.
- Page 54 (ON/OFF). VOLTAGE REMOTE Change LD setting with OUTPUT CURRENT OVP/ current setting dial. LOCK b. LOCK switch (press and hold down): register settings Register settings. REMOTE OUTPUT OVP/ Press and hold down LOCK LOCK MATSUSADA Precision Inc.
- Page 55 * For time setting, 1.0 sec or shorter is not applicable. However, 0.0 can be set only at “a On”, “b On”, and “c On”. Change each ON time by pressing SET switch. VOLTAGE Voltage setting dial REMOTE Press down SET CURRENT Current setting dial OUTPUT OVP/ Either can be used to change. LOCK MATSUSADA Precision Inc.
- Page 56 * For OFF time setting, 1.0 sec or shorter is not applicable although 0.0 can be set. Change OFF time by pressing OVP/OCP switch. VOLTAGE Voltage setting dial REMOTE CURRENT Current setting dial OUTPUT OVP/ Press down OVP/OCP Either can be used to change. LOCK MATSUSADA Precision Inc.
- Page 57 REMOTE CURRENT Current setting dial OUTPUT OVP/ Either can be used to Press down LOCK change. LOCK g. LOCK switch (press and hold down): register settings Register settings. REMOTE OUTPUT OVP/ Press and hold down LOCK LOCK MATSUSADA Precision Inc.
- Page 58 “c On”: Ramp time when transferred to memory C can be set when used in combination with Multi-set/pulse sequence. Change ON time by pressing and holding down SET switch. REMOTE REMOTE REMOTE REMOTE Press and hold down SET OUTPUT OUTPUT OUTPUT OUTPUT OVP/ OVP/ OVP/ OVP/ LOCK LOCK LOCK LOCK MATSUSADA Precision Inc.
- Page 59 Current setting dial CURRENT OUTPUT OVP/ Either can be used to Press down LOCK change. LOCK f. LOCK switch (press and hold down): register each setting Register settings. REMOTE OUTPUT OVP/ Press and hold down LOCK LOCK MATSUSADA Precision Inc.
- Page 60 * The Master/Slave setting can be change OFF / MSt / SLV, When there is no function-settings switch in a rear panel b. LOCK switch (press and hold down): register each setting Register settings. REMOTE OUTPUT OVP/ Press and hold down LOCK LOCK MATSUSADA Precision Inc.
- Page 61 VOLTAGE current setting dial. REMOTE Change Interface CURRENT OUTPUT OVP/ setting with current setting dial. LOCK b. LOCK switch (press and hold down): register each setting Register settings. REMOTE OUTPUT OVP/ Press and hold down LOCK LOCK MATSUSADA Precision Inc.
- Page 62 OUTPUT Current setting dial OVP/ CURRENT Press down OVP/OCP Either can be used to LOCK change. d. LOCK switch (press and hold down): register settings Register settings. REMOTE OUTPUT OVP/ Press and hold down LOCK LOCK MATSUSADA Precision Inc.
- Page 63 REMOTE Change ON/OFF of CURRENT OUTPUT OVP/ power failure protection function with current LOCK setting dial. b. LOCK switch (press and hold down): register settings Register settings. REMOTE OUTPUT OVP/ Press and hold down LOCK LOCK MATSUSADA Precision Inc.
- Page 64 REMOTE Change ACCE/FIX of CURRENT OUTPUT OVP/ encoder setting with current setting dial. LOCK b. LOCK switch (press and hold down): register settings Register settings. REMOTE OUTPUT OVP/ Press and hold down LOCK LOCK MATSUSADA Precision Inc.
-
Page 65: List Of Start Menus
OFF delay Press None time None switch (0.0 - 99.9secs) None None None Press and hold down LOCK Slave unit setting Press None None switch (Local/Remote) Register Register Reset to Press and hold down settings settings Factory default MATSUSADA Precision Inc. - Page 66 None None None None None None None None switch (Local/Remote) Register Register Register Register Register Register Register Register Register Register Press Reset to Factory default settings settings settings settings settings settings settings settings settings settings hold down MATSUSADA Precision Inc.
-
Page 67: Delay Trigger Function
2. To enable/disable the ON delay / OFF delay, turn the current setting dial to change the delay function to “ON”/“OFF”. Turning to the right displays “ON”, and turning to the left displays “OFF”. If “ON” is selected, the delay function is enabled. If “OFF” is selected, the delay function is disabled. MATSUSADA Precision Inc. - Page 68 To set the Slave Local/Remote mode, turn the current setting dial. Turning to the right displays “Local”, and turning to the left displays “Remote”. * LGmb option is needed for MASTER/SLAVE operation. *In the MASTER/SLAVE operation, the OUTPUT control is always dependent on the MASTER unit operation. MATSUSADA Precision Inc.
- Page 69 “dly OFF”: Disables the delay trigger function. “dly ON”: Enables the delay trigger function. *If “dly” is selected, the ON delay time, OFF delay time and Slave Local/Remote setting are registered at the same time. MATSUSADA Precision Inc.
-
Page 70: Using Delay Trigger Function
1. Setting example when “ON” delay function is in use (1.0 sec) On the delay trigger menu, set “dly” to “ON”. 2. Setting example when “OFF “delay function is in use (1.0 sec) On the Delay Trigger menu, set “dly” to “ON”. MATSUSADA Precision Inc. - Page 71 By pressing the OUTPUT button on the Master unit, the countdown to stop of output starts on both the Master unit and the Slave unit. When the countdown reaches 0, the output stops. OUTPUT OUTPUT 1.0sec 2.0sec 1.0sec 2.0sec Master unit (+10.00V) Slave unit (+10.00V) MATSUSADA Precision Inc.
- Page 72 By pressing the OUTPUT button on the Master unit, the countdown to stop of output starts on both the Master unit and the Slave unit. When the countdown reaches 0, the output stops. OUTPUT OUTPUT 1.0sec 2.0sec 1.0sec 2.0sec Master unit (+5.00V) Slave unit (+15.00V) MATSUSADA Precision Inc.
-
Page 73: 6 Advanced Operation
+ 6-1-3 Divided Operation Connect as shown on the right dialog. When used in this way, the remote connector is - + connected to the -output. Do not connect together CAUTION with any other remote connector. -Vout MATSUSADA Precision Inc. -
Page 74: Ovp(Over Voltage Protection) Setting
・Turn the OUTPUT ON/OFF switch to reset the error, and then turn the voltage setting dial to 0. ・Turn the OUTPUT ON/OFF switch back ON, increase the output voltage gradually and make sure that the output is shut down at the set OVP voltage. Power supply unit User connection Internal circuit 0-10VDC (common) MATSUSADA Precision Inc. -
Page 75: Ocp(Over Current Protection) Setting
・Turn of OUTPUT ON/OFF switch to reset the error, and then turn the voltage setting dial to 0 ・Turn on OUTPUT ON/OFF switch again, and gradually increase the output current to make sure that unit stop the output at the set OCP current. User connection Power supply unit Internal circuit 0-10VDC (common) MATSUSADA Precision Inc. -
Page 76: Turning Output On/Off With The Remote Switch
(the OUTPUT LED is flashing) when the power is turned ON. To start output, turn the Remote Switch to Short. (If the Remote Switch is in Short when the power is turned ON, output will start.) MATSUSADA Precision Inc. - Page 77 User connection Internal circuit TTL LOW = OUTPUT : ON TTL signal TTL HIGH = OUTPUT : OFF 5kΩ (common) External relay SHORT = OUTPUT : ON 100Ω External relay External relay OPEN = OUTPUT : OFF (common) MATSUSADA Precision Inc.
- Page 78 If the remote switch in the start menu is set to "OFF" (invalid), it becomes also invalid when you want to reverse the use for floating of ② and the logic of ③. VOLTAGE Change ON/OFF of LS CURRENT (remote switch) function with REMOTE the current setting dial. OUTPUT OVP/ LOCK MATSUSADA Precision Inc.
-
Page 79: Remote Programming
100A RKT650-8 650V When the maximum dissipation is RKT (400W), it is 420.2W and RKT (800W), it is 840.5W and RKT (1600W) and 1760W is exceeded, the OPP (Over POWER Protection) operates and it suspends an output. MATSUSADA Precision Inc. -
Page 80: Setting The Voltage Program With External Voltage
* When there is no function-settings switch in a rear panel, Set “E.Vol” in Start menu ”Ext Cont” to ”reSi”. Power supply unit User connection Internal circuit common 0-10kΩ 8 7 6 5 4 3 2 1 RKT(1600W) Series MATSUSADA Precision Inc. -
Page 81: Setting The Current Program With External Voltage
* When there is no function-settings switch in a rear panel, Set “E.Cur” in Start menu ”Ext Cont” to ”reSi” Power supply unit User connection Internal circuit common 0-10kΩ 8 7 6 5 4 3 2 1 RKT(1600W) Series MATSUSADA Precision Inc. -
Page 82: Remote Programming Function By Fail-Safe Mode
* When there is no function-settings switch in a rear panel, Set “E.Cur” in Start menu ”Ext Cont” to ”reSi”, “F.SaF” is set to “On”. Power supply unit User connection Internal circuit (common) 0-10kΩ 8 7 6 5 4 3 2 1 RKT(1600W) Series MATSUSADA Precision Inc. - Page 83 Over voltage Protection ・OVP( Sink current : 5mA ・OTP( Over Temperature Protection or less. ・sence reverse connect ・LD(Door switch) ・OCP( Over Current Protection ・AC voltage drop * Output pins and common are to be shorted when status is on. MATSUSADA Precision Inc.
- Page 84 R = 4.7kΩ 22Ω or less 22Ω 22Ω PIN11or12or PIN6 13or19 22Ω When using with pins 6,11,12,13 and 19 floating, be sure to maintain the voltage on ! pins 5 and 10 at 100V or lower. CAUTION MATSUSADA Precision Inc.
- Page 85 <<On local control>> output value not ☐ Is the LS (10 pin and 21 pin) of Dsub? (See page 38.) produced.” * If the LS is set to Open, the OUTPUT LED flashes and no output starts. MATSUSADA Precision Inc.
- Page 86 Preset switch. “def” is displayed. This restores the factory setting. * If none of the above items apply or the symptom is not improved by checking all of them, please contact the sales office of your purchase. MATSUSADA Precision Inc.
- Page 87 MATSUSADA Precision Inc.
Need help?
Do you have a question about the RKT Series and is the answer not in the manual?
Questions and answers