
Related Manuals for Fakir TVL 30


Summary of Contents for Fakir TVL 30
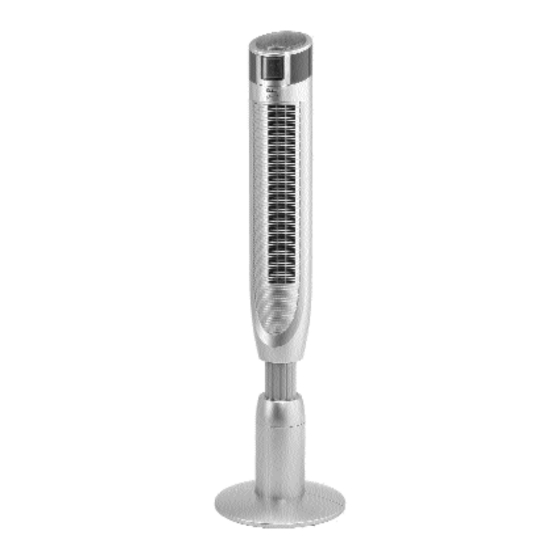
- Page 1 Kullanım Kılavuzu Operating Instructions TVL 30 Kule Tipi Vantilatör Tower Fan...
-
Page 2: Table Of Contents
GENEL ‹çerik Genel Kullan›m k›lavuzu hakk›nda…………...... Sorumluluk……………..........Kullan›m k›lavuzundaki iflaretler……………... Güvenlik CE deklarasyonu…………........Kullan›m amac›…............ Yetkisiz kullan›m…..........Çocuklar…............... Genel…..............Elektrik ak›m›..........……… Sevk…..............Tehlike durumunda………........Ar›za durumunda……........…. Genel Bak›fl Koli açma/teslimat kapsam›…....... Teknik Veriler............Kullan›m Öncesi Montaj..............Kumanda: Pillerin yerlefltirilmesi/de¤ifltirilmesi..Kullan›m Parçalar ve Fonksiyonlar........ -
Page 3: Genel
GENEL Kullan›m k›lavuzu Kullan›m k›lavuzu Bu kullanma k›lavuzu alm›fl oldu¤unuz üründen en iyi Bu kullanma k›lavuzu alm›fl oldu¤unuz üründen en iyi hakk›nda: hakk›nda: performans› alman›z için haz›rlanm›flt›r. Ürünü performans› alman›z için haz›rlanm›flt›r. Ürünü çal›flt›rmadan önce lütfen kullanma k›lavuzunu dikkatle çal›flt›rmadan önce lütfen kullanma k›lavuzunu dikkatle okuyunuz. -
Page 4: Ce Deklarasyonu
GÜVENL‹K CE Deklarasyonu: Cihaz, ürün ve ürün güvenli¤i yasas›na( GPSG) uygundur ve Avrupa Birli¤i standartlar›na (2004/108/EG) ” Elektromanyetik Uyumluluk ”ve “Düflük Voltaj Direktifi”(2006/95/EG)’ne uygun bir flekilde üretilmifltir. Cihaz›n etiketinde CE iflaretini görebilirsiniz. Bu cihaz sadece hafif ev ve ofis kullan›m› için tasarlanm›flt›r. Kullan›m amac›: Endüstriyel ve ticari kullan›m için uygun de¤ildir. -
Page 5: Genel
• Cihaz›n kablosunu bükmeyiniz ve üzerine herhangi bir nesne koymay›n›z. Afl›r› s›cak ortamda tutmay›n›z. • Cihaz›n kablosunda herhangi bir ar›za ya da hasar var ise, cihaz› kullanmay›n›z ve Fakir Yetkili Servisi’ne baflvurunuz. • Cihaz›n güç ç›k›fl› için tasarlanm›fl, uygun uzatma kablosu kullan›n›z. -
Page 6: Ar›Za Durumunda
GÜVENL‹K Arıza Durumunda: UYARI! “Ar›zal› bir cihaz› çal›flt›rmay›n›z. Elektrik çarpma tehlikesi vard›r.” UYARI! Fakir Yetkili Servisi’ne baflvurmadan önce, sorun giderme bölümünde belirtilen direktifler do¤rultusunda sorunun giderilmedi¤inden emin olunuz. (Sayfa 12) NOT! “E¤er sorunu kendiniz çözemiyor- san›z, lütfen Fakir Yetkili Servis’i NOT! ile irtibata geçiniz.”... -
Page 7: Genel Bak›Fl
GENEL BAKIfi Koli Açma/ Ambalaj› açt›ktan sonra, parça bütünlü¤ünü kontrol ediniz. Teslimat Kapsamı: Kumanda(piller dahil), Kule tipi vantilator (6 adet vida dahil) Vantilatör aya¤ı (4 adet vida dahil) Kullan›m k›lavuzu. E¤er cihaza nakliyesi s›ras›nda bir hasar meydana gelmifl ise, lütfen ürünü ald›¤›n›z ma¤aza ile irtibata geçiniz. -
Page 8: Kullan›M Öncesi
KULLANIM ÖNCES‹ Montaj UYARI! “Kurulum s›ras›nda cihaz›n fiflinin prize tak›l› olmad›¤›ndan emin olunuz.” UYARI! ‹ki parçadan oluflan ayaklar› birlefltiriniz. Kullan›m paneli afla¤› gelecek flekilde kule vantilatörünü ters çeviriniz ve tutunuz. Fiflli kabloyu aç›n ve ayak ortas›nda bulunan delikten geçiriniz. Aya¤› cihaz ile birlefltirin . Kablonun s›k›flmad›¤›ndan emin olunuz. -
Page 9: Kumanda: Pillerin Yerlefltirilmesi/De¤Ifltirilmesi
KULLANIM ÖNCES‹ Kumanda: Pillerin yerlefltirilmesi: 1- Uzaktan kumanda arkas›nda bulunan pil kapa¤›n› d›fla pillerin yerlefltirilmesi/ do¤ru itiniz ve kapa¤› al›n›z. de¤ifltirilmesi: 2- 2 adet pili belirtilen flekilde yerlefltiriniz. 3- pil kapa¤›n› tekrardan kapat›n›z. Pillerin de¤ifltirilmesi: 1- Uzaktan kumanda arkas›nda bulunan pil kapa¤›n› d›fla do¤ru itiniz ve kapa¤›... -
Page 10: Parçalar Ve Fonksiyonlar
KULLANIM Parçalar ve NOT! fonksiyonlar: “Cihaz› uzaktan kumanda ile veya uzaktan kumanda bölmesinde NOT! bulunan kontrol paneli ile kullanabilirsiniz. Seçilen fonksiyon ekranda görünecektir.” TIMER-zamanlayıcı Kontrol Paneli MODE-ayar OSC.-üfleme ON/OFF-açma/kapama Ionisation (‹yonizer) NATURAL-Mode Uzaktan SLEEP (Uyku) - Mode kumanda TIMER-Mode Oscillation (Üfleme) Hız “ON/OFF”... -
Page 11: Özel Fonksiyonlar
ÖZEL FONKS‹YONLAR Üfleme(sal›n›m): Cihaz dikey hareket edebilme özelli¤ine sahiptir. Seçmek istedi¤iniz 3 kademeli üfleme yönü için “OSC” (f) tufluna basmal›s›n›z. KAPALI - 90˚- 180˚- 360˚- KAPALI Zamanlay›c›: Bu özellik cihaz›n otomatikman kapanmas›n› sa¤lar. Kullan›m süresini belirlemek için, “TIMER” (d) tufluna her saat için bir kez bas›n›z. -
Page 12: Kullan›M Sonras
KULLANIM SONRASI Temizleme ve Bakım: UYARI! “Cihaz›n fiflini prizden çekiniz ve temizlik öncesi cihaz›n bir müddet so¤umas›n› bekleyiniz.” UYARI! DIKKAT! “Cihaz› temizlemek için tiner, alkol veya di¤er kimyasal s›v›lar› D‹KKAT! kullanmay›n›z.” Cihaz›n; • içindeki tozlar elektrikli süpürge veya basınçlı hava ile temizlenebilir. -
Page 13: Sorun Giderme
Ürünlerimiz s›k› kalite kontrollerine tabi tutulmaktad›r. Cihaz›n düzgün çal›flmamas› ihtimali bile bizim için bir üzüntüdür. E¤er sorunu kendiniz çözebilirseniz, Fakir Yetkili Servis’ine baflvurmadan önce kontrol ediniz. Sorunu kendiniz çözemiyorsan›z, lütfen Fakir Yetkili Servis’i ile irtibata geçiniz. UYARI! “Ar›za çözümü s›ras›nda cihaz›n fiflini prizden ç›kar›n›z. Böylelikle temizlik esnasında cihazın yanlıfl-... -
Page 14: Geri Dönüflüm
KULLANIM SONRASI Geri dönüflüm Cihaz›n kullan›m ömrü bittikten sonra kablosunu keserek cihaz› kullan›lmaz hale getiriniz. Daha sonra cihaz kanunlara göre yok ediniz. Elektrikli cihazlar› evinizde çöpe atmay›n. Bu maddeler sa¤l›¤a ve çevreye zarar verir. Cihazlar›n d›fl paketleri geri dönüflüme uygun materyallerden üretilmifl... - Page 15 General Table of contents General Information about the operating instructions ....15 Liability .................15 Notices in the operating instructions......15 Safety CE Declaration of Conformity ........16 Intended use ..............16 Unauthorized use............16 Children................16 General ................17 Electric current .............17 Dispatch ...............17 In case of danger ............17 In case of defects............18 Overview Unpacking/Scope of delivery ........
-
Page 16: Information About The Operating Instructions
General Information about the These operating instructions are intended to enable operating instructions: the safe and proper handling and operation of the tower fan. Read these operating instructions carefully before using the appliance for the first time. Keep the operating instructions in a safe place. Include these operating instructions when passing the tower fan on to another user. -
Page 17: Safety
Safety CE Declaration of This appliance fulfils the requirements of the Appliance Conformity and Product Safety Law (GPSG) and the EG Directives 2004/108/EG “Electromagnetic Compatibility” and 2006/95/EG “Low-Voltage Directive”. The appliance bears the CE mark on the rating plate. Intended use This fan may only be used for its intended purpose –... -
Page 18: General
Safety General • Do not direct the air flow directly at people. • Do not obstruct the air flow and keep a minimum clearance of 50 cm on all sides. Electric current • Incorrect voltage can destroy the appliance. Operate the appliance only if the voltage specified on the rating plate corresponds to the voltage in your household. -
Page 19: In Case Of Defects
Before contacting our service department, check to see if you can eliminate the problem yourself. > see Chapter “Troubleshooting” on page 25. NOTICE! “If you were not able to eliminate a problem yourself, please contact NOTICE! an authorized Fakir Service.”... -
Page 20: Overview
Overview Unpacking/ Unpack the appliance and check the contents Scope of delivery for completeness: Remote control (batteries included). Tower Fan with 6 screws Tower stand with 4 screws Operating Instructions If you detect damage from transport, contact your retail dealer immediately. NOTICE! “Keep the packaging material for storage and later transport (e.g. -
Page 21: Before Use
Before Use Assembly WARNING! “Prior to assembly, make sure that the mains plug is unplugged.” WARNING! Assemble two parts stand of tower fan. Reverse the tower fan and keep it. Let the power cord through the hole of the base. Assemble the stand with the tower fan. -
Page 22: Remote Control: Battery Placement And Changing
Before Use Remote control: 1- Open the battery compartment on the back. 2- Insert two batteries. battery placement and 3- Close the battery compartment. changing: Battery changing: 1- Open the battery compartment on the back. 2- Insert 2 (AAA/LR03 1,5 V) batteries . 3- Close the battery compartment. -
Page 23: Operation
Operation Parts and functions: NOTICE! You can use the appliance with remote control or control panel. Selected function will be indicated NOTICE! on the LCD. TIMER Control Panel MODE OSC. ON/OFF Ionisation NATURAL-Mode Remote SLEEP - Mode Control TIMER-Mode Oscillation Speed Power - on: Power - on:... -
Page 24: Special Functions
Special Functions Oscillation: Appliance is equipped for horizontal sewiveling. Press the “OSC” (f) button to select one of the three stages of the oscillation direction. OFF - 90˚- 180˚- 360˚- OFF Timer: This feature allows the device automatically switches off . To set the use of time, press once the “TIMER”... -
Page 25: After Use
After use Cleaning/care WARNING! “Switch off and unplug the appliance. Allow appliance to cool before starting with cleaning and care. This will prevent the appliance from WARNING! accidentally being switched on.” ATTENTION! “Do not use cleaning agents, abrasives or alcohol, since ATTENTION! they could damage the housing.”... -
Page 26: Troubleshooting
Switch on appliance No electricity at wall socket Use other wall socket not work. Power cord is damaged Contact an authorized Fakir Service Batteries are empty Insert new batteries Remote control does insert the batteries Batteries are inserted in reverse. -
Page 27: Disposal
After Use Disposal When the tower fan has reached the end of its service life, especially in the event of malfunctions, render the appliance unserviceable by first unplugging and then cutting the power cord. Dispose of the appliance in accordance with the applicable environmental regulations for your country. - Page 28 WAON DEVELOPMENT LIMITED ROOM 1006-1007,10/F.,Fortress Tower,250 King's Road,North Point,Hong Kong Tel: (852) 2578 3303,Fax: (852) 2887 8192...
Need help?
Do you have a question about the TVL 30 and is the answer not in the manual?
Questions and answers