
Subscribe to Our Youtube Channel
Related Manuals for Fakir ROTATING 360°


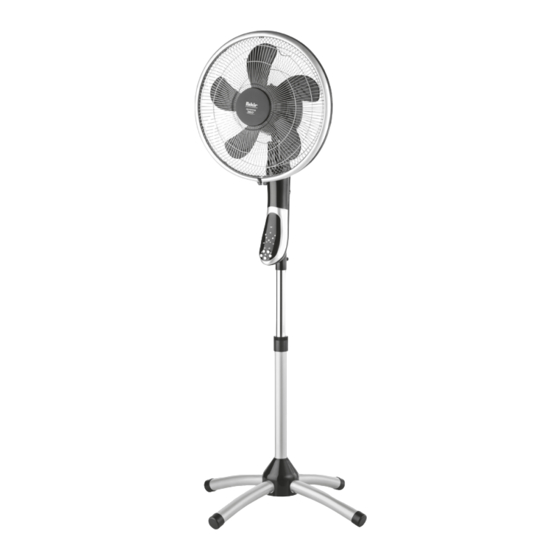
Summary of Contents for Fakir ROTATING 360°
- Page 1 ROTATING 360° Kullanım Kılavuzu Vantilatör Instruction Manual Pedestal Cooling Fan...
-
Page 2: Table Of Contents
GENEL Genel ................3 Kullanım kılavuzu hakkında..........3 Sorumluluk..............3 Kullanım Kılavuzundaki işaretler........3 Güvenlik ...............4 CE Deklarasyonu ............4 Kullanım Alanı..............4 Yetkisiz Kullanım............4 Çocuklar ................4 Elektrik akımı ..............5 Tehlike durumunda............5 Arıza durumunda............5 Genel Bakış ..............6 Kutuyu Açma ve İlk Kullanım...........6 Teknik Veriler ..............7 Kurulum ...............8 Ürün Parçaları..............8 Pervane ve Izgara montajı... -
Page 3: Genel
GENEL Size uzun yıllar güvenle hizmet verecek olan Fakir Rotating 360° stant vantilatörü satınalmış olduğunuz icin kutlarız. Kullanım kılavuzu Bu kullanma kılavuzu almış olduğunuz üründen en iyi hakkında performansı almanız için hazırlanmıştır. Ürünü çalıştırmadan önce lütfen kullanma kılavuzunu dikkatle okuyunuz. Bu kılavuzu ilerideki kullanımlar için güvenli bir yerde saklayınız. -
Page 4: Güvenlik
GÜVENLİK CE Deklarasyonu Cihaz, ürün ve ürün güvenliği yasasına( GPSG) uygundur ve Avrupa Birliği standartlarına (2004/108/EC) ” Elektromanyetik Uyumluluk ”ve “Düşük Voltaj Direktifi”(2006/95/EC)’ne uygun bir şekilde üretilmiştir. Cihazın etiketinde CE işaretini görebilirsiniz. Kullanım Alanı Ürün modeli ev tipi kullanım için tasarlanmıştır. İş yeri ve sanayi tipi kullanıma uygun değildir. -
Page 5: Elektrik Akımı
Cihazın kablosunu bükmeyiniz ve üzerine herhangi bir nesne koymayınız. Aşırı sıcak ortamda tutmayınız. Cihazın kablosunda herhangi bir arıza ya da hasar var ise, • cihazı kullanmayınız ve Fakir Yetkili Servisi’ne başvurunuz. Cihazın güç çıkışı için tasarlanmış, uygun uzatma kablosu kullanınız. Cihaz kullanımda değilken, cihazın yerini değiştirirken, cihazın parçalarını... -
Page 6: Genel Bakış
GENEL BAKIŞ Kutuyu Açma ve • Ön koruyucu kafes İlk Kullanım • Sıkma halkası • Somun • Pervane • Sabitleme vidası • Arka koruyucu kafes • Vida • Kafa • Boru sabitleme aparatı • Teleskopik boru • Taban • Kapak somunu •... -
Page 7: Teknik Veriler
GENEL BAKIŞ Teknik veriler Voltaj : 220-240 V AC Frekans : 50 Hz Maksimum Güç : 55W Hız kademesi 3 rüzgâr ayarı : (normal/doğal/uyku modu) Salınım : yatay 360° Salınım : dikey 35° Zamanlayıcı : maksimum 7,5 saat Kumanda : açma/kapama, hız sayacı, rüzgâr ayarı, 360°... -
Page 8: Kurulum
KURULUM Ürün parçaları 1. Kafes Şeridi 2. Yuvarlak kapak 3. Ön ızgara 4. Pervane sabitleme vidası 5. Pervane 6. Arka Izgara sabitleme vidası 7. Arka Izgara 8. Motor mili 9. Yukarı-aşağı salınım düğmesi 10. Motor gövdesi 11. Fan gövdesi 12. Kontrol paneli 13. -
Page 9: Pervane Ve Izgara Montajı
KURULUM Pervane ve Izgara 1.Arka Izgarayı motora monte ediniz ve arka ızgara sabitleme vidasıyla ızgarayı sabitleyiniz.. Pervaneyi de montajı sabitleme vidası ile bunun üzerine monte ediniz. 2. Arka ve ön ızgarayı birleştirildikten sonra kafes şeridini tornavida kullanarak ızgaraları sabitleyiniz. Yükseklik ayarı: Cihazın yüksekliği 132cm’den 155cm’e kadar ayarlanabilir. - Page 10 KURULUM DIKKAT! Eğer cihazın fanı dönmüyorsa/bloke olursa, cihazı DİKKAT! derhal kapatınız ve prizden çekiniz. Tekrar çalıştırmadan önce sorunu gideriniz. DIKKAT! Cihazı herhangi bir ısı kaynağından ve direk güneş DİKKAT! ışığından uzak tutunuz. Yüksek sıcaklık cihaza zarar verebilir.
-
Page 11: Kullanım
KULLANIM Vantilatörü düz bir zemine yerleştirin ve elektrik fişini 220-240V /50hz güç soketine sokun. Açma/Kapama Vantilatörü açmak için açma/kapama butonuna basın. Hava hızı ayarı Kontrol paneli ya da uzaktan kumanda üzerindeki hava hızı butonuna basarak 3 farklı hız şeçeneğine ulaşabilirsiniz. (Düşük / Orta / Yüksek ) 360°... -
Page 12: Kullanım Sonrası
KULLANIM SONRASI UYARI! Cihazın fişini prizden çekiniz ve temizlik öncesi cihazın bir UYARI! müddet soğumasını bekleyiniz. DİKKAT! Cihazı temizlemek için tiner, alkol veya diğer kimyasal DİKKAT! sıvıları kullanmayınız. Cihazın içindeki tozlar elektrikli süpürge ile temizlenebilir. Kafeslerin ve pervanenin temizlenmesi için yumuşak nemli bir bez kullanıp, daha sonra kurulayınız. -
Page 13: Sorun Giderme
Ürünlerimiz sıkı kalite kontrollerine tabi tutulmaktadır. Cihazın düzgün çalışmaması ihtimali bile bizim için bir üzüntüdür. Eğer sorunu kendiniz çözebilirseniz, Fakir Yetkili Servis’ine başvurmadan önce kontrol ediniz. Sorunu kendiniz çözemiyorsanız, lütfen Fakir Yetkili Servis’i ile irtibata geçiniz. UYARI! Arıza çözümü sırasında cihazın UYARI! fişini prizden çıkarınız. -
Page 14: Geri Dönüşüm
Sevk Cihaz orijinal ambalajında veya cihazın zarar görmesini önlemek için, iyi ve yumuşak pakette taşınması gerekmektedir. Urunumuz Fakir Elektrikli Ev Aletleri Dış Ticaret A.Ş adına Joyo Electric Appliance MFG. Ltd. Add.: Yanglong Village, Xinpu Town, Cixi, Ningbo, China tarafından uretilmiştir. - Page 15 GENERAL General............... 16 Information about the operating instructions ....16 Liability ................ 16 Notices in the operating instructions....... 16 Safety ................. 17 CE Declaration of Conformity........17 Usage Area..............17 Unauthorized Use ............17 Children ............... 17 Electric current ............. 18 In case of danger............
-
Page 16: General
GENERAL Thank you for purchasing Fakir Rotating 360° Pedestal Cooling Fan. It was developed and manufactured to work reliably for many years. Information about the These operating instructions are intended to enable the safe operating instructions; and proper handling and operation of the cooling fan. -
Page 17: Safety
SAFETY CE Declaration of This appliance fulfils the requirements of the Appliance and Conformity; Product Safety Law(GPSG) and the EU directives 2004/108/EC “Electromagnetic Compatibility” and 2006/95/EC “Low-Voltage Directive”. The appliance bears the CE mark on the rating plate. This product designed for just household use. It is not Usage Areause;... -
Page 18: Electric Current
SAFETY General Do not direct the air flow directly at people. Do not obstruct the air flow and keep a minimum clearance of 50 cm on all sides. Electric current Incorrect voltage can destroy the appliance. • Operate the appliance only if the voltage specified on the rating plate corresponds to the voltage in your household. -
Page 19: Overview
OVERVIEW Unpacking and Unpack the appliance and check the contents for completeness: first use Protective grille on front • Clamping ring • • Fan blade • Screw connection • Protective grille on back • Motor head • Knurled screw • Telescopic stand tube •... -
Page 20: Technical Data
OVERVIEW Technical data Rated voltage : 220-240 V AC Rated frequency : 50 Hz Max. power output : 55W Speeds 3 wind modes : normal/natural/sleeping Oscillation : Horizontal 360° Oscillation : Vertical 35° Timer : max. 7.5 hours Remote control : On-Off, speed, timer, wind modes, 360°... -
Page 21: Assembly
ASSEMBLY Parts Reference 1. Clamping ring 2. Circle plate 3. Front grille 4. Blades fastener 5. Blades 6. Back grille fastener 7. Back grille 8. Motor shaft 9. Up-down oscillation button 10. Motor housing 11. Fan body 12. Control panel 13. -
Page 22: Assembly Of Blades And Grilles
ASSEMBLY Assembly of blades 1. Remove and discard the plastic sleeve on the motor shaft. Position the back grille against the front of the motor housing and grilles through the motor shaft. Ensure that the handle at the back of grille is facing up and that all guiding pegs on the motor housing are lined up with cutouts on the rear grille. -
Page 23: Operation
OPERATION 1. Place the fan on a flat, level and stable surface and plug into 220-240V~50Hz power socket. Use ‘ON/OFF’ to power the fan ON/OFF. Setting of airflow speed Pressing ‘SPEED’ button on the control panel or supplied remote control will cycle the fan through 3 comfort speeds High/Medium/Low Setting of 360 degree oscillation This fan can operate in 360 degree oscillation or stationary... -
Page 24: After Use
AFTER USE Remote Controller 1. Insert 1xCR2025 button battery (included) into the back of Instruction the remote control. 2. Pull the insulation film out from the backside of the remote control before use it. 3. The remote controls all the functions as the base unit for convenience. -
Page 25: Trouble Shooting
AFTER USE Trouble shooting; Dear Customer, Our products are subjected to stringent quality controls. If this appliance should nevertheless fail to function properly, this is a mattter of regret for us. Before contacting our service department, check to see if you can eliminate the problem yourself. -
Page 26: Dispatch
Send the appliance in the original package or a similar, well-padded package to prevent damage to the appliance This product is produced on behalf of Fakir Elektrikli Ev Aletleri Dış Ticaret A.Ş. by Joyo Electric Appliance MFG. Ltd. Add.: Yanglong Village, Xinpu Town, Cixi, Ningbo, China... - Page 27 NOTES...
- Page 28 İmalatçı / İthalatçı Firma: Fakir Elektrikli Ev Aletleri Dış. Tic. A.Ş. Meşrutiyet Cad. No:43 Tepebaşı-İstanbul TÜRKİYE Tel:(212) 249 70 69 (pbx) Fax:(212) 251 51 42...
Need help?
Do you have a question about the ROTATING 360° and is the answer not in the manual?
Questions and answers
sadece sağa sola dönmezmi