Table of Contents
Advertisement
Quick Links
Advertisement
Table of Contents

Related Manuals for Breville Barista Touch BES880BSS2JAN1


Summary of Contents for Breville Barista Touch BES880BSS2JAN1
- Page 1 Barista Touch ™ Instruction Book - BES880...
-
Page 2: Table Of Contents
BREVILLE Contents RECOMMENDS SAFETY FIRST 2 Breville Recommends At Breville we are very safety Safety First conscious. We design and 2 Limited Product Warranty manufacture consumer 7 Warning for Button Battery 8 Components products with the safety of you, 10 Features... - Page 3 Breville Service...
- Page 4 Any procedure not listed your appliance. in this instruction booklet should be performed at This memory storage an authorised Breville consists of a small chip to Service Centre. The collect certain information installation of a residual about your appliance...
- Page 5 • Do not use any other chip please contact us at liquid apart from cold privacy@breville.com mains/town water. We do not recommend the use of highly filtered, SPECIFIC de-mineralised or distilled...
- Page 6 SPECIFIC metal surfaces are liable to get hot during use. INSTRUCTIONS • Use caution when using FOR WATER the descale feature as hot FILTER steam may be released. Before descaling, ensure • Filter cartridge should drip tray is empty and be kept out of reach of inserted.
-
Page 7: Warning For Button Battery
WARNING FOR BUTTON BATTERY Keep out of reach of children • The battery inside the • If you suspect your product shall not be child has swallowed or replaced or removed by inserted a button battery, the user at any time. immediately seek medical attention or call the 24- •... -
Page 8: Components
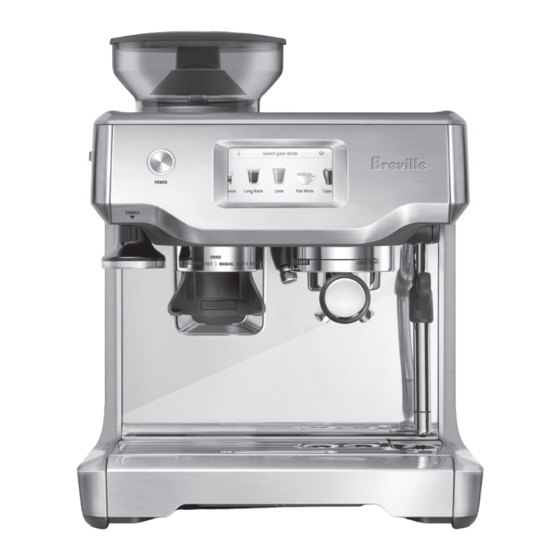
Components A. 250g bean hopper J. Removable wet & dry coffee separator With locking system for easy removal, drip tray storage and transfer of coffee beans. K. 2L removable water tank With replaceable water filter to reduce B. Integrated conical burr grinder impurities and scale. - Page 9 All parts of the Barista Touch™ that come into contact with coffee, water and milk are BPA Free. ACCESSORIES 7. Cleaning brush 1. Stainless steel milk jug 8. The Razor™ precision dose trimming tool 2. Cleaning disc 3. Cleaning tablets 9.
-
Page 10: Features
Barista Touch Features COLOUR TOUCH SCREEN HANDS FREE GRINDING CONTROL PANEL Auto stop for hands free grinding directly into the portafilter. Swipe & Select from the drinks menu. Adjust your shot volume, milk texture or milk THE RAZOR™ DOSE temperature, then save it as your personal TRIMMING TOOL favourite. -
Page 11: Assembly
Replacing the water filter after three months • Set the reminder for next month of or 40L will reduce the need to descale the replacement. We recommend to replace the machine. Filter can be purchased at Breville filter after 3 months. webpage. NOTE DO NOT use highly filtered, demineralised or distilled water in this machine. -
Page 12: Functions
NOTE Functions Using the drip tray protection guard cover is optional. But note that using the drip tray protection guard can protect your drip tray FIRST USE from dents and scratches 1. Press POWER button to turn the machine on. 2. - Page 13 DRINK SELECTION To enter Drinks Menu screen, touch the Home icon . Swipe & select your drink. Touch the 'Help & Tip' icon to see Barista Touch™ Guide. Select your drink Espresso Long Black Latte Flat White Cappuccino NOTE Please keep the touch screen dry and clean to ensure that the machine functions properly. DRINK SCREEN In this screen, you can customise your drink by touching the oval shaped buttons.
- Page 14 SETTING GRIND SIZE • Grinding will automatically stop, however if you wish to stop grinding before the cycle has Selecting Your Filter Basket finished, push and release the portafilter. Choose and insert the Filter Basket into the NOTE Portafilter for the number of coffees or strength you are making.
- Page 15 Trimming the Dose Place the portafilter underneath the group head so that the handle is aligned with the INSERT The Razor™ precision dose trimming tool position. Insert the portafilter into the group allows you to trim the puck to the right level for head and rotate the handle towards the center a consistent extraction.
- Page 16 TEXTURING MILK NOTE Different brands and types of milk and milk Prior to texturing milk, it is recommended to alternatives will texture differently. You may momentarily purge the steam wand by first need to adjust the froth level accordingly. Start touching the 'Milk' button.
- Page 17 HOT WATER AUTO OFF MODE The machine automatically switches to The HOT WATER function can be used to AUTO OFF mode after 30 minutes. pre-heat cups or add hot water manually. To start & stop hot water, touch 'Hot Water' on SETTINGS the screen.
-
Page 18: Tips
Tips PRE-HEATING Dual Wall Filter Baskets Use Dual Wall filter baskets if using Heating your cup or glass pre-ground coffee. A warm cup will help maintain the coffee’s Dual Wall filter baskets regulate the pressure optimal temperature. Pre-heat your cup by and help to optimise the extraction regardless rinsing with hot water from the hot water outlet of the grind, dose, tamp pressure or freshness. - Page 19 THE GRIND EXTRACTING ESPRESSO If grinding coffee beans, the grind size should • Place pre-warmed cup(s) beneath the be fine but not too fine. The grind size will portafilter and touch the 'Brew' button for the affect the rate at which the water flows through desired volume.
- Page 20 EXTRACTION GUIDE CORRECT EXTRACTION UNDER EXTRACTION OVER EXTRACTION • Flow starts after 8-12 secs • Flow starts after 1- 7 secs • Flow starts after 13 secs • Flow slow like warm honey • Flow fast like water • Flow drips or not at all •...
- Page 21 After texturing is complete HINTS & TIPS • Tap the jug on the counter-top to collapse • Fresh, quality coffee beans will give you the any bubbles. best possible extraction. • Swirl the jug to polish and re-integrate the • We recommend quality 100% Arabica beans texture.
- Page 22 ADJUSTING CONICAL BURRS Some types of coffee may require a wider grind range to achieve an ideal extraction or brew. A feature of your Barista Touch™ is the ability to extend this range with an adjustable upper burr. We recommend making only one adjustment at a time. PUSH AIR TIGHT CONTAINER...
-
Page 23: Care & Cleaning
The limitation of 40L is based on water hardness level 4. If you are in level 2 area, you can increase this to 60L. NOTE To purchase water filters visit Breville webpage. CLEANING CYCLE There will be a message prompt when a cleaning cycle is required. This is a back-flushing cycle and is separate from descaling. - Page 24 CLEANING THE CONICAL BURR GRINDER This grinder cleaning cycle removes oil build-up on the burrs which can impede performance. PUSH Unlock hopper Empty hopper Replace hopper Lock hopper Run grinder Unlock hopper Remove hopper empty Unlock top burr Remove top burr Clean top burr Clean lower Clean chute...
- Page 25 CLEANING THE STEAM WAND CLEANING THE DRIP & STORAGE TRAY • The steam wand should always be cleaned after texturing milk. Wipe the steam wand • The drip tray should be removed, emptied, with a damp cloth. and cleaned at regular intervals, particularly when the drip tray full indicator is visibly •...
- Page 26 Do not overtighten screw. 8. Re-insert the drip tray and water tank. Contact Breville Consumer Support or visit the Breville webpage for replacement silicone seals or for advice. 5. Once loosened, carefully remove and retain...
-
Page 27: Troubleshooting
Dosing Funnel ™ Troubleshooting PROBLEM POSSIBLE CAUSES EASY SOLUTION Water does not flow Water tank is empty. Fill tank. from the group head. Water tank is not fully inserted and Push water tank down completely to No hot water. locked into position. lock into place. - Page 28 PROBLEM POSSIBLE CAUSES EASY SOLUTION Espresso runs out Coffee is ground too coarsely. Use slightly finer grind. too quickly. Refer to ‘Setting the Grind Size’ under ; and ‘Under Extraction’ Functions under section. Tips Not enough coffee in the filter Increase dose of coffee.
- Page 29 PROBLEM POSSIBLE CAUSES EASY SOLUTION Coffee not hot enough. Cups not pre-heated. Rinse cups under hot water outlet and place on cup warming tray. Portafilter not pre-heated. Rinse portafilter under hot water outlet. Dry thoroughly. Milk not hot enough Make sure sensor is in contact. Adjust (if making a cappuccino milk temperature setting on screen..
- Page 30 Allow to cool for about 30–60 minutes. If problem persists, call Breville Support. No ground coffee No coffee beans in hopper. Filler hopper with fresh coffee beans.
- Page 31 Notes...
- Page 32 Web: www.breville.com www.breville.com Breville is a registered trademark of Breville Pty. Ltd. A.B.N. 98 000 092 928. Copyright Breville Pty. Ltd. 2023. Due to continued product improvement, the products illustrated/photographed in this brochure may vary slightly from the actual product.
Need help?
Do you have a question about the Barista Touch BES880BSS2JAN1 and is the answer not in the manual?
Questions and answers