EcoFlow WAVE EFH200 - Portable Air Conditioner Manual
- User manual (24 pages) ,
- User manual (40 pages)
Advertisement
Getting Started
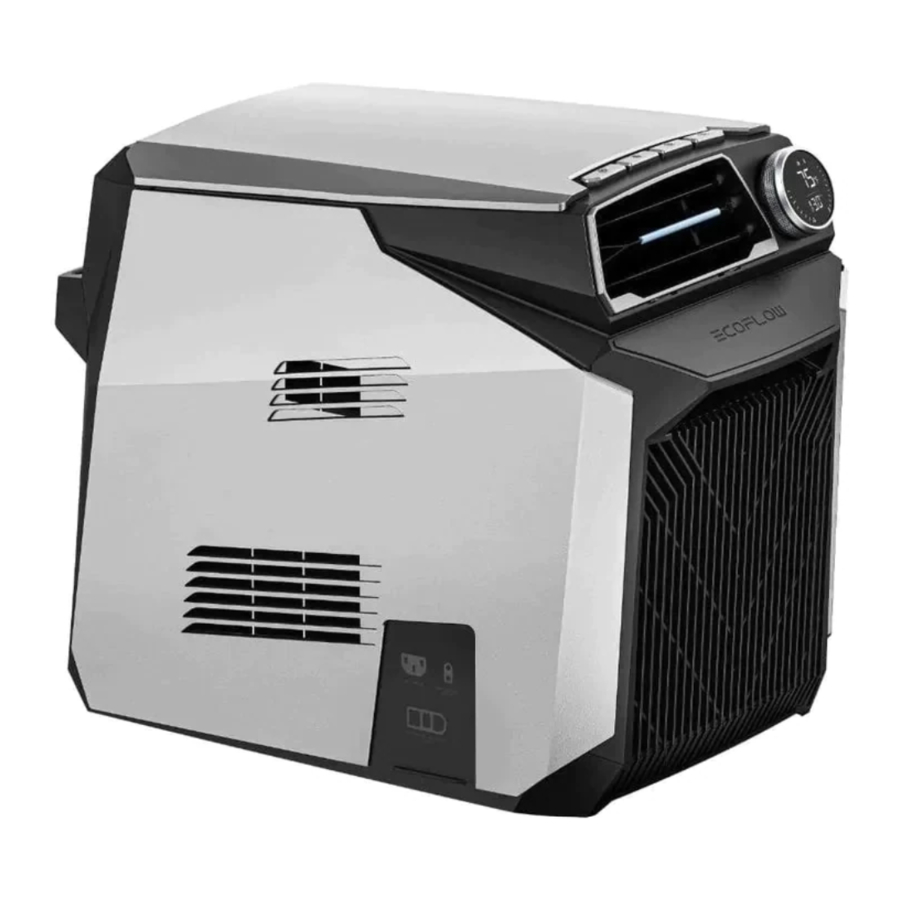
Description of Appearance

Icons on the LCD Screen
![]()
Using the Product

Short press the main power button to power on the device. After the device has started, the LCD screen will be illuminated and the main power indicator light will pulse. The product will enter Sleep Mode if left idle for 5 minutes without any activity, and the LCD screen will automatically switch off. If the product is then operated, the LCD screen will automatically illuminate. To turn the LCD screen on or off, short press the main power button. Press and hold the main power button to switch off the machine. When the Add-On Battery is the only power supply, pressing and holding the main power button will also switch off the Add-On Battery.
Setting the Timer

Short press the timer button. The timer icon and time will flash to indicate that you have entered the timer adjustment interface. Turn the dial to adjust the time — turn clockwise to increase the time or counter-clockwise to decrease the time. When connected to an AC power supply, the machine automatically shuts down at the set time; When connected to the Add-On Battery alone, the machine automatically shuts down when the screen battery has enough charge to be used for longer than the set time. If the screen battery cannot be used for the entire set time, the air conditioning has a built-in intelligent power distribution algorithm that reduces the cooling effect by a certain amount to achieve a longer run time.

Turn clockwise to increase the time

Counter-clockwise to decrease the time
Setting the Temperature

Short press the temperature button. The temperature icon and the temperature will flash to indicate that you have entered the temperature adjustment interface. Turn the dial clockwise to decrease the temperature and counter-clockwise to increase the temperature.

Default is air volume setting
Clockwise to decrease the air volume

Default is air volume setting
Counter-clockwise to increase the air volume
Setting the Temperature Unit
Press and hold the temperature button for three seconds to toggle the temperature between Fahrenheit and Celsius. Intelligent power distribution function: Extends the run time of the machine when connected only to the Add-On Battery/EcoFlow Power Station and when the remaining charge is limited.

Celsius

Degrees fahrenheit
Setting the Operating Mode

Short press the Mode button to switch to Cooling Mode; short press again to switch to Fan Mode (Fan Mode is only available in Car Charging or Solar Charging Mode)

Air supply mode

Refrigeration mode
No-Drain
Function This product has a self-evaporating, drain-free system that sprays condensation water from the evaporator to the condenser for heat dissipation and evaporation, eliminating the need for frequent drainage in environments with low humidity. Note: Some water droplets may not evaporate and it is normal for the hot-zone outlet to blow out a few water droplets. The no-drain function drains most of the condensation, but a small amount of water may still remain in the base. To avoid retaining water that may breed bacteria, tilt the machine slightly when not in use to completely drain the remaining water through the drainage port. Shut Down When Full Function The product is equipped with a function that shuts it down when it is full of water. When the ambient humidity is high, the air conditioner condensation cannot be completely drained by the no-drain system and the internal water level gradually rises. The machine has an overflow to prevent excessive water storage. After reaching a predetermined water level, the function is triggered to shut down the machine and prompt the user to connect the drainage tube to manually drain the water.
Note: Tilting the product can affect detection of the water level. Excessive tilting can cause the water level to be inaccurately detected, leading to unnecessary shutdown or the product not shutting down when full of water. The product should be positioned as horizontally as possible during use.
AC Power Supply
An AC power supply can be connected to power or charge the product. When the product is connected to AC power, press and hold the main power button and the machine will enter Standby Mode. If a battery is connected, the battery pack will be charged at maximum power. When the product is connected to AC power, short press the main power button and the device will operate normally. If a battery is connected, the product will prioritize providing power to the air conditioner via the built-in intelligent charging algorithm while simultaneously charging the battery pack at the optimum power.
Solar Charging
The product can be powered by solar energy. If a battery is connected when the product is in Standby Mode, the battery can be charged at a maximum rate of 200W. The operating state is limited by the power of the port and can only be operated in Fan Mode when powered separately. There are no restrictions when connected to other power sources (battery pack, AC power). If a battery is connected, it can operate in Fan Mode and charge the battery simultaneously.
Recommendation: Where possible, a battery should be connected when using car or solar charging.

Car Charging
The product can be powered via the in-car charging connector, which can supply a maximum current of 8A (supports 12V/24V) for charging when in standby mode. The operating state is limited by the power of the port and can only be operated in Fan Mode when powered separately. There are no restrictions when connected to other power sources (battery, AC power). If a battery is connected, it can operate in Fan Mode and charge the battery simultaneously.
Recommendation: Where possible, a battery should be connected when using car or solar charging.

Connecting the Add-On Battery
EcoFlow Wave Add-On Battery

Place the main unit on the top of the battery pack and slide into place. A clicking sound indicates that the main unit is properly connected to the battery pack. Then, insert the battery plug into the battery connector of the air conditioner. (See battery pack instructions for further details)
Wave supports the following batteries: EcoFlow Wave Add-On Battery, DELTA Max, DELTA Max Extra Battery, DELTA Pro, DELTA Pro Extra Battery.
(If using a portable power station such as DELTA Max)

Take the DELTA Max cable and connect it to the air conditioner; the air conditioner does not come with a separate cable for this. To connect the DELTA Pro cable to the air conditioner, the adapter must be connected first; the air conditioner does not come with a separate cable and adapter for this.
Using the App

EcoFlow APP
Control, monitor and customize your portable power station from afar with the EcoFlow App.
Download at: https://download.ecoflow.com/app
Privacy Policy
By using EcoFlow Products, Applications and Services, you consent to the EcoFlow Term of Use and Privacy Policy, which you can access via the "About" section of the "User" page on the EcoFlow App or on the official EcoFlow website at https://www.ecoflow.com/policy/terms-of-use and https://www.ecoflow.com/policy/privacy-policy
Installation
Installing the cold-end fan shroud and duct

Installing ventilation ducts

Installing the hot-end fan shroud and duct

Installing the drainage tube

Use Scenarios
Tent
- Place in an opening in the tent zipper with the cold end inside the tent and the hot end outside the tent

- Place outside the tent with the cold air vent directed into the tent

- Place inside the tent with the hot air vent directed outside the tent


RV

Indoors/kitchen

Frequently Asked Questions
| No. | Question category | Analysis of cause | Troubleshooting |
| 1 | The air outlet does not blow air or blows out little air |
|
|
| 2 | The unit does not cool or performance is poor |
|
|
| 3 | The fan is not running |
|
|
| 4 | The compressor is not running |
|
|
| 5 | Water is leaking from the base |
|
|
| 6 | The water pump is faulty |
|
|
Considerations for use:
- The operation of the air conditioner depends mainly on the exchange of heat from one end to the other. Therefore, when installing avoid blocking or obstructing the air inlet or outlet as this will reduce the cooling effect.
- It is recommended that the area to be cooled be less than 5m ² and without direct sunlight, since sunlight can increase the temperature in the space and reduce the cooling effect.
- Air conditioners can be used in different scenarios using air ducts, which should be installed as short as possible and with a good bending curve to avoid causing excessive air resistance and affecting the efficiency of the air conditioner.
- The air conditioner has a built-in water pump to provide the no-drain function. However, if the ambient humidity is high the drainage pipe must be connected to assist in draining the water.
- The air conditioner should be switched off via the power switch, and users should avoid directly pulling the plug out or shutting off the power to switch it off, as this may reduce the service life of the air conditioner.
- The power cable provided by EcoFlow should be used as the AC power cable for the air conditioner. The power plug should be plugged in firmly and not be loose, as this will result in poor contact and damage the air conditioner.
- To avoid frequent stopping and starting of the compressor, the compressor is set to stop for at least two minutes after switching off. It is normal for the compressor to not move for two minutes when switching on and off within a short period of time.
- The air conditioner must be placed as horizontally as possible; it is not recommended to exceed the maximum tilt angle of 15°, otherwise the reliability of the system operation will be reduced.
- Avoid exposure to rain or sunlight during operation, otherwise air conditioner components could be damaged.
Troubleshooting
| Fault code | Fault name | Solution |
| 5 | Wireless module failure | Disconnect the power supply (including the battery) and restart the machine |
| 10-12 | Electric drive board fault | Disconnect the power supply (including the battery) and restart the machine. If the problem persists, upgrade the system via the app and ensure it has the latest firmware version |
| 20-35 | Power board fault | Disconnect the power supply (including the battery pack) and restart the machine. If the problem persists, upgrade the system via the app and ensure it has the latest firmware version |
| 40-44 | Temperature sensor fault | Disconnect the power supply (including the battery) and restart the machine |
| 60 | Water level fault | Open the drainage port to drain the water, then restart the machine |
| 61 | Cold zone fan fault | Disconnect the power supply (including the battery) and restart the machine |
| 62 | Hot zone fan fault | Disconnect the power supply (including the battery) and restart the machine |
| 63 or 65 | Overheat protection | Remove any obstructions at the hot zone inlet and outlet, leave the machine for five minutes then restart the machine |
| 64 | Overcooling protection | Remove any obstructions at the cold zone inlet and outlet, leave the machine for five minutes then restart the machine |
Note: If the user still cannot solve the fault after handling the above solutions, please contact the after-sales personnel for maintenance.
What's In the Box

Maintenance
- After the machine has been shut down for storage, close the socket cover to prevent the ingress of dust.
- After the machine has been shut down for storage, any water droplets must be manually removed from inside the machine to prevent the formation of bacteria during long-term storage and avoid water spillage when the machine is moved.
- It is recommended that this product be stored at 20°C to 30°C (68°F to 86°F) and kept away from water, heat sources and other metal objects.
Specifications
| General Information | |
| Model number | EFH200 |
| Net weight | 17.5kg |
| Dimensions | 20.39 x 12.2 x 16.38 in |
| Wi-Fi | Supported |
| Bluetooth | Supported |
| Input Specifications | |
| AC input voltage/frequency | 100-240V ~ 50/60Hz |
| AC input power | Max 700W |
| Add-On Battery power | Max 600W |
| Solar charging input | 11-35V Max 12A Max 200W |
| Car charging input | 12 V/24V Max 8A Max 200W |
| Cooling Specifications | |
| Ambient temperature | 5°C ~ 50°C (41°F ~ 122°F) |
| Cooling temperature settings | 16°C ~ 30°C (60.8°F ~ 86°F) |
| Cooling capacity | 1200W |
| Circulation air volume | 290m³/h |
| Refrigerant/amount | R134a/0.4kg |
| Cooling input power (AC/DC) | 460W/410W |
| Max cooling power | 600W |
| Noise | |
| No-Drain Function | Supported |
| Shut Down When Full Function | Supported |
| Other Specifications | |
| EcoFlow Wave Add-On Battery | Supported |
| EcoFlow DELTA Max | Supported |
| EcoFlow DELTA Max Extra Battery | Supported |
| EcoFlow DELTA Pro | Supported |
| EcoFlow DELTA Pro Extra Battery | Supported |
This device contains a radio transmission module with type approval code CMIIT ID:2021DP3313.
Safety Guidelines
- It is strictly prohibited to place this product near heat sources, such as fire or heating furnaces.
- It is prohibited to use this product in strong static or strong magnetic field environments.
- It is prohibited to disassemble this product in any way or puncture this product with sharp objects.
- It is prohibited to use wires or other metal objects to cause this product to short circuit.
- Do not use unofficial components or accessories. If replacements are necessary, please visit EcoFlow's official sales channel for the relevant purchase information.
- It is strictly prohibited to stack other heavy objects on this product.
- Avoid impacts, falling, dropping or strong vibrations. In the case of severe external impact, please turn off the power immediately and stop using the product. Keep the product properly secured during transport to avoid vibration and impact.
- Handle this product with care to prevent it from being damaged due to overturning. If the product is overturned and badly damaged, switch it off immediately.
- It is strictly prohibited to block or obstruct the inlet or outlets of this product.
- t is strictly prohibited to overturn this product, as there is a risk of damaging the compressor.
- Keep this product out of the reach of children and pets. Please supervise children during use and ensure they do not play with the equipment.
- Store the product in a dry and ventilated place.
- If the interface of this product becomes dirty, wipe it with a dry cloth.
- Do not expose this product to rain or sunlight.
- Handle this product with care. If it is accidentally overturned, it must be left for six hours.
- It is prohibited to forcibly block the fan during use.
- Do not drop foreign objects into the fan inlets and outlets as these could damage the fans.
- Keep the inlets and outlets of the appliance at least 0.5 m away from any walls and other obstructions that interfere with the air inlet and outlet.
- If the power cable is damaged, it must be replaced by the manufacturer, their service agent or similarly qualified personnel in order to avoid hazards.
- Do not immerse this product in water or allow it to get wet. Do not use this product in the rain, damp conditions or wet environments.
- Operating the equipment in a residential environment may cause radio interference.
- Do not allow persons with reduced physical, sensory or mental abilities or lack of experience and knowledge (including children) to use the appliance unless they are supervised or instructed

Documents / Resources
References
Download manual
Here you can download full pdf version of manual, it may contain additional safety instructions, warranty information, FCC rules, etc.
Download EcoFlow WAVE EFH200 - Portable Air Conditioner Manual
Advertisement


Need help?
Do you have a question about the WAVE and is the answer not in the manual?
Questions and answers