Table of Contents
Advertisement
Advertisement
Table of Contents

Related Manuals for TomTom VIA 1435T


Summary of Contents for TomTom VIA 1435T
- Page 1 TomTom Via...
-
Page 2: What's In The Box
What’s in the box • TomTom Via including the Easy Click mount What’s in the • USB cable • USB car charger or RDS-TMC Traffic Receiver, depending on your product To check what is included in your product, see the list of box contents on the product packaging. -
Page 3: Gps Reception
Answer the questions by tapping the screen. GPS reception When you first start your TomTom Via navigation device, the device may need a few min- utes to determine your GPS position and show your current position on the map. In future, your position will be found much faster, usually within a few seconds. -
Page 4: Device Not Starting
If this does not solve the problem, you can reset the device. To do this, press and hold the On/Off button for 15 seconds and release the button when your device begins to restart. Charging your device The battery in your TomTom Via navigation device charges when you connect it to the car charger or to your computer. -
Page 5: Take Care Of Your Navigation Device
USB hub or USB port on a keyboard or monitor. Take care of your navigation device Never leave your TomTom Via or accessories on view when you leave the car as they may become an easy target for thieves. -
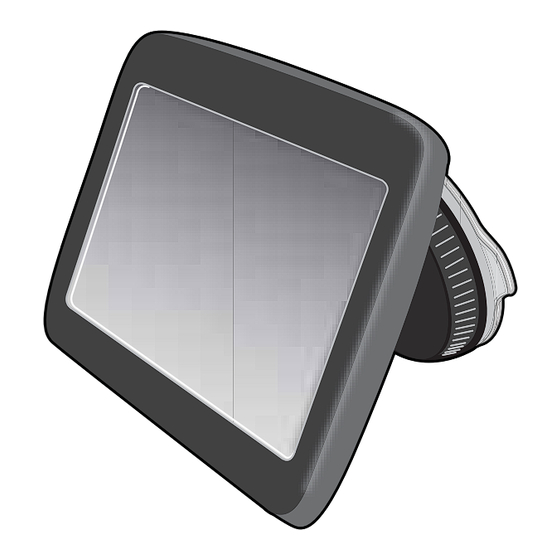
Page 6: Installing The Mount
These are some of the options included in the safety settings: • Show essential menu buttons while driving • Show safety reminders • Warn when driving faster than allowed You can also drive more safely by using voice commands to control your TomTom Via. -
Page 7: Planning A Route
Plan- ning a route should always plan a route before you start driving. To plan a route on your TomTom Via, do the following: 1. Tap the screen to open the Main menu. 2. Tap Navigate to... 3. Tap Address. - Page 8 5. Enter the streetname. • Streets with similar names are shown in the list while you type. • When the correct streetname appears in the list, tap the name to select the destina- tion. 6. Enter the house number, then tap Done. 7.
-
Page 9: Route Summary
9. When the new route is shown, tap Done. • For more information about the route, tap Details. • To plan a different route, tap Change route. Your TomTom Via starts to guide you to your destination, using spoken instructions and onscreen directions. Route summary The route summary shows an overview of your route, the remaining distance to your des- tination and the remaining estimated journey time. -
Page 10: Using Your Voice To Plan A Route
Show my frequent destinations You can set your TomTom Via to ask if you want to plan a route to one of your frequently visited destinations every time the device starts. To change this setting, do the following: 1. -
Page 11: Navigation Menu Options
Tap YES to enter a preferred arrival time. Your Via calculates your arrival time and shows you whether you will arrive on time. You can also use this information to work out when you need to leave. If your Via shows that you will arrive 30 minutes early, you can wait and leave in 30 minutes time, rather than arrive early. -
Page 12: Planning A Route In Advance
Position of last stop Planning a route in advance You can use your TomTom Via to plan a route in advance, selecting your starting point and your destination. Here are some more reasons to plan a route in advance: • Find out how long a journey is going to take before you start. -
Page 13: Viewing Route Information
7. Your TomTom Via plans the route between the two locations you selected. Viewing route information You can access these options for the route you last planned by tapping View route in the Main Menu or the Details button on the route summary screen. -
Page 14: About Voice Control
About voice control Voice control Instead of tapping the screen to control your TomTom Via, you can use your voice to con- trol your Via. For example, to increase the volume on your Via, you can say, "Increase volume." To view the list of available commands, tap Help in the Main menu then tap Product man- uals and then tap What can I say? Important: Voice control requires a computer voice. -
Page 15: Planning A Journey Using Your Voice
If the command is incorrect, say, "No" and repeat the command after you hear the tone. Your Via plans a route from your current location to your Home address. Tip: To stop your Via from listening out for further commands, say "Back" or "Cancel" or "Quit"... -
Page 16: Entering Addresses Using Your Voice
6. When the route has been calculated and the route summary is shown, tap Done. Your TomTom Via starts to guide you to your destination, using spoken instructions and onscreen directions. Entering addresses using your voice Important: In the interest of safety and to reduce distractions while you are driving, you should always plan a route before you start driving. - Page 17 To enter the destination using your voice, tap one of the following buttons: Tap this button to enter an address entirely using speech. Spoken address helps you to enter information without tapping the screen. Spoken address This option recognises the following spoken terms: •...
-
Page 18: About The Driving View
Driving View When your TomTom Via device starts for the first time, you are shown the Driving View along with detailed information about your current position. Tap the centre of the screen at any time to open the Main Menu. -
Page 19: Driving View Symbols
10.Navigation instruction for the road ahead and the distance to next instruction. If the sec- ond instruction is less that 150m after the first instruction, you see it shown immediately instead of the distance. Tap this part of the status bar to repeat the last voice instruction and to change the vol- ume. -
Page 20: Advanced Lane Guidance
Note: Lane guidance is not available for all junctions or in all countries. Your TomTom Via helps you prepare for motorway exits and junctions by showing the correct driving lane for your planned route. As you approach an exit or junction, the lane you need is shown on the screen. - Page 21 Tip: If no lane guidance is shown in the status bar and all lanes are highlighted, you can use any lane.
-
Page 22: Making Changes To Your Route
Making changes to your route About route changes Mak- change s to your route After you plan a route, you may want to change the route or even the destination. There are various ways to change your route without the need to completely replan the entire journey. - Page 23 Note: This button is only available when Traffic is enabled in the LIVE services menu. For more information about TomTom traffic information services, go to tomtom.com/services. Tap this button to change the current destination.
-
Page 24: View Map
Note: To show traffic information on the map, you need an RDS-TMC Traffic Receiver. Traffic services are not supported in all countries. For more information and to subscribe, visit tomtom.com/services. 3. Marker Markers point to your current location (blue), your home location (yellow) and your des- tination (red). -
Page 25: Cursor Menu
To create your own marker, tap the cursor button. Then tap Set marker position to place a green marker at the cursor position. To disable markers, tap Options, then tap Advanced and unselect Markers. • Coordinates - select this option to show GPS coordinates in the lower left corner of the map. Cursor menu... - Page 26 You can make the correction only on your own map or you can share Correct location the correction with the TomTom Map Share community. Tap this button to call the location at the cursor position. This button is only available if your Via has the phone number for the location.
-
Page 27: Map Corrections With Tomtom Map Share
This means that one year after the release date, you can still correct your own map but you cannot send or receive map corrections until you upgrade your map to the latest ver- sion. Note: TomTom Map Share is not available in all regions. For more information, go to tom- tom.com/mapshare. TomTom Map Share community To join the Map Share community, do the following: 1. -
Page 28: Map Correction Settings
These corrections are investigated and verified by TomTom and are included when the next map version is released. Map correction settings You can decide which map corrections from the Map Share community are used to cor- rect your maps. To select a category, tap Map corrections settings in the Map corrections menu. -
Page 29: Types Of Map Correction
Important: For safety reasons, do not enter the full details of a map correction while you are driving. Mark the location of the map error instead and enter the full details later. To show the report button in the Driving view, do the following: 1. - Page 30 6. Tap Done. The next time you connect your device to MyTomTom, your correc- tions are shared with the TomTom Map Share community. Tap this button to correct the traffic direction of a one-way street, where the direction of traffic is different to the direction shown on your map.
- Page 31 Tap this button to change the name of a street on your map. For example, to rename a street near to your current location: Edit street 1. Tap Edit street name. name 2. Tap Near you. 3. Select the street or section of a street you want to correct by tapping it on the map.
- Page 32 Tap this button to report other types of corrections. These corrections are not immediately applied to your map. Your TomTom Via sends a special report to TomTom Map Share. Other You can report missing streets, errors in motorway entrances and exits and missing roundabouts.
-
Page 33: Sounds And Voices
English language computer voice. For more information on computer voices, go to tomtom.com/services. Selecting a voice To select a different voice on your TomTom Via, tap Voices in the settings menu. Then tap Change voice and select the required voice. Changing the volume level You can change the volume on your TomTom Via in several ways. -
Page 34: Automatic Volume Control
Tap Settings in the Main menu, then tap Volume settings and move the slider to adjust the volume. Tap Test to listen to the new volume level. Automatic volume control To set your TomTom Via to automatically adjust the volume, do the following: 1. Tap Settings in the Main menu. 2. Tap Volume settings. -
Page 35: About Settings
About settings Set- tings You can change the way your TomTom Via looks and behaves. Most of the settings on your device can be accessed by tapping Settings in the Main Menu. Use night colours / Use day colours Tap this button to reduce the brightness of the screen and display the map in darker colours. -
Page 36: Phone Settings
Phone settings Status & Information Tap this button to find technical information on your TomTom Via such as the device serial number, application version and the map version. You can also view the current status for GPS reception. Status &... -
Page 37: Volume Settings
Tap this button to set the type of spoken directions and other route instructions your TomTom Via will read aloud. Voice settings Volume settings Tap this button to set the volume level for your TomTom Via. Move the slider to change the volume. Volume preferences... -
Page 38: Mytomtom Account
MyTomTom account Tap this button to log in to your TomTom account. You can only log in to one account at a time on your TomTom Via. If you have more than one account or several people share the same device, MyTomTom you can switch from one account to another as required. -
Page 39: Planning Settings
Tap IQ Routes to set if you want the device to use IQ Routes information to help find the best route. Set whether you want your TomTom Via to replan the current route if a faster route is found while you are driving. This is useful if traffic builds up or clears, further ahead on your route. -
Page 40: Change Car Symbol
Change car symbol Tap this button to select the car symbol that shows your current loca- tion in the Driving view. Change car symbol 2D/3D settings Tap this button to set the default view of the map. To switch between 2D and 3D views while driving, tap the centre part of the status bar in Driving View. -
Page 41: Brightness Settings
Tap Search to search for a colour scheme by typing the name. Change map colours To download more colour schemes, go to tomtom.com. Brightness settings Tap this button to set the brightness of the screen. Move the sliders to adjust the brightness level. -
Page 42: Battery Saving Settings
• Automatically adjust clock for time zone Reset factory settings Tap this button to delete all your personal settings and restore the standard factory settings to your TomTom Via. This is not a software update and will not affect the version of the soft- Reset factory ware application installed on your Via. -
Page 43: About Points Of Interest
Points of Interest About Points of Interest Points of Inter- Points of Interest or POIs are useful places on the map. Here are some examples: • Restaurants • Hotels • Museums • Parking garages • Petrol stations Tip: To report incorrect or missing information about an existing Point of Interest included with your map, use the Map Share service to share your corrections with the Map Share community. - Page 44 Tap this button to set your Home location as a POI. This is useful if you decide to change your Home location, but first want to create a POI using the current Home address. Home Tap this button to create a POI from a Favourite. You might want to create a POI from a Favourite because you can only create a limited number of Favourites.
-
Page 45: Using Pois To Plan A Route
7. Tap the name of the car park you want to use and tap Done when the route has been calculated. Your TomTom Via starts to guide you to the car park. Show POI on map Tap this button to select the types of Point of Interest (POI) you want to see on the map. -
Page 46: Calling A Poi
Note: Hands-free calling is not supported on all devices. Many of the POIs on your TomTom Via include phone numbers. This means you can use your Via to call the POI and plan a route to the location of the POI. - Page 47 Manage POIs Tap this button to manage your POI categories and locations. Tip: To report incorrect or missing information about an existing Point Manage POIs of Interest included with your map, use the Map Share service to share your corrections with the Map Share community. You can set your Via to let you know when you are near to selected POI locations.
-
Page 48: About Getting Help
Help About getting help Help Tap Help in the Main Menu to navigate to emergency services centres and other specialist services and contact them by phone. For example, if you are involved in a car accident, you could use the Help menu to call the nearest hospital and tell them your exact location. - Page 49 Tap this button to find the contact details and location of a service centre. Phone for help Note: Hands-free calling is not supported on all devices. Tap this button to navigate your way by car to a service centre. Drive to help Tap this button to navigate your way on foot to a service centre.
-
Page 50: Handsfree Calling
• You may have to enter the password ‘0000’ on your phone in order to connect to your TomTom Via. • Save your TomTom Via as a trusted device on your phone. Otherwise you need to enter ‘0000’ every time you use the phone. -
Page 51: Receiving A Call
When someone calls you, the caller’s name and phone number are shown. Tap the screen to accept or reject the call. Auto-answer You can set your TomTom Via to automatically answer incoming phone calls. To set automatic answering, tap Phone settings in the settings menu, then tap Auto- answer settings. - Page 52 Tap this button to change your Home phone number. Change Home number Tap this button to disable Bluetooth on your TomTom Via. Disable Bluetooth Tap this button to select information you want to delete. You can delete the list of recent callers and the list of recently dialled num- bers.
-
Page 53: About Favourites
Favourites About Favourites Favour- ites Favourites provide an easy way to select a location without the need to enter the address. They do not need to be favourite places, they can simply be seen as a collection of useful addresses. Creating a Favourite To create a Favourite, do the following: 1. -
Page 54: Using A Favourite
Tap this button to add your current location as a Favourite. For example, if you stop somewhere interesting, while you are there you can tap this button to create the Favourite. My location Tap this button to create a Favourite using the Map Browser. Select the location of the Favourite using the cursor, then tap Done. -
Page 55: Changing The Name Of A Favourite
Tip: Use the left and right arrows to choose another Favourite from your list. Your Via calculates the route for you. 6. When the route is calculated, tap Done. Your Via will immediately start guiding you to your destination with spoken instructions and visual instructions on the screen. -
Page 56: Using Traffic Information
The Traffic Message Channel (TMC) also known as RDS-TMC, transmits traffic information as a radio signal and is available free of charge in many countries. TMC is not a TomTom Service, but is available when using the TomTom RDS-TMC Traffic Receiver. -
Page 57: Setting The Radio Frequency For Rds-Tmc Information
5. Enter the frequency of the radio station. 6. Tap Done. Your TomTom navigation device looks for your radio station. If it doesn't find a radio sta- tion at the frequency you set, it automatically continues to search for the next available station. -
Page 58: Making Commuting To Work Easier
2. Tap Traffic. 3. Tap Traffic settings. 4. Choose between always taking the faster route automatically, being asked or never changing your route. 5. Tap Next and then Done. To manually minimise traffic delays at any time, do the following: 1. -
Page 59: Getting More Information About An Incident
3. Tap Work to home. The Driving View is shown and a message is displayed telling you about traffic incidents on this route. The Traffic sidebar also shows any delays. Getting more information about an incident To check for delays on your route, tap Show traffic on route in the Traffic menu. Your nav- igation device shows a summary of the traffic delays on your route. -
Page 60: Changing Traffic Settings
4. Tap on any traffic incident to get more information. A screen is shown that gives you detailed information about the incident you chose. To display information about surrounding incidents use the left and right arrows at the bot- tom of this screen. Changing Traffic settings Use the Traffic settings button to choose how Traffic works on your navigation device. -
Page 61: Traffic Menu
Traffic incident symbols: Accident Road works One or more lanes closed Road closed Traffic incident Traffic jam Weather related symbols: Rain Wind Snow Note: The incident avoided symbol is shown for any traffic inci- dent that you avoid using a traffic service. Traffic menu To open the Traffic menu, tap the Traffic sidebar in the Driving View or tap Traffic in the Services menu. - Page 62 Tap this button to change your settings for how the Traffic service works on your device. Read aloud traffic info Tap this button to hear spoken information about traffic incidents on your route. Note: Your TomTom device must have a computer voice installed to read information aloud.
-
Page 63: About Speed Cameras
By default, warnings are given 15 seconds before you reach a speed camera location. You are warned in three ways: • Your TomTom Via plays a warning sound. • The type of speed camera and your distance from the camera location is shown in the Driving View. -
Page 64: Changing The Way You Are Warned
Cameras menu. Changing the way you are warned To change the way your TomTom Via warns you about speed cameras, tap the Alert settings button. You can then set how close you want to be to a speed camera before Alert settings you are warned and what type of sound will be played. -
Page 65: Report Button
Toll road camera Restricted road camera - located on a minor road that reduces traffic on a larger road Other camera Mobile camera hotspot Average speed check Accident black spot Bi-directional speed camera Ungated railway crossing Report button To show the report button in the Driving View, do the following: 1. -
Page 66: Reporting A New Speed Camera While At Home
Note: This must be done within 20 seconds of receiving the camera alert. 2. Tap Remove. The next time you connect your navigation device to the TomTom website, the camera alert is reported as incorrect. Types of fixed speed camera you can report When you report a fixed speed camera, you can select the type of fixed camera you are reporting. -
Page 67: Average Speed Check Camera Warnings
This type of camera monitors traffic at toll road barriers. Toll road camera This type of speed camera checks the average speed of vehicles between two fixed points. Average speed check This type of camera checks traffic on roads where access is restricted. Vehicle restriction All other types of camera that do not fall into any of the above catego-... -
Page 68: Speed Cameras Menu
Intermediate warning - type 3 Once in the speed check zone, if you are driving at over 100% of the permitted speed and have not received a start of zone warning, you see a visual warning in the Driving View indicating the maximum permitted speed. -
Page 69: About Mytomtom
MyTomTom helps you manage the contents and services of your TomTom Via navigation device, as well as giving you access to the TomTom community. You log in to MyTomTom on the TomTom website. It is a good idea to frequently connect your navigation device to MyTomTom, to ensure you always have the latest updates. - Page 70 MyTomTom account To download content and services from TomTom, you need a MyTomTom account. You can create an account when you start using MyTomTom. Note: If you have more than one TomTom device, you need a separate account for each device.
-
Page 71: Customer Support
Tap this button to view technical information about your device, such as your serial number for your device and the TomTom App version. Version information Tap this button to check the status of your subscriptions to TomTom Services. My Services Tap this button to see the current status for GPS reception. -
Page 72: Important Safety Notices And Warnings
TomTom device. TomTom does not accept any liability for the availability and accuracy of GPS. Use with Care Use of a TomTom device for navigation still means that you need to drive with due care and attention. Aircraft and Hospitals Use of devices with an antenna is prohibited on most aircraft, in many hospitals and in many other locations. -
Page 73: This Document
The information in this document is sub- ject to change without notice. TomTom shall not be liable for technical or editorial errors or omissions contained herein; nor for incidental or consequential damages resulting from the performance or use of this material. -
Page 74: Copyright Notices
Produkt geltenden Garantien und Endnutzerlizenzvereinbarungen finden Sie unter www.tomtom.com/legal. © 2010 TomTom N.V., Pays-Bas. TomTom® et le logo composé de « deux mains », entre autres, font partie des marques commerciales appartenant à TomTom N.V. ou l'une de ses filiales. L'utilisation de ce produit est régie par notre garantie limitée et le contrat de licence utilisateur final, que vous pouvez consulter à... - Page 75 © 2010 TomTom NV, Holland. TomTom™ og logoet med "de to hænder" er blandt de var- emærker, produkter og registrerede varemærker, der tilhører TomTom International B.V.
- Page 76 TomTom N.V. vai kādam tā meitas uzņēmumam. Garantijas un gala lietotāja līgumus, kas piemērojami šim izstrādājumam, skatiet vietnē www.tomtom.com/legal. © 2010 TomTom N.V., Hollanda. TomTom® ve diğer logolar ile birlikte "iki el" logosunun mülkiyeti, TomTom N.V. veya bağlı şirketlerine aittir. Bu ürün için geçerli garanti ve son kullanıcı...
- Page 77 For more information, visit tomtom.com/gpl or to call your local TomTom customer support team, visit tomtom.com/support and upon your request we will send you a CD with the corresponding source code.
Need help?
Do you have a question about the VIA 1435T and is the answer not in the manual?
Questions and answers