Table of Contents
Advertisement
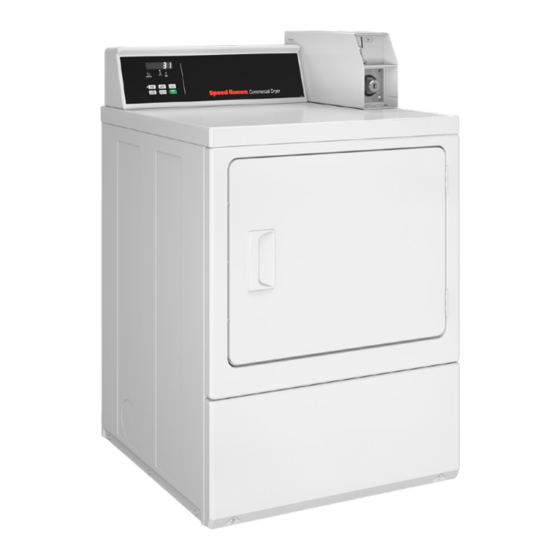
Clothes Dryer
Electric and Gas Models
DRY710C_SVG
Original Instructions
Keep These Instructions for Future Reference.
CAUTION: Read the instructions before using the machine.
(If this machine changes ownership, this manual must accompany machine.)
Part No. D514691ENR8
www.alliancelaundry.com
July 2019
Advertisement
Table of Contents

Subscribe to Our Youtube Channel
Related Manuals for Alliance Laundry Systems DV6000WG


Summary of Contents for Alliance Laundry Systems DV6000WG
- Page 1 Clothes Dryer Electric and Gas Models DRY710C_SVG Original Instructions Keep These Instructions for Future Reference. CAUTION: Read the instructions before using the machine. (If this machine changes ownership, this manual must accompany machine.) Part No. D514691ENR8 www.alliancelaundry.com July 2019...
- Page 3 Installation and service must be performed by a appliance. qualified installer, service agency or the gas sup- plier. W053 W052 This product uses FreeRTOS V7.2.0 (www.freertos.org). © Copyright, Alliance Laundry Systems LLC - Part No. D514691ENR8 DO NOT COPY or TRANSMIT...
- Page 4 Network Control Assembly maintains a separation distance great- er than or equal to 2.5 cm which is intrinsic to the installation as described in this manual. © Copyright, Alliance Laundry Systems LLC - Part No. D514691ENR8 DO NOT COPY or TRANSMIT...
-
Page 5: Table Of Contents
Insert Coins or Card..................32 © Copyright 2018, Alliance Laundry Systems LLC All rights reserved. No part of the contents of this book may be reproduced or transmitted in any form or by any means without the expressed written consent of the publisher. - Page 6 Dryer Interior....................35 Cabinet.....................35 Control Panel.................... 35 Exhaust System..................35 Lint Filter.....................35 Motor Overload Protector................36 For Energy Conservation................36 Troubleshooting..................37 Contact Information................39 Installer Checklist.................40 © Copyright, Alliance Laundry Systems LLC - Part No. D514691ENR8 DO NOT COPY or TRANSMIT...
-
Page 7: Safety Information
Read all instructions before using the dryer. • Use the dryer only for its intended purpose, drying clothes. ALWAYS follow the fabric care instructions supplied by the © Copyright, Alliance Laundry Systems LLC - Part No. D514691ENR8 DO NOT COPY or TRANSMIT... - Page 8 Failure to install, maintain, and/or operate this machine ac- cording to the manufacturer’s instructions may result in con- ditions which can produce bodily injury and/or property dam- age. © Copyright, Alliance Laundry Systems LLC - Part No. D514691ENR8 DO NOT COPY or TRANSMIT...
-
Page 9: Dimensions
711 mm [28 in.] 597 mm [23.5 in.] NOTE: Exhaust openings are 102 mm [4 inch] metal * With leveling legs turned into base. ducting. © Copyright, Alliance Laundry Systems LLC - Part No. D514691ENR8 DO NOT COPY or TRANSMIT... - Page 10 For maximum drying per- formance, we recommend that more clearance be al- lowed around the dryer than the clearances that are lis- ted throughout this manual. © Copyright, Alliance Laundry Systems LLC - Part No. D514691ENR8 DO NOT COPY or TRANSMIT...
-
Page 11: Installation
No other fuel burning appliance should be installed in the same The machine is shipped from the factory with the Electronic Con- closet with the dryer. trol Diagnostic Harness Assembly unplugged. To avoid unauthor- © Copyright, Alliance Laundry Systems LLC - Part No. D514691ENR8 DO NOT COPY or TRANSMIT... - Page 12 5. All four legs must rest firmly on the floor so the weight of the dryer is evenly distributed. The dryer must not rock. DRY2607N_SVG 1. Dryer Base 2. Level 3. Leveling Leg 4. Rubber Foot Figure 3 © Copyright, Alliance Laundry Systems LLC - Part No. D514691ENR8 DO NOT COPY or TRANSMIT...
- Page 13 Front View (Closet Door) 2 (G) DRY2637N_SVG 1. Closet Door 2. Centered Air Openings (G) (2 Openings minimum) 3. Outer Wall of Enclosure Figure 4 © Copyright, Alliance Laundry Systems LLC - Part No. D514691ENR8 DO NOT COPY or TRANSMIT...
-
Page 14: Connect Dryer Exhaust System
To reduce the risk from substances in the fuel or from fuel combustion, make sure this appliance is installed, operated, and maintained according to the instructions in this manual. W115 © Copyright, Alliance Laundry Systems LLC - Part No. D514691ENR8 DO NOT COPY or TRANSMIT... -
Page 15: Exhaust Direction
• Use 102 mm [4 inch] diameter rigid or flexible metal duct. Dryer is shipped from factory ready for rear exhaust. © Copyright, Alliance Laundry Systems LLC - Part No. D514691ENR8 DO NOT COPY or TRANSMIT... -
Page 16: Exhaust System
2.4 m [7.87 ft.], Note how each dryer has its own exhaust system vented to the as required to meet UL2158, clause 7.3.2.A. central exhaust duct. © Copyright, Alliance Laundry Systems LLC - Part No. D514691ENR8 DO NOT COPY or TRANSMIT... - Page 17 2. Clean Out Cover (Must be provided). Inspect monthly. 3. Weather Hood or Sweep Elbow (No cap or screen) 4. 610 mm [24 in.] Minimum Clearance to Roof/Ground Figure 6 © Copyright, Alliance Laundry Systems LLC - Part No. D514691ENR8 DO NOT COPY or TRANSMIT...
- Page 18 305 mm [12 inches] 326 mm [13 inches] 356 mm [14 inches] 381 mm [15 inches] 381 mm [15 inches] 406 mm [16 inches] Table 3 © Copyright, Alliance Laundry Systems LLC - Part No. D514691ENR8 DO NOT COPY or TRANSMIT...
-
Page 19: Gas Dryers - Connect Gas Supply Pipe
Gas Dryers - Connect Gas Supply Pipe mm [in- Part m [feet] ches] Number 610 [2,000] 2.44 D503776 [0.0960] Table 4 continues... © Copyright, Alliance Laundry Systems LLC - Part No. D514691ENR8 DO NOT COPY or TRANSMIT... - Page 20 Refer to Table 5 . Union at gas supply connection (listed to ANSI Z21.24 and CSA 6.10). © Copyright, Alliance Laundry Systems LLC - Part No. D514691ENR8 DO NOT COPY or TRANSMIT...
-
Page 21: Electric Dryer Only - Connect Electrical Plug
© Copyright, Alliance Laundry Systems LLC - Part No. D514691ENR8 DO NOT COPY or TRANSMIT... - Page 22 6. Strain Relief (Not supplied with dryer) 2. Power Cord 7. Ground Screw 3. Stain Relief Nut 8. “L1” Terminal 4. Strain Relief Figure 11 Figure 10 © Copyright, Alliance Laundry Systems LLC - Part No. D514691ENR8 DO NOT COPY or TRANSMIT...
-
Page 23: Connecting Power Cord With Three-Wire Plug
4. Neutral Terminal 5. “L2” Terminal 6. Black Wire 7. White Wire (Neutral) 8. Strain Relief (Not supplied with dryer) 9. Red Wire Figure 12 © Copyright, Alliance Laundry Systems LLC - Part No. D514691ENR8 DO NOT COPY or TRANSMIT... - Page 24 15. Direct Connection 16. Power Cord Connection Figure 13 1. Disconnect power to dryer. 2. Remove access cover from rear of dryer. D695I_SVG Figure 14 © Copyright, Alliance Laundry Systems LLC - Part No. D514691ENR8 DO NOT COPY or TRANSMIT...
-
Page 25: Connecting Power Cord With Four-Wire Plug
Connecting Power Cord with Four-Wire Plug NOTE: Four-wire cord is required for new branch-cir- cuit installations, mobile homes or where codes do not permit grounding through neutral. © Copyright, Alliance Laundry Systems LLC - Part No. D514691ENR8 DO NOT COPY or TRANSMIT... -
Page 26: Reverse Door, If Desired
10. Reinstall access cover and screw. Reverse Door, if Desired NOTE: Doors with windows cannot be reversed. © Copyright, Alliance Laundry Systems LLC - Part No. D514691ENR8 DO NOT COPY or TRANSMIT... - Page 27 DRY1918N_SVG Figure 27 7. Reinstall nine screws removed in Step 2. DRY1916N_SVG Figure 24 4. Rotate door panel 180 degrees as shown. DRY1919N_SVG Figure 28 © Copyright, Alliance Laundry Systems LLC - Part No. D514691ENR8 DO NOT COPY or TRANSMIT...
-
Page 28: Wipe Out Inside Of Dryer
W521 Figure 31 When plugging in the dryer: • DO NOT overload circuits. • DO NOT use an extension cord. © Copyright, Alliance Laundry Systems LLC - Part No. D514691ENR8 DO NOT COPY or TRANSMIT... -
Page 29: Recheck Steps
1. Close the loading door and start the dryer in a heat setting (re- ground. In the event of malfunction or breakdown, the earth/ fer to the operation instructions). © Copyright, Alliance Laundry Systems LLC - Part No. D514691ENR8 DO NOT COPY or TRANSMIT... -
Page 30: Gas Dryers
Meter Case of your choice. The factory mounted coin meter case does not include the service door lock, coin slide (if applicable), coin drawer, coin drawer © Copyright, Alliance Laundry Systems LLC - Part No. D514691ENR8 DO NOT COPY or TRANSMIT... -
Page 31: Additional Security
W883 1. Remove the Phillips head screw from service door (refer to Figure 35 ). 2. Remove two screws holding control panel to control hood. © Copyright, Alliance Laundry Systems LLC - Part No. D514691ENR8 DO NOT COPY or TRANSMIT... -
Page 32: Operation
2. Add fabric softener sheet if desired. IMPORTANT: To avoid damage to dryer, do not use DRY2534N_SVG more than one fabric softener sheet per load. Figure 39 Insert Coins or Card © Copyright, Alliance Laundry Systems LLC - Part No. D514691ENR8 DO NOT COPY or TRANSMIT... -
Page 33: To Insert Coins
Remove knits when slightly damp because overdrying may cause shrinkage. Do not tumble dry knit woolens. © Copyright, Alliance Laundry Systems LLC - Part No. D514691ENR8 DO NOT COPY or TRANSMIT... - Page 34 COOL DOWN is lit whenever the COOL DOWN portion of a heated cycle is active. It is also lit when the NO HEAT cycle is in operation. © Copyright, Alliance Laundry Systems LLC - Part No. D514691ENR8 DO NOT COPY or TRANSMIT...
-
Page 35: Maintenance
Exhaust System WARNING D608I_SVG1 1. Lint Filter To reduce the risk of electric shock, disconnect the electrical service to the dryer before cleaning. Figure 43 W043 © Copyright, Alliance Laundry Systems LLC - Part No. D514691ENR8 DO NOT COPY or TRANSMIT... -
Page 36: Motor Overload Protector
Should you plan to dry several loads, do them one after anoth- er, then you do not have to reheat the dryer unit’s interior parts each time. © Copyright, Alliance Laundry Systems LLC - Part No. D514691ENR8 DO NOT COPY or TRANSMIT... -
Page 37: Troubleshooting
Normal operating sounds include the heat source going on and off and the humming of air moving through the dryer and exhaust system. Table continues... © Copyright, Alliance Laundry Systems LLC - Part No. D514691ENR8 DO NOT COPY or TRANSMIT... - Page 38 • Ventilate room before drying clothes. © Copyright, Alliance Laundry Systems LLC - Part No. D514691ENR8 DO NOT COPY or TRANSMIT...
-
Page 39: Contact Information
+1 (920) 748-3950 for the name Table continues... and address of the nearest authorized parts distributor. DRY2527N_SVG 1. Serial Plate Figure 44 © Copyright, Alliance Laundry Systems LLC - Part No. D514691ENR8 DO NOT COPY or TRANSMIT... -
Page 40: Installer Checklist
Start and Run Dryer in Heat Setting to Verify Dryer is Heating. • Connect Electrical Cord. CHECK CHECK D699I_SVG1 Reverse Door, if De- sired. CHECK D675I_SVG1 Refer to the manual for more detailed information © Copyright, Alliance Laundry Systems LLC - Part No. D514691ENR8 DO NOT COPY or TRANSMIT...
Need help?
Do you have a question about the DV6000WG and is the answer not in the manual?
Questions and answers