
Subscribe to Our Youtube Channel
Related Manuals for Honda HRZ536CTDE


Summary of Contents for Honda HRZ536CTDE
- Page 1 Rotary Mower HRZ536CTDE OWNER'S MANUAL MANUEL DE L'UTILISATEUR BEDIENUNGSANLEITUNG MANUAL DE EXPLICACIONES GEBRIUKSAANWIJZING MANUALE DELL'UTENT © 2004-2007 American Honda Motor Co., Inc.—All Rights Reserved...
-
Page 2: Table Of Contents
CONTENTS SAFETY INSTRUCTIONS ................... 3 SAFETY LABEL ......................6 CONTROLS & FEATURES..................7 COMPONENT & CONTROL LOCATIONS ............... 7 DESCRIPTION OF CONTROLS................8 BEFORE OPERATION ....................11 ARE YOU READY TO GET STARTED? ..............11 IS YOUR LAWN MOWER READY TO GO?............11 CHECK YOUR WORK AREA ................. - Page 3 The warranty policy is a separate document provided by your dealer. Honda Power Equipment Mfg., Inc. reserves the right to make changes at any time without notice and without incurring any obligation. No part of this publication may be reproduced without written permission.
-
Page 4: Safety Instructions
SAFETY INSTRUCTIONS WARNING To insure safe operation - • Honda lawn mowers are designed to give safe and dependable service if operated according to instructions. Read and understand the Owner’s Manual before operating the mower. Failure to do so could result in personal injury or equipment damage. - Page 5 SAFETY INSTRUCTIONS • Replace faulty mufflers. • Before using, always visually inspect to see that the blade(s), blade • bolt(s) and mower housing are not worn or damaged. Replace worn • or damaged blade(s) and bolt(s) in sets to preserve balance.On multi- bladed machines, take care as rotating one blade can cause •...
- Page 6 SAFETY INSTRUCTIONS • Do not start the engine when standing in front of the discharge chute opening. • Do not put hands or feet near or under rotating parts. Keep clear of the discharge opening at all times. • Never pick up or carry a lawn mower while the engine is running. •...
-
Page 7: Safety Label
SAFETY INSTRUCTIONS SAFETY LABEL This label warns you of potential hazards that can cause serious injury. Carefully read the meaning of each label. If a label comes off or becomes hard to read, contact your dealer for replacement Symbol Meaning Read and understand the owner’s manual and the operation of all controls before... -
Page 8: Controls & Features
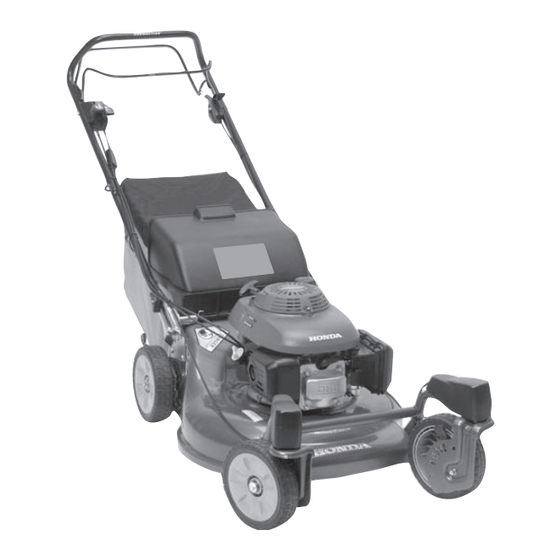
CONTROLS & FEATURES COMPONENT & CONTROL LOCATIONS Use this illustration to locate and identify the most frequently used controls. 1 Safety label 10 Caster wheel 2 Fuel valve 11 Mower deck 3 Throttle lever 12 Rear discharge guard 4 Shift lever 13 Grass bag 5 Caster wheel lock lever 14 Handlebar locking knob... -
Page 9: Description Of Controls
CONTROLS & FEATURES DESCRIPTION OF CONTROLS Fuel Valve The fuel valve [1] controls fuel flow from the fuel tank to the carburetor. The fuel valve must be ON [2] to start and operate the mower. The fuel valve should be kept OFF [3] when the mower is not in use. Throttle Lever CHOKE For starting a cold engine. - Page 10 CONTROLS & FEATURES Drive Clutch Lever The drive clutch lever [2] engages and disengages the transmission that drives the rear wheels. The drive clutch lever should only be engaged after the engine has been warmed up. Shift Lever The shift lever [3] selects the mower ground speed. For mowing thick grass or 1 (slow) maneuvering in small areas.
- Page 11 CONTROLS & FEATURES Cutting Height Adjustment Levers The mower deck can be set to any of the six approximate settings using the cutting height adjustment levers [7]. Each wheel should be adjusted to the same position. Lower deck Move front adjusters forward & rear adjusters backward. Raise deck Move front adjusters backward &...
-
Page 12: Before Operation
BEFORE OPERATION ARE YOU READY TO GET STARTED? Your safety is your responsibility. A little time spent in preparation will significantly reduce your risk of injury. Knowledge Read and understand this manual. Know what the controls do and how to operate them. Familiarize yourself with the lawn mower and its operation before you begin using it. -
Page 13: Check Your Work Area
BEFORE OPERATION Check the General Condition of the Lawn Mower: • Look around and underneath the lawn mower for signs of oil or gasoline leaks. • Look for signs of damage. • Check each control for proper operation. • Check the blade for wear. Replace as necessary (page 29). Check that the blade bolts are tight (page 30). - Page 14 BEFORE OPERATION Cutting Height Set all four adjustment levers [1] to the same cutting height position. Each position changes the height approximately 13 mm. To adjust cutting height, pull each adjustment lever toward the wheel, and move it into another notch. If you are not sure what cutting height to select, start with a high setting and check the appearance of the lawn after mowing a small...
- Page 15 BEFORE OPERATION Grass Bag A lawn mower works like a vacuum cleaner; it blows air through the bag, which traps the grass clippings. Always empty the grass bag before it becomes filled to the limit of its capacity. Bagging performance will diminish after the bag becomes about 90% full. Also, the bag is easier to empty when not packed full.
-
Page 16: Operation
OPERATION MOWING PRECAUTIONS Before operating the mower for the first time, please review the LAWN MOWER SAFETY chapter beginning on page 3 and the BEFORE OPERATION chapter beginning on page 11. Even if you have operated other mowers, take time to become familiar with how this mower works and practice in a safe area until you build up your skills. - Page 17 OPERATION 3. Release the drive clutch lever [6] (page 9). If the drive clutch lever is engaged, the mower will move forward when you operate the starter. 4. Pull back on the flywheel brake lever [7] and hold it against the handlebar. 5.
-
Page 18: Operating The Controls For Mowing
OPERATION OPERATING THE CONTROLS FOR MOWING Throttle Lever For best cut quality, always mow with the throttle lever [1] in the FAST [2] position. When the blade rotates at the preset fast speed, it creates a strong fan action that lifts and cuts grass more efficiently. Do not try to increase the preset engine speed, the blade could fracture and come apart. - Page 19 OPERATION Drive Clutch Lever Push the drive clutch lever [4] forward and hold it against the handlebar to propel the mower forward. Release the drive clutch lever to stop the mower’s forward movement. Always release the drive clutch lever before starting the engine. If the drive clutch is engaged, the mower will move forward when you operate the starter.
- Page 20 OPERATION Caster Wheel Lock Lever Use the caster wheel lock lever [1] to hold the front wheels in the straight ahead direction. The lock lever can be moved anytime while moving forward; however, if the lever is difficult to move to the RELEASE position [2], do not force it.
-
Page 21: Stopping The Engine
OPERATION STOPPING THE ENGINE 1. Move the throttle lever to the SLOW [1] position. 2. Release the drive clutch lever [2] . 3. Release the flywheel brake lever [3]. 4. When the mower is not in use, turn the fuel valve [4] to OFF [5]. -
Page 22: Safe Mowing Practices
OPERATION SAFE MOWING PRACTICES For your safety, keep all four wheels on the ground, and be careful to avoid losing your footing and control of the mower. Keep a firm grip on the handlebar and walk, never run, with the mower. Be very careful when mowing uneven or rough ground. - Page 23 OPERATION Obstacles Use the side of the mower to cut close to obstacles, such as fences or walls. Release the drive clutch lever to disengage the drive when mowing around trees and other obstacles. Push the mower around obstacles for better directional control. Be careful when mowing over obstacles embedded in the lawn, such as sprinkler heads, paving, edging, etc.
-
Page 24: Mowing Tips
OPERATION MOWING TIPS When to Mow Most grasses should be mowed when they have grown ½ to 1 inch above their recommended height. More frequent mowing is required for mulching than for bagging. For best mulching results, you may need to mow the lawn twice a week during the growing season. Cutting Height Consult a local nursery or lawn and garden center for cutting height recommendations and advice about specific types of grasses and... - Page 25 OPERATION Dry Grass If the ground is too dry, mowing will stir up a lot of dust. Besides being unpleasant to work in, too much dust will clog the air filter. If dust is a problem, water your lawn the day before mowing. Mow when the grass is dry to your touch, but the soil is still moist.
- Page 26 OPERATION Mowing Patterns Your Honda mower will work most efficiently if you use the following mowing patterns as much as possible. Mower deck and equipment design, and the direction in which the blade rotates, cause these mowing patterns to give the best results.
-
Page 27: Servicing Your Mower
Other service tasks that are more difficult, or require special tools, are best handled by professionals and are normally performed by a Honda technician or other qualified mechanic. The maintenance schedule applies to normal operating conditions. If... -
Page 28: Maintenance Safety
Remember that an authorized Honda servicing dealer knows your mower best and is fully equipped to maintain and repair it. To ensure the best quality and reliability, use only new, genuine Honda parts or their equivalents for repair and replacement. -
Page 29: Maintenance Schedule
– (1) Service more frequently when used in dusty areas. (2) These items should only be serviced by an authorized Honda servicing lawn mower dealer, unless you are mechanically proficient and have the proper tools. Refer to the Honda shop... -
Page 30: Blade
When a blade needs sharpening or replacement take the lawn mower to an authorized Honda servicing dealer. Or, if you have a torque wrench, you can remove and install the blade(s) yourself (page 30). - Page 31 To avoid weakening the blade(s), or causing imbalance or poor cutting, the blade(s) should be sharpened by trained staff at an authorized Honda servicing dealer. If replacing the blade, use a genuine Honda replacement blade(s) or equivalent.
-
Page 32: Grass Bag Cleaning And Replacement
Blade bolt torque: 36 ~ 43 ft-lb (49 ~ 59 N·m) If you don’t have a torque wrench, have an authorized Honda servicing dealer tighten the blade bolts before you use the mower. If the blade bolts are overtightened, they could break. -
Page 33: Engine Maintenance
The SAE oil viscosity and service classification are in the API label on the oil container. Honda recommends that you use API SERVICE category SH or SJ oil. - Page 34 SERVICING YOUR MOWER Engine Oil Change Drain the used oil while the engine is warm. Warm oil drains quickly and completely. 1. Turn the fuel valve to OFF to reduce the possibility of fuel leakage (page 20). 2. Lock the front wheels (page 20). 3.
- Page 35 SERVICING YOUR MOWER Air Cleaner Service A dirty air filter restricts air flow to the carburetor, reducing engine performance. If you operate the mower in very dusty areas, clean the air filter more often than specified in the MAINTENANCE SCHEDULE. NOTICE Operating the engine without an air filter, or with a damaged filter, will allow dirt to enter the engine, causing rapid engine wear.
- Page 36 SERVICING YOUR MOWER Spark Plug Service Recommended spark plug: BPR5ES (NGK) For good performance, the spark plug must be properly gapped and free of deposits. NOTICE An incorrect spark plug can cause engine damage. 1. Disconnect the spark plug cap [1] and remove dirt from the area.
-
Page 37: Flywheel Brake
MUFFLER [1] (3) FLYWHEEL BRAKE Start the engine outdoors and move the throttle to FAST. Release the flywheel brake lever; the engine should stop quickly. If it does not, take your mower to an authorized Honda servicing dealer for repair. -
Page 38: Caster Wheel Lock Pins
SERVICING YOUR MOWER CASTER WHEEL LOCK PINS Remove the 4 wheel cover screws [1] and the front wheel covers [2]. Move the lock lever between the LOCK [3] and RELEASE [4] positions and make sure the lock pins [5] move freely. The lock pins must completely lock and release the front wheels. -
Page 39: Fuel System
SERVICING YOUR MOWER FUEL SYSTEM Refueling Fuel tank capacity: 0.91 l If the fuel level is low, refuel in a well-ventilated area with the engine stopped. If the engine has been running, allow it to cool first. To refuel, remove the fuel tank cap [1], and fill the tank with gasoline to the bottom of the filler neck [2]. - Page 40 If spark knock or pinging occurs at a steady engine speed, under normal load, change brands of gasoline. If spark knock or pinging persists, see an authorized Honda servicing dealer. NOTICE Running the engine with persistent spark knock or pinging can cause engine damage.
-
Page 41: Storage
STORAGE STORAGE PREPARATION Proper storage preparation is essential for keeping your lawn mower trouble-free and looking good. The following steps will help to keep rust and corrosion from impairing your lawn mower’s function and appearance, and will make the engine easier to start when you use the lawn mower again. - Page 42 STORAGE Fuel Gasoline will oxidize and deteriorate in storage. Old gasoline will cause hard starting, and it leaves gum deposits that clog the fuel system. If the gasoline in your mower deteriorates during storage, you may need to have the carburetor and other fuel system components, serviced or replaced.
- Page 43 STORAGE Draining the Fuel Tank and Carburetor 1. Remove the carburetor drain bolt [1] with a 10 mm wrench, and drain the carburetor bowl fuel into an approved container. WARNING Gasoline is highly flammable and explosive. You can be burned or seriously injured when handling fuel.
-
Page 44: Storage Precautions
STORAGE STORAGE PRECAUTIONS If your mower will be stored with gasoline in the fuel tank and carburetor, it is important to reduce the hazard of gasoline vapor ignition. Select a well-ventilated storage area away from any appliance that operates with a flame, such as a furnace, water heater, or clothes dryer. -
Page 45: Transporting
TRANSPORTING BEFORE LOADING If the engine has been running, allow it to cool for at least 15 minutes before loading the mower on the transport vehicle. A hot engine and exhaust system can burn you and can ignite some materials. Turn the fuel valve [1] to OFF [2] (page 20). -
Page 46: Taking Care Of Unexpected Problems
Start engine with throttle lever in FAST position. Take mower to an Fuel filter clogged, carburetor Replace or repair faulty authorized Honda servicing malfunction, ignition components as necessary. dealer, or refer to shop malfunction, valves stuck, etc. manual. Loss of Power... -
Page 47: Vibration Problems
Clean out mower deck (p. 24). blade. under mower deck. Take mower to an authorized Mechanical damage, such as Replace or repair faulty Honda servicing dealer for a bent crankshaft. components as necessary. repair. MOWING AND BAGGING PROBLEMS Poor Cut Quality or Poor... -
Page 48: Set-Up
SET-UP Unpacking Remove all the cardboard from the mower, including the piece around the handlebar. Handlebar Setup Loosen the two locking knobs [1] on the lower handlebar enough to raise the handlebar into the mowing position. Hold the flywheel brake [1] (2) lever [2] against the handlebar, and unfold the handlebar into the... -
Page 49: Before Operation
SET-UP Engine Oil The lawn mower is shipped WITHOUT OIL in the engine. Add enough SAE 10W-30 API service category SH or SJ oil to bring the oil level between the upper limit [2] and lower limit [3] marks on the filler cap/dipstick [1] as shown. -
Page 50: Technical & Consumer Information
TECHNICAL & CONSUMER INFORMATION TECHNICAL INFORMATION Carburetor Modification for High Altitude Operation At high altitude, the standard carburetor air-fuel mixture will be too rich. Performance will decrease, and fuel consumption will increase. A very rich mixture will also foul the spark plug and cause hard starting. Operation at an altitude that differs from that at which this engine was certified, for extended periods of time, may increase emissions. - Page 51 TECHNICAL & CONSUMER INFORMATION Oxygenated Fuels Some conventional gasolines are being blended with alcohol or an ether compound. These gasolines are collectively referred to as oxygenated fuels. To meet clean air standards, some areas use oxygenated fuels to help reduce emissions. If you use an oxygenated fuel, be sure it is unleaded and meets the minimum octane rating requirement.
- Page 52 Carbon monoxide does not react in the same way, but it is toxic. Honda uses lean carburetor settings and other systems to reduce the emissions of carbon monoxide, oxides of nitrogen, and hydrocarbons.
- Page 53 TECHNICAL & CONSUMER INFORMATION SPECIFICATIONS MOWER MODEL Honda rotary mower, grass bag, 530 mm mower deck, HRZ536CTDE 3-speed transmission, flywheel brake, European market DIMENSIONS, WEIGHTS, AND CAPACITIES Length 1785 mm Width 585 mm Overall height 970 mm Dry weight 41.9 kg...
- Page 54 TECHNICAL & CONSUMER INFORMATION MAINTENANCE Fuel Unleaded gasoline with a See page 39. pump octane rating of 86 or higher Engine oil SAE 10W-30 See page 32. Spark plug type NGK - BPR5ES See page 35. (Resistor plugs reduce interference with radio and television reception.) Maximum governed speed See shop manual.
-
Page 55: Consumer Information
Honda Publications These publications will give you additional information for maintaining and repairing your lawn mower. You may order them from your servicing Honda lawn mower dealer. Shop Manual This manual covers complete maintenance and overhaul procedures. It is intended to be used by a skilled technician. - Page 56 POM53754-B 39VG4020 IPC XXXX.2007.09 Printed on 00X39-VG4-0200 PRINTED IN U.S.A. Recycled Paper...
Need help?
Do you have a question about the HRZ536CTDE and is the answer not in the manual?
Questions and answers