Table of Contents
Advertisement
Quick Links
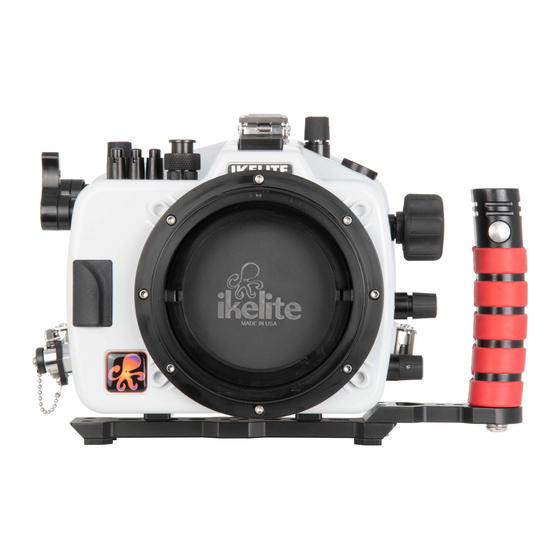
200DL Underwater Housing for Panasonic Lumix
DC-S1, DC-S1R
Product # 71301
Product Registration
Please register your product within 15 days of purchase. Our product
registration database is the quickest way for us to contact you in the
event of a product update.
To register, send a photo of the above registration label to us via
ikelite@ikelite.com along with your name, address, and phone
number.
Advertisement
Table of Contents

Subscribe to Our Youtube Channel
Related Manuals for Ikelite 71301


Summary of Contents for Ikelite 71301
-
Page 1: Product Registration
To register, send a photo of the above registration label to us via ikelite@ikelite.com along with your name, address, and phone number. -
Page 2: Introduction
1962. We are available if you have any questions or want photo advice. Send us an email 24 hours a day to ikelite@ikelite.com. We strive to reply within 1 business day. An electronic version of this instruction manual is available for download via the product page on our website: https://www.ikelite.com... -
Page 3: Important Notices
Important Notices This housing requires a compatible DL lens port for waterproof » operation (sold separately). The housing is not waterproof without a DL lens port attached. A bulkhead cap or sync cord must be attached to the housing » bulkhead for waterproof operation. -
Page 4: Table Of Contents
Contents Product Registration Introduction In the Box Important Notices Getting to Know Your Housing Base with Quick Release Handle Accessory Port Top Accessory Mount Vacuum Valve Trigger Extensions Setting Up Your Camera Pre-Installation Checklist Camera Settings Camera Settings Display Exposure Settings Back Button Focus Setting Up Your Housing Removing the Port Hole Cover... - Page 5 Final Check Entering the Water Shooting Underwater Learning about Underwater Photography Maintaining Your Housing Post-Dive Lens Port Storage Servicing Recommendations Lubricating Controls Lubricating Push Buttons Lubricating Control Shafts Troubleshooting Spare Parts Limited Warranty Service and Repairs Contact Us...
-
Page 6: Getting To Know Your Housing
Getting to Know Your Housing Zoom gear Port hole cover retainer Bulkhead with cap Zoom / Shutter Focus Lens release for MC21 Tray mounts Adapter Vacuum valve Lens release... - Page 7 AF mode Video rec Rear dial Viewfinder AF-ON Playback DISP. PANASONIC S1 S1R / 200 FT MADE IN USA O-ring Function / Control joystick center dial MENU / SET Right Left Down Cancel DISP. Display Delete PANASONIC S1 S1R / 200 FT MADE IN USA...
- Page 8 Bulkhead Top mount without cap Port mount White balance recess Port mount sensitivity Front o-ring Exposure compensation Accessory On/off port Lid snap Lid snap hook Mode dial...
-
Page 9: Base With Quick Release Handle
A central 1/4-20 threaded hole allows attachment of the base plate to a standard tripod. The base features additional mounting locations for attachment to a variety of Ikelite housings (hardware not included). Accessory Port This housing features one spare accessory port which may be used for the attachment of optional third party accessories. -
Page 10: Top Accessory Mount
Top Accessory Mount The housing features a 1/4-20 threaded top mount. Ball and flex type mounts are available for the attachment of a GoPro camera, focus light, or other lightweight accessories. Vacuum Valve Your housing features a valve to check for leaks before entering the water. -
Page 11: Setting Up Your Camera
Setting Up Your Camera Pre-Installation Checklist 1. Insert a fully charged camera battery. 2. Insert a properly formatted memory card. 3. Remove lens cap and any attached lanyard or neck strap. Camera Settings • Eye Sensor Menu > LVF/Monitor Switch to “MON.”... -
Page 12: Exposure Settings
Photo School section of our website for recommendations on exposure settings for a wide variety of shooting situations: https://www.ikelite.com/blogs/cheat-sheets Back Button Focus Back button focus takes some adjustment to get used to but can be very valuable in a variety of shooting scenarios. -
Page 13: Setting Up Your Housing
Setting Up Your Housing Removing the Port Hole Cover 1. Align the zoom gear retainer tool with the notches in the zoom gear retainer. Tool Port hole Retainer cover Port mount 2. Rotate the removal tool counter-clockwise until the retainer is free from the lens port mount. -
Page 14: Installing A Zoom Or Focus Gear
Installing a Zoom or Focus Gear 1. Place the zoom or focus gear (sold separately) into the lens port mount opening with the gear teeth toward the inside of the housing. Retainer Zoom or focus gear 2. Place the gear retainer into the opening around the gear. -
Page 15: Opening The Housing
3. Tighten the retainer by turning clockwise with the tool until snug. Do not overtighten. Opening the Housing 1. Push the lid snap lock forward and lift the curved end away from the housing. Lock 2. Lid snaps are designed to provide enough force to compress the o-ring for a proper seal. -
Page 16: Installing The Camera
Installing the Camera 1. Remove any lanyard or neck strap which may be attached to the camera. 2. Check to see whether the camera’s lens will fit through the port opening of the housing. If not, the lens will need to be removed from the camera body and re-attached after the camera body is installed in the housing. -
Page 17: Attaching The Hotshoe
Attaching the Hotshoe 1. Orient the hotshoe with the arrow on top pointing towards the front of the camera. Camera hotshoe mount Housing hotshoe 2. Slide the housing hotshoe into camera’s hotshoe mount until it stops. The hotshoe must be all the way forward in the camera mount »... -
Page 18: Attaching A Lens Port
5. Push the lid snaps towards the housing until they are flat against the housing and the lock has engaged. Close opposing lid snaps at the same time. 6. Check the o-ring seal. The o-ring should form a uniform, solid line visible through the back of the housing. - Page 19 3. Apply a very thin, even layer of lubricant to the exposed portion of the front o-ring and to the lens port sealing surface. Avoid dry spots or uneven build-up of lubricant. 4. Align the port thumbscrews with the recesses in the housing’s port mount.
-
Page 20: Setting Up An External Strobe
5. Press the port firmly towards the housing until the base of the port is flush with the housing’s port mount. If there is resistance, remove the port and re-check that the thumbscrews are loosened and the o-ring is properly lubricated. 6. -
Page 21: About Sync Cords
About Sync Cords Connecting a strobe via electrical sync cord provides faster strobe recycle times as compared to a fiber optic connection, and prolongs camera battery life. To connect two strobes to the camera, you must use a dual » sync cord. -
Page 22: Getting In The Water
3. Align plug and insert into the housing bulkhead. Each male pin mates with a female receptacle. Failing to line up the contacts properly before tightening may result in damage to the converter plug and/or housing bulkhead. 4. Hand-tighten the retaining ring. 5. -
Page 23: Entering The Water
6. Submerge the housing in a fresh water tank dedicated to underwater photography equipment. Visually confirm that there are no signs of water intrusion. One sign of water intrusion is a steady stream of bubbles coming from one of the housing’s seals. Entering the Water 1. -
Page 24: Learning About Underwater Photography
Learning about Underwater Photography Visit the Photo School section of ikelite.com for a wide range of information on shooting underwater including: • Product Tutorials Videos •... -
Page 25: Lens Port
2. NEVER leave your housing in a fresh water rinse tank, even if it is the only system in the tank. Collisions with another person’s gear can cause scratches or damage to your equipment. Accidental damage occurs most often in the rinse tank. 3. -
Page 26: Servicing Recommendations
Servicing Recommendations It is recommended that the housing be sent to Ikelite or an authorized service center annually for routine service and maintenance. Service may be required more or less frequently depending on care and use. -
Page 27: Lubricating Push Buttons
After a few minutes, operate the push button. If this does not correct the problem, return the housing to Ikelite for maintenance. To prevent build-up of salt, sand, or debris, the push buttons »... -
Page 28: Lubricating Control Shafts
Push buttons look similar but vary in length. Remove and re- » install one push button at a time. Lubricating Control Shafts 1. Loosen the knob set screw using a hex key. 2. Remove the control shaft from the inside of the housing. 3. -
Page 29: Troubleshooting
8. Check that the set screw is oriented properly by holding the control shaft in place on the inside of the housing while attempting to rotate the control knob on the outside of the housing. If there is rotation, loosen the set screw and realign with control flat; retighten and recheck. - Page 30 Photos are under-exposed (too dark) • Adjust aperture (larger), shutter speed (slower), or ISO (higher) setting. • Move light(s) closer to your subject and make sure they are pointed in the right direction. • Adjust exposure compensation in the camera. •...
-
Page 31: Spare Parts
• Ensure that nothing is preventing the camera from going all of the way into the housing. • Check that the camera mounting plate is pushed all of the way forward. Camera is not functioning normally underwater • Check each housing control while underwater to ensure that they are disengaged. -
Page 32: Limited Warranty
Except as mentioned above, no other warranty expressed or implied applies to this Ikelite product. Service and Repairs Ikelite is most interested in performing any service to ensure that all products perform as intended. No prior authorization is required. You may return directly to us or through your dealer. -
Page 33: Contact Us
Ikelite Underwater Systems Attention: Service Department 50 W 33rd St Indianapolis, IN 46208 USA +1 (317) 923-4523 service@ikelite.com For detailed instructions on returning your product for service including important information on international customs documentation, please refer to our website at: https://www.ikelite.com/pages/service-repairs...
Need help?
Do you have a question about the 71301 and is the answer not in the manual?
Questions and answers